Table of Contents
Advertisement
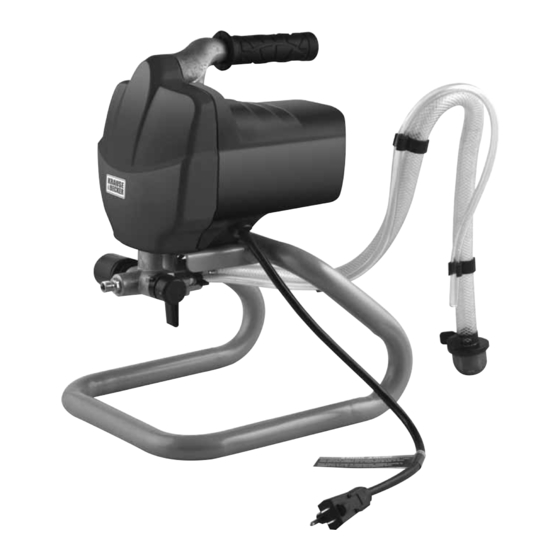
Airless Paint Sprayer
Item 68001
Read this material before using this product.
Failure to do so can result in serious injury.
SAve thIS mAnuAl.
Notice
CleAn ImmedIAtely
Clean the Sprayer ImmedIAtely after use.
delayed or inadequate cleaning will
permanently clog the Sprayer.
Warranty void if sprayer is not
properly cleaned immediately
after every use.
See "Cleaning" on pages 16-17.
When unpacking, make sure that the product is intact and undamaged.
If any parts are missing or broken, please call 1-800-444-3353 as soon as possible.
visit our website at: http://www.harborfreight.com
email our technical support at: tech@harborfreight.com
©
®
Copyright
2010 by Harbor Freight Tools
. All rights reserved. No portion of this manual or any artwork contained herein may be reproduced in any shape
or form without the express written consent of Harbor Freight Tools. Diagrams within this manual may not be drawn proportionally. Due to continuing
improvements, actual product may differ slightly from the product described herein. Tools required for assembly and service may not be included.
Manual Revised 11h
Advertisement
Table of Contents

Related Manuals for KRAUSE & BECKER 68001


Summary of Contents for KRAUSE & BECKER 68001
- Page 1 . All rights reserved. No portion of this manual or any artwork contained herein may be reproduced in any shape or form without the express written consent of Harbor Freight Tools. Diagrams within this manual may not be drawn proportionally. Due to continuing improvements, actual product may differ slightly from the product described herein.
-
Page 2: Important Safety Information
Notice Clean the Sprayer ImmedIAtely after use. delayed or inadequate cleaning will permanently clog the Spray Gun. Warranty void if sprayer is not properly cleaned immediately after every use. Save this manual Symbol Definitions Keep this manual for the safety warnings and precautions, Symbol Property or statement assembly, operating, inspection, maintenance and cleaning... -
Page 3: Safety Warnings
Notice Clean the Sprayer ImmedIAtely after use. delayed or inadequate cleaning will permanently clog the Spray Gun. Warranty void if sprayer is not properly cleaned immediately after every use. 3. Personal safety Safety Warnings a. Stay alert. Watch what you are doing and use common sense when operating the sprayer. - Page 4 Notice Clean the Sprayer ImmedIAtely after use. delayed or inadequate cleaning will permanently clog the Spray Gun. Warranty void if sprayer is not properly cleaned immediately after every use. sprayer’s operation. If damaged, have the 9. do not use Paint Sprayer to spray sprayer repaired before use.
- Page 5 SAve theSe These carry important safety information. If unreadable or missing, InStRuCtIOnS. contact Harbor Freight Tools for a replacement. 28. Avoid unintentional starting. Prepare to begin work before turning on the sprayer. 29. This product is not a toy. Keep it out of reach of children.
-
Page 6: Extension Cords
Notice Clean the Sprayer ImmedIAtely after use. delayed or inadequate cleaning will permanently clog the Spray Gun. Warranty void if sprayer is not properly cleaned immediately after every use. extension Cords Grounding 1. Grounded sprayers require a three wire extension cord. Double insulated sprayers can use either a two or three wire extension cord. - Page 7 Notice Clean the Sprayer ImmedIAtely after use. delayed or inadequate cleaning will permanently clog the Spray Gun. Warranty void if sprayer is not properly cleaned immediately after every use. Symbology Double Insulated Canadian Standards Association Underwriters Laboratories, Inc. Volts Alternating Current Amperes No Load Revolutions n 0 xxxx/min.
-
Page 8: Before You Begin
Notice Clean the Sprayer ImmedIAtely after use. delayed or inadequate cleaning will permanently clog the Spray Gun. Warranty void if sprayer is not properly cleaned immediately after every use. Before you Begin Familiarize yourself with the Paint Sprayer and its functions. Handle Suction Tube ON/OFF... - Page 9 Notice Clean the Sprayer ImmedIAtely after use. delayed or inadequate cleaning will permanently clog the Spray Gun. Warranty void if sprayer is not properly cleaned immediately after every use. Prime/Spray Switch This switch toggles the unit between Prime Spray priming mode and spraying mode. locked unlocked trigger lock...
- Page 10 Notice Clean the Sprayer ImmedIAtely after use. delayed or inadequate cleaning will permanently clog the Spray Gun. Warranty void if sprayer is not properly cleaned immediately after every use. 2. Attach Paint Hose to Paint Gun and Setup tighten with two wrenches. note: Remove or cover objects that you want to protect from overspray (paint mist).
- Page 11 Notice Clean the Sprayer ImmedIAtely after use. delayed or inadequate cleaning will permanently clog the Spray Gun. Warranty void if sprayer is not properly cleaned immediately after every use. 4. Turn Trigger Lock Knob to Locking position. to Relieve Sprayer Pressure 1.
- Page 12 Notice Clean the Sprayer ImmedIAtely after use. delayed or inadequate cleaning will permanently clog the Spray Gun. Warranty void if sprayer is not properly cleaned immediately after every use. 4. Turn Prime/Spray switch to Prime mode. Priming Spray Gun This procedure is used for first time operation and also to flush storage fluids out of the Sprayer.
- Page 13 Notice Clean the Sprayer ImmedIAtely after use. delayed or inadequate cleaning will permanently clog the Spray Gun. Warranty void if sprayer is not properly cleaned immediately after every use. 8. Remove Suction Tube from water or flushing 11. Turn Spray/Prime Switch to Spray mode and solvent and submerge in paint pail.
- Page 14 Notice Clean the Sprayer ImmedIAtely after use. delayed or inadequate cleaning will permanently clog the Spray Gun. Warranty void if sprayer is not properly cleaned immediately after every use. Painting Painting techniques Before painting, ensure the Sprayer has been primed Before painting, ensure the Sprayer has been primed (see Priming and Startup steps) and verify (see Priming and Startup steps) and...
- Page 15 Notice Clean the Sprayer ImmedIAtely after use. delayed or inadequate cleaning will permanently clog the Spray Gun. Warranty void if sprayer is not properly cleaned immediately after every use. 5. Unlock Trigger. Clearing Spray tip Occasionally, the Spray Gun Tip will become clogged with paint.
- Page 16 Notice Clean the Sprayer ImmedIAtely after use. delayed or inadequate cleaning will permanently clog the Spray Gun. Warranty void if sprayer is not properly cleaned immediately after every use. 5. Unthread Spray Tip and remove. Cleaning 1. Relieve pressure and drain paint from Tubes. 6.
- Page 17 Notice Clean the Sprayer ImmedIAtely after use. delayed or inadequate cleaning will permanently clog the Spray Gun. Warranty void if sprayer is not properly cleaned immediately after every use. 9. Change to waste bucket as paint thins. 13. Remove trigger guard from housing. 10.
-
Page 18: Long Term Storage
Notice Clean the Sprayer ImmedIAtely after use. delayed or inadequate cleaning will permanently clog the Spray Gun. Warranty void if sprayer is not properly cleaned immediately after every use. long term Storage When cleaning for long term storage (more than 48 hours). It is very important that the Paint Sprayer is not stored with any water or water-based material left in the Pump, Hose, Tubes, or Spray Gun. -
Page 19: Disposal Instructions
Notice Clean the Sprayer ImmedIAtely after use. delayed or inadequate cleaning will permanently clog the Spray Gun. Warranty void if sprayer is not properly cleaned immediately after every use. disposal Instructions Improper disposal of paint is against the law and a health and environmental hazard. Dispose of paint through local recycling facility. -
Page 20: Parts List
Parts list Part description Part description Spray Gun Wire Fastening Seat Paint Hose Label Base Frame Hex Bolt (M6x10) Hex Bolt (M6x4) Housing Pressure Relief Valve Label Label Housing Cover Motor Assembly Output Gear Bushing Power Switch Rolling Bearing Pin (3x12) Output Pole Hex Bolt (M5x14) Gear... -
Page 21: Assembly Diagram
Assembly diagram SKU 68001 For technical questions, please call 1-800-444-3353. Page 21... -
Page 22: Limited 90-Day Warranty
90 day Warranty Harbor Freight Tools Co. makes every effort to assure that its products meet high quality and durability standards, and warrants to the original purchaser that this product is free from defects in materials and workmanship for the period of 90 days from the date of purchase. -
Page 23: Specifications
Specifications Electrical Input 120V~ / 60Hz / 7A Motor 5/8 HP Max. Working Pressure 3000 PSI Outlet 1/4″-NPSM Paint Hose 25′ Long SKU 68001 For technical questions, please call 1-800-444-3353. Page 23... - Page 24 3491 Mission Oaks Blvd. • PO Box 6009 • Camarillo, CA 93011 • (800) 444-3353 www.harborfreight.com...