Panasonic SC-HTB370 Owner's Manual
Home theater audio system
Hide thumbs
Also See for SC-HTB370:
- Quick start manual (2 pages) ,
- Owner's manual (36 pages) ,
- Owner's manual (36 pages)
Table of Contents
Advertisement
Owner's Manual
Home Theater Audio System
SC-HTB370
Model No.
Thank you for purchasing this product.
Please read these instructions carefully before using this product,
and save this manual for future use.
If you have any questions, contact:
U.S.A. and Puerto Rico: 1-800-211-PANA (7262)
Canada: 1-800-561-5505
Register online at www.panasonic.com/register (U.S. customers only)
P
PC
RQT9777-1P
Advertisement
Table of Contents

Related Manuals for Panasonic SC-HTB370


Summary of Contents for Panasonic SC-HTB370
- Page 1 Thank you for purchasing this product. Please read these instructions carefully before using this product, and save this manual for future use. If you have any questions, contact: U.S.A. and Puerto Rico: 1-800-211-PANA (7262) Canada: 1-800-561-5505 Register online at www.panasonic.com/register (U.S. customers only) RQT9777-1P...
-
Page 2: Important Safety Instructions
IMPORTANT SAFETY INSTRUCTIONS Read these operating instructions carefully before using the unit. Follow the safety instructions on the unit and the applicable safety instructions listed below. Keep these operating instructions handy for future reference. WARNING Read these instructions. Keep these instructions. Heed all warnings. - Page 3 Do not recharge, disassemble, remodel, heat or operation. throw into fire. Responsible Party: ≥ When disposing the batteries, please contact your local Panasonic Corporation of North America authorities or dealer and ask for the correct method of One Panasonic Way, disposal. Secaucus, NJ 07094...
-
Page 4: Table Of Contents
Table of contents IMPORTANT SAFETY INSTRUCTIONS ............2 Before use Supplied items ....................5 This system (SC-HTB370)......................5 Accessories ..........................5 Control reference guide ..................6 This system (Front)........................6 This system (Rear) ........................7 Remote control ........................... 8 Getting started Step 1 Selecting the placement method............ -
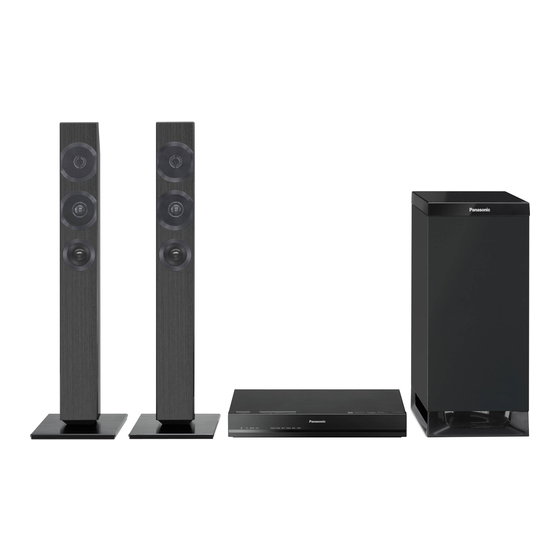
Page 5: Supplied Items
≥ The illustrations shown may differ from your unit. ≥ Operations in this Owner’s Manual are described mainly with the remote control, but you can perform the operations on the main unit if the controls are the same. Supplied items This system (SC-HTB370) ∏... -
Page 6: Control Reference Guide
Control reference guide This system (Front) Active subwoofer Main unit Standby/on switch (Í/I) Sound mode indicators §1 Press to switch the unit from on to standby E STANDARD indicator mode or vice versa. In standby mode, the unit Lights when STANDARD is the current is still consuming a small amount of power. -
Page 7: This System (Rear)
This system (Rear) AC IN terminal ( USB port (for service use only) Speaker terminals ( AUX terminal ( TV terminal ( Active subwoofer on/off button ( BD/DVD terminal ( § The I/D SET button is only used when the main unit is not paired with the active subwoofer. ( RQT9777... -
Page 8: Remote Control
Remote control ∫ Before using for the first time Remove the insulation sheet A. DIALOG LEVEL ∫ To replace a button-type battery Battery type: CR2025 (Lithium battery) INPUT LINK MODE SELECTOR SOUND ---- PAIRING Turn the main unit on or off ( Adjust the dialog effect level ( Adjust the output level of the active subwoofer (bass sound) (... -
Page 9: Step 1 Selecting The Placement Method
Step 1 Selecting the placement method ≥Choose a placement method that suits you best. When attaching the speakers to a wall Place the speakers horizontally Page 11 Place the speakers vertically Page 14 When placing the speakers on a table Place the speakers using the leg stands Page 16... -
Page 10: The Speaker System
Caution ≥ This system is to be used only as indicated in these instructions. Failure to do so may lead to damage to the amplifier and/or the speakers, and may result in the risk of fire. Consult a qualified service person if damage has occurred or if you experience a sudden change in performance. -
Page 11: Step 2 Assembling The Speakers
Step 2 Assembling the speakers When attaching the speakers to a wall Place the speakers horizontally The speakers can be wall mounted by drilling screws into the wall, etc. Make sure that the screw used and the wall are strong enough to support the weight of at least 33 kg (72.8 lbs). The screws and other items are not supplied as the type and size will vary with each installation. - Page 12 Connect the speaker cables. 1 Insert the wire fully. r: White s: Blue line ≥ Insert the wire fully, taking care not to insert beyond the wire insulation. 2 Press into the groove. A Right speaker connector B Left speaker connector Push White §...
- Page 13 Fit the speaker securely onto the screw(s). Red connector: The speaker attached to the red connector cable is to be placed on the right side. White connector: The speaker attached to the white connector cable is to be placed on the left side. White A Right speaker connector B Left speaker connector...
- Page 14 Place the speakers vertically The speakers can be wall mounted by drilling screws into the wall, etc. Make sure that the screw used and the wall are strong enough to support the weight of at least 33 kg (72.8 lbs). The screws and other items are not supplied as the type and size will vary with each installation.
- Page 15 Drive a screw into the wall. F Front speaker ≥ Use the measurements indicated below to identify the screwing positions on the wall. (Rear view) ≥ Leave at least 20 mm ( q) of space above and on each ...
-
Page 16: When Placing The Speakers On A Table
When placing the speakers on a table Place the speakers using the leg stands ∏ 2 Speakers ∏ 2 Speaker cables ∏ 1 Metal bracket WHITE: Left RED: Right ∏ 2 Leg stands ∏ 4 Screws ≥For a safety measure to prevent the speakers from falling, refer to page 20. ≥To prevent damage or scratches, lay down a soft cloth and perform the assembly on it. - Page 17 Place the speakers using the support legs and speaker feet ∏ 2 Speakers ∏ 2 Speaker cables ∏ 1 Metal bracket WHITE: Left RED: Right ∏ 2 Support legs ∏ 4 Screws ∏ 2 Speaker feet ≥For a safety measure to prevent the speakers from falling, refer to page 20. ≥To prevent damage or scratches, lay down a soft cloth and perform the assembly on it.
- Page 18 Place the speakers using the speaker bases ∏ 2 Speakers ∏ 2 Speaker cables ∏ 2 Stand necks WHITE: Left RED: Right ∏ 2 Speaker bases ∏ 4 Screws ≥For a safety measure to prevent the speakers from falling, refer to page 20. ≥To prevent damage or scratches, lay down a soft cloth and perform the assembly on it.
- Page 19 Attach the speaker base. ≥ The two speakers are interchangeable. ≥ Keep the screws out of reach of children to prevent swallowing. Screw (supplied) ≥ Tighten securely. Align the projecting parts with the holes on the speaker. Press into the groove. Red connector: The speaker attached to the red connector cable is to be placed on the right side.
-
Page 20: Additional Speaker Fall Prevention Measures
Additional speaker fall prevention measures To prevent the speakers from falling, it is recommended, as an additional protection measure, to attach the speakers to the wall or table with a fall prevention cord (hereafter “cord”). ≥ Consultation with a qualified installation specialist concerning the appropriate procedure when attaching to a concrete wall or a surface that may not have strong enough support is recommended ( 12, 15). - Page 21 When placing the speakers on a table Horizontal placement Vertical placement A Cord C Wall § B Screw eye D Approx. 150 mm (5 ≥ Depending on the placement of the speakers, the screwing position of the screw eye may differ.
-
Page 22: Step 3 Connections
Step 3 Connections ≥Turn off all equipment before connection and read the appropriate operating instructions. Do not connect the AC power supply cord until all other connections are completed. Connection with the TV OPTICAL OUT DIGITAL AUDIO Optical digital audio cable (OPT1) DIGITAL AUDIO... -
Page 23: Speaker Cable Connection
Speaker cable connection Match the connector shape and connect to the terminals of the same color. SPEAKERS/HAUT-PARLEURS DIGITAL AUDIO SPEAKERS/HAUT-PARLEURS AC IN A RED B WHITE Right speaker connector Left speaker connector AC power supply cord connection ≥ Connect only after all other connections are completed. ... -
Page 24: Active Subwoofer Wireless Connection
Active subwoofer wireless Bluetooth connection ® connection By using the Bluetooth connection, you can listen ® to the sound from the Bluetooth audio device Preparation ® from this system wirelessly. ≥ Turn on the main unit. Preparation Press [BÍ CI]. ≥... -
Page 25: Using This System
Using this system Adjust the volume and sound effect Preparation level. ≥ Turn on the active subwoofer. ∫ To adjust the volume of this system ≥ Turn on the TV and/or connected device. Press [i VOL j]. ≥ Volume range: 0 to 100 §... -
Page 26: 3D Sound
5.1ch. Produces a highly realistic sound “STADIUM” Adding to the Dolby Virtual for live broadcasts of sports. Speaker effect, Panasonic has Re-creates the sound of musical applied its own sound field “MUSIC” instruments and songs with an controlling technology to expand 3D surround expansive sound. -
Page 27: Advanced Operations
Advanced operations Audio format indicator Auto gain control To display the current audio format. With this function, you can prevent sudden loud sounds. The output will be reduced automatically when the input Press and hold [SOUND] for more than exceeds a certain level. 4 sec. -
Page 28: Remote Control Code
∫ Remote control code Depending on your preference, It is possible to turn off the When other Panasonic devices respond to this system’s 3D surround effect and the clear-mode dialog effect. remote control, change the remote control code on this system and the remote control. -
Page 29: Troubleshooting
Troubleshooting Bluetooth ® Before requesting service, make the following checks. If you are in doubt about some of the check points, or if the Pairing cannot be done. solutions indicated in the following guide do not solve the Check the Bluetooth device condition. -
Page 30: Specifications
Specifications There is no audio. The power of the main unit turns off AMPLIFIER SECTION automatically. (When the main unit detects a problem, a safety measure RMS output power: Dolby Digital Mode is activated and the main unit automatically switches to Front ch (L, R ch) standby mode.) 60 W per channel (6 ≠), 1 kHz, 10 % THD... - Page 31 SPEAKER SECTION SPEAKER GENERAL Front speakers For wall mounting layout 3 way, 3 speaker system (Bass reflex type) Speaker unit(s) Impedance 6 ≠ Horizontal placement Woofer 5.7 cm (2 q) cone type Dimensions (WkHkD) Tweeter 1060 mmk68 mmk41 mm 2.5 cm (1q) semi-dome type Super tweeter Piezo type Mass (Weight)
-
Page 32: Unit Care
Use this device at a maximum range of 10 m (33 ft). Bluetooth SIG, Inc. and any use of such marks by The range can decrease depending on the environment, Panasonic Corporation is under license. Other trademarks obstacles or interference. and trade names are those of their respective owners. -
Page 33: Indicator Illumination
Indicator illumination The indicators display the condition of this system by flashing. The indicator patterns illustrated below are displayed during normal operational conditions. They do not refer to the indications of a problem. Indicator Description The BD/DVD indicator blinks and sound mode §2 indicators light up in sequence for 1 minute. -
Page 34: Limited Warranty (Only For U.s.a. And Puerto Rico)
If your product does not work properly because of a defect in materials or than a Factory Service Center or other Authorized Servicer, or damage that workmanship, Panasonic Consumer Marketing Company of North America is attributable to acts of God. -
Page 35: Limited Warranty (Only For Canada)
Home Theater Systems Product - One (1) year, parts and labour This warranty is given only to the original purchaser, or the person for whom it was purchased as a gift, of a Panasonic brand product mentioned above sold by an authorized Panasonic dealer in Canada and purchased and used in Canada, which product was not sold “as is”, and which product was delivered to you in new condition in the original... - Page 36 For Canada only: The word “Participant” is used in place of the word “Partner”. Panasonic Consumer Marketing Panasonic Canada Inc. Company of North America, 5770 Ambler Drive Division of Panasonic Corporation of Mississauga, Ontario L4W 2T3 North America www.panasonic.ca One Panasonic Way, Secaucus, New Jersey 07094 http://www.panasonic.com...