Table of Contents
Advertisement
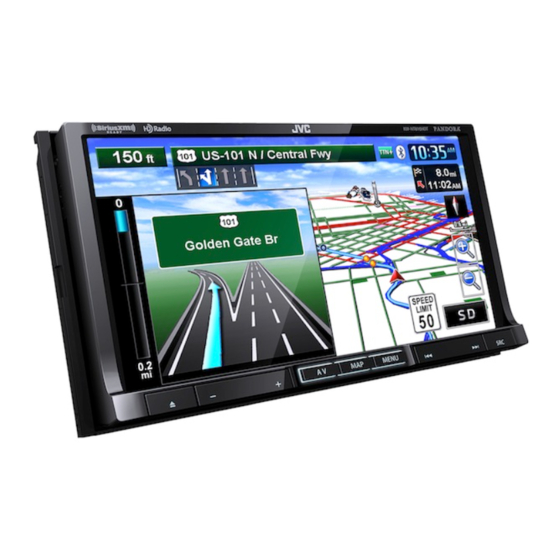
GPS NAVIGATION SYSTEM
SISTEMA DE NAVEGACIÓN GPS
SYSTÈME DE NAVIGATION GPS
KW-NT810HDT
For installation and connections, refer to the separate manual.
Para la instalación y las conexiones, refiérase al manual separado.
Pour l'installation et les raccordements, se référer au manuel séparé.
INSTRUCTIONS
MANUAL DE INSTRUCCIONES
MANUEL D'INSTRUCTIONS
For customer Use:
Enter below the Model No.
and Serial No. which are
located on the top or bottom
of the cabinet. Retain this
information for future
reference.
Model No.
Serial No.
LVT2407-001A
[J]
Advertisement
Table of Contents

Related Manuals for JVC KW-NT810HDT


Summary of Contents for JVC KW-NT810HDT
-
Page 1: Gps Navigation System
GPS NAVIGATION SYSTEM SISTEMA DE NAVEGACIÓN GPS SYSTÈME DE NAVIGATION GPS KW-NT810HDT For customer Use: Enter below the Model No. and Serial No. which are For installation and connections, refer to the separate manual. located on the top or bottom Para la instalación y las conexiones, refiérase al manual separado. - Page 2 Thank you for purchasing a JVC product. Please read all instructions carefully before operation, to ensure your complete understanding and to obtain the best possible performance from the unit. FCC CAUTION CAUTION This equipment may generate or use radio frequency Use of controls or adjustments or performance of energy.
- Page 3 IC (Industry Canada) Notice Cautions on the monitor: This device complies with Industry Canada • The monitor built in this unit has been produced licenceexempt RSS standard(s). with high precision, but it may have some Operation is subject to the following two conditions: ineffective dots.
- Page 4 This equipment complies with FCC/IC radiation exposure limits set forth for an uncontrolled environment and meets the FCC radio frequency (RF) Exposure Guidelines in Supplement C to OET65 and RSS-102 of the IC radio frequency (RF) Exposure rules. This equipment has very low levels of RF energy that it deemed to comply without maximum permissive exposure evaluation (MPE). But it is desirable that it should be installed and operated keeping the radiator at least 20 cm or more away from person’...
-
Page 5: How To Forcibly Eject A Disc
For safety... How to forcibly eject a disc • Do not raise the volume level too much, as this will block outside sounds, making driving dangerous. • Stop the car before performing any complicated operations. Temperature inside the car... [Hold] If you have parked the car for a long time in hot or cold weather, wait until the temperature in the car becomes normal before operating the unit. -
Page 6: Table Of Contents
Contents How to forcibly eject a disc .................5 Introduction ..........10 Parts identification ................10 Installation settings ................12 Basic operations ................13 • Turning on the power ................13 • Turning off/on the screen ................13 • Adjust the angle of the front panel ............13 •... - Page 7 • About route guidance screen ..............32 • Getting information on your route and places ...........33 Arranging your route ................34 • Changing the sequence of the destination/via points ........34 • Adjusting the vehicle position ..............35 Editing registration of home/favorite points ........36 Using information service from HD Radio or iHeartRADIO ....37 •...
- Page 8 Contents Using other external components ............82 Changing illumination color ..............83 Settings for video playback..............84 • Picture/aspect ratio adjustment ..............84 System settings items ...............84 Additional information ..............87 Sound Settings.........90 Setting the Sound ................90 • Setting Fader/Balance ................90 • Setting the vehicle type ................91 •...
- Page 9 Rear View Camera Operations ..... 110 Using a rear view camera ..............110 • Activating the rear view camera ..............110 • Displaying the picture from the rear view camera ........110 Others ............ 111 Initializing the settings ..............111 Setting the security lock ..............112 References ..........
-
Page 10: Introduction
Introduction dd[· -I~Jbl Qv:::X:::MAULJ4E'i!LJj 1111 111 -... - Page 11 1 Screen (touch panel) (skip/search) button (Eject) button/Security indicator (source) button • Adjusts the angle of the front panel. (☞ page 13) Displays the source screen. (☞ page 17) • Displays the disc insert/eject screen. (☞ page 54) Turns off the AV function.[Hold] (☞ page 45) •...
-
Page 12: Installation Settings
When you turn on the unit for the first time, the initial Set the installation settings (1), then press setup screen appears. [OK] (2). Turn on the ignition switch. The power of the unit is turned on. Select the language you want for the display and the voice guidance. -
Page 13: Basic Operations
Turning on the power Adjust the angle of the front panel Turn on the ignition switch. • When displaying the map screen for the first time You can adjust the angle of the front panel to after turning on the power, the screen below compensate for the effects of glare etc.. -
Page 14: Operations On The Touch Panel
Operations on the touch panel Ex.: Album list When items on the menu are not available Plays back all items in the next lower layer Non-available items will be shaded Scrolling the track/song information To change the page of menu/list When all the text is not shown at once... -
Page 15: Using The Quick Menu
Using the Quick menu Touch the feature you want to assign to the button. Quick menu is assigned a set of frequently used features, which is user-changeable. It is activated from the current position screen. To use the quick menu You can also change these settings through <Settings>... -
Page 16: Switching Screens
Navigation mode ■ Map screen ■ Destination Menu Use this screen to search for a destination using one of the available search methods. ■ Settings Menu ■ Function Menu Use this screen to change the detailed Use this screen to get information about settings and get information about the your destination and the travel route. - Page 17 AV mode ■ AV screen Displays the screen for the current AV source. ■ Source selection screen Use this screen to select an AV source. The AV control bar is displayed on the map screen. You can perform AV source operations using the AV control bar.
-
Page 18: Navigation System
Use of the data is only permitted in this specific JVC incurred to you, your passengers or other road users. system. It is forbidden to extract or make further use... -
Page 19: Basic Operations
About the current position screen Your position Current time POI (Point Of Interest) Home (☞ “List of POI (☞ pages 22, 36) icons”, page 44) Direction (☞ below) Favorite points Scale (☞ pages 22, 36) Zoom buttons (☞ page 20) Shows the AV control bar (☞... -
Page 20: To Change The Map Scale
To change the map scale To scroll the map Display the zoom buttons and scale buttons. The position you touched is centered on the map. Zoom in (only for 3D map) Touch the arrow to rotate the map 360 degrees You can also zoom in and out by sliding the slider. -
Page 21: To Display/Hide Poi Icons On The Map
To display/hide POI icons on To display/hide Favorite icons on the map the map Press - <Settings> - <Navigation>. Press - <Settings> - <Navigation>. Select categories (1) of POI which you want Select categories of Favorite Icons that you to be displayed on the map. want to be displayed on the map. -
Page 22: Registering Your Home/Favorite Points
You can register up to 300 favorite points (including To register as your home one home). In step 4 on the left... Scroll the map to select the point you want to register. To change your registered home location When you search for a new location that you want to register as your home and select via step 2 (above), a confirmation message is displayed. -
Page 23: Searching For A Place
Setting a destination by Setting a destination using the scrolling the map <Destination> menu Scroll the map to select the position you Press want to select as a destination. (☞ page 20) Select a method to search for a destination. Home * Goes to your home. -
Page 24: About Search Screens And Input Screens
About search screens and input screens Read through the following instructions for using search screens and input screens before using <Destination> menu. To enter names/addresses State/Province selecting screen You can change the State/Province if the selecting button appears on the screen. Number of matches •... -
Page 25: By Address
By address <Address> Enter the house number, then press [OK]. • If you don’t know the number of house for the selected street, you can select [Middle of Road]. Enter the city name, then select from the list. (☞ page 24) Changes State or Province Selects the center of the street •... -
Page 26: Poi Near A Place/Route
POI near a place/route From the list of POI <Vicinity> <POI Name> The System has a huge database of POIs (Point Of Interest), such as restaurants, gas stations, hospitals, etc. You can search for a POI around the place where you are now. -
Page 27: By Telephone Number
By telephone number By coordinates <Phone> <Coordinates> Enter the telephone number, then select Enter the latitude and the longitude, then from the list. (☞ page 24) press [OK]. Displays the list of matches The search result is displayed. • To start guidance, ☞ page 29. The search result is displayed. -
Page 28: Using The "Navibridge" (For Iphone Or Android Device)
Using the “NaviBridge” (For iPhone or Android device) What is NaviBridge? “NaviBridge” is an iPhone/Android application developed by DENSO to be used for interaction with the car navigation system. You can search for location information using “NaviBridge”, and then forward it to the car navigation system as a destination point. -
Page 29: How You Are Guided
Starting guidance to the destination or via point Select a destination or via point. (☞ page 23) . Select a route (1), then press [OK](2). To set as destination The estimated time and distance to the destination are displayed. The System starts calculating. [Fastest]: The recommended route. -
Page 30: Changing Route Options
Changing route options Recalculating the route after changing route options Press - <Settings> - <Navigation>. Press - <Function> Set options. Select a route (1), then press [OK](2). Priority Select the priority for route The estimated time and distance to the calculation ([Fastest]: destination are displayed. -
Page 31: Adjusting The Volume Of The Voice Guidance
Adjusting the volume of the Delete previous destinations voice guidance Press Select items to delete (1), and delete them (2). • You can also adjust the volume through Selected items are highlighted. - <Settings> - <Navigation> - <Guide> - <Guidance Volume>. (☞ page 42) Canceling guidance Press Selects/deselects all items... -
Page 32: About Route Guidance Screen
About route guidance screen Direction, distance, and estimated time of arrival (ETA) at the destination ( ) or a via point ( ) • Press to switch the information between the final destination and the nearest via point. Distance to the next turn Next street Next turn to make The second turn to... -
Page 33: Getting Information On Your Route And Places
Getting information on your route and places To check the entire route If via points are set, select a desired via point to check its detailed information. Press - <Function>. To confirm how your trip will go <Simulation> To check the information on the destination and via points Drive simulation starts. -
Page 34: Arranging Your Route
Changing the sequence of the destination/via points • Highways are always used to calculate the route if distance to a destination exceeds a certain distance. • If the destination cannot be reached without using highways, ferries, or toll roads, they are used to calculate the route without respect to the <Route>... -
Page 35: Adjusting The Vehicle Position
Adjusting the vehicle position If you find your current position is displayed on a wrong Move the cursor to the position where you place on the map, use this setting to correct your want to set as current position. position. •... -
Page 36: Editing Registration Of Home/Favorite Points
Edit the information. Press A Displays the name editing screen C Displays the category selection screen B Displays the phone number editing screen A To edit the name • You can use up to 48 characters. Displays other keyboards • For available characters, ☞ page 14. Select the category for the favorite point to edit. -
Page 37: Using Information Service From Hd Radio Or Iheartradio
You can use the information services provided by Total Traffic HD NETWORK service (from HD Radio) and Total Traffic CONNECT service (from iHeartRADIO). JVC cannot assume responsibility for the completeness or accuracy of the information. Using the traffic information service... - Page 38 Checking the traffic information On the map From <Traffic List> Touch the traffic icon. Press - <Function>. Select a list (1), then a traffic alert (2). [All]: Lists all the information. • If there are several POIs on the selected position, [On Route]: Lists the information on your route.
-
Page 39: Using The Information Service
Using the information service To display the information screen To bookmark favorite items You can store (up to 5 bookmarks) favorite items on the Press - <Function>. bookmark list. ]: Displays the bookmark list. ]: Adds the selected item to the bookmark list. To delete the item from the bookmark list Select items to delete (1), then delete them (2). -
Page 40: Checking The Information Of The Navigation System
System Info Sensor Status Press - <Settings>. Press - <Settings>. 1 Version of the software q Connection status of the reverse gear signal lead 2 Version of the map database <On>: Reverse gear signal is detected. 3 Serial number • If the rear view screen is displayed when shifting 4 Speed pulse rate the gear to the reverse (R) position, the reverse 5 GPS antenna connection status... -
Page 41: Navigation Menu Items
Press - <Settings>. Switches the category by pressing the corresponding tab Menu items Selectable settings Initial: Underlined View Mode (☞page 19) ☞page 21 POI Icon ☞page 21 Favorite Icon Vehicle Icon Color configuration Change the color of the map for the day and night screens. Press [Enter] to display the adjustment screen. - Page 42 Menu items Selectable settings Initial: Underlined Guidance Volume Adjust the volume of the voice guidance and voice alert. (The adjustment does not affect the audio volume.) 1 to 20; Initial 10 Attention Tone Select whether to use the attention tone, which is played before the voice guidance.
-
Page 43: Additional Information
• The route calculated by the System is one of the How you are guided possible routes to your destination. The route is not • If GPS signal reception is poor, navigation guidance always the most appropriate one. may not be correct. •... - Page 44 List of POI icons Gas Station Entertainment Community Parking Child Service Casino Restaurant Education Museum Government/Administration Coffee/Desserts Bar/Nightclub Coffee/Pastries Health/Safety Theater Desserts/Smoothie Insurance Others Finance Legal Service Recreation Multimedia Bowling Center Bank Police/Fire Golf Course Service Post Office Outdoor Religious Shopping Ski Resort Beauty...
-
Page 45: Av Operations
AV Operations To show <Source> screen, press <Source> screen Selects the source (☞ below) Turns off the AV source (☞ below) Selecting the playback source • The sources “Pandora”, “iHeartRADIO”, and “BT Audio” can be selected if they are not connected, but playback will not be possible. -
Page 46: Listening To The Hd Radio™ Broadcast
You can tune in to both conventional and HD Radio broadcasts. HD Radio Feature Descriptions • Program Service Data provides song name, artist, station ID, and other relevant data streams. • Adjacent to traditional main stations are HD2/HD3 Channels, providing new original formats on the FM dial. - Page 47 • HD: Lights when receiving an HD Radio broadcast Band • ST: Lights when receiving an FM stereo broadcast Station frequency currently tuned in Station Call Sign and PTY code for the HD Radio channel number for broadcast the HD Radio broadcast Only when receiving HD Radio Displays the album station: the song information...
-
Page 48: Changing Hd Radio Reception Mode
Changing HD Radio reception Storing stations in memory mode You can preset six channels for each band. Automatic presetting — SSM (Strong-station While receiving an HD Radio broadcast, you can change Sequential Memory) the reception mode — digital or analog. •... -
Page 49: Selecting A Preset Station
Manual presetting Selecting a preset station Tune in to a station or channel you want to Display the preset list. preset. (☞ page 47) Band The station frequency you want to preset Display the preset list. Also changes preset stations Reducing the interference Select a preset number. -
Page 50: Bookmarking The Song
Bookmarking the song You can bookmark the current song. • The bookmark information is displayed only for the items with the information recorded. • If you have your device read the QR code, the bookmark information will be transferred to the device. Displaying the list of •... -
Page 51: About Alert Messages
About alert messages Alert messages received via HD Radio are displayed on Select locations. the screen. • When you press an item, it is highlighted. When you press again, the selection is canceled. [Snooze]: Do not interrupt the same alert message for 10 minutes. -
Page 52: Tagging/Purchasing Your Favorite Songs From Itunes Store
Tagging/purchasing your favorite songs from iTunes Store Some HD Radio broadcasts provide PSD (Program Step 1: Tagging the song Service Data) for a song. You can tag the song and store While receiving a song with PSD... its PSD while listening to the song. By using the tagging function, you can easily purchase the songs from iTunes Store. - Page 53 Step 2: Transferring the tagged PSD to Step 3: Purchasing songs from iTunes your iPod/iPhone Store • iTunes 7.4 or later version is required to purchase the tagged songs. Connect the iPod/iPhone to the unit. (☞ page 65) • For details about iPod/iPhone and iTunes, refer also to the instructions supplied with the iPod/iPhone or The tagged PSDs are transferred automatically to your visit <http://www.apple.com/>.
-
Page 54: Disc Operations
To insert a disc If “ ” appears on the screen, the unit cannot Open the monitor panel. accept the operation you have tried to do. • In some cases, without showing “ ”, operations will not be accepted. When playing back a multi-channel encoded disc, the multi-channel signals are downmixed. -
Page 55: Playable Disc Types
Playable disc types Disc type Recording format, file type, etc. Playable DVD Video (Region Code: 1) * • DTS sound cannot be reproduced or output from this unit. DVD Audio DVD-ROM DVD Recordable/Rewritable DVD Video (DVD-R/-RW * , +R/+RW * DVD-VR * •... - Page 56 Watching DVD Video/DVD-VR (DVD Video playback screen) (Skipping/searching (1), show the operating buttons (2)) Audio format Playback mode Disc type Playback status (8: pause/7: stop) Seek bar Title no./Chapter no./ Playing time [3 / 8] Starts playback/pauses. Hides/displays the operating Stops playback.
- Page 57 VR playback mode—VR-PROG Audio format (program) or VR-PLAY (playlist) Playback mode Disc type Playback status (8: pause/7: stop) Program no. (or Playlist Seek bar no.)/Chapter no. (or file no.)/Playing time [3 / 8] Starts playback/pauses. Hides the operating buttons on the Stops playback.
- Page 58 Listening to music Disc (CD/MP3/WAV/WMA/AAC) Playback mode Playback status (8: pause) Disc type Seek bar Track no./Playing time The track information appears when it is recorded. [3 / 8] Starts playback/pauses. Selects playback modes. [4] [¢] Press: Selects track. (☞ page 59) Hold: Reverse/forward search.
-
Page 59: Selecting Playback Modes
Selecting playback modes For DVD/DVD-VR For CD/MP3/WAV/WMA/AAC Playback mode Playback mode Selects Random Selects Repeat Selects Repeat playback mode playback mode playback mode • For DVD: • You cannot activate the repeat mode and the random Repeats current chapter. CHAP. mode at the same time. -
Page 60: Settings For The Disc Playback
Settings for the disc playback Disc Setup items Selectable settings Initial: Underlined Menu Language Select the initial disc menu language; Initial English. (☞ also page 89) Audio Language Select the initial audio language; Initial English. (☞ also page 89) Subtitle Language Select the initial subtitle language or erase the subtitle (Off);... -
Page 61: Sd/Usb Operations
This unit can play the MP3/WMA/AAC/FLAC/MPEG4/MPEG4-AVC H.264/WMV files stored in SD card/USB mass storage class device. • All tracks in the SD card/USB device will be played repeatedly until you change the source. • Make sure all important data has been backed up. Playing back SD card Playing back USB device You can connect a USB mass storage class device such as... - Page 62 Caution: • Do not connect 2 or more USB hubs to the USB cable of the unit. • If you connect a USB device with large consumption current to the USB hub, it may not operate. In this case, connect the device directly to the USB cable. •...
- Page 63 Listening to audio files Audio format (MP3/WMA/AAC/FLAC) Playback mode Playback status (8: pause) Source type (“SD” or “USB”) Seek bar Folder no./Track no./ Playing time Tag data appears only While playing, “Jacket when it is recorded. picture” is shown if the file (Current folder name has the tag data including and file name appear if...
- Page 64 Watching video files (Video file playback screen) (Skipping/searching (1), show the operating buttons (2)) MPEG4/MPEG4-AVC H.264/WMV MPEG4/MPEG4-AVC H.264/WMV MPEG4/MPEG4-AVC H.264/WMV MPEG4/MPEG4-AVC H.264/WMV Playback status Video format Playback mode (8: pause) Audio format Source type Seek bar (“SD” or “USB”) Current folder name and file name Folder no./Track no./ Playing time...
-
Page 65: Ipod/Iphone Operations
• You can control the following iPod/iPhone Playing back iPod/iPhone models: Connect iPod/iPhone – iPod classic For connections, refer also to the Installation/ – iPod nano (6th Generation) Connection Manual. – iPod nano (5th Generation) • Use the following cables: –... - Page 66 Setting the iPod control mode Caution: iPod Control Mode • When you turn on this unit, the iPod/iPhone is Head Mode Controls playback from this unit. charged through the unit. iPod Mode Controls audio/video playback from the However, when connected via a USB hub, the iPod/iPhone.
- Page 67 • When playing back a track containing Artwork , Notice: operating buttons temporarily disappear while When operating an iPod/iPhone, some operations loading its Artwork. may not be performed correctly or as intended. In this case, visit the following JVC web site: <http:// www3.jvckenwood.com/english/car/> (English website only)
- Page 68 Watching the video in the iPod/iPhone To watch the video, select an item from the list. (☞ page 69) (iPod/iPhone playback screen) (Skipping/searching (1), shows the operating buttons (2)) Track no./Total track number/Playing time Playback mode Playback status (8: pause) Seek bar Tag data appears only when it is recorded...
-
Page 69: Selecting A Track/Video From Menu On The Ipod/Iphone
Selecting a track/video from menu on the iPod/iPhone Displays the top/previous layer See page 70 Select the menu (Music or Video) (1), a category (2). Music menu: Select the item in the selected layer until a desired track starts playing. Corresponding icon lights in blue. - Page 70 Searching for items in the selected category by alphabet Press [List]. Display the first character of the title of the item you want to search for (1), then search for an item (2). Press the character button repeatedly until the desired item is displayed.
-
Page 71: Iheartradio Operations (For Iphone)
All stations are streamed in high-quality AAC format. You can listen to iHeartRADIO on this unit by using the “iHeart Link for JVC” application on an iPhone. Install the latest version of the iHeart Link application to your iPhone. - Page 72 Searching from the Station List Searching for stations in All Cities category by alphabet You can use the Station List screen to search for stations. Press [Stations]. Press [Stations]. • It may take time to display lists with many items. Select the station type.
- Page 73 Storing your favorite stations To delete the station from the favorite list Press [Stations]. Select the favorites. The station currently being listened to is added to the [Favorites] station list. • A maximum of 100 stations can be added to the [Favorites] station list.
- Page 74 Tagging songs and purchasing songs from the Purchase the song from the iTunes Store. iTunes Store iHeartRADIO provides tag information for each song. Press [Tag]. While listening to a song with tag information: 1 Connect the iPhone to the computer. 2 Synchronize the iPhone to iTunes.
-
Page 75: Pandora® Internet Radio Operations (For Iphone Or Android Device)
About Pandora® internet radio • In the application on your device, log in and create an account with Pandora. (If you are not already a registered user, an account can also be created at www.pandora.com.) • Internet connection by 3G, EDGE, or WiFi. •... - Page 76 Thumb up/down indicator Playing time Playback status Station name (8: pause) Track information The picture data is displayed if available from the current content. [Stations] Displays the Station List. Bookmarks the artist. [3 / 8] (☞ below) Starts/pauses playback. ] Selects thumbs up/thumbs [¢] Skips the current track.
-
Page 77: Siriusxm Radio Operations
Before operating, connect the SiriusXM tuner (not supplied) to the expansion port on the rear of the unit. (☞ Installation/Connection Manual) Activating subscription Select “SiriusXM” as the source. SiriusXM Tuner starts updating all the SiriusXM channels. Check your Radio ID. Radio ID is labeled on the casing of the SiriusXM Tuner or the bottom of the SiriusXM Tuner unit. -
Page 78: Storing Channels In Memory
Storing channels in memory Selecting a channel from Category/Channel list You can preset six channels for each band. Tune in to a station you want to preset. (☞ page 77) Display the preset list. Select a channel. Select a category Select a preset number you want to store. -
Page 79: Selecting A Channel Directly
Selecting a channel directly Enter a 4-digit new code number (1), then press [OK] (2). Press: Deletes last character Hold: Deletes all characters Enter the channel number (1), then press [OK] (2). Enter the same code, then press [OK]. Select the category, then the channel you want to activate the channel locking. - Page 80 Adding/changing channel locking • When you try to receive a channel or select a channel directly by entering the channel number Display <Channel Locking> screen. with the channel locking activated, the lock code input screen appears and you cannot receive the channel until you enter the correct code.
- Page 81 To clear the selection of channels with the Skipping the unwanted channels channel locking activated If you do not want to receive some channels, you can skip them. On <Mode> screen. Setting the channel skipping Activate the channel skip function. On <Mode>...
-
Page 82: Using Other External Components
You can connect an external component to the LINE IN/VIDEO IN jacks. (☞ Installation/Connection Manual) Select <AV-IN> as the source. Turn on the connected component and start playing the source. AV-IN audio screen AV-IN video screen To display the operating buttons, touch the screen. Hides the operating buttons on the screen. -
Page 83: Changing Illumination Color
You can change the illumination color of the buttons on the monitor panel. Saving your own adjustments Press - <Settings>. • When variable color illumination is selected, you cannot adjust the color. After selecting a color in step 5 on the left... Adjust the color. -
Page 84: Settings For Video Playback
Picture/aspect ratio Aspect ratio settings adjustment 4:3 signal 16:9 signal Full: You can adjust the picture quality and change the aspect For 16:9 original ratio for video source, except for the picture quality for pictures SD/USB and the aspect ratio for rear view camera. Regular: Display the adjustment menu. - Page 85 Menu items Selectable settings Initial: Underlined Time Zone Select your residential area from one of the following time zones for clock adjustment. Hawaii (UTC–10:00), Alaska (UTC–09:00), Pacific (UTC–08:00), Mountain (UTC–07:00), Central (UTC–06:00), Eastern (UTC–05:00), Atlantic (UTC–04:00), Newfoundland (UTC–03:30) Activate this if your residential area is subject to DST. (Daylight Saving Time) Auto : Activates daylight saving time.
- Page 86 Menu items Selectable settings Initial: Underlined Antenna Remote Auto: Antenna remote output is always on. Manual: Allows user to turn on/off antenna remote output. (☞ page 15) Camera Input The setting varies depending on the installation settings (☞ page 12). On, Off (☞...
-
Page 87: Additional Information
Playable Audio/video files Extension code Audio format Video format Audio .mp3 – .wma – .m4a – .wav – .fla/.flac FLAC – × × Video .avi/.mp4 H.264/AVC × × MPEG4 × × .wmv × × For CD and DVD, see also “Playable disc types”. (☞ page 55) : Playable ×: Not playable •... - Page 88 MPEG4 – Format: ISO MPEG4 – Profile: Simple profile – Picture size: 720×480 (30 fps) – Video bit rate: Max 8 Mbps – Audio format: MP3 – Audio bit rate: 32 to 320 kbps (VBR compatible) – Audio sampling frequency: 32/44.1/48 kHz •...
- Page 89 Sound signals emitted through the rear terminals Through the analog terminals (Speaker out/FRONT OUT/REAR OUT) 2-channel signal is emitted. When playing multi-channel encoded disc, multi-channel signals are downmixed. • DTS sound cannot be reproduced. Language codes (for DVD language selection) Code Language Code Language Code Language...
-
Page 90: Sound Settings
Sound Settings You can set the audio effects and sound quality in the vehicle here. Set the sound when the AV source is selected. This cannot be set when the AV source is turned off (on standby). Setting Fader/Balance Press - <Settings>. -
Page 91: Setting The Vehicle Type
Setting the vehicle type Setting the speaker configuration You can set the vehicle type here. Press - <Settings> - <Sound>. You can set the vehicle’s speaker configuration here. Press - <Settings> - <Sound>. Select a vehicle type. Touch a speaker to be set. The Digital Time Alignment (DTA) suitable for the selected vehicle type is set. - Page 92 To change the crossover frequency of the Touch next to <Size> to set the speakers: size of the speaker. Set the crossover frequency between the front/rear speakers and the subwoofer, slope (attenuation rate) and phase of the subwoofer. If the size is unknown, select <6-1/2”>. If there is no speaker, select <None>.
-
Page 93: Setting The Listening Position
Setting the listening position Only when you select the front speaker and the size of the tweeter is set for the front You can select the listening position here to set a better speaker in the speaker settings, touch sound field for the people inside the vehicle. to set the tweeter output level. - Page 94 To fine-tune the DTA for the listening Furthermore, if <Level> is used for the adjustment, adjust the DTA while listening to the position: sound. You can fine-tune the DTA so it best fits the actual Repeat steps 3 and 4 to set all of the listening position.
-
Page 95: Setting The Preset Equalizer
Setting the preset equalizer The preset equalizer can be set by source here. Trace the equalizer curve on the screen you want to set. Select a source you want to set and press - <Settings> - <Sound>. You can touch to select the frequency and touch to set the level. -
Page 96: Setting The Volume Of Each Source Equal
Setting the volume of each Setting the audio effects source equal You can set various audio effects here. Set the audio effects when the AV source is selected. Set the volume of each source equal against the volume They cannot be set when the AV source is turned off (on of CD (include music file DVD disc). - Page 97 The following items can be set. Menu items Selectable settings Description Initial: Underlined Bass Boost Sets the level that the bass is boosted. Turns Bass Boost off. Loudness High Compensates bass and treble when insufficient in quiet audio segments. That level can be set here. Sets Loudness to Off.
-
Page 98: Setting The Hardware
Setting the hardware Setting the subwoofer level Sets the built-in amplifier output. You can set the subwoofer level here. Press - <Settings> - <Sound>. Press - <Settings> - <Sound>. Press [ ] or [ ] to adjust the subwoofer level (-50 to 10 initial:0). Press an option. -
Page 99: Bluetooth Operations
Bluetooth Information: This unit supports the following Bluetooth profiles; If you wish to receive more information about • HFP (Hands-Free Profile) Bluetooth, visit the following JVC web site: • OPP (Object Push Profile) <http://www3.jvckenwood.com/english/car> • PBAP (Phonebook Access Profile) (English website only) •... -
Page 100: Using Bluetooth Device
Operate the Bluetooth device to turn on its Bluetooth function. first time Select “JVC Navi” on the Bluetooth device. When you connect a Bluetooth device to the unit for the first time, make pairing between the unit and the device. Pairing allows Bluetooth devices to When the PIN code or input screen is displayed on communicate with each other. - Page 101 When the unit recognizes the Bluetooth When the unit recognizes the Bluetooth device you want to connect, the following device you want to connect, the following screen appears. screen appears. Enter the PIN code of the unit shown on the Press [Pair].
-
Page 102: Change The Pin Code
Change the PIN code Connecting/disconnecting a registered Bluetooth device Press - <Settings> - <Bluetooth>. Press - <Settings> - <Bluetooth>. To connect PIN code (initial: 0000) Select the device you want to connect. Press: Deletes last character : mobile phone / : audio player / : both mobile phone Hold: Deletes all characters and audio player... -
Page 103: Using Bluetooth Mobile Phone
Receiving a call Adjusting the volume of calls/ earpiece When a call comes in/making a call... On map screen: The mobile phone control bar appears. Ends/rejects the call Decrease Increase Call information See below • This adjustment does not affect the volume level of •... -
Page 104: Switching Between Handsfree Mode And Phone Mode
Switching between handsfree Using the phone book/call lists mode and phone mode While talking... ] From dialed call list. ] From received call list. ] From missed call list. From phone book. • For copying the phone book, ☞ page 105. Each time you press the button, the talking method is •... -
Page 105: Copying The Phone Book
Copying the phone book Searching for a phone number from phone book You can copy the phone book memory of a mobile phone into the unit (up to 500 memories). Press Display the first character of the name you want to search for (1), then search for a name (2). -
Page 106: Deleting The Phone Number Memory In The Unit
Deleting the phone number About mobile phone compatible memory in the unit with Phone Book Access Profile (PBAP) Display the phone book/call list you want to delete. (☞ page 104) When your mobile phone supports PBAP, phone book and call lists are automatically copied to the unit. •... -
Page 107: Preset Dial
Preset dial Press [ ](store from the phone book) or ](store using the numeric keypad). Store phone numbers in preset dial in advance. (☞ see below) Press Delete selected preset dial Select the number you want to dial. When you store from the phone book Press the number to store in the preset dial. -
Page 108: Using Bluetooth Audio Player
• To register a new device, ☞ page 100. • To connect/disconnect a device, ☞ page 102. Battery reminder (only when the information comes Playback mode Playback status (8: pause/7: stop) from the device) Seek bar Track no./Playing time Tag data (current track title/artist name/album title) •... -
Page 109: Bluetooth Device Settings
• To change the PIN code, press [Change], enter a new PIN code, then press [OK]. (☞ page 102) Device Name Shows the device name (JVC Navi) to be shown on the Bluetooth device. Device Address Shows the MAC address of the unit. -
Page 110: Rear View Camera Operations
Rear View Camera Operations • To use a rear view camera, the reverse gear signal lead connection is required. For connecting a rear view camera, ☞ Installation/Connection Manual. Activating the rear view Displaying the picture from the camera rear view camera Press - <Settings>... -
Page 111: Others
Others You can initialize all settings of the unit to the factory default values. Press - <Settings>. A confirmation message appears. -
Page 112: Setting The Security Lock
You can set the startup security lock as an antitheft Enter the same security code again, then measure. press [OK]. To set the security code Press - <Settings>. • After setting the security code, entering the security code is necessary each time you turn on the unit. - Page 113 To clear the security code Enter the security code you set, then press [OK]. Press - <Settings>. Press around for about 3 seconds.
-
Page 114: References
References Caution on cleaning the unit To keep discs clean Do not use any A dirty disc may not play correctly. solvent (for If a disc does become dirty, wipe it with example, thinner, a soft cloth in a straight line from centre benzine, etc.), to edge. -
Page 115: Troubleshooting/Error Messages
What appears to be trouble is not always serious. Check the following points before calling a service center. • For operations with the external components, refer also to the instructions supplied with the adapters used for the connections (as well as the instructions supplied with the external components). Symptoms Remedies/Causes No sound comes out of the speakers. - Page 116 Symptoms Remedies/Causes You cannot operate some functions of an AV On the map screen, you can operate some limited source on the map screen. functions of the current source only. Press AV and operate the source on the AV screen. Route calculation seems to have stopped.
- Page 117 Symptoms Remedies/Causes No sound comes out of the speakers. Check the connection. (☞ Installation/Connection Manual) Files cannot be played back. • Check the playable file format. (☞ page 87) • Add appropriate extension codes to the file names. Video files cannot be played back. Some video files are unplayable depending on the software that created the file.
- Page 118 Symptoms Remedies/Causes The song cannot be tagged. The HD Radio broadcast does not support iTunes Tagging function or the broadcast does not contain PSD. You can tag the PSD only when the TAG indicator lights up on the screen. “Memory Full. Connect iPod.” You are trying to store the 101st PSD in the unit.
- Page 119 Symptoms Remedies/Causes • “Eject Error” • Eject the disc forcibly. (☞ page 5) • “Loading Error” • Check the disc. “Region code error” Region code is not correct. (☞ page 55) USB device cannot be recognized. • The USB connector is not connected correctly. Connect the USB connectors of the USB devices and USB cables firmly.
- Page 120 Symptoms Remedies/Causes Sound is distorted. Deactivate the equalizer either on this unit or the iPod/ iPhone. Video is not played back. Check the connection of USB Audio and Video cable (KS- U49, not supplied). iPod/iPhone cannot be charged. Connect iPod/iPhone directly to the unit without using a USB hub.
- Page 121 Symptoms Remedies/Causes “App Not Connected” Start iHeart Link on the iPhone that is connected to the navigation system. “Content Not Available” Selected station is not being broadcast. “Request Timed Out” iPod touch or iPhone not connected. Confirm connection. “Stream Stopped” Data cannot be received from iHeartRADIO server.
-
Page 122: Specifications
Design and specifications are subject to change without notice. If a kit is necessary for your car, consult your telephone directory for the nearest car audio speciality shop. System & Service L1, C/A code Global Positioning System Standard Positioning Service Reception System 12-channel multi-channel reception system Reception Frequency... - Page 123 Frequency Range 87.5 MHz to 107.9 MHz 530 kHz to 1 710 kHz FM Tuner Usable Sensitivity: 8.3 dBf (0.7 μV/75 Ω) 50 dB Quieting Sensitivity: 14.3 dBf (1.4 μV/75 Ω) Alternate Channel Selectivity (400 kHz): 65 dB Frequency Response: 20 Hz to 20 000 Hz (HD Radio broadcast) 40 Hz to 15 000 Hz (Conventional broadcast)
- Page 124 Version Bluetooth 2.1 + EDR certified Output Power +4 dBm Max. (Power class 2) Service Area Within 10 m (10.9 yd) Profile HFP (Hands-Free Profile) OPP (Object Push Profile) PBAP (Phonebook Access Profile) A2DP (Advanced Audio Distribution Profile) AVRCP (Audio/Video Remote Control Profile) 1.3 SPP (Serial Port Profile) Screen Size 7.0 inch wide liquid crystal display...
- Page 125 Personal Use Only. Restrictions. Warning. No Warranty. Disclaimer of Warranty:...
- Page 126 Disclaimer of Liability: Export Control. Entire Agreement. Governing Law. Government End Users.
- Page 127 Bluetooth SIG, Inc. and any use of such marks by HD Radio™ and the HD, HD Radio, and “Arc” logos are JVC KENWOOD Corporation is under license. Other trademarks proprietary trademarks of iBiquity Digital Corp. and trade names are those of their respective owners.
- Page 128 libFLAC Copyright © 2000,2001,2002,2003,2004,2005,2006,2007,2008,2009 Josh Coalson Redistribution and use in source and binary forms, with or without modification, are permitted provided that the following conditions are met: - Redistributions of source code must retain the above copyright notice, this list of conditions and the following disclaimer.
- Page 129 Call 1-800-252-5722 EN, SP, FR 1112NSHCREJEIN © 2013 JVC KENWOOD Corporation...
- Page 130 . Si su vehículo no posee . Si votre véhicule n’offre pas ce voltage inverter is required, which can be purchased at JVC car audio este sistema, será necesario un inversor de tensión, que puede ser type d’alimentation, il vous faut un convertisseur de tension, que vous dealers.
- Page 131 JVC ou une by a qualified technician. JVC de equipos de audio para automóviles o a una compañía que compagnie d’approvisionnement. suministra tales herramientas. • Si vous n’êtes pas sûr de pouvoir installer l’appareil correctement, •...
-
Page 132: Installing The Gps Antenna
Install the unit at an angle of less than 30˚ vertically and of less than 5˚ horizontally. Instale la unidad a un ángulo de menos de 30° en sentido vertical, y de menos de 5° en sentido horizontal. Installez l’appareil avec un angle vertical de moins de 30˚ et un angle horizontal de moins de 5˚. •... - Page 133 To prevent short circuits, we recommend that you disconnect the Para evitar cortocircuitos, recomendamos que desconecte el terminal Pour éviter tout court-circuit, nous vous recommandons de débrancher battery’s negative terminal and make all electrical connections before negativo de la batería y que efectúe todas las conexiones eléctricas la borne négative de la batterie et d’effectuer tous les raccordements installing the unit.
- Page 134 ENGLISH ESPAÑOL FRANÇAIS Connect the parking brake lead to the parking brake system Connectez le fil de frein de stationnement au système de frein de built in the car. stationnement intégré à la voiture. Conecte el cable del freno de estacionamiento al sistema del freno de estacionamiento instalado en el coche.
- Page 135 D’INSTRUCTIONS. la salida de línea delantera en la parte trasera). • La voix de guidage sort uniquement par les enceintes avant (et la sortie de ligne à l’arrière). INPUT JVC Amplifier Subwoofer SUBWOOFER OUT JVC Amplificador Subwoofer JVC Amplificateur...
- Page 136 Cable USB 2.0 (accesorio del iPod/iPhone) Câble USB 2.0 (accessoire du iPod/iPhone) (not supplied / no suministrado / non fourni) • To watch video, connect the iPod/iPhone using JVC KS-U49 • , conecte el iPod/iPhone mediante el JVC KS-U49 • Pour voir une séquence vidéo, connectez l’iPod/iPhone en utilisant (en venta por separado);...
-
Page 137: Removing The Unit
Engage the catch pins on the removal tool and remove the two Enganche los pasadores fiadores de la herramienta de extracción y Engagez les goupilles de blocage dans l’outil d’enlèvement et retirez locks on the lower level. extraiga los dos seguros del nivel inferior. les deux verrous du côté... - Page 138 • • • ((f) N NECT BLACK \fiiRE GND) TO GROUND FIRSr. CAU T I 0 N en - OTHERWISE, DAM~GE TO YOUR UNIT MAY OCCUR. ::» INCORRECT CONNECTION CAUSES SERIOUS DAMAGE TO THIS UNIT :::::i 0::: oeni= PLEASE READ INSTALLATION/CONNECTION MANUAL CAREFULLY. 1!:! :::»...
- Page 141 OUR VALUED CUSTOMER THANK YOU FOR PURCHASING THIS JVC PRODUCT. WE WANT TO HELP YOU ACHIEVE A PERFECT EXPERIENCE. NEED HELP ON HOW TO HOOK UP? NEED ASSISTANCE ON HOW TO OPERATE? NEED TO LOCATE A JVC SERVICE CENTER? LIKE TO PURCHASE ACCESSORIES?
- Page 142 WHAT WE WILL DO: : If this product is found to be defective within the warranty period, JVC will repair or replace defective parts with new or * rebuilt equivalents at no charge to the original owner. Such repair and replacement services shall be rendered by JVC * : during normal business hours at JVC authorized service centers.