
Related Manuals for AEG OKO-LAVAMAT 72640


Summary of Contents for AEG OKO-LAVAMAT 72640
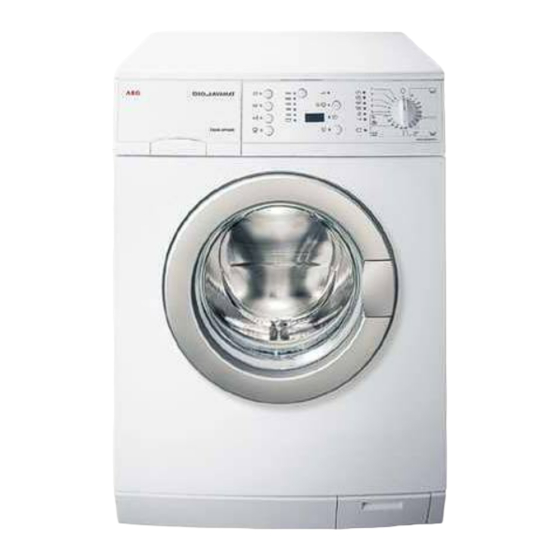
- Page 1 ÖKO-LAVAMAT 72640 update The environmentally friendly washing machine User information...
- Page 2 Dear Customer, Please read this user information carefully. Pay particular attention to the section "Safety" on the first Info pages. Please keep this user information in a safe place for later reference. Pass it on to any future owners of the unit. The warning triangle and /or signal words (Warning!, Caution!, Impor- tant!) emphasise information which is important for your safety or for the unit's functional reliability.
-
Page 3: Table Of Contents
Contents Operating Instructions ........Safety ............Disposal . - Page 4 Program tables ..........26 Washing .
- Page 5 Electrical connection ......... . . 45 Water connection .
-
Page 6: Operating Instructions
Operating Instructions Operating Instructions Safety The safety aspects of AEG electrical appliances comply with accepted technical standards and the German Appliance Safety Law. However, as manufacturers we regard it as our responsibility to inform you about the following safety instructions. -
Page 7: General Safety
Operating Instructions Safety of Children and Infirm Persons • Packaging materials (e.g. films, polystyrene) can be dangerous for children. Risk of suffocation! Keep packaging away from children. • The appliance is not intendet for use by young children or infirm per- sons without supervision. -
Page 8: Disposal
Operating Instructions • Small animals can chew the power cables and water hoses. Risk of electric shock and danger of water damage! Keep small animals away from the washing machine. Disposal Disposing of the Packaging Material! Dispose of the packaging of your washing machine correctly. All pakka- ging materials used are environmentally-compatible and recyclable. -
Page 9: Unit Description
Operating Instructions Unit description Front view Drawer for de- tergent and Control panel care agent Rating plate (be- hind filling door) Main door Flap in front of Screw feet drain pump (height-adjustable) Drawer for detergent and care agent Stain removers Pre-wash detergent/ Main wash detergent soaking agent or... -
Page 10: Control Panel
Operating Instructions Control panel Spin speed / RINSE HOLD button Program sequence display Additional program buttons Program selector DOOR Indicator Multi-display OVER DOSING display Button DELAY TIMER START/PAUSE button Program selector The program selector defines the nature of the washing cycle (e.g. - Page 11 Operating Instructions } (EASY CARES) Main washing cycle for easy-care textiles (mixed fabrics) at 40 °C to 60 °C. Position < (EASY IRON): Main washing cycle at 40 °C for easy-care textiles which, with the aid of this program, only have to be either gently ironed or not ironed at all.
-
Page 12: Additional Program Buttons
Operating Instructions Additional program buttons The additional program buttons are for adapting the washing program to the dirtiness of the washing. Addi- tional programs are not required for washing which is not excessively dirty. Various functions can be combined with each other, de- pending on the program. -
Page 13: Consumption Values
Operating Instructions Consumption values The values for selected programs in the following tables were determi- ned under normal conditions. However, there is a helpful orientation aid for domestic operation. Filling Quantity Water Energy Program selector / temperature in kg in Litres in kWh t (COTTONS/LINEN) 90 1.70... -
Page 14: Before The First Wash
Operating Instructions Before the first wash Perform a washing cycle without washing. Program: t (COTTONS/ LINEN) 95 with half the amount of detergent. This removes residues left over from production on the drum and solu- tion container. Prepare washing cycle Sort washing and prepare •... -
Page 15: Washing Types And Care Symbols
Operating Instructions Washing Types and Care Symbols The care symbols help you chose the correct washing program. The washing should be sorted according to type and care symbol. The tem- peratures shown in the care symbols are the maximum temperatures in each case. -
Page 16: Detergents And Care Agents
Operating Instructions Detergents and care agents Which detergent and care agent? Use only detergents and care agents which are suitable for use in wash- ing machines. Always follow the manufacturer's instructions. How much detergent and care agent? The required quantity depends upon: •... -
Page 17: Run A Washing Cycle
Operating Instructions Run a washing cycle Brief instructions A washing cycle is run in the following steps: 1. Set the correct washing program: – Set the program and temperature with the program selector. – Set any additional program(s). 2. If necessary, change the spin speed/select o (RINSE HOLD). 3. -
Page 18: Setting The Washing Program
Operating Instructions Setting the Washing Program For the suitable program, the correct temperature and possible addi- tional programs for the particular washing type, refer to the "Program tables". 1. Set the program selector to the required washing program with the required temperature. The probable duration of the set program in minutes is shown in the multi display. -
Page 19: Changing The Spin Speed/Selecting The Rinse Hold Function
Operating Instructions Changing the spin speed/Selecting the rinse hold function If required, change the spin speed for the final spin/select rinse hold: Changing the spin speed Continue pressing the spin speed/o (RINSE HOLD) button until the indicator for the desired spin speed is illuminated. -
Page 20: Set The Delay Timer / Soaking Duration
Operating Instructions Set the delay timer / soaking duration Delay timer The b (DELAY TIMER) button allows the start of a washing program to be postponed for between 1 and maximum 19 hours. To do this, press the b (DELAY TIMER) button as often as necessary until the required start delay is shown in the multi display, for example in the form12h for the postponement of the program... -
Page 21: Opening And Closing The Filling Door
Operating Instructions Opening and closing the filling door Open: Pull on the handle of the filling door. Close: Press the filling door firmly closed. The displays K (DOOR) and O/s (START/PAUSE) show when the unit is switched on whether the filling door can be opened. -
Page 22: Add Detergent/Care Agent
Operating Instructions Add detergent/care agent For information on detergent and care agents, refer to the section "De- tergents and care agents". 1. Open the detergent drawer: grip inside the flap on the drawer at the bottom (1) and pull out the drawer as far as it will go (2). -
Page 23: Start The Washing Program
Operating Instructions Start the washing program 1. Check that the water valve is open. 2. Start the washing program: Press the O/s (START/ PAUSE) button. The washing program is started or it starts after the set time expires. The filling door is not correctly closed if the K (DOOR) display flashes red when the O/s (START/PAUSE) button is pressed. -
Page 24: Change Program
Operating Instructions Change program Changing or aborting the program 1. Press the O/s (START/PAUSE) button. 2. Turn the program selector to I (OFF). The washing program is aborted. 3. If required, set a new washing program. Otherwise, turn the program selector to C (PUMP OUT) and press the O/s (START/PAUSE) button. -
Page 25: The Washing Cycle Is Finished/Remove The Washing
Operating Instructions The washing cycle is finished/Remove the washing After a washing program has ended, L (END) lights up on the program sequence display. If o (RINSE HOLD) was selected, the display next to the O/s (START/ PAUSE) button flashes. 1. -
Page 26: Program Tables
Operating Instructions Program tables Washing Not all possible settings are listed below, only those which are normal and appropriate in everyday use. Max. Possible Type of washing; Program selector; filling quantity additional care symbol temperature programs (dry weight) k (PRE WASH) t (COTTONS/LINEN) q (SOAKING) Cottons... - Page 27 Operating Instructions Max. Possible Type of washing; Program selector; filling quantity additional care symbol temperature programs (dry weight) P (HAND WASH) Woollens/ s (WOOLLENS) Hand Wash 2 kg 9 ì ï r (COLD) to 40 1) The load amount inquiry operates in accordance with the EN 60456 standard load.
-
Page 28: Separate Conditioning/Starching/Impregnation
Operating Instructions Separate conditioning/starching/impregnation Max. Filling quantity Type of washing Program selector (dry weight) Cottons/Linen 5 kg B (STARCHING) Separate rinse Max. Filling quantity Type of washing Program selector (dry weight) Cottons/Linen 5 kg Easy Cares 2.5 kg A (GENTLE RINSE) Delicates 2.5 kg Woollens/Hand Wash... -
Page 29: Cleaning And Care
Operating Instructions Cleaning and Care Control panel Important! Do not use any furniture cleaning agents or aggressive cleaning agents in order to clean panel and control parts. Wipe control panels with a damp cloth. When doing so, use warm wa- ter. -
Page 30: Washing Drum
Operating Instructions 7. Use a brush to clean the entire rinsing-in section of the washing machine, particularly also the noz- zles on the top side of the rinsing- in chamber. 8. Set the detergent drawer into the guide tracks and push in. Washing Drum The washing drum is made of stainless steel. -
Page 31: What To Do If
Operating Instructions What to do if... Remedying faults In the event of a fault, try to solve the problem yourself with the aid of the information provided here. If you use the Customer Service to rem- edy one of the faults listed here or to remedy an operating fault, the customer service technician's visit will be subject to a charge, even dur- ing the warranty period. - Page 32 Operating Instructions Problem Possible Cause Remedy Water valve closed. Open the water valve. Close the water valve. Un- Water is not running. Filter in screw connection of screw the hose from the tap, The fault code E10 ap- the intake hose blocked. remove the sieve and clean pears.
- Page 33 Operating Instructions Problem Possible Cause Remedy The screw connection on the Tighten the intake hose intake hose is leaky. screw connection. Check the drainage hose and The drainage hose is leaky. replace it if necessary. The washing solution pump Close cover correctly. cover is not correctly closed.
- Page 34 Operating Instructions Problem Possible Cause Remedy Drainage hose bent. Remove the bend. Contact your customer serv- Maximum pump head (dis- ice. For pumping heights Washing not well spun. charge height 1 m from the over lm he can offer you a Residual water still vis- unit's floor) is exceeded.
-
Page 35: If The Washing Results Are Not Satisfactory
Operating Instructions Problem Possible Cause Remedy The cause is probably a de- No negative effect on the The rinsing water is tergent with a high silicate rinsing result, use liquid de- murky. content. tergent if necessary. The corresponding dis- play does not light up The selected additional pro- when one of the addi- gram cannot be combined... -
Page 36: Carrying Out Emergency Drainage
Operating Instructions Carrying out emergency drainage • If the washing machine no longer pumps off the washing solution, emergency drainage must be performed. • If the washing machine is in a room where there is a risk of frost, emergency drainage must be performed if there is a possibility of frost. -
Page 37: Drain Pump
Operating Instructions When the water is completely drained: 6. Push the plug securely into the emergency drainage hose and turn it clockwise to secure it. 7. Replace the emergency drainage hose in its holder. 8. Put on the flap and close. Drain pump The drain pump is maintenance free. -
Page 38: Additional Rinse +Á (Rinse+)
Operating Instructions 5. Replace the pump cover. Laterally insert the webs on the cover into the guide slots and screw on the cover in a clock- wise direction. 6. Close the emergency emptying hose and place it in the holder. 7. -
Page 39: Child Safety Feature
Operating Instructions Child Safety Feature If the child safety feature is set, the filling door can no longer be closed and no washing program can be started. Setting the child safety feature Use a coin to turn the rotary knob on the inside of the filling door clockwise as far as it will go. -
Page 40: Installation And Connection Instructions
Installation and connection instructions Installation and connection instructions Installation Safety Precautions • Do not tilt the washing machine onto its front or onto its right side (viewed from the front). Electronic components can get wet. • Check the washing machine for transport damages. A damaged unit must never be put into operation under any circumstances. -
Page 41: Installation Of The Appliance
Installation and connection instructions Installation of the appliance Washing machines with curved panels are not suitable for installing under units. Transporting the appliance • Do not place the washing machine on its front or on its right side (viewed from the front). Otherwise, electrical components can get wet. - Page 42 Installation and connection instructions The special spanner (A) and the caps (B) (2 each) and (C) (1 each) are supplied with it. 3. Remove the screw D, including the compression spring with the special spanner A. 4. Cover the hole with the cap C. Important! When fitting the plastic caps, press until they snap into the rear panel securely.
-
Page 43: Prepare The Installation Place
Installation and connection instructions Prepare the installation place • The installation surface must be clean and dry, free of floor polish residues and other greasy coatings so that the unit does not slip away. Do not use lubricants as a sliding aid. •... -
Page 44: Compensate For Floor Unevenness
Installation and connection instructions Compensate for floor unevenness Floor unevenness can be compensated for and the height can be cor- rected with the four adjustable screw feet. The height can be adjusted in the range +10 .. -5mm. To adjust the feet use the special spanner supplied for removing the transport braces. -
Page 45: Electrical Connection
Installation and connection instructions Electrical connection Details of the mains voltage, current type and required fuses can be found on the rating plate. The ra- ting plate is located at the top above the filling door. For permanent electrical connection within the electrical circuit, provi- sions must be made which allow for electrical disconnection of the ap- pliance from the mains with a contact opening of at least 3 mm at all... -
Page 46: Water Inflow
Installation and connection instructions Water inflow A pressure hose of 1.35m in length is supplied. If a longer inflow hose is required, only a VDE-approved, complete set of hoses with fitted hose screw connections offered by our Customer Service is permissible. –... -
Page 47: Water Drain
Installation and connection instructions Water drain The drainage hose can either be connected to a siphon or hung in a wash basin or discharge basin or a bath tub. Only original hoses may be used for extensions (max. 3m laid on the floor and then up to 80cm high). -
Page 48: Technical Data
Installation and connection instructions Technical data Adjustment possibility Approx. +10 / -5mm Filling quantity (program-dependent) max. 5kg Area of use Domestic Drum speed, spinning See rating plate Water pressure 1-10 bar (= 10 - 100 N/cm = 0.1 - 1.0 Mpa) Dimensions (dimensions in mm) -
Page 49: Warranty Conditions / Customer Service Centres
In diesen Ländern gelten die Garantiebedingungen der örtlichen Partner. Diese können dort eingesehen werden. Further after-sales service agencies overseas In these countries our AEG agents’ own guarantee conditions are applicable. Please ob- tain further details direct. Autres agences étrangères assurant le service après-vente Dans ces pays, les conditions de garantie des concessionnaires de la région sont vala-... - Page 50 Warranty conditions / Customer service centres Australia Korea (South) Namibia ANDI-Co Pty. Ltd Core Incorp. AEG NAMIBIA (PTY) LIM- 9 Kingston Town Close 3/F Chewoo Bldg. ITED-Jeppe Street Oakleigh VIC 3166 200 Nonhyun-Dong Northern Industrial Area Tel.: (03) 9569 1235...
- Page 51 Tel.: 0120-13-7117 Fax: 03-3790-5257 Thailand Slovakia Rep. South Africa OLYMPIA Thai Ltd. Electrolux Slovakia S.R.O. AEG (Pty) Ltd. 44 Ratchadapisek Road Seberiniho 1 55, 12th Road 10320 Bangkok 821 03 Bratislava P.O. Box 1 02 64 Tel.: 2 513 6111 Tel.: 02 4333 4322, 4355...
- Page 52 Warranty conditions / Customer service centres...
-
Page 54: Index
Index Index Abort program ..... . . 24 Pre wash ....12 Pre-wash detergent . -
Page 55: Service
Service Service In the chapter "What to do if...“ , some faults are listed which you can remedy yourself. Look there first if a fault occurs. If you do not find any information there, please consult your Customer Service. (You can find the addresses and telephone numbers in the section "Customer Service Centres“.) Always prepare in advance for the discussion. - Page 56 USD 14 billion in more than 150 countries around the world. AEG Hausgeräte GmbH Postfach 1036 D-90327 Nürnberg http://www.aeg.hausgeraete.de © Copyright by AEG 822 943 145-01-310303-03 Subject to change without notice...