
Related Manuals for Bush LTF22M4


Summary of Contents for Bush LTF22M4
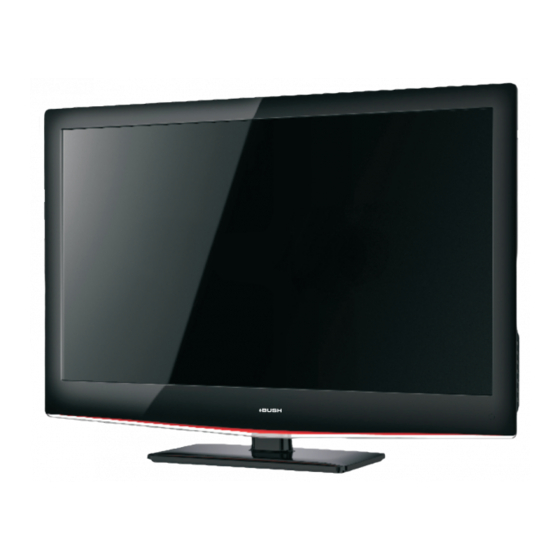
- Page 1 LTF22M4/LTF24M4 Bush 22in Full HD 1080P Digital LED LCD TV Bush 24in Full HD 1080P Digital LED LCD TV INSTRUCTION MANUAL Customer helpline: 0845 604 0105...
- Page 2 BUSH|Full HD 1080p LED LCD TV | User Manual | Helpline:0845 604 0105...
- Page 3 P.02 BUSH|Full HD 1080p LED LCD TV | User Manual | Helpline:0845 604 0105...
- Page 4 P.03 BUSH|Full HD 1080p LED LCD TV | User Manual | Helpline:0845 604 0105...
-
Page 5: Warnings And Cautions
WARNINGS AND CAUTIONS Warning Caution High voltages are used in the operation Do not trap the power supply cord under of this television receiver. Do not remove the television receiver. the cabinet back from your set. Refer servicing to qualified service personnel. Caution Never stand on, lean on, or suddenly push Warning... -
Page 6: Installation
Introduction INSTALLATION CAUTION *Locate the TV in the room where light Never tamper with any components inside the TV, or any other adjustment controls does not strike the screen directly. not mentioned in this manual. All LED-TVs *Total darkness or a reflection on the are high voltage instruments. -
Page 7: Preset Mode
PRESET MODE V.Freq.(Hz) H.Freq.(KHz) RESOLUTION 800*600 37.88 640*480 31.47 48.36 1024*768 1280*1024 63.98 P.06 BUSH|Full HD 1080p LED LCD TV | User Manual | Helpline:0845 604 0105... -
Page 8: Base Stand Assembly Instruction
Base Stand Assembly Instruction 1. Place the TV with the display side down 2. Fix the bottom with turning the screw on a flat surface.Use a cloth to protect. tightly on the stand. Locate the bottom at the stand. INSTALLATION NOTES This TV can be connected to an AC 100-240 Volts, 50/60 Hz power supply. -
Page 9: Wall Mounting Installation Guidelines
WALL MOUNTING INSTALLATION GUIDELINES This television can be wall mounted as follows: 1.Place the LED LCD Television onto a solid surface. Please place some soft material over the front of the screen to protect it from any damage. 2.Remove the screws from the lower part of the television, where the base joins to the TV, and take away the stand (put the stand somewhere safe for future use). -
Page 10: Front Control Panel
Remote Control Front control panel SOURCE MENU VOL+ VOL- STANDBY SOURCE Display the input source menu. Remote control sensor. Display main MENU. MENU Indicator LED: In TV mode,press CH+ or CH- to change CH+/CH- the channel up and down. BLUE:POWER ON. RED STAND BY. In MENU, press CH+ or CH- to select items . - Page 11 P.10 BUSH|Full HD 1080p LED LCD TV | User Manual | Helpline:0845 604 0105...
-
Page 12: Common Interface
COMMON INTERFACE The common interface (CI) slot is designed to accept the conditional Access (CA) Module and Smart card in order to view the pay TV programmes and additional services. Contact your Common Interface service provider to get more information about the modules and subscription. -
Page 13: Remote Control
Remote control 1:POWER:To set the TV to standby or power on. 2:NUMERIC KEY: For direct access to channels. POWER MUTE 3:TV MENU:To display TV menu. 4:CURSOR:To move within the menu. AUDIO 5:CH.LIST:To display the channels list. RECALL 6:VOL+/- :To adjust sound level. 7:PIC:To switch picture mode. - Page 14 REMOTE CONTROL TELETEXT Teletext is an information system broadcast by certain channels which can be consulted like a newspaper. It also offers access to subtitles for viewers with hearing problems or who are not familiar with the transmission language(cable networks, satellite channels, etc.) Press: You will obtain :...
-
Page 15: Operation
OPERATION Installation Guide Channel Tuning : 0 Programme(s) Please select an OSD Language DTV : 0 Programme(s) Radio : 0 Programme(s) Cesky Engli sh Magyar Pols ki Fran ais Data: 0 Programme(s) Espanol Dansk Hrvatski Nederla nds Portugues UHF CH 68 DTV Deutsch Itali ano Norsk... -
Page 16: Sound Menu
NOTE: Pic ture Mode Standard Press teletext red button to storage to channels Colo r Temperature after manual tuning . Aspect Ratio 4). Program edit: Nois e Reductio n < > PICTURE Screen You can Delete ,Rename ,Move, Skip , FAV any programs. -
Page 17: Option Menu
5.OPTION MENU 7. APPLICATIONS MENU The sixth item of the MENU is the OPTION MENU. The fifth item of the MENU is the OPTION MENU. You can adjust the Menu language, Audio language,Subtitle language etc. OSD Language Engli sh < >... - Page 18 Select the media file by pressing , then INFO the preview frame will pop up.Press the button to choose the programs , Press to play the media file in full screen.When the INFO key, you can display the highlight program's media file (photo,music, Movie, or text type) is information.
-
Page 19: Pvr Function
9.PVR function as below 1.Prepare to record the program From OPTION MENU enter into PVR File Sele ct Dis k System In “OPTION MENU”, please choose “check PVR File System”. Click Check PVR File Syste m Sta rt “OK”, until “checking”change into USB Dis k “Success”. - Page 20 2.Record the program (Suggest to format the format the device by “High Speed Fs...”, which can speed up As playing the DTV source, choose the channel and click “record”, the record the record.) frame will pop up. Click “record” again, Format dis k the record frame will disappear and the “REC”...
-
Page 21: Timeshift Function
9.Timeshift function 1.Prepare to record the program 00:00:33/00:04:22 This TV allows you to pause and record the currently watched digital program to a USB Play Prev . Ne xt Stop storage device, and to resume to the point Pause where it was paused. NOTE: Formatting a USB 2.0 storage device will NOTE:... -
Page 22: Time Shift Limitations
Time Shift limitations: 1. When the Time Shift feature is activated, only the PLAY/PAUSE/STOP/FWD/REV/ VOL+/VOL-/MUTE keys and some basic operation keys (ENTER/EXIT/navigation keys) are available. 2. Video playback may not be smooth and skip if USB recording speed does not meet the minimum requirements . -
Page 23: Troubleshooting
Trouble shooting Trouble phenomenon Symptom Inspection Check Picture Audio antenna position, direction Snow Noise or connection antenna position, direction Ghost Normal audio or connection electronic equipment,car/ Interference Noise motorcycle,fluorescent light Volume(check if mute is activated or if the audio system Normal Picture connections are not correct) Mute... -
Page 24: Specification
Specification PAL-B/G 、I、D/K Colour system SECAM- B/G、 D/K、L、 L ' Sound system BG, DK, I, L,L' SCART, YP , AV, Video input VGA, HDMI, USB. 480i/p, 576i/p, 720p, 1080i, 1080p HDMI 480i/p, 576i/p, 720p, 1080i, 1080p Power supply DC 12V, 3A (Power adaptor supplied) Audio output 3W+3W Working temperature:... -
Page 25: Product Guarantee
Product guarantee Argos PRODUCT GUARANTEE This product is guaranteed against manufacturing defects for a period of Year This product is guaranteed for twelve months from the date of original purchase. Any defect that arises due to faulty materials or workmanship will either be replaced, refunded or repaired free of charge where possible during this period by the dealer from whom you purchased the unit.