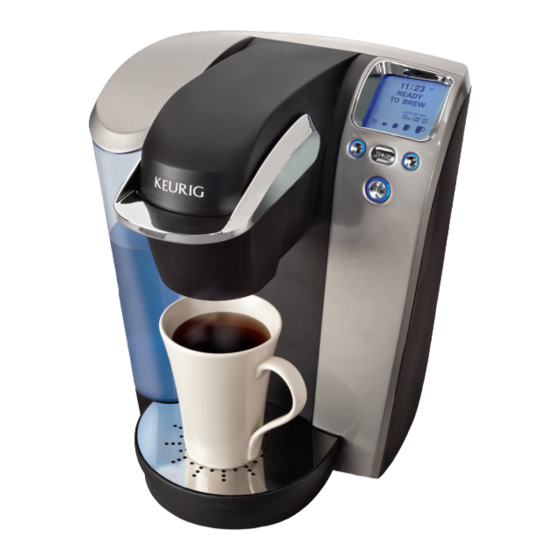
Keurig Platinum B70 Owner's Manual
Keurig - b70 brewer - platinum
Hide thumbs
Also See for Platinum B70:
- Use and care manual (32 pages) ,
- Owner's manual (21 pages) ,
- Setup manual (2 pages)
Advertisement
Available languages
Available languages
Quick Links
Advertisement

Related Manuals for Keurig Platinum B70


Summary of Contents for Keurig Platinum B70
- Page 1 USING YOUR BREWER OWNER’S MANUAL: Getting the most from your new Platinum B70 Keurig Brewer ® COMMENT UTILISER VOTRE CAFETIÈRE MANUEL D’UTILISATION : Tirez le meilleur de votre nouvelle cafetière Platinum B70 de Keurig ®...
- Page 2 IMPORTANT SAFEGUARDS TABLE OF CONTENTS Safe Operation & Use KEURIG GOURMET SINGLE CUP HOME BREWING SYSTEM ® Platinum B70 — Using Your Brewer When using electrical appliances, basic before putting on or taking off parts and event of an electrical short circuit, grounding CAUTION: There are two sharp needles that puncture the K-Cup ®...
-
Page 3: Set-Up
Lock Tab Slot Drip Tray Base MENU Button from children. Cup-5.25 oz., Small Mug-7.25 oz., Large Mug- K-Cup ® Portion Pack Handle Remove enclosed literature. Vent BREW Button 9.25 oz., and Travel Mug-11.25 oz.) your Keurig ® Assembly Housing Funnel... - Page 4 SECTION 1 Set-Up & First Brew the Water Reservoir during this and subsequent Place a K-Cup portion pack fig. You cannot use your Keurig Brewer until IMPORTaNT: ® Lock Tab Place Water Reservoir base into fig. heating — this is normal.
- Page 5 Set-Up & First Brew (continued) SECTION 1 Purging the Brewer To use the Iced Beverage setting, place a tall Enjoy your first cup of Keurig Brewed ® The Water Reservoir can be filled in two ways. fig. gourmet coffee, tea or hot cocoa! glass filled with ice on the Drip Tray Plate.
-
Page 6: Programming On/Off Features
SECTION 2 Controls & Indicators (LCD Control Center) b. Press or hold the Left Button under the c. Press or hold the Right Button under the fig. fig. blinking “H” to advance 1 hour at a time, up “M” to scroll through the minutes to your to 9 hours. - Page 7 SECTION 3 Cleaning & Maintenance SECTION 2 Controls & Indicators (LCD Control Center) Programming Brew Temperature (187° – 192º F) Cleaning External Parts simply press the Power Button and you can To change the brew temperature again, repeat steps 1 through 3 to change fig.
- Page 8 SECTION 3 Cleaning & Maintenance (continued) De-Scaling Your Brewer De-Scaling Instructions Service 2. Cleaning the Funnel — The Funnel can be fig. removed from the K-Cup ® Holder by pulling on it until it pops off (fig. 19). The Funnel is A.
-
Page 9: Section 5 Warranty
If you have repeated the de-scale procedure on • • system. Keurig will, at its option, repair or replace the Brewer without charge YOUR B70 BREWER, INCLUDING ANY IMPLIED WARRANTY OF MERCHANT turned on and LCD lights are illuminated. your Brewer two times and it is still only brewing upon its receipt of proof of the date of purchase. - Page 10 Réglage de l’horloge ................ L’utilisation d’accessoires non recommandés éviter qu’un enfant puisse le saisir ou que quelqu’un trébuche et (3) la ral- niquer avec le Service à la clientèle de Keurig adaptateur. ® par le fabricant de l’appareil risque de causer...
- Page 11 Pour infuser un café dans une tasse de voyage, de l’ensemble de départ pour filtre à eau de Keurig® Placez la cafetière debout sur une surface vous n’avez qu’à retirer la cuvette d’égouttage [vendu au www.keurig.com].
- Page 12 Préparation et première infusion REMARQUE : Durant le cycle de préparation Placez un godet K-Cup dans le support à fig. IMPORTaNT : N’utilisez pas votre cafetière Keurig avant de ® Languette de Replacez la base du réservoir d’eau sur le fig.
- Page 13 READY (96 ml/3,25 oz) WATER » (AJOUTER DE L’EAU) (fig. 9). K-Cup préféré, sélectionnez le format Bois- chocolat chaud Keurig Brewed Grande tasse ® ® Si la cafetière n’a pas été utilisée pendant plus d’une semaine, vous devriez (274 ml/9,25 oz) son glacée et appuyez sur le bouton d’infusion...
- Page 14 SECTION 2 Commandes et voyants (Afficheur ACL) b. Appuyez sur le bouton de gauche sous le « H » c. Appuyez sur le bouton de droite, sous le « M », pour fig. fig. clignotant pour avancer le délai d’une heure à régler les minutes de l’heure de mise en marche la fois, jusqu’à...
- Page 15 SECTION 3 Nettoyage et entretien SECTION 2 Commandes et voyants (Afficheur ACL) Réglage de la température de l’eau Nettoyage des pièces externes Pour infuser une tasse après cette période, REMARQUE : Si vous êtes à une altitude élevée (plus de 1500 m/5000 pi) et que fig.
- Page 16 SECTION 3 Nettoyage et entretien (suite) Détartrage 2. Nettoyage de l’entonnoir — L’entonnoir peut pourrait endommager la cafetière. Dans ce cas, le message « DE-SCALE » étape : Vous devrez peut-être effectuer des cycles de rinçage supplémen fig. taires si vous décelez un goût résiduel de vinaigre. être enlevé...
- Page 17 MENU et faites défiler les options de DE L’EAU) même après que vous ayez rempli le clientèle de Keurig en composant le numéro sans frais 1 866 901-2739. Avant LES FRAIS ET LES COÛTS ENGENDRÉS PAR UNE VIOLATION DE LA programmation.
- Page 19 55 Walkers Brook Drive Reading, MA 01867 Keurig, Incorporated is a wholly-owned subsidiary of Keurig, Incorporated est une filiale à 100 % de Green Mountain Coffee Roasters, Inc. Green Mountain Coffee Roasters, Inc. CLICK, CaLL OR ShOP I www.keurig.com I...