
Related Manuals for Samsung HMX-F90BP


Summary of Contents for Samsung HMX-F90BP
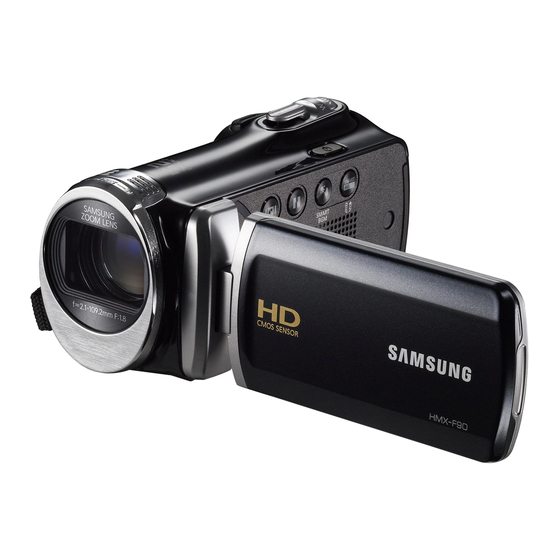
- Page 1 USER MANUAL HMX-F90/HMX-F91 HMX-F900/HMX-F910 HMX-F920 Digital Camcorder www.samsung.com/register For video recording, use a memory card that supports faster write speeds. - Recommended Memory Card: 6MB/s (Class 6) or above.
-
Page 2: Before Reading This User Manual
Please follow them explicitly. After reading this section, keep it in a and then use the product properly. safe place for future reference. • Samsung is not responsible for any injury or damage caused by not following the instructions in the user manual. PRECAUTIONS • In this manual, a ‘memory card’... - Page 3 Before reading this user manual The following terms are used in this manual: Notes regarding trademarks • ‘Scene’ refers to the point where you press the [Recording start/stop] button to start recording until you press it again to • All the trade names and registered trademarks mentioned in this stop recording. manual or other documentation provided with your Samsung • The terms ‘photo’ and ‘still image’ are used interchangeably with product are trademarks or registered trademarks of their the same meaning. respective holders. Furthermore, ‘ ’ and ‘ ’ are not mentioned in ® each case in this manual. Before using this camcorder • SD, SDHC and SDXC logos are trademarks of SD-3C, LLC. • Microsoft , Windows , Windows Vista , Windows 7, and ®...
-
Page 4: Safety Information
Safety information The safety precautions illustrated below are to prevent personal injury or material damages. Heed all instructions carefully. WARNING Prohibited action. Do not touch the product. Means that there is a potential risk of serious personal injury. CAUTION Do not disassemble the product. Unplug from the power supply. - Page 5 There is a risk of fire or an request service from a Samsung shock. There is a risk of fire or injury. electric shock.
- Page 6 Safety information CAUTION Do not press the surface of the LCD Do not drop or expose the camcorder, Do not use the camcorder on a tripod Do not use the camcorder near direct with force, or hit it with a sharp object. battery, power adaptor or other (not supplied) in a place where it is sunlight or heating equipment.
- Page 7 Keep important data separately. Only plug the power adaptor plug into Other manufacturers of optional surface that is well ventilated. Samsung is not responsible for data a socket that is easily accessible. If any accessories compatible with this loss. problem occurs with the product, you...
-
Page 8: Table Of Contents
Contents Before reading this user manual ....... 2 Getting ready to start recording ...... 30 SAFETY WARNINGS ..............2 INSERTING AND EJECTING A MEMORY CARD (NOT SUPPLIED) ... 30 PRECAUTIONS ................2 SELECTING A SUITABLE MEMORY CARD (NOT SUPPLIED) ................. 31 IMPORTANT INFORMATION ON USE ........... - Page 9 Contents Advanced recording ........52 Shutter Sound ................78 Auto Power Off ................79 iSCENE ..................52 PC Software ................79 Video Resolution................53 Format ..................80 Photo Resolution ................. 54 Default Set ................... 80 White Balance ................54 Language ..................80 Face Detection ................
-
Page 10: Quick Start Guide
Quick start guide This quick start guide introduces the basic operation and features of your camcorder. See the reference pages for more information. STEP 1: Get ready STEP 2: Record videos and photos Insert the battery into the battery slot. page 19 Open the LCD screen and press the [Power ( )] button to turn on the camcorder. - Page 11 Quick start guide STEP 3: Play back videos or photos Viewing on a TV You can enjoy detailed, brilliant quality videos on a connected TV. Viewing videos or photos on the LCD screen pages 81~83 You can find recordings quickly by using the thumbnail view. STEP 4: Save recorded videos / photos Press the [MODE] button to select the playback ( ) mode.
- Page 12 Quick start guide Importing and viewing videos/photos to your PC from Sharing videos/photos on Web sites the camcorder Share your contents with the world by uploading photos and videos directly to a web site with a single click. Start the Intelli-studio programme by connecting the camcorder Click the Share ( ) ...
-
Page 13: Getting To Know The Camcorder
Getting to know the camcorder UNPACKING Check your accessories Your new camcorder comes with the accessories shown on this page. If any of these items is missing from your box, call Samsung’s Customer Care Centre. Battery Power adaptor USB cable... -
Page 14: Location Of Controls
Getting to know the camcorder LOCATION OF CONTROLS Front & Left Lens MENU button Control (Up/Down/Left/Right/OK) button / Zoom (T/W) button 8 9 10 11 Recording start/stop button LCD screen Memory card/Jack cover ⓐ USB jack ( ⓑ Memory card slot ( ⓒ... - Page 15 Getting to know the camcorder Right/Top & Bottom Rear Mode indicator MODE button : Recording mode (Video/Photo) : Playback mode Zoom lever (T/W) Recording start/stop button PHOTO / My Clip button Battery slot Strap Strap hook Be careful not to cover the internal microphone and lens during recording.
-
Page 16: Identifiying The Screen Displays
Getting to know the camcorder IDENTIFIYING THE SCREEN DISPLAYS The available functions vary depending on the selected operation mode. Different indicators appear depending on the setting values. • The On Screen Display (OSD) below appears when the camcorder is in the recording ( ) mode only. - Page 17 Getting to know the camcorder • The On Screen Display (OSD) below appears in the video playback ( ) mode only. • Press the [MODE] button to select the playback ( ) mode. page 26 Video playback mode: Thumbnail view Top of the LCD screen Centre of the LCD screen Normal...
- Page 18 Getting to know the camcorder • This On Screen Display (OSD) below appears in the photo playback ( ) mode only. • Press the [MODE] button to select the playback ( ) mode. page 26 Photo playback mode: Thumbnail view Top of the LCD screen Centre of the LCD screen Normal...
-
Page 19: Getting Started
[Battery release (BATT.)] switch • Use only Samsung-approved batteries. Do not use batteries from other manufacturers. Otherwise, there is a danger of overheating, fire, or explosion. • Samsung is not responsible for the problems caused by unapproved batteries. -
Page 20: Charging The Battery
Getting started CHARGING THE BATTERY Insert the battery into the camcorder. page 19 Open the jack cover of the camcorder. You can charge the battery with the USB cable and power adaptor. Charge the battery using the USB cable and power adaptor. Make sure that you use the supplied USB cable or power adapter The CHG (charge) indicator lights up and charging starts. -
Page 21: Checking The Battery State
Getting started CHECKING THE BATTERY STATE Battery level display The battery level display shows the amount of battery power You can check the charging state and remaining battery capacity. remaining in the battery. To check the charging state The colour of the CHG lamp indicates the charging state. STBY [220Min] 9999... - Page 22 • Charging time: Approximate time in minutes required to fully charge a completely exhausted battery. • Recording/Playback time: Approximate time available when you have fully charged the battery. • The time is only for reference. Times shown above are measured under Samsung’s test conditions. Your times may differ, depending on your usage and conditions.
- Page 23 Getting started About the battery • Battery properties • Check whether the battery terminal is damaged if the battery A lithium-ion battery is small-sized and has a high capacity. Low falls or is dropped. ambient temperature (below 50ºF (10ºC)) may shorten its usage - If you install a battery with the damaged terminal into the time and affect its function.
-
Page 24: Basic Operation Of The Camcorder
Basic operation of the camcorder TURNING YOUR CAMCORDER ON/OFF SWITCHING TO THE POWER SAVING MODE If you need to use camcorder for the extended time, the following Open the LCD screen and press the [Power ( )] button to turn functions enable you to prevent unnecessary energy consumption. -
Page 25: Setting The Date/Time For The First Time
Basic operation of the camcorder SETTING THE DATE/TIME FOR THE FIRST Internal rechargeable battery TIME • Your camcorder includes a internal rechargeable battery that retains the You can set the date and time of your local area when you turn on date and time settings even after the power is turned off. -
Page 26: Setting The Operation Modes
Basic operation of the camcorder SETTING THE OPERATION MODES SWITCHING THE INFORMATION DISPLAY MODE You can switch the operation mode in the following order each time you press the [MODE] button. You can switch the on-screen information display mode. Recording mode ( ) ... -
Page 27: Using The Shortcut Menu (Ok Guide)
Basic operation of the camcorder USING THE SHORTCUT MENU (OK GUIDE) Press the [Control (Left)] button to STBY [220Min] select EV function. 9999 The shortcut menu (OK guide) contains the most frequently Press the [Control (Left/Right)] • accessed functions for the selected mode. Pressing the [Control button to adjust the exposure (OK)] button will display the shortcut menu of frequently used while viewing the image on the... - Page 28 Basic operation of the camcorder Controlling the shortcut functions using the control buttons Playback ( ) mode Button Menu selection Recording ( ) mode Photo playback ( ) mode Video playback ( ) mode Confirms selection - Access the shortcut menu - Access the shortcut menu - Access the shortcut menu - Confirm selection...
-
Page 29: Selecting The Languages
Basic operation of the camcorder SELECTING THE LANGUAGES You can select the language that appears on the LCD screen. Press the [MENU] button STBY [220Min] [Control (Left/Right)] button Settings. Settings Format Default Set Press the [Control (Up/Down)] Language button to select Language, and Exit then press the [Control (OK)]... -
Page 30: Getting Ready To Start Recording
Getting ready to start recording INSERTING AND EJECTING A MEMORY CARD (NOT SUPPLIED) To insert a memory card To eject a memory card Turn the camcorder off. Turn the camcorder off. Open the memory card cover as shown in the figure. Open the memory card cover as shown in the figure. -
Page 31: Selecting A Suitable Memory Card (Not Supplied)
Getting ready to start recording SELECTING A SUITABLE MEMORY CARD (NOT SUPPLIED) Compatible memory cards • You can use SD, SDHC, and SDXC cards with this camcorder. Usable memory card We recommend you use an SDHC card. This camcorder supports SD cards up to 2GB. We cannot guarantee normal operation with SD cards bigger than 2GB. - Page 32 Erased data cannot be recovered. • A memory card has a certain life span. If you cannot record new • Samsung is not responsible for data loss due to misuse, including data, you have to purchase a new memory card.
-
Page 33: Recordable Time And Capacity
Getting ready to start recording RECORDABLE TIME AND CAPACITY • Your recordable time and capacity and recordable number of photos may differ from the figures in the tables depending on your subject and actual recording conditions. Recordable time available for video • The higher the resolution, the more memory is used. -
Page 34: Attaching The Strap
Getting ready to start recording ATTACHING THE STRAP ADJUSTING THE LCD SCREEN Adjust the length of strap so that the camcorder is stable when you The wide LCD screen on your camcorder offers high quality image press the [Recording start/stop] button with your thumb. viewing. -
Page 35: Basic Recording
• If power is interrupted or an error occurs during recording, the video may not be recorded. • Samsung is not responsible for any damage caused by a failure of normal recording or playback operations caused by memory card error. -
Page 36: Recording Pause/Resume
Basic recording • For on-screen information display, see pages 16~18. RECORDING PAUSE/RESUME • For approximate recording times, see page 33. • Eject the battery when you have finished recording to prevent The camcorder allows you to pause temporarily while recording a unnecessary battery power consumption. -
Page 37: Tagging And Capturing Great Moments While Recording (My Clip Function)
Basic recording TAGGING AND CAPTURING GREAT Understanding My Clip function MOMENTS WHILE RECORDING Captured photos are saved in the photo thumbnail view. (MY CLIP FUNCTION) My Clip lets you tag good scenes with the My Clip icon ( ) by pressing the [PHOTO] button while you are recording a video, and then lets you extract those clips from the video and watch them separately. -
Page 38: Recording Photos
Basic recording RECORDING PHOTOS Centre the subject in the LCD screen. Set the desired resolution before recording. page 54 Fully press the [PHOTO] button. The shutter sound is heard • Insert a memory card. page 30 • • Open the Lens cover by using the [Lens cover open/close] (when Shutter Sound: On is switch. -
Page 39: Recording With Ease For Beginners (Smart Auto)
Basic recording RECORDING WITH EASE FOR BEGINNERS Scene icons Meaning (SMART AUTO) Appears when recording a night scene. User-friendly SMART AUTO optimises your camcorder for the recording conditions automatically, providing you with the best Appears when recording with a very bright background. performance. -
Page 40: Zooming In/Out
Basic recording ZOOMING IN/OUT W: Wide-angle T: Telephoto Use the zoom function for close-up or wide-angle recording. This camcorder allows you to record using 52x optical power zoom, 70x Intelli-zoom and 130x digital zoom. • Zoom magnification over 70x is done through digital image processing, and is therefore called digital zoom. -
Page 41: Using The Back Light Button
Basic recording USING THE BACK LIGHT BUTTON Back lighting influences recording when the subject is darker than the background: When a subject is lit from behind, this function compensates for • The subject is in front of a window. lighting so that the subject is not too dark. • The subject is against a snowy background. -
Page 42: Basic Playback
Basic playback CHANGING THE PLAYBACK MODE • You can switch to the playback mode by pressing the [MODE] button. • The recorded videos or photos appear in thumbnail view and the most recently created file is highlighted. • The camcorder selects the thumbnail display options based on the standby mode you used the last time. However, you can choose the video or photo thumbnail view display options by using the [Zoom] lever. -
Page 43: Playing Back Videos
Basic playback PLAYING BACK VIDEOS Use the [Control (Up/Down/Left/ 0:00:00/0:00:55 Right)] button to select the desired You can preview recorded videos in a thumbnail view, find your videos, and then press the [Control desired video quickly, and play back directly. (OK)] button. - Page 44 Basic playback Various playback operations Skip playback • During playback, press the [Control (Right)] button to locate the starting point of the next file. Pressing the [Control (Right)] button repeatedly skips files in the forward direction. • During playback, press the [Control (Left)] button to locate the [Control (Up/Down/Left/ Right/OK)] button starting point of the current file.
-
Page 45: Playing Back My Clip
Basic playback PLAYING BACK MY CLIP USING THE SMART BGM FUNCTION You can extract and play back the scenes tagged as ‘My Clip’ from You can enjoy music during video playback. If the original sound in a video. the video is loud, the background music will be decreased naturally. On the other hand, if the original sound in the video is quiet, the background music will be increased naturally. -
Page 46: Tagging And Capturing Great Moments While Playing Back Video
Basic playback TAGGING AND CAPTURING GREAT When you see a scene you want to tag, press the [PHOTO] button. MOMENTS WHILE PLAYING BACK VIDEO The camcorder tags the scenes • You can tag good scenes during playback using the My Clip as My Clip ( ) and captures function (... -
Page 47: Viewing Photos
Basic playback VIEWING PHOTOS Use the [Control (Up/Down/ 1/10 Left/Right)] button to select the You can view recorded photos by using various playback functions. desired photos, and then press the [Control (OK)] button. The camcorder displays the • • Insert a memory card. page 30 photo you selected in full screen • Open the LCD screen and press the [Power ( )] button to turn Thumbnail View... -
Page 48: Zooming During Photo Playback
Basic playback ZOOMING DURING PHOTO PLAYBACK Press the [Control (Up/Down/ x1.5 1/10 Left/Right)] button to view the area You can magnify a playback image by using the zoom function. you want on the magnified photo. To cancel, use the [Zoom] lever. Exit 100-0001 • Photos recorded on other devices or those edited on a PC cannot... -
Page 49: Using The Menu Items
Using the menu items HANDLING MENUS Press the [Control (Up/Down)] button to select the desired submenu item, and then press the [Control (OK)] button. The instructions below are examples of how to access and use menu items using the [MENU] button. When you access and use When you finish changing settings, press the [MENU] button to other menu items, use these examples as guides. -
Page 50: Menu Items
Using the menu items MENU ITEMS • The items available in each menu vary depending on the operation mode. • For item operation details, see the page number listed under Page in the table. Recording menu items Playback menu items : Accessible ●... - Page 51 Using the menu items : Accessible ● Setting menu items : Not accessible ✕ Recording Playback mode (Thumbnail view) Playback mode (Single view) Items Default values Page Video Photo Video Photo mode Storage Info ● ● ● ● ● Series File No.
-
Page 52: Advanced Recording
Advanced recording iSCENE Submenu Items This camcorder automatically can set the shutter speed and aperture according to the subject and brightness for optimum On-screen Items recording. display Use this setting for regular recording conditions. The camcorder automatically Auto Select the recording ( ) mode by pressing the [MODE] adjusts the aperture value and shutter button. -
Page 53: Video Resolution
Advanced recording • 50p indicates the camcorder will record in progressive scan mode at Video Resolution 50 frames per second. • 25p indicates the camcorder will record in progressive scan mode at You can select the resolution of a video to be recorded. 25 frames per second. -
Page 54: Photo Resolution
Advanced recording Photo Resolution White Balance You can select the quality of photo images to be recorded. Using the White Balance function, you can select a setting that matches the light illuminating the subject you are shooting (Daylight, Fluorescent, etc.) or let the camcorder make all adjustments Select the recording ( ) mode by pressing the [MODE] automatically. - Page 55 Advanced recording To set the white balance manually Submenu items Select Custom WB. On-screen STBY [220Min] Items display The indicator ( ) and message 9999 • Set White Balance Set White Balance appear. To let the camcorder adjust the white Auto balance automatically according to Frame a white object such as...
-
Page 56: Face Detection
Advanced recording Face Detection Examples of the Face detection mode When you set Face detection to On, the face detection frame Face Detection detects and recognises face-like shapes and adjusts appears around faces as shown in the figure below. focus, colour, and exposure automatically. Also, it adjusts recording The camcorder can detect up to three faces. -
Page 57: Ev (Exposure Value)
Advanced recording EV (Exposure Value) Understanding EV (Exposure Value) The camcorder usually adjusts the exposure automatically. Exposure value is the total amount of light allowed to fall on the You can also manually adjust the exposure to your preference. photographic media (Image sensor) during the process of taking photos or videos. -
Page 58: C.nite
Advanced recording C.Nite Focus You can adjust the shutter speed when recording a slow moving When you turn the camcorder on, focus is always set to automatic. object or a brighter image in dark places without compromising You can also set the focus manually. colours. -
Page 59: Adjusting The Focus Manually
Advanced recording Adjusting the focus manually Examples of when to use the Manual focus mode This camcorder automatically focuses subjects from close-up to • When the subject is dark. infinity. However, the correct focus may not be obtained depending • When the background is too bright. on the recording conditions. -
Page 60: Anti-Shake(Hdis)
Advanced recording Anti-Shake(HDIS) Use the Anti-Shake function in the following cases Use the Anti-Shake(HDIS) function to compensate for unstable • When recording while using the zoom extensively. images caused by shaking movements while holding the camcorder. • When recording a close up picture of a small object. • When recording while walking, or in a moving car. -
Page 61: Digital Special Effect
Advanced recording Digital Special Effect Examples of 7 digital effect options Using the digital special effect function gives your recording a creative look. Disables the function. Select the recording ( ) mode by pressing the [MODE] button. page 26 Blk&Wht ( This mode changes the image into black and white. -
Page 62: Zoom Type
Advanced recording Zoom Type Digital zoom range The camcorder offers three types of zoom: optical, intelligent, and digital zoom. STBY [220Min] 9999 Select the recording ( ) mode by pressing the [MODE] button. page 26 Press the [MENU] button STBY [220Min] The right side of the bar shows the digital zooming zone. -
Page 63: Cont. Shot
Advanced recording Cont. Shot Submenu Items The Continuous Shot function allows you to capture photos in rapid succession and gives you more photo-taking opportunities when On-screen Items display recording moving subjects. To record only one photo image. While you are pressing the [PHOTO] button, Select the recording ( ) mode by pressing the [MODE] the camcorder can take up to 30 photos... -
Page 64: Time Lapse Rec
Advanced recording Time Lapse REC Move to the next setting (Hr) by pressing the [Control (Left/ Right)] button, and then set the desired total recording time in Using the Time Lapse feature, you can programme your camcorder the same way. to create a time lapse video by recording a series of frames over a set period of time with a set time interval between each frame. - Page 65 Advanced recording Example of Time Lapse Recording The Time Lapse Recording function records image frames at Total time for recording a predefined interval over the total recording time to produce a Recording interval time-lapse video. Time Lapse Recording is useful for filming the following subjects: Timeline - Blooming flowers - A bird building a nest...
-
Page 66: Guideline
Advanced recording Guideline Submenu Items This camcorder provides 3 types of guidelines to help you to set up On-screen a balanced image composition on the screen. Items display To cancel the guideline function. Select the recording ( ) mode by pressing the [MODE] Cross Use when focusing a subject in the centre. -
Page 67: Advanced Playback
Advanced playback Thumbnail View Option Normal Date The Thumbnail View Option lets you sort thumbnails of the recorded Normal Date videos or photos by different display options. 0:00:55 1/10 01/JAN/2013 1/10 • Press the [MODE] button to select the playback ( ) mode. -
Page 68: Playoption
Advanced playback PlayOption Smart BGM Option You can play back one video or all videos once, or play back one You can play back a video with background music. The Smart BGM video or all videos repeatedly. Option lets you select the music that will play. • Press the [MODE] button to select the playback ( ) mode. - Page 69 Advanced playback Using external songs as background music (Smart BGM II) To delete the external songs in the memory card You can delete the external songs from You can play songs you have saved to a memory card as Manage BGM in the Smart BGM screen background music as well as the songs stored in the camcorder’s or from the BGM folder in the memory memory and available through the Smart BMG option.
-
Page 70: Delete
Advanced playback Delete If you selected All Files, the message corresponding to the selected option appears. Use the [Control (Left/Right)] button You can erase your recordings one by one or all at once. to select Yes, and then press the [Control (OK)] button. • Press the [MODE] button to select the playback ( ) mode. -
Page 71: Delete My Clip
Advanced playback Delete My Clip If you selected All Files, the message corresponding to the selected option appears. Use the [Control (Left/Right)] button You can delete the My Clip tag from a video tagged as ‘My Clip’. to select Yes, and then press the [Control (OK)] button. • Press the [MODE] button to select the playback ( ) mode. -
Page 72: Protect
Advanced playback Protect If you selected All On, the message corresponding to the selected option appears. Use the [Control (Left/Right)] button You can protect important saved videos or photos from accidental to select Yes, and then press the [Control (OK)] button. deletion. -
Page 73: Share Mark
Advanced playback Share Mark If you selected All On, the message corresponding to the selected option appears. Use the [Control (Left/Right)] button You can set the share mark on a video and directly upload the to select Yes, and then press the [Control (OK)] button. marked file to the YouTube site. -
Page 74: Slide Show
Advanced playback Slide Show File Info You can enjoy a slide show with various effects. You can see the image information for photos and videos. • Press the [MODE] button to select the playback ( ) mode. Press the [MODE] button to select the playback ( ) mode. -
Page 75: Other Settings
Other settings Storage Info File No. Storage Info displays the storage information for the storage media. The camcorder assigns file numbers to recorded files in the order they were recorded. Use File No. to continue or reset the current file Press the [MENU] button ... -
Page 76: Date/Time Set
Other settings Date/Time Set Date/Time Display You can set whether or not the date and/or time appear on the LCD By setting the date and time, you can display the date and time of a recording during playback. screen. Press the [MENU] button Press the [MENU] button ... -
Page 77: Lcd Brightness
Other settings LCD Brightness Auto LCD Off To reduce power consumption, the brightness of the LCD screen You can adjust the brightness of the LCD screen to compensate for ambient lighting conditions. is automatically dimmed if the camcorder is idle for more than 2 minutes. -
Page 78: Beep Sound
Other settings Beep Sound Shutter Sound You can turn the shutter sound the camcorder emits when you When Beep Sound is on, the camcorder sounds a beep when you press a button. press the [PHOTO] button on or off. Press the [MENU] button Press the [MENU] button ... -
Page 79: Auto Power Off
Other settings Auto Power Off PC Software If you set PC Software to On, you can use the built-in PC software You can set your camcorder to turn off automatically if it is idle for 5 minutes without an operation. This function will prevent unnecessary easily by connecting a USB cable between the camcorder and your PC. -
Page 80: Format
Other settings Format Default Set You can restore all menu settings to their defaults. Use the Format function if you want to delete all files completely or to correct problems on the storage media. Press the [MENU] button STBY [220Min] [Control (Left/Right)] button Insert a memory card. -
Page 81: Connecting To A Tv
Connecting to a TV CONNECTING TO A HIGH DEFINITION TV Using a micro HDMI cable WITH HDMI Turn on the camcorder. You can view High Definition (HD) quality videos recorded in HD If you do not turn on the camcorder first, the camcorder may •... -
Page 82: Connecting To A Regular Tv
Connecting to a TV CONNECTING TO A REGULAR TV Stereo Type Mono Type You can view images recorded with your camcorder on a regular TV that supports standard definition. This camcorder supports the composite output for standard definition video transfer. Yellow White Yellow... -
Page 83: Viewing On A Tv Screen
Connecting to a TV VIEWING ON A TV SCREEN Image display depending on LCD and TV screen ratio Appearance on Wide Recording ratio Appearance on 4:3 TV Screen (16:9) TV Images recorded in a 16:9 ratio Images recorded in a 4:3 ratio Adjust the volume to a moderate level. -
Page 84: Dubbing Videos
Dubbing videos DUBBING TO VCR OR DVD/HDD Insert the storage media into the recording device. RECORDERS Connect your camcorder to the recording device (VCR or DVD/ HDD recorders) with the supplied Audio/Video cable. You can dub images recorded on your camcorder to other recording devices, such as VCRs or DVD/HDD recorders. -
Page 85: Using With A Windows Computer
Using with a windows computer WHAT YOU CAN DO WITH A WINDOWS System Requirements COMPUTER Your computer must meet the following requirements to run Intelli- studio: You can perform the functions listed below by connecting your camcorder to your Windows computer with a USB cable and using Items System Requirements the Intelli-studio editing software built into your camcorder. -
Page 86: Using The Intelli-Studio Programme
3. If the Stop a Hardware device window appears, click OK. 4. Disconnect the USB cable from the camcorder and PC. • Use the provided USB cable. (Supplied by Samsung) • Make sure you insert the USB plug into the USB jack with the plug oriented in the correct direction. - Page 87 Using with a windows computer Step 2. About the Intelli-studio main window For details, select Help Help on the When the Intelli-studio starts up, video and photo thumbnails appear Intelli-studio screen. in the main window. Description Menu items Display files in the selected folder. Switch to Photo edit mode.
- Page 88 Using with a windows computer Step 3. Playing back videos or photos Step 4. Editing videos or photos You can play back the recordings conveniently using the Intelli- You can edit the videos or photos in various ways with various studio application.
- Page 89 Using with a windows computer Step 5. Sharing the videos/photos online Click Upload to start uploading. A pop-up window appears. The window will either ask you • Share your contents with the world by uploading photos and videos to enter your ID and password or ask you to click OK to directly to a web site with one click.
-
Page 90: Upload Your Videos Directly To Youtube
Using with a windows computer UPLOAD YOUR VIDEOS DIRECTLY TO YOUTUBE! The One-Press [Share ( )] button lets you directly upload and share your videos on YouTube. Just press the [Share ( )] button while your product is connected to a Windows computer using the USB cable. STEP 1 STEP 3 On the product, select a video you want to upload in the video... -
Page 91: Using As A Removable Storage Device
Connect the camcorder to the PC with the USB cable. page 86 The Removable Disk or • Samsung window appears on the PC’s screen after a moment. Select Open folders to • view files using Windows Explorer and then click... - Page 92 Using with a windows computer Structure of folders and files on the storage media • The folder and file structure for the storage media is shown below. • Do not arbitrarily change or remove the folder or file name. It may not be playable.
-
Page 93: Troubleshooting
Troubleshooting WARNING INDICATORS AND MESSAGES Before contacting a Samsung authorised service centre, perform the following simple checks. They may save you the time and expense of an unnecessary call. Power source Message Icon Informs that... Action • Replace with a charged battery or use the power adaptor. - Page 94 Troubleshooting Storage media Message Icon Informs that... Action The memory card is not supported in Not Supported Card • Change to a memory card that we recommended. this camcorder. The memory card is not formatted. • Format the memory card using the menu. Please format Low speed card.
- Page 95 Troubleshooting Recording Message Icon Informs that... Action Folder and file number have reached File number is full. • Set File No. to Reset and format the storage media. Remember to back up the maximum number. You cannot Cannot record video. important files before formatting.
-
Page 96: Symptoms And Solutions
Troubleshooting SYMPTOMS AND SOLUTIONS If these instructions do not solve your problem, contact the nearest Samsung authorised service centre. Power Symptom Explanation/Solution • The battery may not be installed on your camcorder. Insert a battery into the camcorder. • The inserted battery may be discharged. Charge the battery or replace it with a charged one. - Page 97 Troubleshooting Displays Symptom Explanation/Solution Unknown indicator appears on the screen. • A warning indicator or message appears on the screen. pages 93~95 An afterimage remains on the LCD screen. • This occurs if you disconnect the power adaptor or remove the battery before turning the power off. The image on the LCD screen looks dark.
- Page 98 Troubleshooting Recording Symptom Explanation/Solution • There is not enough free space to record on the storage media. • Make sure the memory card is inserted and write-protect tab is set to unlock. Pressing the [Recording start/stop] button does • The internal temperature of your camcorder is unusually high. not start recording.
- Page 99 Troubleshooting Recording Symptom Explanation/Solution When the screen is exposed to direct sunlight during recording, the screen turns red or black for an • Do not expose the LCD screen to direct sunlight. instant. During recording, the date/time does not appear. • Set Date/Time Display to on.
- Page 100 Troubleshooting Adjusting the image during recording Symptom Explanation/Solution • Set Focus to Auto. page 58 • The recording conditions are not suitable for auto focus. Focus does not adjust automatically. Adjust the focus manually. page 58 • The lens is dusty on the surface. Clean the lens and check the focus. • You are recording in a dark place.
- Page 101 Troubleshooting Connecting to a computer Symptom Explanation/Solution When accessing videos, a computer does not • Disconnect the USB cable from the computer and camcorder, restart the computer, then reconnect it recognise your camcorder. correctly. • You need to install a video codec on the PC to play back the files recorded by your camcorder. Install or run the internal edit software (Intelli-studio).
- Page 102 Troubleshooting Dubbing with other devices Symptom Explanation/Solution • The Audio/Video cable is not connected properly. Make sure that the Audio/Video cable is connected to You cannot dub correctly using the Audio/Video the proper jacks, i.e. to the input jacks of the device used for dubbing an image from your camcorder. cable.
-
Page 103: Maintenance & Additional Information
Maintenance & additional information MAINTENANCE • To clean the lens Use a air brush to remove dust, and then wipe the lens gently with a soft cloth. If necessary, wipe gently with lens paper or tissue. Cautions when storing - Mould may form on the lens if the lens is left dirty. - If the lens looks dim, turn off the camcorder and leave it off for • To store your camcorder safely, turn it off. -
Page 104: Using Your Camcorder Abroad
• What can I do? Turn the power off, detach the battery, and leave the The format transcoder is not provided by Samsung. camcorder in a dry area for 1~2 hours before using it. PAL-compatible countries/regions • Use the camcorder only after dew condensation has completely disappeared. -
Page 105: Glossary
Maintenance & additional information GLOSSARY Focal length (f) The distance from the middle of the lens to its focal point (in millimeters). Longer focal lengths result in narrower angles of view and the subject is magnified. Shorter focal AF (Auto Focus) lengths result in wider angles of view. -
Page 106: Specifications
Specifications Model name HMX-F90/HMX-F91/HMX-F900/HMX-F910/HMX-F920 Video signal Picture compression format H.264/AVC Audio compression format AAC (Advanced Audio Coding) Image device 1/3.2” CMOS System Effective pixels Approx. 920,000 pixels Total pixels Approx. 5 Mega pixels Lens 1.8 to 4.9, 52x (Optical), 70x (Intelli), 130x (Digital) Electronic zoom lens Focal length 2.1mm~109.2mm Size/dot number... - Page 107 Contact SAMSUNG WORLD WIDE If you have any questions or comments relating to Samsung products, please contact the SAMSUNG customer care centre. Region Country Contact Centre Web Site Region Country Contact Centre Web Site www.samsung.com/ca (English) CANADA 1-800-SAMSUNG (726-7864)
- Page 108 1-800-8-SAMSUNG(726-7864) for Globe SLOVAKIA 0800 - SAMSUNG (0800-726 786) www.samsung.com/sk 02-5805777 Asia SINGAPORE 1800-SAMSUNG(726-7864) www.samsung.com SPAIN 902 - 1 - SAMSUNG (902 172 678) www.samsung.com Pacific THAILAND 1800-29-3232, 02-689-3232 www.samsung.com/th SWEDEN 0771 726 7864 (SAMSUNG) www.samsung.com 0800-329-999 www.samsung.com/ch (German) TAIWAN www.samsung.com...
- Page 109 Correct disposal of batteries in this product Correct Disposal of This Product (Waste Electrical & Electronic Equipment) (Applicable in countries with separate collection systems) (Applicable in countries with separate collection systems) This marking on the battery, manual or packaging This marking on the product, accessories or literature indicates that the batteries in this product should not indicates that the product and its electronic accessories be disposed of with other household waste at the...
- Page 110 Samsung Electronics Co., Ltd. 129, Samsung-Ro, Yeongtong-Gu, Suwon-Si, Gyeonggi-Do 443-742 Korea Samsung Electronics Euro QA Lab. Blackbushe Business Park Saxony Way, Yateley, Hampshire GU46 6GG, UK RoHS compliant Our product complies with “The Restriction Of the use of certain Hazardous Substances in electrical and electronic equipment”, and we do not use the 6 hazardous materials- Cadmium (Cd), Lead (Pb), Mercury (Hg), Hexavalent Chromium (Cr +6), Poly Brominated Biphenyls (PBBs), Poly Brominated Diphenyl Ethers (PBDEs)- in our products.