Table of Contents
Advertisement
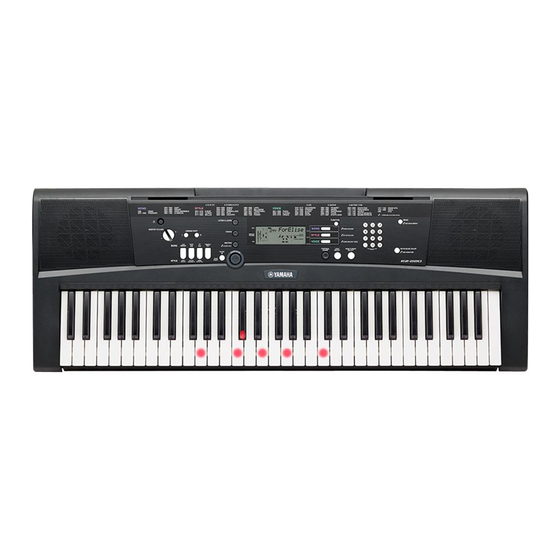
Owner's Manual
Thank you for purchasing this Yamaha Digital Keyboard!
We recommend that you read this manual carefully so that you can fully take advantage of the
advanced and convenient functions of the instrument.
We also recommend that you keep this manual in a safe and handy place for future reference.
EN
Before using the instrument, be sure to read "PRECAUTIONS" on pages 4–5.
Advertisement
Table of Contents

Related Manuals for Yamaha EZ-220


Summary of Contents for Yamaha EZ-220
- Page 1 Owner’s Manual Thank you for purchasing this Yamaha Digital Keyboard! We recommend that you read this manual carefully so that you can fully take advantage of the advanced and convenient functions of the instrument. We also recommend that you keep this manual in a safe and handy place for future reference.
- Page 2 This product should be used only with the components supplied or; a rectly. Mismatches or incorrect installation may result in overheating and cart, rack, or stand that is recommended by Yamaha. If a cart, etc., is battery case rupture. used, please observe all safety markings and instructions that accom- Warning: pany the accessory product.
- Page 3 Model No. Serial No. (bottom_en) COMPLIANCE INFORMATION STATEMENT (DECLARATION OF CONFORMITY PROCEDURE) Responsible Party : Yamaha Corporation of America Address : 6600 Orangethorpe Ave., Buena Park, Calif. 90620 Telephone : 714-522-9011 Type of Equipment : Digital Keyboard Model Name : EZ-220 This device complies with Part 15 of the FCC Rules.
-
Page 4: Precautions
Yamaha service personnel. - When using Ni-MH batteries, follow the instructions that came with the batteries. Use only the specified charger device when charging. -
Page 5: About This Manual
• Copying of the commercially available musical data including but not limited to MIDI data and/or audio data is strictly prohibited except for your personal use. • This product incorporates and bundles computer programs and contents in which Yamaha owns copyrights or with respect to which it has license to use others' copyrights. -
Page 6: About The Manuals
Yamaha website. Yamaha Manual Library http://www.yamaha.co.jp/manual/ Access the Yamaha Manual Library, then enter your Try out various model name (EZ-220, for example) in the Model Name area to search the manuals. functions Supplied Accessories • Owner’s manual (this book) •... -
Page 7: Table Of Contents
39 Setting the Split Point 28 Adding Reverb 29 Adding Panel Sustain Connecting to a Computer Page Turner of the Score on the iPad Troubleshooting Effect Type List Voice List Style List 45 Maximum Polyphony Specifications Drum Kit List Index EZ-220 Owner’s Manual... -
Page 8: Panel Controls And Terminals
!2 [DEMO] button....... page 18( Switches between the Main A and Main B of the Starts/stops playback of all the preset Songs in Style. During playback, a Fill-in is added when you numerical order. press this button. EZ-220 Owner’s Manual... -
Page 9: Rear Panel
GM System Level. XGlite As its name implies, “XGlite” is a simplified version of Yamaha’s high-quality XG tone generation format. Natu- rally, you can play back any XG song data using an XGlite tone generator. However, keep in mind... -
Page 10: Setting Up
Setting Up Power requirements Although the instrument will run either from an optional AC adaptor or batteries, Yamaha recommends use of an AC adaptor whenever possible. An AC adaptor is more environmentally friendly than batteries and does not deplete resources. -
Page 11: Auto Power Off
• When the instrument’s sound is output to an external device, first turn on the power to the instrument, then to pressing the [+] and [-] buttons. the external device. Reverse this order when you turn the Default setting: on power off. EZ-220 Owner’s Manual... -
Page 12: Playing The Keyboard
Pressing the [PORTABLE GRAND] button @0 will reset the Voice setting to Grand Piano. The default volume value is “12” (6 bars on the display). NOTE • The Volume setting is reset to the default value whenever the power is turned off. EZ-220 Owner’s Manual... -
Page 13: Listening To Songs
Play a chord with your left hand and play a melody with your right hand. Press the [INTRO/ENDING/rit.] button !5 . After playback shifts to the Ending and reaches the end, Style playback will stop auto- matically. EZ-220 Owner’s Manual... -
Page 14: Practicing And Learning
Page 32 Press the [METRONOME] button !3 to start the Met- ronome. Press the [TEMPO/TAP] button !7 , then use the number buttons to adjust the tempo. Press the [METRONOME] button again to stop the Metronome. EZ-220 Owner’s Manual... -
Page 15: Setting Parameters
D-Cancel ON, OFF produces no NOTE sound, and vice • When Initial Send is selected, pressing [+] will transmit versa. the panel settings to the connected computer as MIDI Auto Power events. AutoOff ON, OFF Page 11 EZ-220 Owner’s Manual... -
Page 16: Basic Operation And Displays
For numbers that start with one or two zeroes, the first zeroes can be omitted. Start playing. • After selecting a Song or Style, press the [START/STOP] button to start/stop playback. • After selecting a Voice, play the keyboard. EZ-220 Owner’s Manual... - Page 17 Right is muted Sound level is 1–2 parts of the Song by pressing Left and right Sound level is 0 are on (no indication). the [L] and [R] buttons. The [L] and [R] icons indicate the current status. EZ-220 Owner’s Manual...
-
Page 18: Playing The Songs
Pressing the [DEMO] button for longer than a second repeatedly plays Song 000. During playback, you can change the Song via the Number buttons. The selected Song will play repeatedly until pressing the [DEMO] or [START/ STOP] button. EZ-220 Owner’s Manual... -
Page 19: Song List
• Refer to the included Song Booklet for details. • Some of the Preset Songs have been edited for length or arrangement, and may not be exactly the same as the original. • Depending on the Song arrangement, a left-hand part may not be available. EZ-220 Owner’s Manual... -
Page 20: Song Playback Settings
You can supply a count-in at any tempo you like to start playback. Simply tap the [TEMPO/TAP] button at any tempo—four times for time signatures in 4, and three times for time signatures in 3—and the selected Song or Style (Rhythm part only) will start at the tapped tempo. EZ-220 Owner’s Manual... - Page 21 Before starting playback, press the [A-B REPEAT] button to set Point A at the begin- ning of the Song. To specify the end of the Song as Point B: After Point A is specified during playback, let the Song play back normally until the end. EZ-220 Owner’s Manual...
-
Page 22: Song Volume
During Song playback, pressing the [R] button will mute the right-hand part while pressing the [L] button will mute the left-hand part. To cancel the mute status, press the corresponding Part buttons, [R] or [L] again dur- ing Song playback, or select a different Song. EZ-220 Owner’s Manual... -
Page 23: Guide Function
Examples of crossing under and over Crossing under Crossing over Play the F key with Play the E key with your thumb your middle finger * This function does not apply to the Song 000. EZ-220 Owner’s Manual... -
Page 24: Using The Lesson Feature
This is because the “Your Tempo” parameter (page 15) is set to ON. If you want to disable this function, WAITING or you want to learn using the original tempo, set Your Tempo to OFF. EZ-220 Owner’s Manual... - Page 25 You can stop the Lesson at any time by pressing the [START/STOP] button. chord lesson, it is fixed at 54 or F Grade When playback of Timing and Waiting reaches to the end, you can confirm your Grade on the display. Good Very Good Excellent EZ-220 Owner’s Manual...
-
Page 26: Selecting A Voice
Playing the “Grand Piano” When you want to reset various settings to default and simply play a Piano sound, press the [PORTABLE GRAND] button. The Voice for the entire keyboard will be set to “001 Grand Piano 1.” EZ-220 Owner’s Manual... - Page 27 Example: 141 Standard Kit 1 Std.Kit1 To reset the Voice to the Grand Piano, press the [PORTABLE GRAND] button. * When Voice number 141 is selected, the icons printed above the keyboard indicates the instruments assigned to each key. EZ-220 Owner’s Manual...
-
Page 28: Playing With A Variety Of Effects
The current Reverb type appears after the “Reverb” indication. Hall1 Current Reverb type Select the desired Reverb Type by using the number buttons [0]– [9], [+], [-]. Refer to the Reverb Type list on page 52 for details. EZ-220 Owner’s Manual... -
Page 29: Adding Panel Sustain
[-] button. an optional Footswitch. For details, refer to page 27. • For certain Voices, the sus- Sustain tain effect may not be obvi- ous or audible, even when Panel Sustain is turned on. EZ-220 Owner’s Manual... -
Page 30: Controlling The Pitch
Use the [+] and [-] buttons to set the Tuning value over a range of NOTE • Tuning cannot be applied to 427.0Hz to 453.0Hz. the Drum Kits (Voice num- bers 141–153). • To call up the default value (440.0Hz), press the [+] and [-] buttons simultaneously. EZ-220 Owner’s Manual... -
Page 31: Changing The Touch Sensitivity
This is the standard piano touch response. The volume level does not change much when you play the keyboard soft or hard. The volume level does not change at all regardless of (Off) whether you play the keyboard soft or hard. EZ-220 Owner’s Manual... -
Page 32: Using The Metronome
Use the number buttons to set the tempo over a range of 11 to 280. NOTE • The metronome tempo will be automatically changed to the value set in the Song or Style when you select a dif- ferent Song or Style. EZ-220 Owner’s Manual... -
Page 33: Setting The Time Signature
The denominator of the Time Signature is shown on the display. or Style. TimeSigD Use the [+] and [-] buttons to select a note. The available values are as follows: Value Descriptions Half note Quarter note 8th note 16th note EZ-220 Owner’s Manual... -
Page 34: Playing With A Style
ACMP on then play the chord in the Auto Accompaniment range of the keyboard to turn on playback of other accompaniment parts. Press the [ACMP ON/OFF] button to turn on ACMP. To turn ACMP off, press this button again. HH Light Appears when ACMP is on. EZ-220 Owner’s Manual... - Page 35 Play a variety of left-hand chords while playing a melody with your right hand. To stop playback, press the [START/STOP] button. You can stop playback also by pressing the [INTRO/ENDING/rit.] button (page 36) so that the Ending of the current Style will play and then Style playback will stop. EZ-220 Owner’s Manual...
-
Page 36: Using The Style Sections
8. Press the [INTRO/ENDING/rit.] button. (For adding an Ending) An appropriate Ending Section will play and then Style playback will stop. You can have the Ending gradually slow down (ritardando) by pressing the [INTRO/ENDING/rit.] button again during Ending playback. EZ-220 Owner’s Manual... - Page 37 (three keys alto- gether). EZ-220 Owner’s Manual...
-
Page 38: Looking Up Chords Using The Chord Dictionary
When you’ve played the chord properly, a bell sound signals your success and the chord name in the display flashes. To call up possible inversions of the chord, press the [+]/[-] buttons. To exit from the Chord Dictionary display, press the [SONG] or [STYLE] button. EZ-220 Owner’s Manual... -
Page 39: Style Playback Settings
The current Split Point key is lighted. Use the Number buttons to set the Split Point. NOTE • Press the [+] and [-] buttons simultaneously to instantly reset the value to its default setting (54 or F EZ-220 Owner’s Manual... -
Page 40: Connecting To A Computer
Computer OS: Windows XP (SP3 or later) (32bit), Windows Vista (32bit), Windows 7 (32bit/64bit), Mac OS X Version 10.5.0–10.7.X NOTICE • Connecting a computer which does not satisfy the above OS may cause computer malfunction. Yamaha USB-MIDI Driver is supported only by the above OS. On the instrument, turn off the power. -
Page 41: Midi Settings
Receiving data over MIDI channel 1 from a computer lights the corresponding notes on the keyboard. This means that you can use the Song data on a computer for key- board practice if the melody part to be practiced is assigned to MIDI channel 1. EZ-220 Owner’s Manual... -
Page 42: Page Turner Of The Score On The Ipad
* iPad or App Store may not be available depending on your particular area. Using the Page Turner function with the dedicated application To use the Page Turner function, download the dedicated application “EZ-220 Page Turner” (free downloadable), attach the music rest (page 6) to this instrument then follow the instructions below. - Page 43 NOTE On the iPad, start EZ-220 Page Turner to call up the Tutorial. • If the Tutorial is not called up This operation automatically calls up the Tutorial which describes instructions successfully, tap the button...
-
Page 44: Troubleshooting
When a Style is in use, the Page Turner function This is normal. The Page Turner function can be used when the Song or Les- cannot be used even if the button is pressed. son is in use. EZ-220 Owner’s Manual... -
Page 45: Voice List
Contrabass Clarinet Orchestral Harp English Horn Orchestra Hit Bassoon GUITAR FLUTE Nylon Guitar Flute Steel Guitar Piccolo Jazz Guitar Pan Flute Clean Guitar Recorder Muted Guitar Blown Bottle Overdriven Guitar Shakuhachi Distortion Guitar Whistle Guitar Harmonics Ocarina EZ-220 Owner’s Manual... - Page 46 Organ Bass Crystal 70's Drawbar Organ 2 Atmosphere Cheezy Organ Brightness Drawbar Organ 2 Goblins 70's Percussive Organ Echoes Detuned Percussive Organ Sci-Fi Light Organ SOUND EFFECTS Percussive Organ 2 Fret Noise Rotary Organ Breath Noise Slow Rotary EZ-220 Owner’s Manual...
- Page 47 Orchestra Gamelimba Orchestra 2 Warm Atmosphere Tremolo Orchestra Hollow Release Velocity Strings Nylon Electric Piano Stereo Slow Strings Nylon Harp Legato Strings Harp Vox Warm Strings Atmosphere Pad Kingdom Goblins Synth Stereo Choir Creeper Mellow Choir Ritual EZ-220 Owner’s Manual...
- Page 48 Door Squeak Door Slam Scratch Cut Scratch Split Wind Chime Telephone Ring 2 Car Engine Ignition Car Tires Squeal Car Passing Car Crash Siren Train Jet Plane Starship Burst Roller Coaster Submarine Laugh Scream Punch Heartbeat Footsteps EZ-220 Owner’s Manual...
-
Page 49: Drum Kit List
Guiro Short Guiro Long D# 5 Claves Wood Block H Wood Block L Cuica Mute Scratch Push Cuica Open Scratch Pull G# 5 Triangle Mute Triangle Open A# 5 Shaker Jingle Bell Bell Tree C# 6 D# 6 EZ-220 Owner’s Manual... - Page 50 Analog Claves Wood Block H Wood Block L Cuica Mute Scratch Push Scratch Push Cuica Open Scratch Pull Scratch Pull G# 5 Triangle Mute Triangle Open A# 5 Shaker Jingle Bell Bell Tree C# 6 D# 6 EZ-220 Owner’s Manual...
- Page 51 Wood Block H Wood Block L Cuica Mute Uh!+Hit Cuica Open G# 5 Triangle Mute Triangle Open A# 5 Shaker Jingle Bell Bell Tree Machine Gun C# 6 Horse Laser Gun Bird Tweet 2 Explosion D# 6 Firework Maou EZ-220 Owner’s Manual...
-
Page 52: Effect Type List
Effect Type List Reverb Types Reverb Type Description 01–03 Hall 1–3 Concert hall reverb. 04–05 Room 1–2 Small room reverb. 06–07 Stage 1–2 Reverb for solo instruments. 08–09 Plate 1–2 Simulated steel plate reverb. No effect. EZ-220 Owner’s Manual... -
Page 53: Style List
Jive TechnoParty Traditional UKPop USMarch HipHopGroove 6/8March HipShuffle GermanMarch HipHopPop PolkaPop Disco OberPolka 70sDisco Tarantella LatinDisco Showtune SaturdayNight ChristmasSwing DiscoHands ChristmasWaltz Swing&Jazz ScottishReel BigBandFast Waltz BigBandBallad SwingWaltz JazzClub JazzWaltz Swing1 CountryWaltz Swing2 OberWalzer Five/Four Musette Dixieland Ragtime EZ-220 Owner’s Manual... -
Page 54: Specifications
• Headphones: HPE-150/HPE-30 * Specifications and descriptions in this owner’s manual are for information purposes only. Yamaha Corp. reserves the right to change or modify products or specifications at any time without prior notice. Since specifications, equipment or options may not be the same in every locale, please check with your Yamaha dealer. -
Page 55: Index
..........25 Repeat Playback .....18, 21 Guide Function ......23 Reverb ...........28 Rhythm Part ........34 Right part ........17 Root .........37, 38 Headphones ........11 Sections .........36 Initial Send ........41 Song ..........18 INTRO .......... 36 Song List ........19 EZ-220 Owner’s Manual... - Page 57 Warranty service will only be provided for defective products within the Warranted Area. Contact your local authorized Yamaha dealer who will advise you of the procedures to be followed. If this is not successful, contact Yamaha at the address, telephone number or website shown below. Yamaha may request that you send the defective product to a local authorized Yamaha Servicer or authorize return of the defective product to Yamaha for repair.
- Page 58 Niederlassung und bei Yamaha Vertragshändlern in den jeweiligen Bestimmungsländern erhältlich. Pour plus de détails sur les produits, veuillez-vous adresser à Yamaha ou au distributeur le plus proche de vous figurant dans la liste suivante. Para detalles sobre productos, contacte su tienda Yamaha más cercana o el distribuidor autorizado que se lista debajo.
- Page 60 Yamaha Global Site http://www.yamaha.com/ Yamaha Manual Library http://www.yamaha.co.jp/manual/ U.R.G., Digital Musical Instruments Division © 2012 Yamaha Corporation 202POTY*.*-**A0 Printed in China WZ93480...