Yamaha Electone STAGEA ELB-01 Owner's Manual
Hide thumbs
Also See for Electone STAGEA ELB-01:
- Playing manual (44 pages) ,
- Assembly instructions (4 pages)
Table of Contents
Advertisement
Quick Links
Advertisement
Table of Contents

Related Manuals for Yamaha Electone STAGEA ELB-01


Summary of Contents for Yamaha Electone STAGEA ELB-01
- Page 1 ELB-01 Owner’s Manual...
- Page 2 If it should appear to be malfunctioning, discontinue use smells or smoke should appear to be caused by it, immediately turn off the immediately and have it inspected by qualified Yamaha service personnel. power switch, disconnect the electric plug from the outlet, and have the instrument inspected by qualified Yamaha service personnel.
- Page 3 • Do not place vinyl, plastic or rubber objects on the instrument, since this might discolor the panel or keyboard. Yamaha cannot be held responsible for damage caused by improper use • Do not rest your weight on, or place heavy objects on the instrument, and or modifications to the instrument, or data that is lost or destroyed.
-
Page 4: Congratulations
You are the proud owner of a fine electronic organ, the Electone STAGEA ELB-01. The Yamaha Electone combines the most advanced tone generation technology with state-of-the art digital electronics and features to give you stunning sound quality with maximum musical versatility. - Page 5 Voices and effects, and to ensure compatibility of data well into the future. GS was developed by the Roland Corporation. In the same way as Yamaha XG, GS is a major enhancement of the GM specifically to provide more Voices and Drum kits and their variations, as well as greater expressive control over Voices and effects.
-
Page 6: Table Of Contents
Contents Congratulations! ............4 Accompaniment ............68 Accessories ............... 4 Automatic Accompaniment —Auto Bass Chord (A.B.C.)........71 Main Features ............8 Melody On Chord (M.O.C.) ........74 Keyboard Percussion..........77 Panel Layout ........9 Using the Preset Keyboard Percussion..77 Overview ..............9 Changing the Keyboard Percussion volume/ Front Panel............... - Page 7 Footswitches........146 Left Footswitch............146 Quick Introductory Guide Transpose and Pitch Controls..150 Connections .........151 Accessory Jacks and Controls ......151 Voices Connection Examples — External Devices ... 153 Using Headphones ........153 Playing the Sounds of the Electone Through an External Audio System ....153 Voice Controls Recording the Sounds of the Electone to an and Effects...
-
Page 8: Main Features
Main Features Wide Variety of Registration Menus page 14 The Registration Menu buttons feature a total of 330 Registrations, allowing you to instantly set up the Electone for playing your favorite type of music. The Registrations in Registration Menu are divided into six basic categories for ease of selection. -
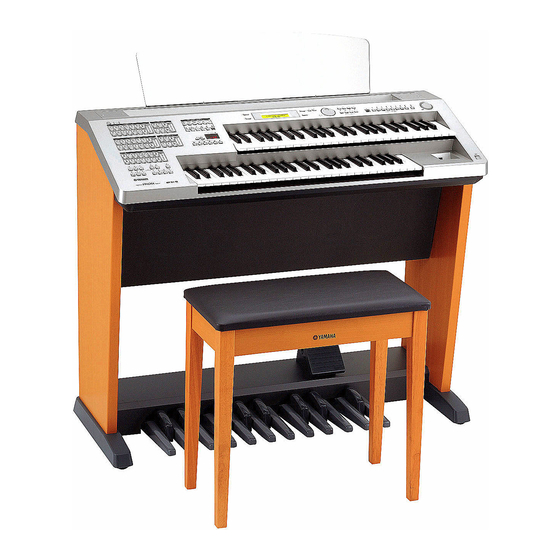
Page 9: Panel Layout
Panel Layout Overview Music Rest Upper Keyboard USB TO DEVICE A terminal Front Panel Lower Keyboard MIDI IN/OUT terminals USB TO DEVICE B terminal USB TO HOST terminal Jacks Right Footswitch Left Footswitch Speaker Expression Pedal Pedalboard ELB-01 Owner’s Manual... -
Page 10: Front Panel
Front Panel MUSIC DATA RECORDER (page 107) LCD display (page 17) Allows recording and playback of your keyboard performances, and lets you Shows the current settings store Registration data for future recall of the Electone Data Control [A] – [D] LEAD VOICE (page 21) PEDAL VOICE 1/2 buttons (page 17) - Page 11 DATA CONTROL dial (page 17) REGISTRATION MEORY Selects the setting in the display buttons Records panel settings made on the panel and LCD PAGE buttons (page 18) [D.] (Disable) button [M.] (Memory) button Selects the Page (page 99) (page 97) of the display MASTER VOLUME dial (page 13)
-
Page 12: Quick Introductory Guide
Only use the voltage specified as correct for the Electone. The required voltage is printed on the name plate of the Electone. Yamaha products are manufactured specifically for the supply voltage in the area where they are to be sold. If you intend to use the instrument in another location, or if any doubt exists about the supply voltage, please consult with a qualified technician. - Page 13 Set the MASTER VOLUME control. The MASTER VOLUME control is an overall control that affects the volume of the entire instrument. Decreases the volume Increases the volume Press the Expression pedal down with your foot. Once you have set the MASTER VOLUME control to a suitable level, you can use the Expression pedal to change the volume with your foot as you play.
-
Page 14: Registration Menu
Registration Menu The Registration Menu is a simple, highly convenient way to instantly change all the Electone settings for playing in specific music styles. A Registration consists of panel settings including the selected Upper Keyboard Voices, Lower Keyboard Voices, Pedal NOTE Voices, the assigned rhythm and so on. -
Page 15: Registration Menu List
Registration Menu List [1] KIDS [2] POPS & ROCK [3] DANCE & BALLAD [4] JAZZ & LATIN Regist. Name Regist. Name Regist. Name Regist. Name 01 Simple 8Beat 1 01 Dynamic 8Beat 01 Organ Ballad 01 Blow On Sax 02 Simple 8Beat 2 02 NY Ballad 02 Dramatic Ballad 02 Sax Ensemble... - Page 16 [5] SYMPHONY & WORLD [ ] LESSON Regist. Name Regist. Name Regist. Name 01 Fanfare 01 Simple 1 St/St 49 Brass Combi. 6 02 StringOrchestra 02 Simple 2 St/Hr 50 Brass Combi. 7 03 Romantic Violin 03 Simple 3 Cl/St 51 Brass Combi.
-
Page 17: Using The Lcd Display
Using the LCD display Many of the Electone’s operations are done from the LCD display. Pressing a button on the panel automatically calls up the relevant function for the corresponding button in the display. Depending on the display that appears, you can conveniently perform various functions and change values/settings by using the [A] –... -
Page 18: Changing The Display Page
Changing the Display Page Ò<FOOT.SW> TIME÷1 ⁄ MODE¿GLIDE ”LEAD PAGE buttons are used to select the various ‘pages’ of the display (when available), with the currently selected page number appearing in highlight at the top right of the LCD. Use the PAGE [ ] button to select the next page, and PAGE [ ] to select the previous page. -
Page 19: Basic Operation
Selecting from a recommended set of Voices/Rhythms The Electone has a huge amount of available Voices and Rhythms—so many that it may be difficult to find the ones you want. To help you find the best Voice/Rhythm for the selected instrument category, we’ve prepared some “recommended” or popular selections in that category. -
Page 20: Factory Set (Initializing The Electone)
Factory Set (Initializing the Electone) All current settings including Registration Memory and LCD Display settings can be Reference Page deleted at once by the following procedure. Be careful when executing Factory Set, since it erases all your existing data. Always save your important data to external media, Storing Registrations (page 97) such as a USB flash memory. -
Page 21: Voices
Voices This Electone features hundreds of high quality Voices. Any of these Voices can be used on the Upper Keyboard, Lower Keyboard and Pedalboard. Up to three Voice sections are available on the Upper Keyboard for playing together in a layer, while the Lower Keyboard and Pedalboard each have two Voice sections. - Page 22 Voices for the Lower Keyboard Up to two different Voice sections are available on the Lower Keyboard for playing together: Lower Keyboard Voice 1 and Lower Keyboard Voice 2. Voices for each section can be selected from the panel’s Lower Keyboard Voice 1/2 section. Voices for the Lower Keyboard 1 and Lower Keyboard 2 Voices for Pedalboard...
-
Page 23: Voice Display
Voice Display The Voice Display allows you to easily check which Voices are being used for each Reference Page keyboard. It also allows you to set whether the Voice for each section sounds or not by changing the On/Off status in the display. On/Off status of Voices (page 28) How to call up the Voice Display:... - Page 24 When the Voice section [1] lights up Upper Keyboard Voice 1 Lead Voice ¨”Strings1ΔViolin3 Ò”Piano1 ∏”FingrBs1 Lower Keyboard Voice 1 Pedal Voice 1 From this display, you can check which Voices have been selected for Voice section 1 on each keyboard (Upper Keyboard Voice 1, Lower Keyboard Voice 1 and Pedal Voice 1). The Lead Voice, which only has one section, is shown only in the Voice section 1 display.
-
Page 25: Selecting Voices With The Voice Buttons
Selecting Voices with the Voice buttons Selecting Voices for Voice section 1 Since selection of Voices follows the same procedure throughout all Voice sections (except Lead Voice), instructions for only the Upper Keyboard Voice 1 of the Voice section 1 are given here. For details on how to select a Voice of Voice section 2, see page Make sure that the lamp of the Voice section [1] is lit. -
Page 26: Adjusting The Voice Volume
The Voice menu contains many Organ Voices, and only the currently selected Organ Voice appears in the display. Select the Voice in the Voice Menu display. You can select other “hidden” Organ Voices in sequence by turning the DATA CONTROL dial clockwise. Turning the DATA CONTROL dial counter- clockwise selects in the reverse order. - Page 27 Setting the Volume in the display (fine) Pressing the same Voice button on the panel again after selecting the Voice calls up the NOTE Voice Condition display. The Volume is displayed in the top left of the Voice Condition display Page 1. You can change the Volume by using the DATA Depending on the volume value (set in the display), CONTROL dial when the arrow indicator (“¿”...
-
Page 28: On/Off Status Of Voices
On/Off status of Voices You can set the whether the Voice sounds or not by setting the On/Off status in the Voice display. To call up the Voice display, press the [VOICE DISPLAY] button. Reference Page Voice Display (page 23) Voice Display (Voice section [1] lit) Upper Keyboard Voice 1 Lead Voice... -
Page 29: Selecting A Voice For Voice Section 2
Selecting a Voice for Voice section 2 This feature lets you blend two Voices together—Voice section 1 with a different Voice in Voice section 2. This is useful for creating rich textures in the sound, playing the two Voices in a layer. For details on how to select a Voice for Voice section 1, see page 25. The instructions below explain how to selecting a Voice (Upper Keyboard Voice 2) for Voice section 2. -
Page 30: Selecting Voices For Voice Section 2
Selecting Voices for Voice Section 2 Since selection of Voices for Voice section 2 follows the same procedure throughout all Keyboard sections, instructions for only the Upper Keyboard, Upper Keyboard Voice 2, are given here. Make sure that the lamp of Voice section [2] is lit. If the Voice section [1] lamp is lit instead, press the [VOICE SECTION] button so that Voice section [2] lights. - Page 31 Press one of the Volume buttons of the Upper Keyboard Voice 1/2 section on the panel to increase the Volume level for the Upper Keyboard Voice 2. Since the default Volume level for Voice section 2 is set to minimum, the Upper Keyboard Voice 2, Lower Keyboard Voice 2 and Pedal Voice 2 will produce no sound even after you select the Voices for Voice section 2.
-
Page 32: Selecting Voices From The User Buttons
Selecting Voices from the User buttons This Electone has a variety of Voices from which you can choose—greater than what is immediately apparent from the front panel controls. You’ve already learned (in “Selecting Voices with the Voice buttons” above) how to select different Voices that are available in the Voice Menu display of each panel voice. - Page 33 Press one of the User buttons in any of the Voice sections. The name of the selected category (Woodwind/Flute) is displayed. <WOODWIND/FLUTE>¨1 › ¿17:Alto Sax 1 Select one of the sixteen Pages (categories) with the PAGE buttons (in this case, “Pad,” Page 7). Currently selected Page <PAD>...
-
Page 34: Voice List
Voice List The letters A, B and D printed at the right side of each Voice name in this list indicate the corresponding DATA CONTROL button’s name. Pressing that button selects the corresponding Voice. Category Voice Name Description STRINGS/VIOLIN Strings 1 These voices feature string ensemble sounds, with accurate simulation of all string instruments, including contrabass, cello, viola and violin. - Page 35 Category Voice Name Description BRASS/TRUMPET Muted Trumpet This recreates the distinctive sound that results when a mute is inserted in the bell of trumpet. The normal “blasting” sound of the trumpet is suppressed, and the resulting sound is thin and metallic.
- Page 36 Category Voice Name Description TUTTI Strings&Winds Unison strings and woodwind ensemble. Strings&Brass Unison strings and brass ensemble. Strings&Horn Strings and horn ensemble. Brass&Sax 1 Brass and sax tutti. Brass&Sax 2 Brass&Winds Brass and woodwind tutti. Orchestra Hit A popular, widely used sampled sound in which the many instruments of the orchestra play together on one chord or note.
- Page 37 Category Voice Name Description SYNTH Synth Cla 1 A bright, round and fresh synth sound, reminiscent of the clarinet. Synth Cla 2 Synth Cla 3 Synth Cla 4 Synth Brass 1 An abundant variety of synth brass voices, from conventional sounds and octave unisons to unique, comical sounds.
- Page 38 Category Voice Name Description PIANO Clavichord Soft keyboard instrument for classical music, with unique sound when keys are released. DX E.Piano 1 Electric piano sounds from the popular DX-7 synthesizer. DX E.Piano 2 Stage E.Piano 1 These electric piano voices feature the characteristic hammer and tine sound, with a bright yet warm feel.
- Page 39 Category Voice Name Description SYNTH BASS Funk Bass 1 Synth bass suitable for rock and blues. Funk Bass 2 Funk Bass 3 Dance Bass 1 Synth bass suitable for dance music. Dance Bass 2 Smooth Bass 1 Contemporary, “cool” synth bass sounds. Smooth Bass 2 Smooth Bass 3 WORLD...
-
Page 40: Voice Controls And Effects
Voice Controls and Effects The Electone is equipped with two general kinds of functions that can be used to change the sound of the Voices: Voice Controls and Effects. Each Voice has been given certain factory-preset effect settings to best enhance its sound. However, if you wish, you can change the sound to suit your preferences by using the controls and effects described in this section. -
Page 41: Selecting From The Voice Condition Display
Selecting from the Voice Condition display To call up the Voice Condition display: Choose a Voice on the panel, then press the same button on the panel again. The Voice Condition display appears. Voice Condition Display Currently selected page VOL.¿24 REV.÷20 ¨1⁄... - Page 42 Voice Condition [Page 1] VOL.¿24 REV.÷20 ¨1⁄ TOUCH¿ 8 FEET÷PRESET In this display, you can adjust the basic Voice controls, including panning, touch sensitivity and volume. The items included in this page differ between the Pedal Voice sections and the other sections.
- Page 43 Voice Condition [Page 2] Press the PAGE buttons to select Page 2. PAN ¿C ¨1¤ TUNE¿ TRANSP.÷ 0 Panning Determines the position of the Voice in the stereo image. Seven pan positions are available. Press the [A] button to make the “¿” indicator flash, then use the DATA CONTROL dial to change the setting.
- Page 44 Voice Condition [Page 3] Press the PAGE buttons to select Page 3. VIB¿PRESET ¨1‹ Vibrato The Vibrato function varies the level of the Voices, making them sound warmer and more animated. This effect is applied independently to each Voice section. For some Voices, vibrato may not be effective at all or the effect may not sound as expected.
- Page 45 Voice Condition [Page 4] Press the PAGE buttons to select Page 4. EFFECT¿PRESET EFFECT¿REVERB EFFECT¿EQ/ENHANCE EFFECT¿THRU EFFECT¿PRESET ¨1› TYPE¿01:THRU Effect You can select the effects applied to each Voice section. Effect Category You can select the Effect Category applied to each Voice section. Press the [A] button to make the “¿”...
-
Page 46: Effect Parameters
When Preset is selected, the original (factory) effect category for the selected Voice is automatically set. Selecting Thru bypasses the effect (no effect is added to the selected Voice). Effect Type Reference Page Effect types are displayed corresponding to the selected effect category. Effect List (page 52) Press the [C] button to make the “¿”... - Page 47 Voice Condition [Page 6] (only for Lead Voice) Press the PAGE buttons to select Page 6. ’SLIDE Î fl SLIDE TIME¿ 0 In this Page, determines whether or not the Slide function is applied to the Lead Voice. Slide Applies a portamento effect to notes played in legato. The Slide function is effective within a one-octave range for the Lead Voice.
-
Page 48: Selecting From The Panel
Selecting from the panel The Reverb, Sustain and Rotary Speaker displays are called up by pressing the respective buttons on the panel. Reverb Reverb adds an echo-like effect to the sound, giving the impression of a performance in a large room or concert hall. You can adjust the reverb volume for each Voice section or the entire system. -
Page 49: Sustain
Sustain The sustain effect, selectable for the Upper, Lower and Pedal Voices, causes Voices to gradually fade out when the keys are released. The sustain on/off and sustain length settings are independent for each keyboard, providing maximum expressive control. Call up the Sustain display to set the Sustain effect by pressing the [SUSTAIN] button on the panel. -
Page 50: Rotary Speaker
Rotary Speaker Rotary Speaker recreates the rich, swirling sound of the popular rotating speaker effect. The Rotary Speaker effect can be switched in real time as you play, with either the front panel button or the Left Footswitch (when properly set for Footswitch operation). Keep in mind that the Rotary Speaker effect CANNOT be turned on only by turning on the [ROTARY SP SPEED] button. - Page 51 Control the Rotary Speaker effect from the panel or from the Left Footswitch. You can control Rotary Speaker on/off not only from the panel but also by using the Left Footswitch, if the Footswitch has been properly assigned. See “4 Rotary Speaker” on page 149 for details. ELB-01 Owner’s Manual...
-
Page 52: Effect List
Effect List PRESET Parameter Range Description The effect type that best matches and is most suited R DelayTime 0.1 – 743.0 msec Determines the time that elapses Echo: 0.1 – 371.5 between the original sound and to the currently selected sound is automatically msec the delayed repeat in the right channel. - Page 53 CHORUS Parameter Value Description Creates a warm effect as if several of the same sound LFO Freq. 0.00 – 39.7 Hz Determines the frequency of oscillation, or the speed of the were playing at once. Makes the overall sound richer, wavering effect.
- Page 54 Parameter Range Description Parameter Value Description LFO Freq. 0.00 – 39.7 Hz Determines the tremolo speed. EQ Hi.Gain -12 – +12 dB Determines the amount over which the high frequency range is AM Depth 0 – 127 Determines the amount of volume boosted or cut.
- Page 55 Parameter Value Description Parameter Value Description Sensitivity 0 – 127 Determines the degree to which EQ LowFreq. 50 – 2.0k Hz Determines the central frequency the wah filter is affected by your ST 2Band EQ: of the low frequency range that is playing touch.
-
Page 56: Rhythm/Keyboard Percussion
Rhythm/Keyboard Percussion This Electone features 133 different real rhythms featuring actual drum and percussion sampled sounds. Automatic Accompaniment functions are used with the rhythms, providing appropriate and completely automatic accompaniment to match the style of the selected rhythm. Moreover, the Electone has a Keyboard Percussion feature that allows you to directly play drum and percussion sounds from the Upper/Lower keyboards and Pedalboard. - Page 57 Select the Rhythm in the Rhythm Menu display. You can select the hidden dance rhythms in sequence (forward or reverse) by using the DATA CONTROL dial. <DANCE> ¿04:UK Pop Here, we’ve selected “UK Pop.” You can select the rhythm in the Rhythm Menu display by pressing the [C] button one or more times.
- Page 58 Rhythm Structure Each rhythm is made up of “sections.” Since each section is a variation of the basic rhythm, you can use them to add “spice” to your performance and mix up the beats while you are playing. You can freely change the section while the rhythm is played back.
-
Page 59: Operating The Rhythm From The Panel
Operating the rhythm from the panel You can turn the rhythm on/off and switch the sections as desired by pressing the buttons on the panel. Using the Fill Ins and Break patterns let you add dynamic interest and “spice” to your performance. To start/stop the rhythm: START The rhythm begins as soon as the [START] button is pressed. - Page 60 To switch the rhythm sections: You can change the rhythm section of the Main phrase by pressing the desired MAIN/ FILL IN [A] – [D] button. The selected section's lamp (above the button) lights. To use the Fill In patterns: As you play the Electone along with the rhythm, occasionally press the selected MAIN/ FILL button as desired.
-
Page 61: Adjusting The Tempo
Adjusting the tempo You can adjust the rhythm tempo by pressing the TEMPO buttons. TEMPO Indicator TEMPO buttons For adjusting the speed of the rhythm. Pressing the right button increases the tempo and pressing the left button decreases it. Each rhythm has its original (preset) tempo. Press the TEMPO buttons simultaneously to restore the tempo to the original setting. -
Page 62: Changing The Rhythm Volume/Reverb
Changing the rhythm volume/reverb You can adjust the rhythm volume or amount of reverb applied to the rhythms and the percussion sounds used in the rhythms in the Rhythm Condition display. You can also have a Fill In play automatically by setting the Auto Fill function to ON. To call up the Rhythm Condition display, select the desired rhythm and press the same rhythm button again. -
Page 63: Selecting Rhythms From The User Buttons
Selecting rhythms from the User buttons As with the Voice sections, the Rhythm section also has User buttons (numbered 1 or 2) from which rhythms can be selected. You can select original User rhythms that have been created with this Electone or other models equipped with the Rhythm Pattern Program function (such as the ELS-01/01C/01X). -
Page 64: To Call Up A User Rhythm
To call up a User rhythm User rhythms created on other Electones that have Rhythm Pattern Programming functions, such as the ELS-01/01C/01X, can be selected and played from the User buttons in the panel Rhythm section. To call up the User rhythm, load back the registration containing the User rhythm to Electone in advance. -
Page 65: Selecting Rhythm From An External Media
Selecting Rhythm from an External Media You can load rhythms from a USB storage device, and select them as User Rhythms. Style File Format files (extension: STY or ST2) can also be loaded. Insert the media into the USB TO DEVICE terminal. Press one of the User buttons at the right of the Rhythm buttons. - Page 66 Select the pattern file you want to load to the Electone. File selection is done in the same way as song selection on page 111. <FILE SELECT> [˜]⁄⁄ ¿ 001:SoftRock [EXE] Press the [D] button corresponding to the [EXE] in the display to load the file back to the Electone.
-
Page 67: Rhythm List
Rhythm List This list shows all available rhythms on the Electone. Numbers written at the left side of each column in this list indicate the numbered buttons displayed in the Rhythm Menu. The letters A, B and D printed at the right side of each column in this list indicate the corresponding DATA CONTROL button’s name. -
Page 68: Accompaniment
Accompaniment The Accompaniment function provides arpeggiated chords and other instrumental embellishments when rhythms are used. This control is selected from Page 3 and Page 4 of the Rhythm Condition display. Select the desired rhythm and press the same button on the panel again. - Page 69 Turn the desired parts on. Successive presses of the [A] – [D] buttons corresponding to the desired accompaniment parts alternates between On and Off. [Page 3] Rhythm Condition Display ”MAIN DR. ”ADD DR.‹ ’CHORD1 ’CHORD2 [Page 4] Rhythm Condition Display ’PAD ›...
- Page 70 Press the [START] button to start the rhythm, and then play the Lower Keyboard. To adjust the volume and amount of reverb applied to the Accompaniment: Make settings in Page 2 of the Rhythm Condition display. Select the desired rhythm and then press the same rhythm Reference Page button on the panel again.
-
Page 71: Automatic Accompaniment-Auto Bass Chord (A.b.c.)
Automatic Accompaniment—Auto Bass Chord (A.B.C.) The Auto Bass Chord (A.B.C.) function works with the Rhythm section of the Electone to automatically produce bass accompaniment as you play. It adds an entirely new dimension to your performance by effectively putting a full backing band at your disposal. - Page 72 Single NOTE You can produce major, minor, 7th, and minor 7th chords by simply using one, or at most, two or three fingers to play the chords. The Single Finger mode provides the When the A.B.C. function mode is set to Single or fastest and easiest means to obtain many different chord/bass combinations.
-
Page 73: Lower Memory
Memory The Memory function is a convenient performance tool in the A.B.C. features that makes playing with the accompaniment even smoother and more fluid. It is available separately for both the Lower keyboard and Pedalboard. To use it, turn Memory on, start the rhythm and play chords and bass notes according to the selected A.B.C. -
Page 74: Melody On Chord (M.o.c.)
Melody On Chord (M.O.C.) The Melody On Chord (M.O.C.) feature automatically adds a harmony part to the melodies you play on the Upper keyboard. The harmony is derived from the chords you play on the Lower keyboard—or from the chords that are played for you, if you use Automatic Accompaniment. - Page 75 Rhythm Sequence Rhythm Sequence lets you create your own rhythm compositions, connecting together any of the Electone’s existing rhythms as well as original rhythms created on other Electones that have the Rhythm Sequence Program function (such as ELS-01). Although the ELB-01 does not have the full Rhythm Sequence Program function, you can load four rhythm compositions to Sequence numbers 1 –...
- Page 76 Press the [RHYTHM SEQUENCE] button to call up the Rhythm Sequence display. Select the sequence by pressing the [A] – [D] buttons corresponding to the desired sequence number in the display NOTE to be played back. Sequence numbers 1 – 4 Successive pressing of the [A] –...
-
Page 77: Keyboard Percussion
Keyboard Percussion The Keyboard Percussion function provides many different drum and percussion sounds, playable from the keyboards and Pedalboard. Keyboard Percussion has two different modes, Preset and User. Preset Keyboard Percussion lets you play the preset drum kit sounds from the keyboards (assigned beforehand to the keys), while the User Keyboard Percussion lets you freely assign the drum sounds to any key or pedal you wish. -
Page 78: Changing The Keyboard Percussion Volume/Reverb
Select the desired percussion kit. You can select a kit from a total of 15 different kits. Press the [D] button to make the “÷” indicator flash, then use the DATA CONTROL dial to select the kit. <KBP1> ⁄ ¿PRE1 KIT÷Wonder Play some notes on the keyboards and/or Pedalboard. - Page 79 [Page 2] Keyboard Percussion Display <KBP1> ¤ VOL.¿16 REV.÷ 8 You can adjust the Keyboard Percussion volume/reverb in the display. Volume Determine the Keyboard Percussion volume. Press the [C] button to make the “¿” indicator flash, then use the DATA CONTROL dial to select the kit.
-
Page 80: Preset Keyboard Percussion List
Preset Keyboard Percussion List Indicates the drum/percussion sounds and their key assignments. Wonderland Kit EL Drum Kit Preset 2 (PK) Preset 1 (LK) Preset 1 (UK) Preset 2 (PK) Preset 1 (LK) Preset 1 (UK) Thunder Laser Beam BD Heavy Horse Laser Shot SD BrRoll... - Page 81 Standard Kit 1 Standard Kit 2 Preset 2 (PK) Preset 1 (LK) Preset 1 (UK) Preset 2 (PK) Preset 1 (LK) Preset 1 (UK) Kick – Kick Short – Side Stick Surdo Mute SideStick L Surdo Mute Snare Surdo Open Snare Short Surdo Open Hand Clap...
- Page 82 Hit Kit Room Kit Preset 2 (PK) Preset 1 (LK) Preset 1 (UK) Preset 2 (PK) Preset 1 (LK) Preset 1 (UK) KickTight H – Kick – StickAmbien Surdo Mute Side Stick Surdo Mute SnareAmbien Surdo Open SnareSnappy Surdo Open Hand Clap Hi Q Hand Clap...
- Page 83 Rock Kit Electro Kit Preset 2 (PK) Preset 1 (LK) Preset 1 (UK) Preset 2 (PK) Preset 1 (LK) Preset 1 (UK) Kick Gate – KickGateHvy – Side Stick Surdo Mute Side Stick Surdo Mute Snare Rock Surdo Open SnareNoisy2 Surdo Open Hand Clap Hi Q...
- Page 84 Analog Kit Jazz Kit Preset 2 (PK) Preset 1 (LK) Preset 1 (UK) Preset 2 (PK) Preset 1 (LK) Preset 1 (UK) Kick Analog – Kick Jazz – SideStickAn Surdo Mute SideStick L Surdo Mute SnareAnalog Surdo Open SnareJazz L Surdo Open Hand Clap Hi Q...
- Page 85 Brush Kit Symphony Kit Preset 2 (PK) Preset 1 (LK) Preset 1 (UK) Preset 2 (PK) Preset 1 (LK) Preset 1 (UK) Kick Jazz – GranCassa M – SideStick L Surdo Mute Side Stick Surdo Mute BrushSlap 3 Surdo Open Band Snare Surdo Open Hand Clap...
- Page 86 SFX1 SFX2 Preset 2 (PK) Preset 1 (LK) Preset 1 (UK) Preset 2 (PK) Preset 1 (LK) Preset 1 (UK) CutingNoiz1 – Phone Call – CutingNoiz2 – Door Squeak – – – Door Slam – String Slap – Scratch Cut –...
- Page 87 ArabicKit Preset 2 (PK) Preset 1 (LK) Preset 1 (UK) Kick Soft – Side Stick – Snare Soft – Arabic Clap – Snare Drum – Floor Tom L – HH Closed – Floor Tom H – HH Pedal – Low Tom –...
-
Page 88: Assigning Sounds To The User Keyboard Percussion
Assigning sounds to the User Keyboard Percussion You can assign any desired drum and percussion sound to any key or pedal, and your original setups can be saved to eight memory locations: User 1 through User 8. The User setting saved in the User memory location can be called up by using the Keyboard Percussion [1] or [2] buttons. - Page 89 Use the PAGE buttons to select Page 3. <KBP1> ⁄ ¿USER1 KIT÷EL [Page 3] Keyboard Percussion Display ¿<CYMBAL> [SET]‹ ¿01:Crash Cym 1[CLR] In this Page, you can assign specific drum sounds to any of the keys. Category This allows you to select the desired percussion category using the [A] buttons. Refer to the “Kit Assign List”...
- Page 90 Select the desired instruments. Press the [C] button to make the “¿” indicator flash, then use the DATA CONTROL dial to select instrument. ¿<BASS DRUM> [SET]‹ ¿02:BD Heavy [CLR] To assign an instrument to a particular key or pedal. NOTE Simultaneously hold down the Data Control button corresponding to [Set] and press the key (or pedal) to which the instrument is to be assigned.
- Page 91 To erase one instrument: Simultaneously hold down the [D] button corresponding to the [Clear] in the display and press the key (or pedal) corresponding to the instrument you wish to erase. (A short ‘beep’ sound indicates that the instrument has been erased.) ¿<BASS DRUM>...
-
Page 92: Recalling The User Keyboard Percussion
Recalling the User Keyboard Percussion Press the Keyboard Percussion button. Select the desired User Keyboard percussion kit. Press the [C] button to make the “¿” indicator flash, then use the DATA CONTROL dial to select the desired User number. <KBP1> ⁄... -
Page 93: Kit Assign List
Kit Assign List Wonderland Kit Crash Cym 2 Surdo Mute Snare Tight Crash Cym M Surdo Rim Snare Soft Ride Cym 1 Surdo Muff Snare Roll Laser Beam Ride Cym 2 TIMBALE/COWBELL Side Stick Laser Shot RideCym Cup OpenRimShot Timbale 1 H Water Phone Orch Cym Timbale 1 L... - Page 94 Splash Cym Metro.Bell Hi Q WoodBlock H Chinese Cym Click Noise WoodBlock L Ride Cym 1 Scratch H Sticks Hit Kit Ride Cym 2 Scratch L Whip Slap RideCym Cup CYMBAL Seq Click L Finger Snap HH Open Crash Cym 1 Seq Click H Hand Clap HH Closed...
- Page 95 PERCUSSION 3 Scratch L 2 Guiro Short Bongo H Cabasa Maracas 2 Bongo L Tambourine Shaker Vibraslap Timbale H Castanet Agogo H PERCUSSION 2 Timbale L JingleBells Agogo L Cowbell Bell Tree Surdo Mute Triangle O SambaWhis.H Surdo Open Claves SambaWhis.L Guiro Long Triangle M...
- Page 96 SFX2 Kick Jazz Floor Tom L HH Closed Kick Tight Floor Tom H HH Pedal SFX 1 Kick Soft Low Tom Snare Drum Phone Call PERCUSSION 1 Mid Tom L Snare Soft Phone Ring Mid Tom H Side Stick CongaH Open Wind Chime Conga L High Tom...
-
Page 97: Registration Memory
Registration Memory Registration Memory is a powerful performance tool that helps you sound like a professional. It lets you store virtually all the settings you make on the panel and LCD, conveniently allowing you to instantly change all Voice settings and rhythms while you're playing—simply by pressing a single Registration Memory button. - Page 98 While holding down the [M.] (Memory) button in the Registration Memory section, press the numbered button to which you wish to save your Registration. 2. Press desired numbered button. 1. While holding down [M.] button... When the Registration is stored, the LED above the numbered the numbered button flashes momentarily.
-
Page 99: Selecting Registrations
Selecting Registrations Simply press the numbered button ([1] – [8]) that corresponds to the Registration you wish to select. (The selected button’s LED lights.) To call up one of the Registrations 9 – 16, simultaneously hold down the [VOICE DISPLAY] button in the Display Select section and press the appropriate numbered button. -
Page 100: Saving The Registration Data To Usb Flash Memory
Initializing Registration Memory If you want to restore the original factory-programmed Registration Memory presets, you can initialize the Electone settings. Keep in mind that this deletes any of your custom Registration Memory and LCD Display settings. Always save your important data to external media, such as USB flash memory. - Page 101 Select the song to which you want to save the Registration data (page 124). ÃUSB 01 [˜] ⁄ ¿ ___:new song Press the PAGE buttons to select Page 9. The Registration Save Page is displayed. ÃUSB 01 [˜] ⁄ ¿ ___:new song <REG.SAVE>...
-
Page 102: Registration Shift
Registration Shift The Registration Shift function conveniently allows you to change Registrations without taking your hands from the keyboards. By using the Right Footswitch on the expression pedal, you can “jump” to a specified Registration or step through the panel Registrations in sequence, either in numeric order or in any order you specify. - Page 103 ¸<REG.SHIFT> MODE¿OFF SHIFT JUMP USER Turns off the Registration Shift assignment. When Off is selected, Registrations cannot be changed by using the Right Footswitch. ¸<REG.SHIFT> MODE¿OFF Shift In the Shift mode, each press of the Right Footswitch selects the Registration Memory presets in their numerical order.
- Page 104 To set the User Registration order: Press the PAGE buttons to select Page 2. ¸<REG.SHIFT> ⁄ MODE¿USER END÷STOP ¸<REG.SHIFT> [INS]¤ T: ~ ~ ~ ~ ~ [DEL] Enter the Registration Number Press the desired numbered button in the Registration Memory section.
- Page 105 Move the cursor to the desired point with the [C] button or DATA CONTROL dial, then insert or delete the desired number by using the [B] and [D] buttons. Insert the number ¸<REG.SHIFT> [INS]¤ T: 3 2 5 ~ ~ [DEL] Move the cursor position Delete the number...
- Page 106 Shift End: Determines the end point for the Registration Shift function. Press the PAGE buttons to select Page 1. Press the [D] button to make the “÷” indicator flash, then use the DATA CONTROL dial to change the setting. ¸<REG.SHIFT> MODE¿USER END÷STOP STOP...
-
Page 107: Music Data Recorder (Mdr)
Moreover, the M.D.R. allows you to perform various other operations to your song data (such as copy, delete and convert). Before purchasing any USB storage device, you should check with your Yamaha dealer or an authorized Yamaha distributor for advice on compatibility. -
Page 108: Using The M.d.r. Function
Using the M.D.R. Function Press the [MDR] button in the panel to call up the M.D.R. display. All operations related to the M.D.R., such as recording and playing your performances, can be done in the M.D.R. display. NOTE If you press the [MDR] button even when no media is inserted into the USB TO DEVICE terminal, the... -
Page 109: Formatting External Media
Formatting External Media If you find that you are unable to use new, blank USB flash memory/floppy disks or old ones that have been used with other devices, you may need to format them. Formatting erases all the data in the media and makes it ready to record. The data erased by formatting will be lost permanently. - Page 110 Press the PAGE buttons to select Page 12. <SONG SELECT> ⁄ ¿Ã001:USB 01 [Õ] <FORMAT> [EXE]⁄¤ USB 01 Currently selected media name The Format display appears. Press the [B] button corresponding to [EXE] (Execute) in the display. <FORMAT> [EXE]⁄¤ USB 01 ≤OK to format? ≤...
-
Page 111: Selecting A Song
Selecting a Song In order to record your performance to the media or to load Registrations in the media back to the Electone, you will need to select a song, as described below. What is a Song? Registration data You can think of a song as a “container” for Performance storing the Electone data for a piece of music, data... - Page 112 Select the desired media. <SONG SELECT> ⁄ ¿Ã001:USB 01 [Õ] To use a USB flash memory device, select “USB xx” (xx indicates the number of the device). If you insert two USB flash memory devices, the device inserted first will be shown as “USB 01” and the latter one will be shown as “USB 02.” To use a floppy disk, select “USB-FD xx”...
- Page 113 Select a “new song” (blank song) if you want to make a new recording or save NOTE data. The new song is a blank song which is automatically created in the media/folder, ÃUSB 01 [˜] ⁄ if the number of the songs in ¿...
- Page 114 Here is the actual procedure again, in linear form: Press the [D] button to call up the folder in the selected media at the bottom of the display. <SONG SELECT> ⁄ ¿Ã001:USB 01 [Õ] ÃUSB 01 [˜] ⁄ ¿¶001:FOLDER_001 [Õ] FOLDER_001 is displayed.
- Page 115 To change the Media/Folder: Make sure to select Song Select display (Page 1) when you want to change the media/ folder/song. öFOLDER_002 [˜] ⁄ ¿ 003:FOLDER_003 [Õ] Current media/folder/song Displays the currently selected media/folder/song. In this case, the folder named “FOLDER_003”...
-
Page 116: Song Icons
Song Icons These icons are shown when you select a media, folder, and song. Icons Description à Indicates media such as a USB flash memory or a floppy disk. ¶ Indicates a folder. Indicates a Protected Song unavailable for editing. See page ... -
Page 117: Recording
Files in the song File Explanation Extension Performance This file contains performance data, played on the .mid data keyboards and pedals of the Electone. Registration This file contains Registration settings, User Voices, User .b00 data rhythms, and Rhythm Sequences. XG-converted This file contains XG song data, for which Electone .mid data... -
Page 118: Re-Recording (Retry)
When you finish playing, press the [STOP] button. CAUTION Recording stops and your performance is written to the song. Do not remove the media The song to which your performance is recorded is automatically named from the instrument during “SONG xx” (xx indicates the number). You can change the song name as recording (while the desired. - Page 119 Select the parts for recording. Each press of a part button switches the status: Play (green LED), Off (LED is off ) and Rec (red LED). Press each part button to turn off the parts you don’t want to record, and make sure the green LED is lit for the parts you want to play and the red lit for the part you want to record.
- Page 120 Press the [CUSTOM PLAY] button to start recording of the new part or parts. Playback of the previously recorded parts starts immediately. The [CUSTOM PLAY] button is used here to record only the parts that have been selected for recording, and plays back only those parts that have been selected for playback. While you listen to the parts being played back, start playing the melody on the Upper Keyboard.
-
Page 121: Punch-In Recording
Punch-in Recording This lets you re-record over a specific phrase or section—either that of a specific part(s) or all parts. Insert the media into the USB TO DEVICE terminal. Select the song which contains the phrase you want to change. For details on selecting a song, see steps 2 and 3 on page 112. -
Page 122: Changing The Song/Folder Name
Changing the Song/Folder Name Even though the Electone automatically assigns a generic name to each recorded song, it’s best to give each song a “meaningful” name, such as an original title or even a date indicating when it was recorded. Insert the media into the USB TO DEVICE terminal. - Page 123 Blank A – Z (capital) NOTE If “English” is selected as a – z (lower case) the Language in the Utility display (page 19), Japanese katakana Japanese Katakana: characters are unavailable. Marks Number 0 – 9 To delete a character: Move the cursor to the character you want to delete, and press the [C] button while holding down the [A] button.
-
Page 124: Saving Registrations As Registration Data (File)
An error message (“This name is not available”) may appear when pressing the [C] button to finish entering the name. If this message appears, the name is invalid and you’ll need to enter a different name. The following names cannot be used. (The letters “xx”... - Page 125 Press the [MDR] button, and select the destination (blank song). Select the blank song. For details on selecting a song, see steps 2 and 3 on page 112. Use the PAGE buttons to select Page 9. <REG.SAVE> [EXE] · ___:new song ¸:__ Press the [B] button corresponding to [EXE] (Execute) in the Reference Page...
-
Page 126: Saving Two Or More Registration Banks To One Song
Saving Two or More Registration Banks to One Song When you save the Registrations, Registrations 1 – 16 will be saved as a Registration bank. When you want to use more than 16 Registration numbers in a song, you can save additional Registration banks—up to a maximum of 50 in a single song—with the following procedure. -
Page 127: Replacing Registrations
Reference Page If you select a numbered bank, such as “01” instead of “_ _”, this procedure will overwrite the numbered bank. For details, see step 6 of “Replacing Registrations” on Files (page 116) page 128. Press the [B] button corresponding to [EXE] (Execute) in the display. -
Page 128: Deleting Registrations
Press the [B] button corresponding to [EXE] (Execute) in the display. <REG.SAVE> [EXE] · 001:SONG 1 ¸÷01 A message appears prompting confirmation of operation. You can cancel the operation at this point by pressing the [D] button. Press the [C] button corresponding to [OK] in the display to overwrite (replace). -
Page 129: Next Regist Settings (Using More Than 16 Registrations In One Song)
Press the [B] button corresponding to [EXE] (Execute) in the display. A message appears prompting confirmation of operation. You can cancel the operation at this point by pressing the [D] button. Press the [C] button corresponding to [Delete] in the display to delete the Registration. - Page 130 Repeat steps 2 through 4 above to save the Registration banks in the order you want to recall them in the same song. When making new Registration Shift setting, delete the previous settings, then continue. For details, see “Saving Two or More Registration Banks to One Song” on page 126.
-
Page 131: Recalling Recorded Registrations
Recalling Recorded Registrations Registrations (and bulk data) recorded to song numbers can be easily loaded back to the Electone. Use this function if you want to recall a specific Registration bank (R:02~) from a song which contains more than two Registration banks Loading Registrations Insert the media into the USB TO DEVICE terminal. -
Page 132: Playing Back A Song
Playing Back a Song This operation lets you automatically load the Registration data saved to a song when playing back your recorded performances. Loading the 16 Registrations to the numbered buttons on the panel. Load Performance Registrations data Play back Song Insert the media into the USB TO DEVICE terminal. -
Page 133: Playing Back The Selected Part(S)
Custom Play If you want to play back the song without resetting the Registrations, press the [CUSTOM PLAY] button instead of the [PLAY/PAUSE] button. This displays the song time and starts playback immediately. When you play the song using the Next Regist function, make sure to press the [PLAY/PAUSE] button to start the song, not the [CUSTOM PLAY] button. -
Page 134: Fast Forward, Rewind And Pause
Fast Forward, Rewind and Pause Fast Forward and Rewind: During playback, press the [FF] (Fast forward) button or [REW] (Rewind) button and hold it down until the time reaches the desired position. When the button is released, playback is paused at the desired position. To resume playback from the point you’ve advanced or reversed to, press the [PLAY/PAUSE] button or [CUSTOM PLAY] button. -
Page 135: Repeat Playback
Repeat Playback This feature allows you to repeatedly play back either all songs on a folder or only one specific song. Select the song you wish to repeatedly play back. If you wish to play back all songs on a folder, select the first song that will be played back. -
Page 136: Playing Back Xg Songs
Playing Back XG Songs The Electone allows you to playback XG song data, created on the computer or Reference Page converted from Electone song format to XG format. Naturally, you can use the fast forward, rewind and pause controls, just as with songs (performances) recorded on the Converting to XG format Electone. -
Page 137: Song Copy/Delete/Convert, Folder Create/Delete
Song Copy/Delete/Convert, Folder Create/Delete These operations let you copy, delete or convert song data, as well as create or delete folders. Song Copy This function lets you copy recorded data from one song to another song. Songs created with the ELS-01/01C/01X or XG songs can be copied. (Only songs created with the EL-series, such as the EL-900, cannot be copied.) This function also lets you copy and exchange data between two different media. - Page 138 Select the destination song. <COPY DEST> [˜] fi ¿ ___:new song [EXE] The new song or the folder that contains the source song will be automatically displayed at the bottom of the display as the destination. If the folder is displayed, select the new song.
-
Page 139: Song Delete/Folder Delete
Musicsoft Downloader application. If you move the song without Musicsoft Downloader, the song cannot be played back. Musicsoft Downloader can be obtained at the following Internet address: http:// music.yamaha.com/download/ Song Delete/Folder Delete These operations let you delete songs and folders. -
Page 140: Creating Folders
Press the [B] button corresponding to [EXE] (Execute) in the display. A message appears prompting confirmation of operation. You can cancel the operation at this point by pressing the [D] button. Press the [C] button to execute the operation. When the operation is completed, the LCD returns to the Delete display. To prevent inadvertent erasure of important data, make sure to return to the Page 1 by pressing both PAGE buttons simultaneously. -
Page 141: Converting Elb Format Songs To El
Converting ELB format songs to EL You can convert songs created on the ELB-01 to the EL-series format, and save them to a floppy disk. The converted data can be used with EL-series Electones, such as the EL- Reference Page 900. -
Page 142: Converting El Format Songs To Elb
Press the [B] button corresponding to [EXE] (Execute) in the display. <CONV>¿EL [EXE] ‡ 001:SONG 1 ´ <CONV DEST> ‡ ¿ ___:new song [EXE] The new song is displayed as the destination in the floppy disk. When a new song is not displayed, select a new song by turning the DATA CONTROL dial or successively pressing the [C] button. - Page 143 Insert the floppy disk that containing the song you want to convert to the ELB format, and insert the USB flash memory device for use as the destination. Press the [MDR] button, then select the song you want to convert to ELB format.
-
Page 144: Converting To Xg Format
Converting to XG format This function allows you to convert ELB-01 song data to XG format data. You can play back the data using XG devices. The converted XG song data may not sound the same as the original data. Make sure to check the remaining memory of the destination media in advance. -
Page 145: Checking The Remaining Memory
Checking the Remaining Memory You can check the remaining memory in the media. Insert the media, and press the [MDR] button. Select the desired media by using the DATA CONTROL dial or by successively pressing the [C] button. Use the PAGE buttons to select Page 13. The remaining memory is displayed. -
Page 146: Footswitches
Footswitches These leg- and foot-operated controls allow you to execute various performance functions and switch the effects on/off, without taking your hands from the keyboard. Left Footswitch The Electone has two Footswitches on the expression pedal. The Right Footswitch is used for the Registration Shift function, while the Left Footswitch can be set to control one of three functions: Rhythm, Glide, or Rotary Speaker. - Page 147 Calls up the Footswitch display. Pressing the [A] button alternates between the Footswitch Page and Regist Shift Page. ¸<REG.SHIFT> MODE¿OFF Footswitch Page Ò<FOOT.SW> MODE¿OFF RHYTHM GLIDE ROTARY SPEAKER In this page, you can assign which function the Left Footswitch will control: Rhythm, Glide, or Rotary speaker.
- Page 148 -3 Main A – Main D These functions correspond to the MAIN/FILL IN [A] – [D] buttons on the panel. For example, when “MAIN A” is selected in this display and you press the Left Footswitch, the rhythm section is switched to Main A or Fill In A. -4 Intro 1 –...
- Page 149 -1 Upper 1, 2, Lower 1, 2, Lead Select the desired Voice section(s) for which the Glide function is to be applied by pressing the corresponding [A] – [D] buttons. -2 Time Determines the speed of the Glide function, or how gradually the pitch returns when the Left Footswitch is released.
-
Page 150: Transpose And Pitch Controls
Transpose and Pitch Controls There are two pitch-related controls on the Electone: Transpose and Pitch. Transpose allows you to change the key of the instrument and Pitch lets you finely adjust the tuning. Transpose and Pitch can be adjusted in the Utility display. Press the [UTILITY] button. -
Page 151: Connections
Connections On the underside and right side of the Electone keyboard is a separate panel equipped with various input/output terminals and miscellaneous controls, the functions of which are described below. Accessory Jacks and Controls This section provides brief explanations for each jack/control on the Electone. For details on connecting to external devices, see page 153. - Page 152 Reference Pages Controlling External MIDI Devices from the Electone (page 154) Controlling the Electone from an External Device (page 155) MIDI IN/OUT terminals Connection with Computer For connecting external MIDI devices such a synthesizer or sequencer. You can also use (page 156) these to connect with a computer that has a MIDI Interface.
-
Page 153: Connection Examples - External Devices
Connection Examples — External Devices Before connecting the Electone to other electronic components, turn off the power to all the components. Before turning the power of the components on or off, set all volume levels to minimum (0). Otherwise, electrical shock or damage to the components may occur. -
Page 154: Recording The Sounds Of The Electone To An External Recorder
Recording the Sounds of the Electone to an External Recorder You can record your Electone performance to an external recorder, such as an MD recorder or cassette tape recorder, using the AUX OUT jacks. Cassette tape recorder, etc. LINE IN L AUX OUT L Audio cable Recording... -
Page 155: Controlling The Electone From An External Device
Installing the Floppy Disk Drive (page 167) floppy disk, Card-R/RW drive, hard disk and other drives) to the USB TO DEVICE terminal(s). Before purchasing a USB storage device, please consult your Yamaha Formatting External Media (page 109) dealer, or an authorized Yamaha distributor for advice. -
Page 156: Connection With Computer
Before you can actually transfer data between the Electone and a computer via the USB connection, you will need to install an appropriate MIDI driver. Download the latest MIDI driver software from the Yamaha web site at “http://music.yamaha.com/download/.” Connecting your Electone to a computer opens up a whole new world of musical NOTE possibilities. -
Page 157: Using The Midi In/Out Terminals
Using the MIDI IN/OUT terminals By using an optional MIDI interface such as the UX16, you can connect the Electone NOTE to the computer, with the MIDI IN/OUT terminals on the instrument. Connect the Electone and the MIDI Interface with two standard MIDI cables (one connecting the Depending on your particular MIDI interface, you may have OUT terminal on the Electone to the MIDI IN terminal on the interface, and the... - Page 158 As shown in the illustration above, in an electronic instrument the sampled note (previously recorded note) stored in the tone generator section (electronic circuit) is played based on information received from the keyboard, and output through the speakers. So then what is the information from the keyboard that becomes the basis for note production? For example, let’s say you play a “C”...
-
Page 159: Midi Messages Of The Electone
MIDI Messages of the Electone MIDI messages can be divided into two groups: the Channel Messages and System Messages. Channel Messages consist of data related to the performance on the keyboard for a specific channel. System Messages consist of data that allows several MIDI devices to communicate with each other. -
Page 160: Midi Channels
MIDI Channels MIDI data is assigned to one of sixteen MIDI channels. Using these channels, 1 – 16, the performance data for sixteen different instrument parts can be simultaneously sent over one MIDI cable. Think of the MIDI channels as TV channels. Each TV station transmits its broadcasts over a specific channel. -
Page 161: Midi Control
MIDI Control When you connect your Electone with a second MIDI device (such as a synthesizer or computer), you can determine how the Electone controls that MIDI device, or how the Electone is controlled. To select the MIDI page: Press the [UTILITY] button. The Utility display appears. - Page 162 Expression Determines the control of the expression pedal functions. Ordinarily, this control is set to Auto. Press the [D] button to make the indicator flash, then use the DATA CONTROL dial to select the setting. Auto: Internal and External is automatically switched. Internal: You can manually control the expression pedal even during M.D.R.
-
Page 163: Appendix
Appendix Assembly Instructions Carefully read these instructions BEFORE assembling the Electone. Be careful not to confuse any of the parts, and be sure to install all parts in the correct direction by following the procedures given below. Be sure to assemble the Electone with two or more people. Don’t use any screws other than the ones specified and included in this package. - Page 164 Mount the Sideboards onto the Pedalboard While holding the Sideboard(s) to the Speaker unit, fasten the four short screws from the rear, to unit. secure the Speaker unit to the Sideboards. Cover Be sure not to confuse the Right and Left the four screw holes on the rear side with the Sideboards.
- Page 165 Use the four long screws to fasten the Main unit to Connect the Pedalboard cord and Speaker the Sideboards as shown in the illustration. cord to the Main Unit. Make sure that the latches on each plug of the cords face toward you, and connect them to each socket securely.
- Page 166 Place the music rest on the Electone. After completing the assembly, please check the following items. • Are there any parts left over? → Review all assembly procedures. • Is the Electone clear of doors and other movable fixtures? → Move the Electone to an appropriate location. •...
-
Page 167: Installing Optional Hardware
Installing Optional Hardware Installing the Floppy Disk Drive The optional UD-FD01 floppy disk drive can be installed Fold the USB cable inside the case as to the bottom of the instrument by using the included shown. floppy disk drive case and screws. Have a Phillips-head (+) screwdriver ready. -
Page 168: Midi Data Format
MIDI Data Format 1. Channel Messages 1.1 EL Mode ˛ “ ” indicates “Not available.” Ø “ ” indicates “Available.” Code (Hexadecimal) Function Receive Transmit Remarks 8n, nn, 00-7F Note Off ˛ ˛ ˛ PEDAL (4ch)* ˛ LEAD 1 5-14ch ˛... - Page 169 Code (Hexadecimal) Function Receive Transmit Remarks Bn, 78, 00 All Sound Off 5-14ch ˛ Bn, 79, 00 Reset All Controllers Bn, 7B, 00 All Note Off Bn, 7C, 00 Omni Off Bn, 7D, 00 Omni On Bn, 7E, 00 Mono Bn, 7F, 00 Poly Cn, nn...
-
Page 170: Realtime Messages
Code (Hexadecimal) Function Receive Transmit Remarks Bn, 60, 00-7F Data Increment 1-16ch ˛ Bn, 61, 00-7F Data Decrement Bn, 62, 00-7F NRPN LSB 1-16ch ˛ Bn, 63, 00-7F NRPN MSB Bn, 64, 00-7F RPN LSB 1-16ch ˛ Bn, 65, 00-7F RPN MSB Bn, 78, 00 All Sound Off... - Page 171 Universal Non-Realtime Messages Code (Hexadecimal) Message Receive Transmit F0, 7E, 7F, 09, 01, F7 GM ON Ø ˛ F0, 7E, 7F, 09, 03, F7 GM2 ON Ø ˛ F0, 7E, 7F, 09, 02, F7 GM OFF Ø ˛ F0, 7E, 7F, 08, 08, JJ, GG, MM, ..data.., F7 GM2 Scale/Octave Tuning Ø...
- Page 172 1. Switches Switch Receive Transmit Left Footswitch Ø Ø Knee Lever Ø Ø Solo Bar Ø Ø 2. Panel Switch Events MIDI Exclusive Format F0, 43, 70, 78, 41, cc, dd, F7 Selectors Switch Remarks Code Receive Rx Range Transmit Tx Range Registration Memory [1-16] Ø...
- Page 173 Rotary Speaker Switch Remarks Code Receive Rx Range Transmit Tx Range Rotary Speaker Speed Ø [00-01] Ø [00-01] 00:OFF, 01:ON [ROTARY SP SPEED] Rhythm Sequence Switch Remarks Code Receive Rx Range Transmit Tx Range Sequence 1 [SEQ.1] Ø [00-01] Ø [00-01] 00:OFF, 01:ON Sequence 2 [SEQ.2]...
- Page 174 Address Size Data Parameter Data Receive Rx Range Transmit Tx Range 00-07 3A-46 Transpose 3A:KeyDown Ø 3A-46 Ø 3A-46 40:Normal 46:KeyUp 00-07 00-7F Volume Mute 00:Mute OFF Ø 00-7F Ø 00-01 01:Mute ON 00-07 Effect 1 Type MSB/LSB Ø Ø 00-7F 00-7F 00-7F...
- Page 175 Rhythm Rhythm Parameters Address Size Data Parameter Data Receive Rx Range Transmit Tx Range 00-0B 0000-7F7F Rhythm Assign Number 0000-7F7F Ø 00-7F Ø 00-7F 00-7F 00-7F 00-0B Rhythm Selector Number 00-0B Ø 00-0B Ø 00-0B 00-7F Percussion Volume 00:MIN Ø 00-7F ˛...
- Page 176 M.O.C. Function Parameters Address Size Data Parameter Data Receive Rx Range Transmit Tx Range 00-7F Melody On Chord Mode 00:OFF Ø 00-7F Ø 00-01 01:ON 00-7F M.O.C. Knee Lever Control 00:OFF Ø 00-7F ˛ 00-01 (On/Off) 01:ON Section Parameters Address Size Data Parameter...
- Page 177 Address Size Data Parameter Data Receive Rx Range Transmit Tx Range 00-7F MIDI Control Lead 1 (INT/EXT) 00:Internal Ø 00-7F ˛ 01:External 00-05 Registration Menu 00-05 Ø 00-05 Ø 00-05 00-07 00-07 00-07 00-07 00-0B 00-0B 00-0B 00-0B Effect Parameters (Overall): Reverb Address Size Data...
-
Page 178: Midi Implementation Chart
MIDI Implementation Chart Date: 03-Mar-2005 YAMAHA [Electone-EL mode] / Model: ELB-01 Version: 1.00 Function Transmitted Recognized Remarks Basic Default 1, 2, 3, 16 1-3, 5-16 Channel Changed 1-16 Mode Default Mode 3 Mode 3 Messages ˛ ˛ Altered ************************ ˛... - Page 179 Date: 03-Mar-2005 MIDI Implementation chart YAMAHA [Electone-XG mode] / Model: ELB-01 Version: 1.00 Function Transmitted Recognized Remarks Basic Default 1, 2, 3, 16 1-16 Channel Changed 1-16 1-16 Mode Default Mode3 Mode 3 Messages ˛ ˛ Altered ˛ ************************ Note...
-
Page 180: Troubleshooting
Troubleshooting Problem Possible Cause and Solution GENERAL OPERATION The sound is not heard for about 10 seconds after This is normal; the Electone takes a while to start up. turning the power on. A cracking noise is sometimes heard. Noise may be produced when either an electrical appliance is turned on or an electric power tool (such as drill) is used in the proximity of the Electone. - Page 181 Problem Possible Cause and Solution EFFECTS The Initial Touch function does not operate. Adjust the Initial Touch settings in the Voice Condition display (page 42). The Reverb effect is not applied to the desired Voice Increase the Reverb depth for the desired Voice sections in Reverb display. sections, even when the Reverb setting in the Voice Condition display Page 1 set to maximum.
-
Page 182: Specifications
Specifications and descriptions in this owner’s manual are for information purposes only. Yamaha Corp. reserves the right to change or modify products or specifications at any time without prior notice. Since specifications, equipment or options may not be the same in every locale, please check with your Yamaha dealer. -
Page 183: Index
Index Feet....................42 File ...................116 [A] – [D] buttons ............... 17 FILL IN ..................58 A.B.C..................71 Fingered Chord .................72 A.B.C./M.O.C................71 FLANGER ................45, 53 Accompaniment................ 68 floppy disk ................107 Add Drum ................. 68 Folder ................113, 116 Auto Bass Chord............... 71 Folder Delete ................139 Auto Fill .................. - Page 184 Melody On Chord ..............74 Rhythm Menu ................56 Memory (A.B.C.) ............... 73 Rhythm Sequence ..............75 Metronome................67 ROTARY SP SPEED..............50 MIDI ..................157 ROTARY SPEAKER .............45, 54 MIDI Control................161 Rotary Speaker................50 MIDI IN/OUT ..............152, 157 MIDI Out.................. 162 Mode (Rotary Speaker).............
- Page 185 VOICE SECTION............... 25 Voice section 1 ................. 25 Voices ..................21 Volume (Accompaniment) ............70 Volume (Keyboard Percussion) ..........78 Volume (Rhythm) ..............57, 62 Volume (Voice)..............26, 42 Volume (XG)................136 WAH..................45, 54 XG ....................5 ELB-01 Owner’s Manual...
- Page 186 Memo...
- Page 187 For details of products, please contact your nearest Yamaha representative or the authorized distributor listed below. NORTH AMERICA ASIA THE NETHERLANDS/ BELGIUM/LUXEMBOURG CANADA THE PEOPLE’S REPUBLIC OF CHINA Yamaha Music Central Europe GmbH, Yamaha Canada Music Ltd. Yamaha Music & Electronics (China) Co.,Ltd.
- Page 188 Yamaha Manual Library http://www.yamaha.co.jp/manual/ U.R.G., Pro Audio & Digital Musical Instrument Division, Yamaha Corporation © 2005 Yamaha Corporation WF12580 512MWAP3.3-02B0 Printed in China...