Table of Contents
Advertisement
Available languages
Available languages
Quick Links
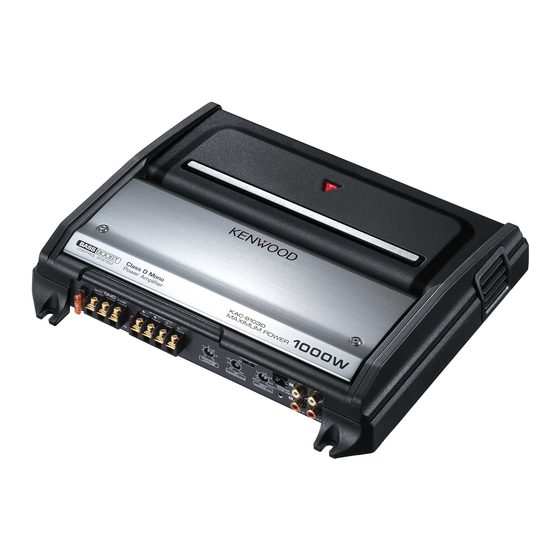
KAC-8103D
CLASS D MONO POWER AMPLIFIER 7 page 2-6
INSTRUCTION MANUAL
AMPLIFICATEUR MONO CLASSE D 7 page 8-12
MODE D'EMPLOI
AMPLIFICADOR DE POTENCIA CLASE D MONOFÓNICO 7 página 14-18
MANUAL DE INSTRUCCIONES
Take the time to read through this instruction manual. Familiarity
with installation and operation procedures will help you obtain the
best performance from your new power amplifier.
For your records
Record the serial number, found on the back of the unit, in the spaces
designated on the warranty card, and in the space provided below. Refer
to the model and serial numbers whenever you call upon your Kenwood
dealer for information or service on the product.
Model KAC-8103D Serial number
US Residence Only
Register your Kenwood product at
www.kenwoodusa.com
© B64-3514-00/00 (KV/EV)
Register Online
Advertisement
Table of Contents

Summary of Contents for Kenwood KAC-8103D
- Page 1 Record the serial number, found on the back of the unit, in the spaces designated on the warranty card, and in the space provided below. Refer to the model and serial numbers whenever you call upon your Kenwood dealer for information or service on the product.
-
Page 2: Safety Precautions
NOTE • If you experience problems during installation, consult your Kenwood dealer. • If the unit does not seem to be working right, consult your Kenwood dealer. FCC WARNING This equipment may generate or use radio frequency energy. Changes or modifications to this equipment may cause harmful interference unless the modifications are expressly approved in the instruction manual. -
Page 3: Installation Procedure
Installation 318 mm 258 mm Ø6 Class D Mono NOTE • Do not remove the dressing cover. Self-tapping screw (ø5 × 18 mm) Installation board, etc. (thickness : 15 mm or more) Accessories Part name External View Self-tapping screws (ø5 × 18 mm) Terminal cover (Small) (Power terminal) Terminal cover (Large) - Page 4 Connection 2WARNING To prevent fire caused by a short in the wiring, connect a fusible link or breaker nearby the battery’s positive terminal. 2CAUTION • If sound is not output normally, immediately turn power off and check connections. • Be sure to turn the power off before changing the setting of any switch.
- Page 5 Class D Mono 1 Fuse (40 A × 1) NOTE If you can’t find the specified capacity fuse at your store etc., consult your Kenwood dealer. 2 Battery terminal 3 Ground terminal 4 Power control terminal Controls the unit ON/OFF.
-
Page 6: Troubleshooting Guide
Troubleshooting Guide What might appear to be a malfunction in your unit may just be the result of slight misoperation or miswiring. Before calling service, first check the following table for possible problems. PROBLEM POSSIBLE CAUSE No sound. • Input (or output) cables are disconnected. •... -
Page 8: Précautions De Sécurité
(comme une pièce de monnaie ou un outil en métal) à l'intérieur de l'appareil. • Si l'appareil commence à émettre de la fumée ou une odeur bizarre, mettez immédiatement l'appareil hors tension et consultez un revendeur Kenwood. • Ne pas toucher l’appareil quand il est en service car la température de sa surface est suffisamment élevée pour provoquer des brûlures. -
Page 9: Procédure D'installation
Installation 318 mm 258 mm Ø6 Class D Mono REMARQUE • Ne retirez pas l’enjoliveur. Vis taraudeuse (ø 5 × 18 mm) Tableau d'installation, etc. (épaisseur: 15 mm ou plus) Accessoires Nom de la pièce Vue extérieure Vis taraudeuses (ø5 × 18 mm) Cache de bornier (petit) (Borne d’alimentation) Cache de bornier (grand) - Page 10 Raccordements 2AVERTISSEMENT Pour éviter tout incendie dû à un court- circuit, insérer un fusible ou un coupecircuit à proximité de la borne de la batterie. 2ATTENTION • En cas d'anomalie, mettre immédiatement l'appareil hors tension et vérifier tous les raccordements. •...
- Page 11 1 FUSIBLE (40 A × 1) REMARQUE Si vous ne trouvez pas de fusible de calibre adéquat dans le commerce, etc., contacter votre agent Kenwood. 2 Borne BATT (alimentation) 3 Borne GND (masse) 4 Borne P.CON (fil de commande d’alimentation) Commande l’unité...
-
Page 12: Guide De Depannage
Guide de depannage Ce qui peut apparaître comme un mauvais fonctionnement de votre appareil n’est peut être que le résultat d’une mauvaise opération ou d’une mauvaise connexion. Avant d’appeler un centre de service, vérifiez d’abord dans le tableau suivant les problèmes possibles. PROBLEME CAUSE POSSIBLE Absence de sons. -
Page 14: Precauciones De Seguridad
• Si nota que la unidad emite humos u olores extraños, desconecte inmediatamente la alimentación y consulte con su distribuidor Kenwood. • No toque el aparato mientras lo utiliza porque su superficie se calienta y puede causar quemaduras si se toca. -
Page 15: Procedimiento De Instalación
Instalación 318 mm 258 mm Ø6 Class D Mono NOTA • No extraiga la cubierta exterior. Tornillo autorroscantes (ø5 × 18 mm) Tablero de instalación, etc. (grosor: 15 mm o más) Accesorios Nombre de pieza Vista exterior Tornillo autorroscantes (ø5 × 18 mm) Cubierta de terminales (Pequeño) (Terminal del cable de... - Page 16 Conexiones 2ADVERTENCIA Para evitar incendios producidos por cortocircuitos en el cableado, conecte un fusible o cortacircuito entre la batería y los terminales de la batería. 2PRECAUCIÓN • Si el sonido no sale normalmente, desconecte inmediatamente la alimentación y compruebe las conexiones. •...
- Page 17 1 FUSIBLE (40 A × 1) NOTA Si no puede encontrar el fusible de la capacidad especificada en su almacén etc., consulte su distribuidor Kenwood. 2 Terminal BATT (alimentación) 3 Terminal GND (tierra) 4 Terminal del control de corriente (P.CON) Controla la CONEXIÓN / DESCONEXIÓN de la unidad.
-
Page 18: Guia Sobre Localización De Averias
Guia Sobre Localización De Averias Lo que podría parecer una falla de funcionamiento de su unidad podría ser simplemente el resultado de un pequeño error de operación o de un defecto de conexión. Antes de acudir al servicio, verifique primero el siguiente cuadro sobre los problemas que se podrían presentar. PROBLEMA CAUSA POSIBLE No hay sonido.


