Kenwood TM-D710A Manual
Hide thumbs
Also See for TM-D710A:
- Service manual (98 pages) ,
- Instruction manual (72 pages) ,
- Product manual (100 pages)
Table of Contents
Advertisement
Quick Links
RepeateR access ...........................................................................................1
tRansmitting a 1750 Hz tone ......................................................................2
ReVeRse FUnction ..........................................................................................3
aUtomatic simplex cHeckeR (asc) ...........................................................3
tone FReqUency iD ........................................................................................3
simplex & RepeateR oR oDD-split memoRy cHannel? .......................1
stoRing simplex anD stanDaRD RepeateR FReqUencies .................1
stoRing oDD-split RepeateR FReqUencies ..........................................2
Recalling a memoRy cHannel ...................................................................2
cleaRing a memoRy cHannel .....................................................................2
naming a memoRy cHannel .........................................................................3
memoRy-to-VFo tRansFeR ...........................................................................3
cHannel Display FUnction .........................................................................3
application examples ..................................................................................1
stoRing Data in pm cHannels ....................................................................2
Recalling pm cHannels ...............................................................................2
aUto pm cHannel stoRe ..............................................................................2
pm cHannel Reset ..........................................................................................2
selecting a scan ResUme metHoD ...........................................................1
VFo scan ............................................................................................................1
memoRy scan ...................................................................................................2
gRoUp scan ......................................................................................................2
pRogRam scan .................................................................................................3
mHz scan ............................................................................................................3
call scan ..........................................................................................................3
VisUal scan .......................................................................................................4
Using ctcss ......................................................................................................1
ctcss FReqUency iD ......................................................................................2
Using Dcs ..........................................................................................................1
Dcs coDe iD .......................................................................................................1
manUal Dialing ................................................................................................1
aUtomatic DialeR ...........................................................................................1
DtmF key lock .................................................................................................2
®
WHat is ecHolink? ..........................................................................................1
setting Up ecHolink sysop moDe ............................................................1
stoRing ecHolink memoRy .........................................................................2
CONTENTS
01-REPEATER-E.pdf
02-MEMORY CHANNEL-E.pdf
03-PM CHANNEL-E.pdf
04-SCAN-E.pdf
05-CTCSS-E.pdf
06-DCS-E.pdf
07-DTMF-E.pdf
08-EchoLink-E.pdf
Advertisement
Table of Contents

Related Manuals for Kenwood TM-D710A


Summary of Contents for Kenwood TM-D710A
-
Page 1: Table Of Contents
CONTENTS Operation File name 01-REPEATER-E.pdf OPERATING THROUGH REPEATERS RepeateR access ...................1 tRansmitting a 1750 Hz tone ..............2 ReVeRse FUnction ..................3 aUtomatic simplex cHeckeR (asc) ............3 tone FReqUency iD ..................3 02-MEMORY CHANNEL-E.pdf MEMORY CHANNELS simplex & RepeateR oR oDD-split memoRy cHannel? .......1 stoRing simplex anD stanDaRD RepeateR FReqUencies ....1 stoRing oDD-split RepeateR FReqUencies ..........2 Recalling a memoRy cHannel ..............2... -
Page 2: Operation File Name
Operation File name 09-OTHER OPERATIONS-E.pdf OTHER OPERATIONS poWeR on message ..................1 Display illUmination ..................1 key lock ......................1 key Beep ......................2 exteRnal speakeR conFigURation ............2 pRogRammaBle VFo ..................2 cHanging tHe FReqUency step size ............3 pRogRammaBle FUnction keys ..............3 FReqUency DiRect entRy ................3 aUtomatic poWeR oFF (apo) ...............4 sWitcHing Fm/am moDe .................4 aDVanceD inteRcept point (aip) ..............4... - Page 3 Operation File name 11-APRS-E.pdf APRS ® connecting WitH a gps ReceiVeR oR WeatHeR station ....2 aDJUsting tHe inteRnal clock ..............2 ReceiVing apRs Data ..................3 accessing ReceiVeD apRs Data ..............3 Display example .....................4 soRt FUnction ....................5 FilteR FUnction ....................5 ReceiVing a message ..................6 enteRing a message ..................6 accessing ReceiVeD apRs messages ............7 tRansmitting a message ................7...
- Page 4 Operation File name 14-CROSS BAND CROSS-BAND/ LOCKED-BAND OPERATION (K TYPE MODELS ONLY) (K TYPE)-E.pdf RepeateR opeRation moDe .................1 RepeateR tx HolD ..................1 RepeateR iD tx ....................1 15-WIRELESS (K TYPE)-E.pdf WIRELESS OPERATION (K TYPE MODELS ONLY) RepaRation .......................1 contRol opeRation ..................1 WEATHER ALERT (K TYPE MODELS ONLY) 16-WEATHER ALERT (K TYPE)-E.pdf...
-
Page 5: Operating Through Repeaters
OPERATING THROUGH REPEATERs Repeaters are often installed and maintained by radio clubs, sometimes with the cooperation of local businesses involved in the communications industry. Compared to simplex communication, you can usually transmit over much greater distances by using a repeater. Repeaters are typically located on mountain tops or other elevated locations. -
Page 6: Transmitting A 1750 Hz Tone
n selecting a Tone Frequency 5 Rotate the Tuning control to select your desired frequency. To select the tone frequency required to access your desired repeater: 1 Turn the Tone function ON. 2 Press [F], [T.SEL]. • The current tone frequency appears on the display. 6 Press [PTT] to start a call. -
Page 7: Reverse Function
REVERsE FUNcTION TONE FREqUENcy ID After setting a separate receive and transmit frequency, This function scans through all tone frequencies to identify you can exchange these frequencies using the Reverse the incoming tone frequency on a received signal. You function. This allows you to manually check the strength can use this function to find which tone frequency is of signals you receive directly from other stations, while required by your local repeater. -
Page 8: Memory Channels
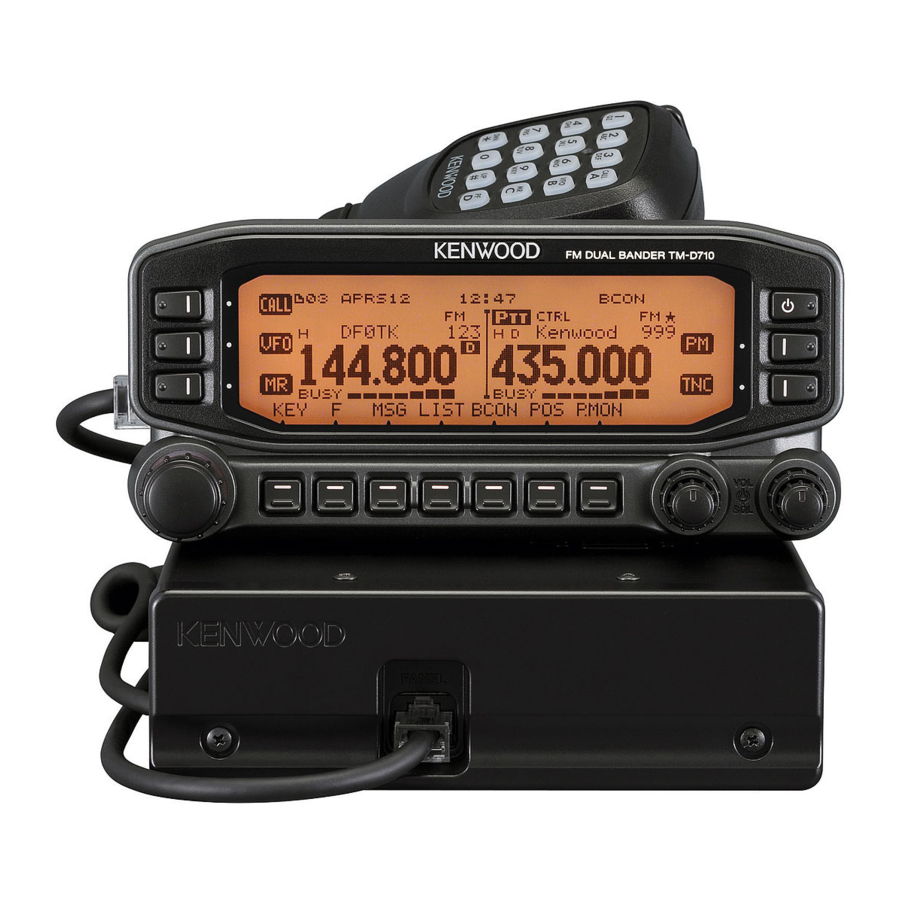
MEMORY CHANNELS In Memory channels, you can store frequencies and related data that you often use. Then you need not reprogram the data every time. You can quickly recall a programmed channel by simple operation. A total of 1000 Memory channels are available for bands A and B. -
Page 9: Storing Odd-Split Repeater Frequencies
STORINg ODD-SPLIT REPEATER FREquENCIES RECALLINg A MEMORY CHANNEL Some repeaters use a receive and transmit frequency pair 1 Press [MR] to enter Memory Recall mode. with a non-standard offset. To access those repeaters, 2 Rotate the Tuning control to select your desired store two separate frequencies in a memory channel. -
Page 10: Naming A Memory Channel
NAMINg A MEMORY CHANNEL CHANNEL DISPLAY FuNCTION You can name Memory channels using up to 8 characters. Use this function when you want to use only Memory When you recall a named Memory channel, its name channels. When this function is switched ON, the appears on the display. - Page 11 Key Name [KEY] [F], [KEY] [KEY] (1s) While Transmitting [KEY] + Power ON Power ON/OFF Power ON/OFF Power ON/OFF Power ON/OFF – – – – – DX PacketClusters – – – – Monitor ON/OFF CALL Call mode – Call Scan –...
-
Page 12: Programmable Memory (Pm)
PROGRAMMABLE MEMORY (PM) Programmable Memory (PM) stores virtually all settings currently set on the transceiver. This transceiver provides 5 PM channels to store 5 sets of transceiver configurations. Later, you can quickly recall any one of these channels, depending on the operations you have in mind or the operating environment. APPLicAtiOn ExAMPLEs The following programmable settings cannot be stored: •... -
Page 13: Storing Data In Pm Channels
PM chAnnEL REsEt stORinG DAtA in PM chAnnELs To reset the PM channels to their default settings: 1 Confirm that the following conditions have been satisfied: 1 Turn the transceiver power OFF. • The transceiver is in receive mode. 2 Press [F] + Power ON. •... -
Page 14: Scan
SCAN Scan is a useful feature for hands-off monitoring of your favorite frequencies. Becoming comfortable with all types of Scan will increase your operating efficiency. This transceiver provides the following types of scans: Scan Type Scan Range VFO Scan Scans all frequencies on the current band. Memory Scan Scans all frequencies stored in the Memory channels. -
Page 15: Memory Scan
MEMORY SCAN 1 Press [MR], then rotate the Tuning control to select a channel in your desired group. Use Memory Scan to monitor all Memory channels 2 Press the Tuning control (1s). programmed with frequency data. • Scan starts at the current channel. 1 Select your desired band. -
Page 16: Program Scan
PROGRAM SCAN 5 To quit Program Scan, press [VFO] again. Note: Program Scan is identical to VFO Scan except that you u If the step size differs between the lower limit and upper limit, select a frequency range for the scan. VFO scan will begin instead of Program Scan. -
Page 17: Visual Scan
VISUAL SCAN Note: u You cannot use the Visual Scan Function under the following While you are receiving, Visual Scan allows you to monitor circumstances: frequencies near the current operating frequency. Visual • When the Built-in TNC is turned ON. Scan graphically and simultaneously shows how all •... -
Page 18: Continuous Tone Coded Squelch System (Ctcss)
CONTINUOUS TONE CODED SQUELCH SYSTEM (CTCSS) You may sometimes want to hear calls only from specific persons. The Continuous Tone Coded Squelch System (CTCSS) allows you to ignore (not hear) unwanted calls from other persons who are using the same frequency. To do so, select the same CTCSS tone as selected by the other persons in your group. -
Page 19: Ctcss Frequency Id
CTCSS FrEQUENCY ID This function scans through all CTCSS frequencies to identify the incoming CTCSS frequency on a received signal. You may find this useful when you cannot recall the CTCSS frequency that the other persons in your group are using. 1 Press [TONE] 2 times to activate the CTCSS function. -
Page 20: Digital Coded Squelch (Dcs)
DIGITAL CODED SQUELCH (DCS) Digital Code Squelch (DCS) is another application which allows you to ignore (not hear) unwanted calls. It functions the same way as CTCSS. The only differences are the encode/ decode method and the number of selectable codes. For DCS, you can select from 104 different codes. -
Page 21: Dual Tone Multi-Frequency (Dtmf)
DUAL TONE MULTI-FREQUENCY (DTMF) The keys on the microphone keypad function as DTMF keys; the 12 keys found on a push-button telephone plus 4 additional keys (A, B, C, D). This transceiver provides 10 dedicated memory channels. You can store a DTMF code with up to 16 digits. -
Page 22: Dtmf Key Lock
n Transmitting Stored DTMF Codes DTMF KEY LOCK 1 Press and hold the microphone [PTT]. This function will lock the DTMF transmission keys so that they will not transmit if they are accidentally pressed. To 2 While transmitting, press the Tuning control. lock the DTMF keys, turn this function ON. -
Page 23: Echolink
EchoLink ® What is EchoLink? EchoLink allows you to communicate with other amateur radio stations over the internet, using VoIP (voice-over-IP) technology. The EchoLink software program allows worldwide connections to be made between stations, or from computer to station, greatly enhancing your communications capabilities. To use EchoLink, you must register using your call sign on their website and download the EchoLink software program (free of charge). -
Page 24: Storing Echolink Memory
stOring EchoLink MEMOry Note: u In step 2, press the microphone [C] key before pressing the There are 10 dedicated EchoLink DTMF Memory channels Tuning control, to transmit the converted DTMF code of the available. You can store up to 8 digits in each channel. EchoLink “Connect by Call”... -
Page 25: Other Operations
OTHER OPERATIONS n Display Contrast POWER ON MESSAGE The display visibility changes depending on the Each time you switch the transceiver ON, “HELLO” ambient conditions, for example between daytime and (default) appears on the display for approximately 2 night. When you find the display is not clear, use this seconds. -
Page 26: Key Beep
KEY BEEP Band Output Speaker You can turn the transceiver beep function ON or OFF as Mode Internal External External Setup desired. Speaker 1 Enter Menu mode and access Menu 000. None A, B – – SP1 only A, B –... -
Page 27: Changing The Frequency Step Size
CHANGING THE fREqUENCY STEP SIzE 2 Set your desired function for the key. Programmable functions available are: WX CH Choosing the correct frequency step size is essential in (Weather Channel)/ FRQ.BAND (Frequency bands)/ selecting your exact frequency. The default step size on CTRL (Control)/ MONITOR (Monitor)/ VGS (Voice the 144 MHz band is 5 kHz (K type) or 12.5 kHz (E, M4 recorder)/ VOICE (Voice announcement)/ GROUP... -
Page 28: Automatic Power Off (Apo)
AUTOMATIC POWER Off (APO) S-METER SqUELCH Automatic Power Off is a background function that S-meter Squelch causes the squelch to open only when monitors whether or not any operations have been a signal with the same or greater strength than the S- performed (keys pressed, Tuning control turned, etc.), meter setting is received. -
Page 29: Speaker Mute
SPEAKER MUTE TIME-OUT TIMER (TOT) While receiving or transmitting on the TX band, you may It is sometimes necessary or desirable to restrict a single not want to hear audio received on the other band. Use transmission to a specific maximum time. You may use this function to mute the speaker allocated to that band this function to prevent repeater time-outs when accessing (not the TX band). -
Page 30: Display Partition Bar
DISPLAY PARTITION BAR The partition bar that appears between bands A and B can be removed if desired. 1 Enter Menu mode and access Menu 527. 2 Set the partition bar display to ON or OFF. POWER ON PASSWORD If power on password is activated, you cannot operate the transceiver without first entering your password, after turning the transceiver power ON. -
Page 31: Packet Operation
PACKET OPERATION Connect this transceiver to your personal computer via a Terminal Node Controller (TNC). You can send messages or commands to far away stations, obtain a variety of information via your local bulletin boards, or enjoy other Packet applications. Reference material for starting Packet operation should be available at any store that handles Amateur Radio equipment. -
Page 32: Data Band
DATA BAND n PC Port Speed 1 Enter Menu mode and access Menu 519. Select how data will be transmitted and received on your transceiver. 1 Enter Menu mode and access Menu 529. 2 Set the PC port speed to 9600, 19200, 38400, or 57600 bps. -
Page 33: Tnc Commands List
TNC COMMANDS LIST The commands supported by the built-in TNC are listed below. You must enter a space between a command name (or short-form) and a parameter, or between two parameters; ex. AU OFF, BEACON EVERY 18. Command Name Short Description Parameter Default... - Page 34 Command Name Short Description Parameter Default Causes the TNC to display the current status of all the commands. You can also specify a class identifier A, C, H, I, L, M, or T to display the status of only the desired command class.
- Page 35 Command Name Short Description Parameter Default When ON, switching the power OFF then ON causes KISS KISS ON/ OFF the TNC to enter (or exit) KISS mode. When ON, changes a small letter (a through z) entered as a stream designator, to a capital letter (A through LCSTREAM ON/ OFF Z).
- Page 36 Command Name Short Description Parameter Default Specifies digipeater call signs to be added when the − NPATH NPATH Call1, ... call7 UISSID parameter in a received packet is 8 or 12. Specifies a group code to be used for making a −...
- Page 37 Command Name Short Description Parameter Default When ON, causes the TNC to respond to software TRFLOW ON/ OFF flow control from the computer in Transparent mode. Specifies the number of transmission retries TRIES 0 ~ 15 programmed in the retry counter. Specifies the time delay between PTT ON and start TXDELAY of transmission.
-
Page 38: Aprs
APRS ® The Automatic Packet/ Position Reporting System (APRS ) is a software program and registered trademark of Bob ® Bruninga, WB4APR. He has made packet communications much more exciting than before. This program allows you to track mobile stations on a map which you recall on a computer screen. Imagine seeing one mobile station moving on the map which can be scaled from 0.5 to 2000 miles. -
Page 39: Connecting With A Gps Receiver Or Weather Station
CONNECTING WITH A GPS RECEIVER OR WEATHER 5 Press [ESC] to exit Menu mode. STATION Note: u When used at room temperature (25°C), the error of the internal The GPS jack on this transceiver accepts a 2.5 mm clock in a month is within one minute. (1/10") 3-conductor plug. -
Page 40: Receiving Aprs Data
RECEIVING APRS DATA ACCESSING RECEIVED APRS DATA Each time a new APRS packet is received, the frequency This transceiver is capable of receiving and storing APRS display is interrupted to show information as below: data received from up to 100 stations in memory. You can easily recall the information of the desired station. -
Page 41: Display Example
DISPLAy ExAmPLE Page 3 Page 1 q: Position data w: Grid square locator q: Station icon (Packet path) w: Status text e: Call sign r: Date t: Time (packet received) y: Situation u: Direction of station q: Call sign i: Distance from station (mile or km) o: Position comment This transceiver is capable of displaying the following For packets received from Mic-encoder stations including... -
Page 42: Sort Function
DTI information is verified and only order, with the closest station listed KENWOOD Kenwood TH-D7, TM-D700, and TM- D710 bureaus are displayed. first. Received data is verified and only 4 The newly sorted station list appears on the display. -
Page 43: Receiving A Message
RECEIVING A mESSAGE ENTERING A mESSAGE Each time a proper message is received, the frequency To transmit a message, first enter the call sign of the display is interrupted to show information as below: target station. To transmit a bulletin, enter “BLN#” instead; where # must be 0 to 9 or A to Z. -
Page 44: Accessing Received Aprs Messages
ACCESSING RECEIVED APRS mESSAGES The table below shows the meanings of the symbols to be shown in step 2. This transceiver is capable of storing a maximum of 100 messages in memory. You can easily access one of those. 1 Press [KEY], [MSG]. Sequence Not-yet-read indicator... -
Page 45: Basic Setting
BASIC SETTING n Tx delay <Tx DELAy> This function allows you to set a transmission delay Enter Menu mode and access Menu 600. time between transmitting the APRS data and transmitting a flag code prior to the APRS data. When the other station has activated their Save Mode, the selected delay time is increased. -
Page 46: Setting Way Point
[MAGELLAN]: The data which is output from the GPS channels. terminal using the " $PMGNWPL" format. [KENWOOD]: The data which is output from the GPS n Name Entry <NAmE> terminal using the " $PKWDWPL" format. You can enter alphanumeric characters plus special n Way Point Name <NAmE>... -
Page 47: Selecting A Position Comment
SELECTING A POSITION COmmENT n Operation when Receiving a QSy When QSY (frequency) information is received, the Enter Menu mode and access Menu 607. station list appears (list summary and details) with the verified frequency. Press the Tuning control. The APRS data which you transmit always includes one of the 15 predetermined position comments. -
Page 48: Selecting Your Station Icon
• The following 29 icons are selectable for APRS: 4 To switch the function OFF, press [KEY], [BCON] again. [AUTO]: KENWOOD/ Home/ Portable / Sailboat/ SSTV/ Aircraft/ 1 Press [KEY], [BCON] to switch the function ON. Boat/ Car/ Motorcycle/ Jeep/ RV/ Truck/ Van/ Truck(18- • “BCON” appears. -
Page 49: Programming A Packet Path
n Propotional Pathing <PROPOTIONAL PATHING> Method 1 (Specific Path): Program the call signs of one or more digipeaters in the This function automatically changes the transmit packet sequence of transfer relay; ex. “KD6ZZV,KF6RJZ”. path with the elapsed time. Method 2 (Generic Path): Operation example for when PROPORTIONAL PATHING Program RELAY and/or WIDE;... -
Page 50: Network
NETWORK WEATHER STATION DATA OUTPUT Enter Menu mode and access Menu 613. Enter Menu mode and access Menu 615. To transmit the meteorological data, you must set the n Transmit <Tx> unprotocol. Using this setting, you can limit the data that This setting determines whether or not to transmit is received. -
Page 51: Setting As A Digipeater
SETTING AS A DIGIPEATER n UIFLOOD Enter Menu mode and access Menu 619. n DIGIPEAT Enter Menu mode and access Menu 616. Specifies how received UI packets, which include WIDEN-N or TRACEN-N parameters, are processed. This transceiver with a built-in TNC may also be used Enter WIDE or TRACE before ID, NOID, or FIRST;... -
Page 52: Storing Auto Message Reply
STORING AUTO mESSAGE REPLy Enter Menu mode and access Menu 622. • You can enter 0 to 9, A to Z, , (comma), and –. For messages, “ ” is also selectable. • The keypad on the microphone also is available to enter alphanumeric characters. -
Page 53: Setting Interrupt Display
SETTING INTERRUPT DISPLAy SELECTING A NAVITRA GROUP Enter Menu mode and access Menu 625. Enter Menu mode and access Menu 628. n Display Area <DISPLAy AREA> n Group mode <GROUP mODE> Selects the Display area. Select to Group mode ON or OFF. [ENTIRE]: n Enter Group Code <GROUP CODE>... -
Page 54: Packet Monitor Display
PACKET mONITOR DISPLAy 4 Press [F], [DX]. • Each time new DX cluster data is received, a call sign, This transceiver presents Terminal Window mode to frequency, and time are displayed. display raw data of received APRS packets. It displays up •... -
Page 55: Troubleshooting
TROUBLESHOOTING Problem Probable Cause Corrective Action 1 The squelch is open. 1 Select the correct squelch level so Packet operation results in no connects with other stations. that the squelch is opened only when 2 You did not correctly set the data length signals are present. -
Page 56: Transceiver Reset
TRANSCEIVER RESET There are 4 types of transceiver reset available: VFO Reset Use to initialize the VFO and accompanying settings. PARTIAL (Partial) Reset Use to initialize all settings other than the Memory channels, the DTMF memory, and the PM channels. PM Reset Use to reset only the Programmable Memory channels to their default values. -
Page 57: Voice Announcements
VGS-1 (OPTIONAL) OPERATION When using the optional VGS-1 voice guide & storage unit, you gain access to the voice recorder and voice announcement functions. <The VGS-1 is sold depending upon area.> VOIcE ANNOuNcEmENTS AUTO: Announcements are made automatically when changing a When changing modes, frequencies, settings, etc., an audio mode/frequency/setting. -
Page 58: Voice Recorder
VOIcE REcORdER AUTO: Announcements are made automatically when changing a The voice recorder provides you with 3 VGS channels for mode/frequency/setting. recording voice memos, along with a single VGS channel for recording conversations. You can also prepare Operation Announcement automated message responses to received calls. Press [LOCK] Each recording can last for up to 30 seconds. - Page 59 ■ continuous Recording ■ Playback Repeat Received signals on the control band are continuously You can set messages to be repeatedly played back. recorded, with the memory retaining the last 30 1 Enter Menu mode and access Menu 007. seconds of recorded signals. 1 Enter Menu mode and access Menu 009.
-
Page 60: Repeater Operation Mode
CROSS-BAND/ LOCKED-BAND OPERATION (K TYPE MODELS ONLY) This transceiver is capable of receiving signals on one band and retransmitting signals on the other band. This function repeats signals originating from one band, using the other band. For example, a signal received on band A (VHF) is retransmitted on band B (UHF). -
Page 61: Wireless Operation (K Type Models Only)
WIRELESS OPERATION (K TYPE MODELS ONLY) If you also have a compatible Kenwood handy transceiver, you may use it as a remote control for this mobile transceiver. You will control one band on the mobile while sending DTMF tones to the other band from the handheld. This function is useful, for example, when you want to control the mobile from a location outside your vehicle. -
Page 62: Weather Alert On/ Off
WEATHER ALERT (K TYPE MODELS ONLY) The Weather Alert is available only in the USA and Canada. When activated, this function will check for a received NOAA 1050 Hz tone. When the tone is received, the weather alert tone will sound. WEATHER ALERT ON/ OFF 1 Enter Menu mode and access Menu 110. -
Page 63: Connecting The Transporter With The Hf Transceiver
SKY COMMAND II (K TYPE MODELS ONLY) <RC-D710 + TM-V71> The Sky Command II allows remote control of a TS-2000, TS-2000X, TS-B2000, TS-480HX, TS-480SAT, TS-570D, TS- 570S, or TS-870S HF transceiver. You will use one transceiver as a control station called “Commander”. The transceiver connected with the HF transceiver is called “Transporter”. -
Page 64: Preparation Flow
PREPARATION FLOW Note: u Unless you program call signs, you cannot select “COMMANDER” The following steps should guide you to a good start of or “TRANSPORTER” using Menu 703. Sky Command operation. First connect the Transporter to u On the HF transceiver, select 9600 bps and 1 stop bit (default) the HF transceiver. -
Page 65: Programming A Tone Frequency
PROGRAMMING A TONE FREQUENCY CONTROL OPERATION On receiving a tone from the Commander, the Transporter When in the Sky Command mode, the Microphone keys causes the HF transceiver to enter Transmit mode. On of the Commander will function as below. First switch both the Commander and Transporter, access Menu 702 ON the HF transceiver and press Microphone [0] on the and select the desired, same tone frequency.