Table of Contents
Advertisement
Dell™ 5130cdn Color Laser Printer User's Guide
Before Beginning
Dell™ 5130cdn Color Laser Printer User's
Guide
Finding Information
About the Printer
Setting Up the Printer (Printer Setup)
Prepare Printer Hardware
Install Optional Accessories (if
applicable)
Connect Printer to Computer or Network
Perform Initial Settings
Install Printer Drivers on the Windows
Computers
Install the PPD File on Macintosh
Computers
Using Your Printer
Dell Printer Configuration Web Tool
Print Media Guidelines
Loading Print Media
Operator Panel
Printing
Notes, Notices, and Cautions
NOTE:
A NOTE indicates important information that helps you make better use of your printer.
NOTICE:
A NOTICE indicates either potential damage to hardware or loss of data and tells you how to avoid the
problem.
CAUTION:
A CAUTION indicates a potential for property damage, personal injury, or death.
Information in this document is subject to change without notice.
© 2009 Dell Inc. All rights reserved.
Reproduction of these materials in any manner whatsoever without the written permission of Dell Inc. is strictly forbidden.
Trademarks used in this text: Dell and the DELL logo are trademarks of Dell Inc.; Microsoft, Windows, Windows Server,
Windows Vista, and Active Directory are either trademarks or registered trademarks of Microsoft Corporation in the United
States and/or other countries; MAC OS is a registered trademark of Apple Inc.; Adobe is either a registered trademark or
a trademark of Adobe Systems Incorporated in the United States and/or other countries; Wi-Fi is a registered trademarks
of the Wi-Fi Alliance.
Other trademarks and trade names may be used in this document to refer to either the entities claiming the marks and
names or their products. Dell Inc. disclaims any proprietary interest in trademarks and trade names other than its own.
Our printer software uses some of the codes defined by the Independent JPEG Group.
Know Your Printer
Printer Settings
Understanding the Tool Box Menus
Understanding the Printer Menus
Understanding Your Printer Software
Printing Using ColorTrack (External
Authentication)
Using Digital Certificates
Understanding Fonts
Understanding Printer Messages
Printing With Web Services on Devices
(WSD)
Printing With UX Filter (UNIX)
Printing With CUPS (Linux)
Printer Specifications
Maintaining Your Printer
Maintaining Your Printer
Removing Options
Clearing Jams
Troubleshooting
Troubleshooting
Appendix
Appendix
Advertisement
Table of Contents

Related Manuals for Dell 5130 Color Laser


Summary of Contents for Dell 5130 Color Laser
- Page 1 Reproduction of these materials in any manner whatsoever without the written permission of Dell Inc. is strictly forbidden. Trademarks used in this text: Dell and the DELL logo are trademarks of Dell Inc.; Microsoft, Windows, Windows Server, Windows Vista, and Active Directory are either trademarks or registered trademarks of Microsoft Corporation in the United States and/or other countries;...
- Page 2 This software and documentation are provided with RESTRICTED RIGHTS. Use, duplication, or disclosure by the Government is subject to restrictions as set forth in subparagraph (c)(1)(ii) of the Rights in Technical Data and Computer Software clause at DFARS 252.227-7013 and in applicable FAR provisions: Dell Inc., One Dell Way, Round Rock, Texas, 78682, USA.
- Page 3 Choose Send To from the drop-down menu, and then click Desktop (create shortcut) on the submenu that appears. 2. Visit the Dell Printer Supplies website at www.dell.com/supplies, or order Dell printer supplies by phone. For best service, have your Dell printer Service Tag available.
-
Page 4: Finding Information
Back to Contents Page Finding Information NOTE: The following are options you can buy separately. USB cable Ethernet cable Parallel cable Wireless adapter 550-sheet feeder 1100-sheet feeder Hard disk Upgradable Memory Module Output Expander What are you looking Find it here for? Drivers and Utilities CD Drivers for my... - Page 5 Manuals - Printer documentation and product specifications You can access the Dell Support website at support.dell.com. Select your region on the support page, and fill in the requested details to access help tools and information. Back to Contents Page...
-
Page 7: About The Printer
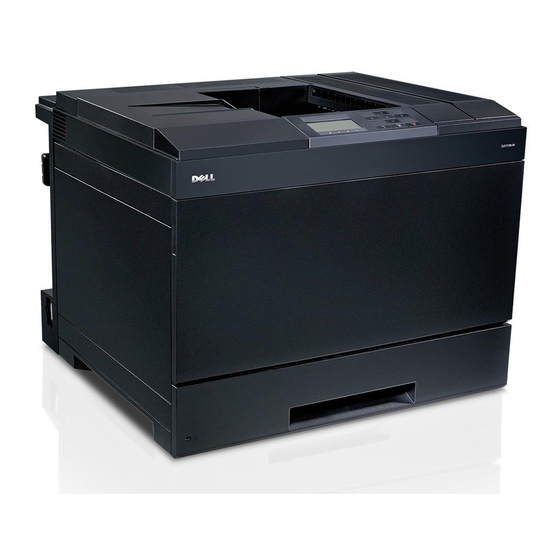
Front, Side, and Back View Operator Panel Securing the Printer Ordering Supplies The following illustrations show the standard Dell™ 5130cdn Color Laser Printer and some optional accessories. Front, Side, and Back View Front View 1 Center Output Tray 2 Right Hand Cover... -
Page 8: Right View
Right View 1 Duplexer 2 Right Hand Cover Handle 3 Multipurpose Feeder (MPF) 4 Power Switch 5 Transfer Roller 6 Fuser Left View Output Expander (optional) 1 Stacker Tray 2 H Transport Unit 3 Knob 4 Stapler Cartridge Rear View... -
Page 9: Operator Panel
1 Control Board Cover 2 Ethernet Port 3 Wireless Adapter Socket 4 USB Port 5 Parallel Port 6 Power Connector for Main Unit 7 Power Connector for Output Expander 8 Control Board NOTE: When you use the printer with the MPF opened, do not locate the printer in direct sunlight. Doing so may cause a malfunction or unnatural screen image. -
Page 10: Ordering Supplies
Ordering Supplies You can order consumables from Dell on the Internet when using a networked printer. Enter the IP address of your printer in your web browser, launch the Dell Printer Configuration Web Tool, and click the Order Supplies at: to order toner for your printer. -
Page 11: Removing Tape
Back to Contents Page Prepare Printer Hardware Removing Tape Removing the Drum Ribbons Installing the Toner Cartridges Loading Paper Removing Tape 1. Remove the tape from the printer. 2. Remove the instruction sheet from the printer. Refer to this sheet for setting up the drums and the toner cartridges. Removing the Drum Ribbons 1. -
Page 12: Installing The Toner Cartridges
Installing the Toner Cartridges CAUTION: Before performing any of the following procedures, read and follow the safety instructions in your Product Information Guide. 1. Open the front cover. 2. Ready the toner cartridges for installation. 3. Shake the yellow cartridge 5 to 6 times to distribute the toner evenly. -
Page 13: Loading Paper
NOTE: Do not touch the area shown in the illustration when you shake the cartridge. 4. Align the arrow on the cartridge with the arrow on the printer, and slide in the cartridge until it stops. 5. Repeat Step 2 Step 4 to install magenta, cyan, and black cartridges. - Page 14 3. Adjust the length guide to the size of paper to be loaded. 4. Before loading the paper, flex the sheets back and forth, and then fan them. Straighten the edges of the stack on a level surface. 5. Load paper into the tray with the recommended print side facing up. NOTE: Do not exceed the maximum fill line in the tray.
- Page 15 Back to Contents Page Install Optional Accessories (if applicable) Installing a 550-Sheet Feeder Installing a 1100-Sheet Feeder Installing both 550-Sheet Feeders and 1100-Sheet Feeder Installing an Output Expander Installing a Memory Module Installing a Hard Disk Installing a Wireless Adapter Configuring a Wireless Adapter You can make the printer more functional by installing the optional accessories.
- Page 16 CAUTION: You need three people to lift the printer. CAUTION: Be careful not to catch your fingers between the printer and the sheet feeder. 4. Tighten the two screws provided with the feeder using a coin or screw driver. 5. Secure the printer and the 550-sheet feeder with a plastic clamp-lock and the long screw provided with the feeder. 6.
- Page 17 8. Adjust the width guides to the size of paper to be loaded. 9. Adjust the length guide to the size of paper to be loaded. 10. Load paper into the tray with the recommended print side facing up. 11. Replace the tray to the 550-sheet feeder. 12.
-
Page 18: When Using The Operator Panel
Verify 550-Sheet Feeder is listed in the printer settings under Printer Options. If the feeder is not listed, turn off the printer, unplug the power cable, and reinstall the 550-sheet feeder. When Using the Dell™ Printer Configuration Web Tool a. Launch Dell Printer Configuration Web Tool. - Page 19 ® Windows Vista x64, Windows Server 2008 R2 x64, Windows Server 2008, and Windows Server 2008 x64. ® 1. Click Start® Devices and Printers. Windows 7/Windows 7 2. Right-click the printer icon and select Printer properties. ® x64/Windows Server 2008 3.
- Page 20 If you cannot acquire the printer information using the Get Information from Printer automatically, try the following procedure: 1. Click the Device Settings tab, and then select any of the available trays from the Paper Tray Configuration. 2. Click Apply, and then click OK. 3.
- Page 21 the Paper Tray Configuration. 2. Click Apply, and then click OK. 3. Close the Printers dialog box. 1. Select the Print & Fax in System Preferences. ® Mac OS X 10.5.x 2. Select the printer in Printers list, and click Options & Supplies. 3.
- Page 22 4. Lift the printer and align the three guide pins of the optional 1100-sheet feeder with the holes at the bottom of the printer. Gently lower the printer onto the 1100-sheet feeder. CAUTION: You need three people to lift the printer. CAUTION: Be careful not to catch your fingers between the printer and the sheet feeder.
- Page 23 8. Remove the tray from the 1100-sheet feeder. 9. Adjust the width guides to the size of paper to be loaded. 10. Adjust the length guide to the size of paper to be loaded. 11. Load paper into the tray with the recommended print side facing up. 12.
- Page 24 Verify 1100-Sheet Feeder is listed in the printer settings under Printer Options. If the feeder is not listed, turn off the printer, unplug the power cable, and reinstall the 1100-sheet feeder. When Using the Dell™ Printer Configuration Web Tool a. Launch Dell Printer Configuration Web Tool.
- Page 25 NOTE: If you installed the 1100-sheet feeder after installing the printer driver, update your driver by following the instructions for each operating system. If the printer is on a network, update the driver for each client. To complete installation of the accessory, the printer driver must be updated to detect it. Updating Your Driver to Detect 1100-Sheet Feeder When Using PCL/XPS Driver NOTE:...
- Page 26 3. Close the displayed active dialog box. When Using PS Driver 1. Click Start® Devices and Printers. Windows 7/Windows 7 2. Right-click the printer that uses the PS driver, and then select Printer x64/Server 2008 R2 x64 properties from the displayed list. 3.
- Page 27 the Paper Tray Configuration. 2. Click Apply, and then click OK. 3. Close the Printers and Faxes dialog box. Windows 2000 1. Click Start® Settings® Printers. 2. Right-click the printer that uses the PS driver, and then select Properties from the displayed list. 3.
- Page 28 CAUTION: When carrying the 550-sheet feeder, do not grasp the areas shown in the following illustration: 5. Gently lower the 550-sheet feeder onto the 1100-sheet feeder. 6. Tighten the two screws provided with the feeder using a coin or similar object. 7.
- Page 29 If the feeder is not listed, turn off the printer, unplug the power cable, and reinstall the 550-sheet feeder and the 1100-sheet feeder. When Using the Dell™ Printer Configuration Web Tool a. Launch Dell Printer Configuration Web Tool. 1) Open the web browser.
- Page 30 e. Press button until the paper type for the installed tray is highlighted, and then press (Set) button. f. Confirm that the selected paper type is marked with a bullet, and then press Menu button. NOTE: If you installed the 550-sheet feeder and the 1100-sheet feeder after installing the printer driver, update your driver by following the instructions for each operating system.
- Page 31 When you use XPS driver, click the Option tab, and then remove the check mark from Enable Bi-Directional Communication check box. Select any of the available trays from the Paper Tray Configuration. 2. Click Apply, and then click OK. 3. Close the displayed active dialog box. When Using PS Driver 1.
-
Page 32: Installing An Output Expander
If you cannot acquire the printer information using the Get Information from Printer automatically, try the following procedure: 1. Click the Device Settings tab, and then select any of the available trays from the Paper Tray Configuration. 2. Click Apply, and then click OK. 3. - Page 33 3. Place the output expander on the left side of the printer. CAUTION: Always hold the positions shown below when lifting the output expander. 4. Open the tray 1 slightly.
- Page 34 5. Open the front cover. 6. Grasp the tab of the upper panel to slightly pull it outwards, and then pull the panel forward to remove it from the printer. Repeat the procedure for the lower panel. 7. Close the front cover of the printer.
- Page 35 8. Insert the tray into the printer, and push until it stops. 9. Press the claw to unlatch the center output tray and lift the tray to remove it from the printer. 10. Place the H transport unit on the printer.
- Page 36 11. Attach the bracket as shown in the illustration below. 12. First, tighten the screw on the right side loosely for later adjustment. Then, tighten the other screw on the left side, and then tighten the right screw firmly. 13. Attach the plastic fastener to the printer to secure the cables. 14.
- Page 37 CAUTION: Always hold the marked positions when lifting the output expander. CAUTION: Check the space between the printer and output expander to confirm that the expander is connected properly. If the output expander does not fit in the printer, detach and install it again. 15.
- Page 38 16. Attach the parts as shown in the illustration below. 17. Remove the connector cover from the printer.
- Page 39 18. Insert the connector in the socket, and then attach the plastic fastener to the printer to secure the cables. 19. Attach the connector cover 2. NOTICE: Always keep the power cable away from cover closures. 20. Insert the connector in the socket, and then attach the plastic fastener to the printer to secure the cables.
- Page 40 21. Attach the connector cover 1. First, attach the left side of the connector cover 1 to the printer. Then close cover 1 as shown in the illustration. 22. Connect the power cable of the output expander to the printer as shown in the illustration. 23.
- Page 41 24. Remove the packing material from the stapler cartridge. NOTE: Ensure that the metal part is lowered as shown in the illustration below. 25. Insert the stapler cartridge in the output expander. 26. Close the front door of the output expander. 27.
- Page 42 If the output expander is not listed, turn off the printer, unplug the power cable, and reinstall the output expander. When Using the Dell™ Printer Configuration Web Tool a. Launch Dell Printer Configuration Web Tool. 1) Open the web browser.
- Page 43 from Printer. 4. Click Apply, and then click OK. 5. Close the Devices and Printers dialog box. ® 1. Click Start® Control Panel® Hardware and Sound® Windows Vista /Vista x64 Printers. 2. Right-click the printer icon and select Properties. 3. Click the Options tab, and then select Get Information from Printer.
- Page 44 4. Click Apply, and then click OK. 5. Click the Device Settings tab, and then confirm Output Expander is available under Installable Options. 6. Close the Printers dialog box. If you cannot acquire the printer information using the Get Information from Printer automatically, try the following procedure: 1.
-
Page 45: Installing A Memory Module
select Show Info. 3. Select Installable Options, and select the options that have been installed on the printer, and then click Apply Changes. Mac OS 9 1. Select a desktop printer related to the model. 2. Click Printing on the System menu bar, and select Change Setup. 3. - Page 46 5. Check that the tabs are locked. 6. Install the control board cover. 7. Close the control board cover and rotate the screw clockwise. 8. Turn on the printer. 9. Print the printer settings page to verify that the memory is installed correctly by following the instructions below. "Printing Printer Settings Page."...
-
Page 47: Updating Your Driver To Detect Memory Module
If the memory capacity has not increased, turn off the printer, unplug the power cable, and reinstall the memory module. When Using the Dell Printer Configuration Web Tool a. Launch Dell Printer Configuration Web Tool. 1) Open the web browser. - Page 48 When you use XPS driver, click the Option tab, and then ensure that Enable Bi-Directional Communication check box is checked. If not, check the check box. 4. Click Apply, and then click OK. 5. Close the Printers dialog box. Windows Server 2008/Server 1.
- Page 49 5. Click the Device Settings tab, and then confirm the memory capacity on the Installable Options. 6. Close the Printers dialog box. If you cannot acquire the printer information using the Get Information from Printer automatically, try the following procedure: 1.
-
Page 50: Installing A Hard Disk
3. Select Installable Options, and select the options that have been installed on the printer, and then click Apply Changes. 4. Click Apply, and then click OK. Mac OS 9 1. Select a desktop printer related to the model. 2. Click Printing on the System menu bar, and select Change Setup. 3. - Page 51 5. Attach the left side spacer to the control board. 6. Connect the hard disk cables to the connectors of the control board. 7. Replace the control board cover.
- Page 52 Verify if Hard Disk is listed in the printer settings under Printer Options. If it is not listed, turn off the printer, unplug the power cable, and reinstall the hard disk. When Using the Dell Printer Configuration Web Tool a. Launch Dell Printer Configuration Web Tool.
- Page 53 c. Click the Printer Settings Report tab. d. Select Reports. e. Press the Start button in the Printer Settings. The printer settings report is printed. f. Verify if Hard Disk is listed in the printer settings under Printer Options. If it is not listed, turn off the printer, unplug the power cable, and reinstall the hard disk. NOTE: If you installed the hard disk after installing the PCL or PS printer driver, update your driver by following the instructions for each operating system.
- Page 54 If the printer information is not updated automatically after clicking Get Information from Printer, follow these steps: 1. Click the Options tab, and then select Hard Disk on the Items list box. 2. Select Available for the hard disk setting. 3.
- Page 55 Printer automatically, try the following procedure: 1. Click the Device Settings tab, and then select storage device from Storage Device under Installable Options. 2. Click OK. 3. Close the Printers and Faxes dialog box. Windows 2000 1. Click Start® Settings® Printers. 2.
- Page 56 Before Installing a Wireless Adapter To install the Dell Wireless Adapter, perform one of the following methods. 1. Video instructions (Recommended) a. Insert the Drivers and Utilities CD in your computer. The Easy Setup Navigator file launches automatically.
- Page 57 2. Remove the cap from the wireless adapter socket. 3. Align the connector and the three protrusions of the wireless adapter with the four holes and insert the adapter. NOTE: Ensure that the adapter is fully inserted and secured. 4. Reconnect the power cable and turn on the printer. NOTE: If a message displays telling you to make initial setup on the operator panel, always do as instructed.
-
Page 58: Determining The Wireless Network Settings
This section describes how to configure a wireless adapter through Easy Setup Navigator. You can select a method to configure a wireless adapter from the following: Wizard Setup through connection Ethernet connection Operator Panel or Dell Printer Configuration Web Tool Advanced Setup through WPS-PIN* WPS-PBC* connection ®... -
Page 59: Using Wizard Setup To Configure A Wireless Adapter
WPS-PBC (Wi-Fi Protected Setup-Push Button Configuration) is a method to authenticate and register devices required for wireless configuration, by pressing the button provided on the access point via wireless routers, and then performing WPS-PBC setting on the operator panel. This setting is available only when the access point supports WPS. NOTE: The optional wireless adapter must be installed on the printer. -
Page 60: Using Advanced Setup To Configure A Wireless Adapter
Using Advanced Setup to Configure a Wireless Adapter Select Advanced Setup to configure your wireless adapter with one of the following: Ethernet Operator Panel Dell Printer Configuration Web Tool WPS-PIN WPS-PBC Ethernet 1. Insert the Drivers and Utilities CD provided with the printer in your computer. The Easy Setup Navigator file launches automatically. - Page 61 The Wireless Configuration window opens. 3. Select Advanced, and then click Next. 4. Select Operator Panel or Dell Printer Configuration Web Tool, and then click Next. The instruction video starts. 5. Follow on-screen instructions to finish configuring the wireless adapter.
- Page 62 6. Press button until PIN Code is highlighted, and then press (Set) button. 7. Write down the 8-digit PIN code displayed on the first line of the panel display or press button until Print PIN Code is highlighted, and then press (Set) button.
- Page 63 3. Select Advanced, and then click Next. 4. Select USB, and then click Next. The instruction video starts. 5. Follow on-screen instructions until the Wireless Setting Tool button appears. 6. Click Wireless Setting Tool to start wireless setup. The Wireless Setting Tool starts. 7.
-
Page 64: Select Network And Internet
NOTE: If your computer provides a wireless adapter tool, change the wireless settings using this tool. Or you can change the wireless settings using the tool provided with the operating system. See the instructions below. For Windows XP and Windows Server 2003: a. - Page 65 Scroll down and select IPv4. f. Scroll down and select IP Address. (Default IP address range: 169.254.xxx.yyy) IP Address 169.254.000.041* 3. Check that the IP address on your computer is assigned by DHCP. 4. Open Dell Printer Configuration Web Tool using the WEB browser.
- Page 66 5. Create wireless setting of the printer on Dell Printer Configuration Web Tool. 6. Reboot the printer. 7. Restore the wireless settings on your computer. NOTE: If your computer provides a wireless adapter tool, change the wireless settings using this tool. Or you can change the wireless settings using the tool provided with the operating system.
-
Page 67: Click Connect
c. Select Network and Sharing Center. d. Select Connect to a network. e. Select the setting you send to the printer from the network items listed in Connect to a network. f. Select Connect Anyway in the warning dialog box indicating you are entering an unsecured area. g. - Page 68 Network name (SSID): dell_device Network Authentication: Open Data encryption: Disabled Ad hoc network: checked i. Click the Move up button to move the newly added SSID to the top of the list. j. Click OK to close the Property dialog box. NOTE: When your operating system is earlier than Windows 2000, select your settings according to the instructions in the manual of the wireless settings tool provided by your wireless device manufacturer.
- Page 69 IP Address 172.031.000.041* 4. Open Dell Printer Configuration Web Tool using the WEB browser. 5. Change the wireless setting of the printer on Dell Printer Configuration Web Tool. 6. Reboot the printer. 7. Restore the wireless settings on your computer.
- Page 70 NOTE: If your computer provides a wireless adapter tool, change the wireless settings using this tool. Or you can change the wireless settings using the tool provided with the operating system. See the instructions below. For Windows XP and Windows Server 2003: a.
-
Page 71: Table Of Contents
b. Select Network and Internet. c. Select Network and Sharing Center. d. Select Connect to a network. e. Select the setting you send to the printer from the network items listed in the available network list, and click Connect. f. Enter the Security key and click OK, if necessary. Back to Contents Page... -
Page 72: Back To Contents Page
Print and Check the Printer Settings Page Assign an IP Address Verify the IP Settings Using the Reset Button Your Dell™ 5130cdn Color Laser Printer interconnection cable must meet the following requirements: Connection type Connection specifications Ethernet 10 Base-T/100 Base-TX/1000 Base-T Wireless IEEE802.11b/802.11g/802.11n... -
Page 73: Usb Cable
USB Cable ® ® ® Microsoft Windows 2000, Windows XP, Windows XP 64-bit Edition, Windows Server 2003, Windows Server 2003 x64 Edition, Windows Server 2008, Windows Server 2008 64-bit Edition, Windows Server 2008 R2 64-bit Edition, Windows ® ® Vista , Windows Vista 64-bit Edition, Windows 7, Windows 7 64-bit Edition and Mac OS X or later operating systems ®... -
Page 74: Network Connection
When Using the Dell™ Printer Configuration Web Tool 1. Enter the IP address of your printer into the web browser. If you do not know how to launch the Dell Printer Configuration Web Tool, see "Dell Printer Configuration Web Tool."... -
Page 75: Assign An Ip Address
When you assign an IP address manually in IPv6 Mode, use the Dell Printer Configuration Web Tool. To open the Dell Printer Configuration Web Tool, use the link local address. (To check a link local address, see "Print and Check the Printer Settings Page.") - Page 76 When Using the Dell Printer Configuration Web Tool (for IPv4 Mode) 1. Enter the IP address of your printer into the web browser. If you do not know how to launch the Dell Printer Configuration Web Tool, see "Dell Printer Configuration Web Tool."...
-
Page 77: Using The Reset Button
If the RESET button is tripped and the printer is turned off, the electric leakage detector functions correctly. Press the RESET button to turn the printer back on. If the RESET button is not tripped, contact Dell. Do not continue to use the printer if the electric leakage detector is not functioning. -
Page 78: Turning On The Printer
Dell™ Printer Configuration Web Tool if needed. For more information on operator panel, see "Understanding the Printer Menus." For more information on Dell Printer Configuration Web Tool, see "Dell Printer Configuration Web Tool." 1. Ensure Panel Language is highlighted, and then press (Set) button. - Page 79 Deutsch Español Dansk Nederlands Norsk Svenska 2. Set Time Zone appears. Specify the time zone, and then press (Set) button. Select a time zone from the drop-down list: UTC - 12:00 UTC - UNITED STATES 11:00 UTC - UNITED STATES 10:00 UTC - UNITED STATES...
- Page 80 +05:00 RUSSIAN FEDERATION +05:30 RUSSIAN FEDERATION +05:45 RUSSIAN FEDERATION +06:00 RUSSIAN FEDERATION +06:30 RUSSIAN FEDERATION +07:00 RUSSIAN FEDERATION, PHILIPPINES, SINGAPORE, AUSTRALIA +08:00 RUSSIAN FEDERATION, JAPAN, SOUTH KOREA +09:00 RUSSIAN FEDERATION, AUSTRALIA +09:30 RUSSIAN FEDERATION, AUSTRALIA +10:00 RUSSIAN FEDERATION +11:00 RUSSIAN FEDERATION, NEW ZEALAND +12:00 +13:00 3.
-
Page 81: Direct Connection Setup
Dell™ printer installation software. To prevent this situation, disable the Windows 7, Windows Vista, Windows Server 2008 R2, Windows Server 2008, or Windows XP firewall before you install the Dell printer software. To disable or enable your Windows 7, Windows Vista, Windows Server 2008 R2, Windows Server 2008, or Windows XP firewall, perform the following steps. -
Page 82: Network Connection Setup
If you want to set a printer as the default, select the Set this printer as default check box. d. If you want to restrict color printing, select the appropriate Dell ColorTrack option. Enter the password when Color-Password Enabled is selected for Dell... -
Page 83: Network Printer Setup On A Remote Network
If you want to install the PostScript driver, select the PostScript Driver check box. 6. Select the software and documentation you want to install, and then click Next. You can specify folders in which to install the Dell software and documentation. To change the folders, click Browse. - Page 84 6. Restart the computer. For Windows Server 2008 R2 and Windows 7: 1. Click Start® All Programs (for Windows 7 only)® Accessories (for Windows 7 only)® Run. 2. Type gpedit.msc, and then click OK. 3. Click Computer Configuration® Administrative Templates® Printers. 4.
- Page 85 Disable User Account Control NOTICE: Disabling the User Account Control might leave the system vulnerable to virus attacks. NOTE: This step is required for Windows Vista, Windows Vista 64-bit Edition, Windows Server 2008, Windows Server 2008 64-bit Edition, Windows Server 2008 R2 64-bit Edition, Windows 7, and Windows 7 64-bit Edition.
-
Page 86: Installing The Printer Driver
If you want to restrict color printing, select the appropriate Dell ColorTrack option. Enter the password when Color-Password Enabled is selected for Dell ColorTrack. 6. Select the software and documentation you want to install, and then click Next. You can specify folders in which to install the Dell software and documentation. To change the folders, click Input. -
Page 87: Point And Print
NOTE: The following are options you need to buy separately for shared printing. Ethernet cable ® ® Windows XP, Windows XP 64-bit Edition, Windows Server 2003, Windows Server 2003 x64 Edition, Windows 2000 1. Click start® Printers and Faxes (Printers for Windows 2000). 2. - Page 88 1. On the Windows desktop of the client computer, double-click My Network Places. 2. Locate the host name of the server computer, and then double-click the host name. 3. Right-click the shared printer name, and then click Connect. Wait for the driver information to copy from the server computer to the client computer, and for a new printer object to be added to the Printers and Faxes (Printers for Windows 2000) folder.
- Page 89 When a test page prints successfully, installation is complete. Windows 7, Windows 7 64-bit Edition, Windows Server 2008 R2 64-bit Edition 1. On the Windows desktop of the client computer, click Start® your user name® Network (Start® Network for Windows Server 2008 R2). 2.
- Page 90 c. Click File® Properties. d. From the General tab, click Print Test Page. When a test page prints successfully, installation is complete. Windows Vista, Windows Vista 64-bit Edition 1. Click start® Control Panel® Hardware and Sound® Printers. 2. Click Add a Printer to launch the Add Printer wizard. 3.
-
Page 91: Setup Security
Reset Defaults is highlighted, and then press (Set) button. 5. Press until Start is highlighted, and then press (Set) button. 6. Turn off the printer to apply the settings. When Using the Dell™ Printer Configuration Web Tool 1. Launch Dell Printer Configuration Web Tool. - Page 92 Open the web browser. b. Enter the IP address of your printer in the web browser. "Dell Printer Configuration Web Tool." 2. Select Printer Settings. 3. Click the Printer Maintenance tab. 4. Select Reset Defaults from the list at the left side of the page.
-
Page 93: Installing The Ppd File
1. Insert the Drivers and Utilities CD into your computer. 2. Launch the Drivers and Utilities CD. 3. Double-click the Mac OS X folder, and then double-click the Dell 5130cdn Installer icon. 4. Type the administrator's name and password, and then click OK. - Page 94 6. Type the IP address of the printer being used in the Address area and select Line Printer Daemon - LPD from Protocol. 7. Select Select a driver to use... from Print Using and select Dell 5130cdn Color Laser from the list. NOTE: When printing is set up using IP printing, the queue name is displayed as blank.
- Page 95 2. Type the IP address for the printer being used to Address in the Protocol menu. 3. Select Dell from Print Using, and confirm Dell 5130cdn Color Laser is selected for the Model Name. NOTE: When printing is set up using IP printing, the queue name is displayed as blank. You do not need to specify it.
-
Page 96: Configure Settings
1. Select IP Printing from the menu, and type the IP address for the printer being used in Printer Address. 2. Select Printer Type from the menu, and select LPD/LPR. 3. Select Dell from Printer Model, and confirm Dell 5130cdn Color Laser is selected for the Model Name. If it is not selected, select it. - Page 97 Changes. NOTE: You must configure the print queue that was automatically created on a non-English version of Mac OS X 10.3 when a USB cable is connected to your computer. Back to Contents Page...
-
Page 98: Dell Printer Configuration Web Tool
This web tool is not available unless the printer is connected to a network using a network cable or the wireless adapter. One of the features of the Dell™ Printer Configuration Web Tool is E-Mail Alert Setup, which sends an e-mail to you or the key operator when the printer needs supplies or intervention. -
Page 99: Using The Dell Printer Configuration Web Tool
"Assign an IP Address." Using the Dell Printer Configuration Web Tool Use the Dell Printer Configuration Web Tool for: Printer Status Use the Printer Status menu to get immediate feedback on the printer supply status. When a toner cartridge is running low, click the order supplies link on the first screen to order an additional toner cartridge. -
Page 100: Set Password
Set Password Use the Set Password menu to lock the Dell Printer Configuration Web Tool with a password so that other users do not inadvertently change the printer settings you selected. NOTE: You must log in as an administrator to use this feature. - Page 101 Exceptions. After setting the language and proxy, type <http://nnn.nnn.nnn.nnn/> (the printer's IP address) in the URL entry field of the browser to activate the Dell Printer Configuration Web Tool. For Firefox 2.0 or Later Setting Up the Display Language 1.
-
Page 102: Setting Up From Operator Panel
Setting Up From Operator Panel You can launch the Dell Printer Configuration Web Tool only when EWS is set to Enable (the factory default) on the operator panel. Confirm the operator panel setting if you cannot launch the Dell Printer Configuration Web Tool. For more information, see "Understanding the Printer... -
Page 103: Left Frame
Dell 5130cdn Displays the printer's product name. Color Laser 2 IP Address Displays the printer's IP address. Displays the printer's location. The location can be changed in Basic Information on the Print 3 Location Server Settings page. Displays the name of the printer's administrator. The name can be changed in the Basic 4 Contact Person Information on the Print Server Settings page. -
Page 104: Right Frame
Changing the Settings of the Menu Items Some menus allow you to change the printer settings through the Dell Printer Configuration Web Tool. When you are accessing these menus, the authentication dialog appears on the screen. Type a user name and password for the printer's administrator by following the prompts displayed in the dialog box. -
Page 105: Details Of The Menu Items
"Printer Settings" "Adjust Fuser" "Auto Registration Adjustment" "Color Registration Adjustments" "Adjust Altitude" "Printer Maintenance" "Reset Defaults" "Storage"* "Non-Dell Toner" "Initialize PrintMeter" "Clock Settings" "Web Link Customization" "Print Server Setup Page" "Print Server Reports" "NetWare Setup Page" "E-Mail Alert Setup Page"... -
Page 106: Printer Status
Indicates that the status of the drum cartridge, staple cartridge and/or waste toner box is OK for use. Indicates that the status of the drum cartridge, staple cartridge and/or waste toner box Replace needs to be replaced soon. The text Call or Order is linked to the Dell Printer Supplies Soon website. Consumables... -
Page 107: Printer Information
To verify the printer details such as the hardware configuration and software version. This page can also be displayed by clicking Printer Information in the Left Frame. Values: Dell Service Tag Number Displays Dell's service tag number. Asset Tag Number Displays the printer's asset tag number. Printer Serial Number Displays the printer's serial number. -
Page 108: Job List
Job List Purpose: To confirm the print jobs that are being processed. Click the Refresh button to update the screen. Values: Displays the job ID. Job Name Displays the file name of the job being printed. Owner Displays the job owner's name. Host Name Displays the name of the host computer. - Page 109 Power Saver Displays the time for transition to the power saver mode (Sleep). Time-Sleep Power Saver Time-Deep Displays the time for transition to the power saver mode (Deep Sleep). Sleep Control Panel Displays whether to emit the tone when the operator panel input is correct. Off Tone indicates that the tone is disabled.
- Page 110 Parallel Displays the ECP communication mode of the parallel interface. Settings Adobe™ Displays PostScript communication protocol for each interface. Protocol Network Adobe Protocol Displays PostScript communication protocol for each interface. Settings USB Port Displays whether the USB interface is enabled. USB Settings Adobe Protocol Displays PostScript communication protocol for each interface.
- Page 111 Expiration Displays the time to delete the files stored as Secure Print in the RAM disk or the hard disk drive. Time* Displays the period to repeat the setting. Recurrence* Weekly Displays the day of the week to repeat the setting. Settings* Monthly Displays the day of the month to repeat the setting.
- Page 112 Supplies at: in the Left Frame. Web Link Displays the regular URL (http://accessories.us.dell.com/sna) that can be Regular Customization linked to Order Supplies at:. Displays the premier URL (http://premier.dell.com) that can be linked to Order Premier Supplies at:. ColorTrack Displays whether to enable the ColorTrack. Mode...
- Page 113 Tray 5 Paper Displays the paper type setting of the fifth tray from the top. Type* Tray 5 Paper Displays the paper size setting of the fifth tray from the top. Size* Tray 5 Custom Displays the length of custom size paper loaded in the fifth tray from the top. Size - Y* Tray 5 Custom Displays the width of custom size paper loaded in the fifth tray from the top.
-
Page 114: Printer Settings
This item is available only when the RAM disk is on or the optional hard disk is installed. Printer Settings The Printer Settings tab includes System Settings, Parallel Settings, Network Settings, USB Settings, PCL Settings, PS Settings, and Secure Settings pages. System Settings Purpose: To configure the basic printer settings. - Page 115 Duplex Mode Low Toner Alert Specifies whether to show the message when the toner is short. Specifies whether to offset the position of the output paper. Job Offset* Banner Sheet Specifies whether to put the banner sheet per offset print. Offset* Job Offset of Specifies whether to staple the offset print.
- Page 116 Paper Tray Specifies the input tray. Paper Size Specifies the paper size. Custom Size Specifies the length of custom size paper. Custom Size Specifies the width of custom size paper. Orientation Specifies how text and graphics are oriented on the page. Sets duplexing as the default for all print jobs.
-
Page 117: Printer Maintenance
NOTE: This menu sets a password to lock the operator panel. When changing the password for the Dell Printer Configuration Web Tool, click Set Password on the Left Frame and set the password. Data Encryption Purpose: To set whether to encrypt the data. -
Page 118: Adjust Fuser
PrintMeter, Clock Settings, and Web Link Customization pages. Paper Density Purpose: To specify the paper density. Values: Plain Sets the density of plain paper to Light or Normal. Label Sets the density of labels to Light or Normal. Adjust BTR Purpose: To specify the optimum voltage settings for printing for the transfer roller (BTR). - Page 119 Values: Plain Sets the temperature settings for the fuser for plain paper within the range of -6 to 6. (60 to 90 gsm) Plain Thick Sets the temperature settings for the fuser for thick plain paper within the range of -6 to 6. (80/90 to 105 gsm) Transparency Sets the temperature settings for the fuser for transparencies within the range of -6 to 6.
- Page 120 Use of a new Dell brand toner cartridge is recommended for your printer. The Dell warranty does not cover any problems caused by the use of any accessory, part, or component that is not supplied by Dell.
-
Page 121: Print Server Settings
Regular Supplies at:. Premier Displays the premier URL (http://premier.dell.com) that can be linked to Order Supplies at:. Print Server Settings Use the Print Server Settings menu to set the type of printer interface and necessary conditions for communications. The following tabbed pages are displayed in the top of the Right Frame. - Page 122 IPv4* Subnet Mask Displays the subnet mask. Gateway Displays the gateway address. Address Enable Stateless Displays whether to enable the stateless address. Address Use Manual Displays whether to set the IP address manually. TCP/IP Address Settings Manual Displays the IP address. Address* Stateless Displays the stateless addresses.
- Page 123 Maximum Displays the maximum number of connections received simultaneously by the Sessions client. Port Status Displays the WSD port status. Port Number Displays the WSD port number. Receive Time- Displays the receive time-out period. Notification Displays the notification time-out period. Time-Out Maximum Displays the maximum number of TTLs.
- Page 124 Address printer. IP Filter Displays the list of subnet mask that are permitted or denied access to the Address Mask (IPv4)* printer. Active Mode Displays whether to be permitted or denied access to the printer. This item is available only when connecting the printer with a wired network. This item is available only when connecting the printer with a wireless network.
- Page 125 Displays the authentication method for outgoing e-mail. Authentication E-Mail Server Settings POP3 Server Displays the POP3 (Post Office Protocol 3) server address. Address POP3 Port Number Displays the POP3 port number. Reply Address Designates the reply e-mail address sent with each E-mail Alert. SMTP Server Displays the status of the SMTP server connection.
- Page 126 Purpose: To specify whether to enable or disable printing ports and management protocol features. Values: Detects Ethernet transmission rate and the duplex settings Auto automatically. 10Base-T Selects 10Base-T Half-Duplex as the default value. Half-Duplex 10Base-T Selects 10Base-T Full-Duplex as the default value. Full-Duplex Ethernet Settings...
- Page 127 Mask Manual Gateway Sets the gateway address. TCP/IP Address Settings Enable Stateless Select the check box to enable the slateless address. Address Use Manual Select the check box to set the IP address manually. Address IPv6 Sets the IP address. To specify an IPv6 address, enter the address Manual Address followed by a slash (/) and then "64".
- Page 128 Receive Sets the receive time-out period from 1 to 65,535 seconds. Time-Out Notification Sets the notification time-out period from 1 to 60 seconds. Time-Out Maximum Number of Sets the maximum number of TTL from 1 to 10. Maximum Number of Sets the maximum number of notifications from 10 to 20.
- Page 129 NOTE: The settings in the NetWare page will be valid only when NetWare or the printer is rebooted. Click the Apply New settings button to apply new settings. E-Mail Alert Purpose: To configure detailed settings for E-Mail Alert. This page can also be displayed by clicking E-Mail Alert in the Left Frame. Values: Primary SMTP Sets the primary SMTP gateway.
- Page 130 Bonjour (mDNS) Purpose: To configure the detailed settings for Bonjour. Values: Host Specifies the host name up to 63 alphanumeric characters and "-" (dash). The original setting will remain Name valid if no input is made. Printer Specifies the printer name up to 63 alphanumeric characters and symbol sets. The original setting will Name remain valid if no input is made.
- Page 131 Authenticate Select the check box to notify Authenticate Error Trap. Error Trap The default value of each items can be changed by using Dell Printer Configuration Web Tool. SNMP v3 Purpose: To edit the detailed settings of SNMP v3 protocol.
- Page 132 Network Specifies the network type from either Ad-Hoc or Infrastructure. Type Wireless Displays the MAC address of the printer's wireless network adapter. Address Settings Link Displays the channel number of the printer's wireless connection. Channel Link Displays the quality of the printer's wireless network connection. Quality Select the security method from the list.
- Page 133 Set Password Purpose: To set or change the password that is required to access the printer's setup parameters from the Dell Printer Configuration Web Tool. Set the password of the operator panel from Panel Lock in the Printer Settings. This page can also be displayed by clicking Set Password in the Left Frame.
- Page 134 To specify the server authentication type, the server response time-out, or the search time-out. Values: Authentication Select the authentication system from the list. System Settings Server Response Specifies the amount of time the printer should wait for response from the server. Sets the Time-Out time period from 1 up to 75 seconds.
- Page 135 Text String Added to User Name Enter the added text string. SSL/TLS Purpose: To specify the settings for the SSL encryption communication to the printer, and set/delete the certificate used for IPsec, LDAPS, or Wireless LAN. Values: HTTP-SSL/TLS Select the check box to enable the HTTP-SSL/TLS Communication. Communication* HTTP-SSL/TLS Specifies the port number, which is not identical with that of HTTP for SSL/TLS.
- Page 136 Displays the device to certificate selected at Certificate Management page Category or SSL/TLS page. Issued To Displays the device to certificate. Issuer Displays the issuer to certificate. Serial Number Displays the serial number of the device. Size of Public Display Size of Public Key. Valid From Displays the time the certificate is valid.
-
Page 137: Copy Printer Settings
Remote peers IPv6 Specifies the IP address to connect to. address Non IPsec communication Selects whether or not to communicate with a device which does not support IPsec. policy This item is effective only when the optional hard disk is installed and is set to On for encryption. NOTE: If IPsec is enabled with incorrect settings, you must disable it using the Reset IPsec menu on the operator panel. -
Page 138: Print Volume
And you need to click the Copy the settings to the Host in the above list and reboot the machine button of the Dell Printer Configuration Web Tool in the destination printer to verify if the settings were actually copied or not. -
Page 139: Tray Settings
To delete a user, click Delete to open the Delete User page. Clicking the Back button returns the screen to the status prior to deleting the user. To confirm or change the registered user, click Confirm/Change to open the Print User Settings page. - Page 140 Size* Tray 3 Custom Size Sets the length of custom size paper loaded in the third tray from the top. - Y* Tray 3 Custom Size Sets the width of custom size paper loaded in third tray from the top. - X* Tray 4 Paper Sets the type of paper loaded in the fourth tray from the top.
-
Page 141: Print Media Guidelines
Back to Contents Page Print Media Guidelines Paper Transparencies Envelopes Labels Storing Print Media Identifying Print Media and Specifications Print media is paper, labels, envelopes, and coated paper among others. Your printer provides high-quality printing on a variety of print media. Selecting the appropriate print media for your printer helps avoid printing troubles. This section describes selecting print media, caring for print media, and loading the print media in the tray 1 or optional 550-sheet feeder. -
Page 142: Grain Direction
The amount of moisture in the paper affects both print quality and the ability of the printer to feed the paper properly. Leave the paper in its original packaging until you are ready to use it. This limits the exposure of the paper to moisture changes that can degrade its performance. -
Page 143: Selecting Preprinted Media And Letterhead
the paper package. Do not use paper that you have cut or trimmed yourself. Do not mix print media sizes, weights, or types in the same source. This may result in a paper jam. Do not remove the tray while a job is printing. Ensure that the paper is properly loaded in the tray. -
Page 144: Selecting Transparencies
Letterhead enters the printer first Selecting Pre-Punched Paper Pre-punched paper brands can differ in the number and placement of holes and in manufacturing techniques. However, it may not be possible to print on the paper to depending on the placement of holes on the paper. To select and use pre-punched paper: Test paper from several manufacturers before ordering and using large quantities of pre-punched paper. - Page 145 Depending on the choice of envelopes, it is possible to expect variable levels of light wrinkling. It is recommended that you try a sample first before buying large quantities of any print media. See "Loading Print Media" for instructions on loading an envelope.
-
Page 146: Storing Print Media
Do not print within 1 mm (0.04 inches) of the die cut. Use full label sheets. Partial sheets may cause labels to peel off during printing, resulting in a jam. Partial sheets also contaminate your printer and your cartridge with adhesive, and could void your printer and cartridge warranties. -
Page 147: Supported Paper Types
(8.5 x 14 in.) Executive (7.25 x 10.5 in.) Envelope #10 (4.125 x 9.5 in.) Monarch (3.875 x 7.5 in.) (4.25 x 8.75 in.) (9 x 6.5 in.) Custom : In this mode, each page is output separately to the stacker tray. : In this mode, the document is sorted into sets or jobs and output to the stacker tray. - Page 148 Coated Thick 163-216 Inkjet printer paper cannot be used. Transparency Inkjet printer paper cannot be used. Label Normal Inkjet printer paper cannot be used. Label Thick Inkjet printer paper cannot be used. Envelopes Recycled Back to Contents Page...
-
Page 149: Loading Print Media
Back to Contents Page Loading Print Media Capacity Print Media Dimensions Loading Print Media in Standard and Optional Trays Loading Print Media in the MPF Linking Trays Using the Duplex Function Using the Center Output Tray Using the Stacker Tray Loading print media properly helps prevent jams and ensures trouble-free printing. - Page 150 NOTE: To avoid paper jams, do not remove the tray while a printing is in progress. NOTE: Use only laser print media. Do not use ink jet paper in this printer. All trays are loaded the same way: 1. Remove the paper tray from the printer. 2.
- Page 151 5. Load paper into the tray with the recommended print side facing up. NOTE: Do not exceed the maximum fill line in the tray. Overfilling the tray may cause paper jams. 6. After confirming that the guides are securely adjusted, replace the paper tray into the printer. 7.
- Page 152 NOTE: To print plain paper using the optional output expander, check if the lever is pulled down as shown in the illustration. 3. Load the envelope into the tray. When Loading Envelope#10, Monarch, or DL When Loading C5 NOTICE: Never use envelopes with windows, coated linings, or self-stick adhesives. These lead to paper jams and can cause damage to the printer.
-
Page 153: Loading Letterhead
NOTE: Ensure that you load an envelope with the flap completely closed. NOTE: If you do not load envelopes in the MPF right after they have been removed from the packaging, they may bulge. To avoid jams, flatten them as shown below when loading them in the MPF. NOTE: If envelopes are still not fed correctly, add some bending to the lead edge of the envelopes as shown in the following illustration. -
Page 154: Loading Print Media In The Mpf
Loading Print Media in the MPF 1. Gently pull open the MPF cover. 2. Extend the extension tray. 3. Slide the width guides to the edge of the tray. The width guides should be fully extended. 4. Insert all media facing down and top edge first into the MPF. NOTE: Do not force the print media into the MPF. -
Page 155: Loading An Envelope In The Mpf
5. Slide both width guides until they rest lightly against the edge of the print media stack. NOTE: Do not force the print media into the MPF. 6. Ensure the type setting for the MPF is set to the correct value for the print media you have loaded. 7. - Page 156 When Loading Envelope#10, Monarch, or DL When Loading C5 NOTICE: Never use envelopes with windows, coated linings, or self-stick adhesives. These lead to paper jams and can cause damage to the printer. NOTE: Ensure that you load an envelope with the flap completely closed. NOTE: If you do not load envelopes in the MPF right after they have been removed from the packaging, they may bulge.
-
Page 157: Using The Mpf
following illustration. The amount of the bending shall be 5mm or less. Using the MPF Load only one size and type of print media during a single print job. To achieve the best possible print quality, use only high-quality print media that is designed for use in laser printers. -
Page 158: Using Booklet Print
Using Booklet Print To use booklet print, you must select either Flip on Short Edge or Flip on Long Edge from the Duplex menu in the printer properties dialog box and then select Booklet Creation in the Booklet/Poster/Mixed Document dialog box displayed by clicking the Booklet/Poster/Mixed Document button. - Page 159 The stacker tray holds up to: Discharging Stapled Paper size mode stapled In bulk 1,000- 50-set (SFP) sheet or 750- A4: P: 64gsm sheet A4: C2: 70gsm Letter: Business 4200: 20 lb Letter: Color Xpressions+: 24 lb (MPF) A4: Premier: 80gsm A4: Premier: 4-hole punched: 80gsm A4: Business: 80gsm A4: Colotech+: 90gsm...
-
Page 160: Using The Operator Panel Buttons
Back to Contents Page Operator Panel Using the Operator Panel Buttons Printing a Panel Settings Page Using the Operator Panel Buttons The operator panel has a liquid crystal display (LCD), eight buttons, and an indicator that blinks when the printer is ready to print, and when an error occurs. -
Page 161: Printing A Panel Settings Page
Panel Settings is highlighted, and then press (Set) button. The panel settings page is printed. When Using the Dell™ Printer Configuration Web Tool 1. Launch Dell Printer Configuration Web Tool. a. Open the web browser. b. Enter the IP address of your printer in the web browser. -
Page 162: Tips For Successful Printing
Back to Contents Page Printing Tips for Successful Printing Sending a Job to Print Canceling a Print Job Printing a Report Page Using the Stapling Function Using the Offset Function Using the Stored Print Function This chapter covers tips for printing, how to print certain lists of information from your printer, and how to cancel a job. Tips for Successful Printing Tips on Storing Print Media Store your print media properly. -
Page 163: Canceling A Print Job
5. Click OK or Print to send the job to the selected printer. Canceling a Print Job There are several methods for canceling a print job. Canceling From the Operator Panel To cancel a job after it has started printing: Press Cancel. -
Page 164: Printing A Printer Settings Page
3. Printer Settings is displayed, and then press (Set) button. The printer settings page is printed. When Using the Dell™ Printer Configuration Web Tool 1. Launch Dell Printer Configuration Web Tool. a. Open the web browser. b. Enter the IP address of your printer in the web browser. -
Page 165: Using The Stored Print Function
® Select PS Fonts List to print a listing of the fonts available to the PostScript 3™. 4. Press (Set) button. The message PCL Fonts List Printing or PS Fonts List Printing appears and remains on the operator panel until the page prints. -
Page 166: Secure Print
cleared even when the printer is turned off. NOTE: Stored Print functions are available when: Enabling the RAM disk in the operator panel menu and setting "RAM Disk" to "Available" in the printer driver Installing a hard disk in your printer and setting "Hard Disk" to "Available"... -
Page 167: Deleting Stored Jobs
and Private MailBox Print require the password you specified in the driver when you sent the job. To print the stored documents, use the procedure below. 1. Press Menu button. 2. Press button until Print Menu is highlighted, and then press (Set) button. -
Page 168: Using The Operator Panel To Change Printer Settings
If you cannot change a setting from your software program, use the operator panel or the Dell Printer Configuration Web Tool. Changing a printer setting from the operator panel or the Dell Printer Configuration Web Tool makes that setting the user default. - Page 169 Printer Settings you want to change. To change the paper type and size, choose Tray Settings from the topics list. To change the ColorTrack settings, choose Print Volume from the topics list and select the Dell ColorTrack tab. To copy your printer settings to another printer on the network, choose Copy Printer Settings from the topics list, and then type the other printer's IP address.
-
Page 170: Resetting Defaults
5. Start or Cancel message appears on the operator panel. Press (Set) button. 6. Turn off the printer, and then on again to apply the settings. When Using the Dell™ Printer Configuration Web Tool 1. Launch Dell Printer Configuration Web Tool. a. Open the web browser. - Page 171 3. Ensure Network is highlighted, and then press (Set) button. 4. Press button until Reset Wireless or Reset LAN is highlighted, and then press (Set) button. 5. Start or Cancel message appears on the operator panel. Press (Set) button. 6. Turn off the printer, and then on again to apply the settings. Back to Contents Page...
-
Page 172: Understanding The Tool Box Menus
Back to Contents Page Understanding the Tool Box Menus The Tool Box allows you to diagnose the printer settings. NOTE: A Password dialog box appears the first time you try to change settings on Tool Box when Panel Lock is set on the printer. -
Page 173: Understanding The Printer Menus
Back to Contents Page Understanding the Printer Menus Report/List Admin Menu Tray Settings Print Menu Panel Lock When your printer is configured as a network printer available to a number of users, the access to the Admin Menu menus can be limited. This prevents other users from using the operator panel to inadvertently change a printer user default that has been set by the administrator. -
Page 174: Job History
To print a detailed list of paper jams and fatal errors. Print Meter Purpose: To print the reports for the total number of pages printed. When printed using either the printer control panel or Dell Printer Configuration Web Tool, the report will be titled Print Volume Report. Color Test Page Purpose: To print a page for testing colors. - Page 175 Values: Auto* Detects the Ethernet settings automatically. 10Base Half Uses 10 base-T half-duplex. 10Base Full Uses 10 base-T full-duplex. 100Base Half Uses 100 base-TX half-duplex. 100Base Full Uses 100 base-TX full-duplex. 1000Base Full Uses 1000 base-T full-duplex. Status Purpose: To display the information on the wireless signal strength. Any change cannot be made on the operator panel to improve the status of the wireless connection.
- Page 176 Select to configure the wireless setting without the access point such as a wireless router. Manual Select to configure the wireless setting without specifying the security method Setup Security from WEP. Specify the WEP 64bit Key to use through the wireless network. Up to 10 WEP Key hexadecimal characters can be entered.
- Page 177 E-Mail Alert Disable Disables the E-mail Alerts feature. Enable* Enables an access to Dell Printer Configuration Web Tool embedded in the printer. Disable Disables an access to Dell Printer Configuration Web Tool embedded in the printer. Enable* Enables the Bonjour(mDNS).
-
Page 178: Adobe Protocol
Reject Rejects an access from the specified IP address. This item is only available for LPD or Port9100. IEEE 802.1x Purpose: To disable the IEEE 802.1x authentication. The change becomes effective after the printer is turned off and then on again. NOTE: This item is displayed only when the IEEE 802.1x authentication is enabled. -
Page 179: Usb Settings
Purpose: To specify the ECP communication mode of the parallel interface. The change becomes effective after the printer is turned off and then on again. Values: Disable ECP communication mode is disabled. Enable* ECP communication mode is enabled. Adobe Protocol Purpose: To specify PostScript communication protocol for parallel interface. -
Page 180: System Settings
Binary Used when no special processing is required for data. System Settings Use the System Settings menu to configure a variety of printer features. NOTE: Values marked by an asterisk (*) are the factory default menu settings. PowerSaver Time Purpose: To specify the time for transition to power saver mode. - Page 181 Off* Does not emit a tone when toner or some other consumable is low. Low Toner Alert Emits a tone when toner or some other consumable is low. Does not emit a tone when the operator panel display is returned to the default settings by Off* scrolling the loop menu.
-
Page 182: Banner Sheet
Automatically outputs a log of completed jobs. Print logs can also be printed using the Report/List menu. NOTE: Restart your printer when you change the settings for the RAM Disk menu. Print ID Purpose: To specify a location where the user ID is printed. Values: Off* Does not print the user ID. - Page 183 This item is displayed only when an optional 1100-sheet feeder is installed on the printer. RAM Disk Purpose: To allocate memory to the RAM disk file system for the Secure Print, Proof Print, and Mailbox Print features. The change becomes effective after the printer is turned off and then on again. Values: Enable Allocate memory to the RAM disk file system.
- Page 184 paper size settings for the current job. Values: No tray size substitute accepted. Substitutes paper of next largest size. When there is no larger paper size, the printer substitutes paper of Larger Size nearest size. Nearest Substitutes paper of nearest size. Size* MPF Feed Substitutes paper from the MPF.
- Page 185 Values: Off* Disables to overwrite the hard disk drive. 1Time Overwrites the hard disk drive once. 3Times Overwrites the hard disk drive 3 times. NOTE: This item is available only when the optional hard disk drive is installed. Secure Job Expiration Purpose: To specify the date and time to delete the files stored as Secure Print in the RAM disk or the hard disk drive.
- Page 186 Off* Rejects printing the data with no authentication. Permits printing the data with no authentication. Set No Account User Password using the Dell Printer Configuration Web Tool. ColorTrack Error Report Purpose: To specify whether to print the error report on the ColorTrack.
- Page 187 Values: Off* Disables to offset the output paper. Offset per Set Offsets each copy before printing the next copy. Offset per Job Offsets each copy per paper job you specify. NOTE: This item is available only when the optional output expander is installed. Banner Sheet Offset Purpose: To specify whether to offset the output paper, and insert a banner sheet before the first page of each copy.
- Page 188 settings, and configure the security settings. NOTE: Values marked by an asterisk (*) are the factory default menu settings. F/W Version Purpose: To display the printer's firmware version. Service Tag Purpose: To display the printer's service tag. Paper Density Purpose: To specify paper density settings.
- Page 189 -6 - +6 Coated (106 to 163 gsm) -6 - +6 Coated Thick (164 to 216 gsm) -6 - +6 Envelope -6 - +6 Recycled -6 - +6 Adjust Fuser Purpose: To specify the optimum temperature settings for printing for the fuser. To lower the temperature, set negative values. To increase, set positive values.
- Page 190 On* Automatically performs color registration adjustment. Does not automatically perform color registration adjustment. Color Registration Adjustment Purpose: To specify whether to manually perform color registration adjustment. Manual Color Registration Adjustments are required such as when the printer is initially installed and after the printer is moved.
-
Page 191: Reset Defaults
Use of a new Dell brand toner cartridge is recommended for your printer. The Dell warranty does not cover any problems caused by the use of any accessory, part, or component that is not supplied by Dell. - Page 192 Off* Does not use another manufacturer's toner cartridge. Uses another manufacturer's toner cartridge. Use the PCL menu to change printer settings that only affect jobs using the PCL emulation printer language. NOTE: Values marked by an asterisk (*) are the factory default menu settings. Paper Tray Purpose: To specify the input tray.
- Page 193 297 mm*/11.7 inch* Y Size Specifies the length of the custom size paper. 127 - 355 mm/5.0-14.0 inches Denotes country-specific factory default values. NOTE: Selecting a custom size for the paper size prompts you to enter a custom length and width. 210 mm*/8.3 inch* Specifies the width of the custom size paper.
- Page 194 Albertus Md Albertus XBd Clarendon Cd Coronet Marigold Arial Arial It Arial Bd Arial BdIt Times New Times New It Times New Bd Times New BdIt Symbol Wingdings Line Printer Times Roman Times It Times Bd Times BdIt Helvetica Helvetica Ob Helvetica Bd Helvetica BdOb CourierPS...
- Page 195 Font size refers to the height of the characters in the font. One point equals approximately 1/72 of an inch. NOTE: The Font Size menu is only displayed for typographic fonts. See also: "Pitch and Point Size." Font Pitch Purpose: To specify the font pitch for scalable monospaced fonts.
- Page 196 Purpose: To specify whether to perform the image enhancement feature. Image enhancement is a feature that makes the boundary line between black and white smoother to decrease jagged edges and enhance the visual appearance. Values: Disables the Image Enhancement feature. On* Enables the Image Enhancement feature.
- Page 197 Black* Prints in the black and white mode. Color Prints in the color mode. PostScript Use the PostScript menu to change printer settings that only affect jobs using the PostScript emulation printer language. NOTE: Values marked by an asterisk (*) are the factory default menu settings. PS Error Report Purpose: To specify whether the printer outputs error contents for a PostScript error.
-
Page 198: Panel Settings
Panel Settings Use the Panel Settings menu to set a password to limit access to the menus. This prevents items from being changed accidentally. NOTE: Values marked by an asterisk (*) are the factory default menu settings. See also: "Panel Lock."... - Page 199 NOTE: Values marked by an asterisk (*) are the factory default menu settings. Purpose: To specify the paper loaded in the MPF. Values: Plain (60 to 90 gsm)* Plain Thick (80/90 to 105 gsm) Transparency Covers (106 to 163 gsm) Covers Thick (164 to 216 gsm) Label Coated (106 to 163 gsm)
- Page 200 Stop printing and show an error on the operator panel if the paper specified from the printer Specified driver does not match the paper configured for the MPF from the operator panel. Mode Driver Continue to print even if the paper specified from the printer driver does not match the paper Specified* configured for the MPF from the operator panel.
- Page 201 Tray 2 Purpose: To specify the paper loaded in the second tray from the top. Values: Plain(60 to 90 gsm)* Plain Thick (80/90 to 105 gsm) Covers (106 to 163 gsm) Paper Type Covers Thick (164 to 216g sm) Recycled Letter Head Auto* Monarch...
- Page 202 Tray 4 Purpose: To specify the paper loaded in the fourth tray from the top. Values: Plain (60 to 90 gsm)* Plain Thick (80/90 to 105 gsm) Covers (106 to 163 gsm) Paper Type Covers Thick (164 to 216g sm) Recycled Letter Head Auto*...
-
Page 203: Print Menu
Print Menu The Print Menu provides document storing services with Secure Print, Private Mailbox Print, Public Mailbox Print, and Proof Print. NOTE: The Print Menu is displayed only when the RAM disk is set to on or the optional hard disk is installed. Secure Print Purpose: To specify printing and deleting the stored document. -
Page 204: Panel Lock
Proof Print Purpose: To specify printing and deleting the stored document. Values: Enter the password you specified on the printer driver. Print and Delete Deletes all documents from print memory after printing them. Print Prints all documents and save them in memory. Document Select User Delete... - Page 205 1. Press Menu button. 2. Press button until Admin Menu is highlighted, and then press (Set) button. 3. Enter the password, and then press (Set) button. 4. Press button until Panel Settings is highlighted, and then press (Set) button. 5. Panel Lock is displayed. Press (Set) button.
-
Page 206: Understanding Your Printer Software
Dell Supplies Management System™ You can launch the Dell Supplies Management System dialog box from the printing status window (for the local printer only), the All Programs menu, or the desktop icon. You can also launch it from the Status Window when a toner error occurs. -
Page 207: Printer Settings Utility
Using the setup disk that you have created will reduce the amount of work required when installing the printer driver. Install in advance the Dell™ 5130cdn Color Laser Printer printer driver in the computer on which the setup disk is to be created. -
Page 208: Tool Box
2. The Quick Launch Utility window provides three buttons; Status Window, Updater, and Troubleshooting. To exit, click the X button at the top-right of the window. For details, click the Help button of each application. Status Window The Status Window button opens the Status Window. See "Status Window."... - Page 209 For USB connection a. Select USB Connection. b. In the list on the Select Printer screen, select the target printer that you diagnose printer settings for. 4. Click OK. The Tool Box starts. Back to Contents Page...
- Page 210 "LDAP Authentication" Dell ColorTrack Specify the authentication method. When Using the Dell™ Printer Configuration Web Tool 1. Launch Dell Printer Configuration Web Tool. a. Open the web browser. b. Enter the IP address of your printer in the web browser.
-
Page 211: No Account User Print
When Using the Operator Panel You can specify only the settings of ColorTrack Mode, No Account User Print, and ColorTrack Error Report using the operator Panel. 1. Press Menu button. 2. Press button until Admin Menu is highlighted, and then press (Set) button. - Page 212 This item is displayed only when External Mode is specified. Authentication System Specify the server authentication type, the server response time-out, or the search time-out. When Using the Dell™ Printer Configuration Web Tool 1. Launch Dell Printer Configuration Web Tool. a. Open the web browser.
-
Page 213: Domain Name
Specify the settings for the Kerberos Server. When Using the Dell™ Printer Configuration Web Tool 1. Launch Dell Printer Configuration Web Tool. a. Open the web browser. b. Enter the IP address of your printer in the web browser. "Dell Printer Configuration Web Tool."... -
Page 214: Ldap Server
When using LDAPS or certificate verification, you must set the LDAP server or import an external certificate. "Using Digital Certificates." For more information, see When Using the Dell™ Printer Configuration Web Tool 1. Launch Dell Printer Configuration Web Tool. a. Open the web browser. b. Enter the IP address of your printer in the web browser. - Page 215 "xxxx" is a hexadecimal variable value. Backup IP Address / Host Name & Port Specify the backup IP address or the host name, and the port address, as necessary. Specify the backup IP address or the host name, and the port address after specifying the IP Address / Host Name & Port. The change becomes effective after the printer is turned off and then on again.
-
Page 216: Ldap Authentication
LDAP Authentication Specify the LDAP server authentication method. When Using the Dell™ Printer Configuration Web Tool 1. Launch Dell Printer Configuration Web Tool. a. Open the web browser. b. Enter the IP address of your printer in the web browser. - Page 217 Dell ColorTrack Mode Specify whether to allow general users to change settings related to authentication or whether general users must use the settings configured by the Administrator. Specify Group Name Specify the name of the belonging group to use when authenticating. If you specify a group that does not belong, authentication fails and the data is not printed.
-
Page 218: Using Digital Certificates
Back to Contents Page Using Digital Certificates Managing Certificates Setting the Features The authentication feature using digital certificates upgrades security when sending print data or setting data. This chapter describes how to manage digital certificates as follows. "Importing a Digital Certificate"... - Page 219 (Set) button. The cursor moves to the next digit. 9. Repeat steps 7 and 8 to enter all of the digits, and then press (Set) button. When Using the Dell™ Printer Configuration Web Tool 1. Launch Dell Printer Configuration Web Tool. a. Open the web browser.
-
Page 220: Importing A Digital Certificate
NOTE: After importing a PKCS#12 format certificate, the secret key is not exported even if you execute exporting. 1. Launch Dell Printer Configuration Web Tool. a. Open the web browser. b. Enter the IP address of your printer in the web browser. -
Page 221: Confirming The Settings Of A Digital Certificate
11. Confirm the content, and press the Use This Certificate button at the upper-right corner. Confirming the Settings of a Digital Certificate 1. Launch Dell Printer Configuration Web Tool. a. Open the web browser. b. Enter the IP address of your printer in the web browser. -
Page 222: Exporting A Digital Certificate
Since the secret key is not exported, an imported PKCS#12 format certificate can be exported only as a PKCS#7 certificate. 1. Launch Dell Printer Configuration Web Tool. a. Open the web browser. b. Enter the IP address of your printer in the web browser. -
Page 223: Setting The Features
6. Select the category from the Category list. 7. Select the purpose of use from the Certificate Purpose list. Click the Display the List button to display the Certificate List page. NOTE: If the list includes more than 20 certificates, press the Next button to display the next page. 8. - Page 224 Setting LDAP-SSL/TLS Communication 1. Displays the SSL/TLS page. 2. Select Enable for LDAP-SSL/TLS Communication. 3. After restarting the printer, LDAP-SSL/TLS Communication is enabled. NOTE: This setting is available only when the optional hard disk is installed and is set to On for encryption. NOTE: When executing the certificate validity of the server and the presentation of the client certificate, see "Setting Server Certificate Verification for LDAP-SSL/TLS...
- Page 225 2. Set the certificate to be used with Wireless LAN. For more information, see "Setting a Digital Certificate." 3. Confirm whether the certificate is set correctly. For more information, see "Confirming the Settings of a Digital Certificate." 4. Click the Print Server Settings tab. 5.
-
Page 226: Understanding Fonts
Back to Contents Page Understanding Fonts Typefaces and Fonts Bitmapped and Scalable Fonts Resident Fonts Symbol Sets Typefaces and Fonts A font is a set of characters and symbols created with a distinct design. The distinct design is called a typeface. The typefaces you select add personality to a document. -
Page 227: Bitmapped And Scalable Fonts
In proportional (or typographic) fonts, every character can have a different width. Since proportional fonts have characters with different widths, the font size is specified in point size, not pitch. Point size refers to the height of the characters in the font. A point is defined as 1/72 inch. The characters in a font printed at 24 point will be twice as large as the characters in the same font printed at 12 point. -
Page 228: Resident Fonts
If you plan to use many downloadable bitmapped or scalable fonts or if you plan to use many different sizes of scalable fonts, you may need to purchase additional memory for your printer. Resident Fonts Your printer is equipped with resident fonts stored permanently in print memory. Different fonts are available in PCL 5/PCL 6 and PostScript 3. - Page 229 Courier BdIt Clarendon Light Cooper Black LetterGothic Cooper Black Italic LetterGothic It Cooper Gothic 32BC LetterGothic Bd Cooper Gothic 33BC Coronet Albertus Md Courier Albertus XBd Courier Oblique Courier Bold Clarendon Cd Courier Bold Oblique Eurostile Medium Coronet Eurostile Bold Eurostile Extended No.
- Page 230 CourierPS Ob Hoefler Text Italic CourierPS Bd Hoefler Text Black CourierPS BdOb Hoefler Text Black Italic Hoefler Ornaments SymbolPS Joanna Joanna Italic Palatino Roman Joanna Bold Palatino It Joanna Bold Italic Palatino Bd Letter Gothic Palatino BdIt Letter Gothic Slanted Letter Gothic Bold ITCBookman Lt Letter Gothic Bold Slanted...
-
Page 231: Symbol Sets
Times Bold Italic Times New Roman Times New Roman Italic Times New Roman Bold Times New Roman Bold Italic Univers 45 Light Univers 45 Light Oblique Univers 55 Univers 55 Oblique Univers 65 Bold Univers 65 Bold Oblique Univers 57 Condensed Univers 57 Condensed Oblique Univers 67 Condensed Bold Univers 67 Condensed Bold Oblique... - Page 232 ISO 17 Spanish ISO 21 German ISO 60 Norwegian v1 ISO 69 French Windows 3.0 Latin 1 Windows Baltic Symbol Wingdings ITC ZapfDingbats MS Back to Contents Page...
-
Page 233: Understanding Printer Messages
"Contacting Dell." If Message Returns NNN-NNN Confirm that the unit is securely inserted. XXX is not fully inserted. Restart Printer If the problem is not solved, contact Dell. Error NNN-NNN relates to printer Reseat XXX problems. "Contacting Dell." Contact Support XXX is either missing or not fully inserted in the printer. - Page 234 Confirm that the outer levers on both sides of Restart Printer the fuser unit are securely locked. If this does The outer levers on both sides of the not solve the problem, contact Dell. fuser unit are not securely locked. Reseat Fuser "Contacting Dell."...
- Page 235 Restart Printer Unauthorized USB devices are not used. An error occurred in the wireless adapter. Reseat Wireless Contact Support If this does not solve the problem, contact Dell. "Contacting Dell." Invalid ID Press (Set) button.
- Page 236 "Contacting Dell." Press Format Error Press (Set) button. 016-387 In downloading the firmware, the format Contact Dell if this message appears repeatedly. of a download file is inaccurate. Data Violation "Contacting Dell." Press Protection Error Press (Set) button. 016-391 A firmware download was performed Contact Dell if this message appears repeatedly.
- Page 237 If this does not solve the problem, contact Dell. Contact Administer Press (Set) button. Job Fail Ask your system administrator to confirm 016-531 An authentication error of the LDAP whether the Kerberos server and the LDAP server server or of the Kerberos server has are set correctly on the printer.
- Page 238 016-543 Ask your system administrator to connect the A certificate destruction error has printer with a wired network, initialize the Restart Printer occurred while using the Wireless WPA Wireless settings, import the Wireless certificate, Certificate Fail Enterprise or WPA2-Enterprise. and set WPA-Enterprise or WPA2-Enterprise again.
- Page 239 printer. Press Wireless Error WPS failed to connect. Press (Set) button. 016-920 A timeout occurred during connection Execute the operation again according to the Timeout Error with the wireless LAN access point operation procedure. (Registrar). Press Download Error WPS failed to connect. Press (Set) button.
- Page 240 024-91X problems. size of the paper you load. Load Tray N N indicates the number of the tray. "Tray Settings" on "Dell Printer Configuration XXXXXXXX YYYYYYYY Tool." XXXXXXXX indicates a paper size. "Tray Settings" on "Understanding the YYYYYYYY indicates a paper type.
- Page 241 Cartridge. expander needs to be replaced now. (www.dell.com/supplies). Continue without Staple? "Replacing the Stapler Cartridge." Are you Sure? Empty Staple 024-979 Replace the stapler cartridge. Replace Now Stapler The stapler cartridge of the output Order a new consumable at the website Cartridge.
- Page 242 Replace the drum cartridge of the indicated color 091-4XX soon. soon. N Drum Crtrdg Order a new consumable at the website (www.dell.com/supplies). N indicates the color of the drum cartridge. "Replacing the Drum Cartridges." Is close to life Ready to Print...
- Page 243 Ready to Print Though some of the toner cartridges have 193-700 The printer is in the custom toner reached the end of their lives, you can continue cartridge mode. Non-DELL Toner printing. Installed Back to Contents Page...
-
Page 244: Adding Roles Of Print Services
Back to Contents Page Printing With Web Services on Devices (WSD) Adding Roles of Print Services Printer Setup ® ® This section provides information for network printing with WSD, the new Windows Vista , Windows Server 2008, ® ® Windows Server 2008 R2, and Windows 7 protocol of Microsoft Adding Roles of Print Services When you use Windows Server 2008 or Windows Server 2008 R2, you need to add the roles of print services to the... - Page 245 4. In the list of available printers, select the one you want to use, and then click Next. NOTE: In the list of available printers, the WSD printer is displayed in the form of http://IP address/ws/. NOTE: If no WSD printer is displayed in the list, enter the printer's IP address manually to create a WSD printer.
-
Page 246: Operating Environment
Back to Contents Page Printing With UX Filter (UNIX) Overview Installing the UX Filter Uninstalling the UX Filter Printing and Using the Utilities Precautions and Limitations Overview The UX Filter This section describes the features of the UX filter and its operating environment. Features The UX filter is an utility software which converts files created by the UNIX workstation into a format which conforms to the PostScript language loaded in the printer. -
Page 247: Before Installation
Before Using the UX Filter Check the following items before using the UX filter. Before setting up the workstation, set up the printer as follows. 1. Make sure the lpd port is working or not when using the network environment. If the lpd port is not working, set LPD to On on the operator panel. -
Page 248: Installation Procedure Overview
Interface program for PRINTER (stored as the printer name during /etc/lp/interfaces program registration) posttxt5130cdn.fd Filter description file for txt2ps2 dell5130cdn.fd Dell5130cdn filter description file for Dell 5130cdn Color Laser Printer /etc/lp/fd postio5130.fd Dellpostio filter description file download5130cdn.fd Delldownload filter description file txt2ps25130cdn.1 Manual page file for txt2ps2 sunras2ps25130cdn.1 Manual page file for sunras2ps2... - Page 249 2. Exit Enter Process No (1/2)? : 1 5. The following menu appears. Select <1> and set up the local printer. Solaris Installation for Dell 5130cdn Color Laser Printer Type Printer 1. Set Local Printer 2. Set Remote Printer Enter Process No (1/2)? : 1 6.
-
Page 250: Installation Procedure
Enter server-hostname? : server server-hostname is 'server' (y/n)[y] : y NOTICE: The host name of the server must be pre-registered with DNS, NIS, NIS+ or /etc/hosts. 8. When Set Remote Printer is selected, type the remote printer name. Enter server-printer-name? : ps server-printer-name is 'ps' (y/n)[y] : y NOTICE: Type ps when the printer is a network connection printer. - Page 251 2. Delete the filters registered with the system. Delete the filters registered during the installation using the lpfilter command. # lpfilter -f dell5130cdn -x (for Dell 5130cdn Color Laser Printer) # lpfilter -f download5130 -x # lpfilter -f postio5130cdn -x...
- Page 252 5. Delete all the directories that contain the UX filters and the files in these directories created during the installation. The following directories must be deleted. /usr/local/dellbin5130 6. Delete the filter description files. Delete the following files from /etc/lp/fd. Filter description files for various printers. dell5130cdn.fd (for Dell 5130cdn Color Laser Printer) download5130.fd postio5130cdn.fd posttxt5130cdn.fd HP-UX 1.
- Page 253 To print to other printers: To print to a printer named dell5130cdn, type as follows. % lp -d dell5130cdn filename NOTE: The name of the printer can be confirmed by executing lpstat -v. To change the default printer temporarily for printing: To change the default printer, set the printer name in the environment variable LPDEST.
- Page 254 The input file will be processed as the PostScript file. If the file does not begin with "%!", "%!" will be output to the beginning line. Whether the file contains "%!" will be ignored. To print text/PostScript files: -y DuplexBook Enables the long-edge binding feature.
- Page 255 Feed paper from the tray loaded with MxNmm defined by users. Possible range specified: Width: 76.2 to 215.9 mm Length: 127.0 to 355.6 mm MxNin Feed paper from the tray loaded with MxNinches defined by users. Possible range specified: Width: 3.00 to 8.5 inches Length: 5.00 to 14.0 inches If this option is not specified or the tray specified tray is not available, feed paper from the default tray.
- Page 256 LabelPaper/Labels Coated/Coated 2/Coated Paper 2 Coated Back/Coated 2/Coated Paper 2 - Side 2 Coated Thick/Coated 3/Coated Paper 3 Coated Thick Back/Coated 3/Coated Paper 3 - Side 2 LetterHead Envelope If this option is not specified, multipurpose feeder Paper Type for the printer can be used. -y mfo=mode Specifies orientation for multipurpose feeder.
- Page 257 -y st=mode Specifies feed separators from. Available feed separators from the following. auto AutoTray/Auto 1stTray/Tray 1 (Standard 550-sheet tray) 2ndTray/Tray 2 (Optional 550-sheet feeder) 3rdTray/Tray 3(Optional 550-sheet feeder) 4thTray/Tray 4 (Optional 1100-sheet feeder) 5thTray/Tray 5 (Optional 1100-sheet feeder) Multipurpose Feeder -y sp Specifies printed separators.
- Page 258 Photo Screen Display Standard/ Normal Business Graphics This option is available only for color printing and when entry data is RGB data. -y gc=mode Specifies RGB gamma correction. Available RGB gamma corrections are as follows: This option is available only for color printing and when entry data is RGB data. -y sc=mode Specifies screen.
- Page 259 This option is available only for color printing. -y br=mode Specifies brightness adjustment. Available brightness adjustment option values are as follows: Bright 5 Bright 4 Bright 3 Bright 2 Bright 1 Normal Dark 1 Dark 2 Dark 3 Dark 4 Dark 5 -y rgbc=mode Specifies RGB color correction.
- Page 260 6000K 9300 9300K This option is available only for color printing and when entry data is RGB data. -y cb=cyan-low:cyan-middle:cyan-high:magenta-low:magenta-middle:magenta-high:yellow-low:yellow- middle:yellow high:black-low:black-middle:black-high Specifies adjustment value for color balance of each color/density. Available adjustment values are as follows: Dark 3 Dark 2 Dark 1 Normal Light 1...
- Page 261 Specifies letterhead duplex mode settings. When letterhead duplex mode is enabled, a print sheet is always fed through duplex feeding path in a printer. As the result, a user can set sheets without caring about sheet orientation in an input slot. Available Letterhead duplex mode values are as follows: Auto -y tr=mode...
- Page 262 For jobownername, enter a job owner name up to 32 characters. For password, enter an alphanumeric password between 4 and 12 characters. For jobgroupname, specify a job group name up to 32 characters. NOTE: Alphanumeric characters, including spaces and colons, and symbols can be entered to specify a job owner name.
- Page 263 To print XWD files: % lp -d dell5130cdn -o XWD filename To print TIFF format files: % lp -d dell5130cdn -o TIF filename To print PostScript files: % lp -d dell5130cdn filename To print PostScript files as text files: % lp -d dell5130cdn -o TX filename However, for PostScript files with options set up, such as paper selection, etc., when the same option is specified, it will be ignored.
- Page 264 To Specify the Password for Authentication Printing: If you need to specify the password in authentication printing, you can specify the password in the environment variable as follows. % setenv JOWN5130P "password" If you do not specify the password inexplicitly, type as follows. % setenv JOWN5130P ""...
- Page 265 Backspace 1 character Option Enables the short-edge binding feature. When it is specified, the printing direction or position will be adjusted and both sides of the paper printed so that the shorter edge of the pages can be bound. Enables the long-edge binding feature. When it is specified, the printing direction or position will be adjusted and both sides of the paper printed so that the longer edge of the pages can be bound.
- Page 266 Feed paper from the tray loaded with Legal (8.5 x 14 inches). Feed paper from the tray loaded with Executive (7.25 x 10.5 inches). Feed paper from the tray loaded with Monarch (3.875 x 7.5 inches). COM10 Feed paper from the tray loaded with Envelope #10 (4.125 x 9.5 inches). Feed paper from the tray loaded with DL (110 x 220 mm).
- Page 267 -ffont Sets the font. NOTE: The available fonts are limited to the font in the printer. For more information, see "Understanding Fonts." -Nc=copies Specifies the number of output copies (the value of copies must be a positive integer). Specifies that printing be collated. If the copies option is not specified, this option will be ignored. The input file will be processed as the PostScript file.
- Page 268 Output all pages. (default in case of Text files conversion) Specify these options as follows. In the case that convert text file, output the host name following the user name on the upper right corner of the paper, output all pages. (User name, Host name, all page output are default) -Hd=ur -Hd=ur:uh...
- Page 269 Transparency LabelPaper/Labels Coated/Coated 2/Coated Paper 2 Coated Back/Coated 2/Coated Paper 2- Side 2 Coated Thick/Coated 3/Coated Paper 3 Coated Thick Back/Coated 3/Coated Paper 3- Side 2 Letterhead Envelope If this option is not specified, multipurpose feeder Paper Type of the printer can be used. -Mfo=mode Specifies orientation for multipurpose feeder.
- Page 270 Use larger size (No zoom) -St=mode Specifies feed separators from. Available feed separators froms are as follows: auto AutoTray/Auto 1stTray/Tray 1 (Standard 550-sheet feeder) 2ndTray/Tray 2 (Optional 550-sheet feeder) 3rdTray/Tray 3 (Optional 550-sheet feeder) 4thTray/Tray 4 (Optional 1100-sheet feeder) 5thTray/Tray 5 (Optional 1100-sheet feeder) Multipurpose Feeder Specifies printed separators.
- Page 271 Photo Screen Display Standard/Normal Business Graphics This option is available only for color printing and when entry data is RGB data. -Gc=mode Specifies RGB gamma correction. Available RGB gamma corrections are as follows: This option is available only for color printing and when entry data is RGB data. -Sc=mode Specifies screen.
- Page 272 This option is available only for color printing. Specifies color transformation. This option is available only for color printing. -Br=mode Specifies brightness adjustment. Available brightness adjustment option values are as follows: Bright 5 Bright 4 Bright 3 Bright 2 Bright 1 Normal Dark 1 Dark 2...
- Page 273 Available RGB input profile option value are as follows: sRGB AdobeRGB This option is available only for color printing and when entry data is RGB data. -RGBTp=mode Specifies RGB color temperature. Available RGB color temperature option value are as follows: 5000 5000K 6000...
- Page 274 -Sl=mode Specifies staple settings. Available staple option values are as follows: This option is available only when the optional output expander is installed. -Os=mode Specifies offset settings. Available offset option values are as follows: Auto Offset per Set (Offsets each copy before printing the next copy.) Offset per Job (Offsets each copy per paper job you specify.) This option is available only when the optional output expander is installed.
- Page 275 Up to eight single-byte characters from 0x20 to 0x7E, except 0x20 " " (blank) and 0x3A":" (colon). Password Up to 12 single-byte characters from 0x30 to 0x39 (numeric characters). DocumentName Up to 12 single-byte characters from 0x20 to 0x7E, except 0x20 " " (blank) and 0x3A ":" (colon). Secure Print -Hld=store:UserID:Password:DocumentName -Hld=store:UserID:Password:...
- Page 276 Incomplete form of -Jown option is treated as no authentication setting being made. In such case, if authentication setting is made with the environmental variable, it is used as setting information. Example To convert the program list of the file.txt file into the PostScript language program that sets the paper to the landscape orientation and prints in the 2-up mode, type as follows: % txt2ps2 -r -2 file.txt | lp To convert file.txt to the PostScript language program and output it to the file.ps file, type as follows:...
- Page 277 Use the -ps option only when a PostScript file that contains no %! at the beginning of the file is used as the PostScript file. If a normal text file is input, it will not function correctly. In HP-UX, txt2ps2 considers files written by PostScript that contain %! at the beginning of the file as the PostScript files.
- Page 278 Feed paper from tray 2 (the second tray from the top). Feed paper from tray 3 (the third tray from the top). Feed paper from tray 4 (the fourth tray from the top). Feed paper from tray 5 (the fifth tray from the top). Feed paper from the tray loaded with A4 (210 x 297 mm).
- Page 279 Rotates the image by 90° and uses the paper in the landscape orientation. Disables the addition of the showpage. It is used when files converted to the PostScript language program are merged with files created with other applications. -l=left,bottom Specifies the print position. Printing will be executed from the left and bottom of the page. The default is 0.25 inches for both left and bottom.
- Page 280 Specify the font to print the header and footer. European fonts the same as half size alphanumeric fonts can be specified. Helvetica is specified as default. If the wrong font is specified, default European font of the printer can be used. If header/footer output option is specified, the font specification of header/footer is ignored.
- Page 281 Envelope If this option is not specified, multipurpose feeder Paper Type of the printer can be used. -Mfo=mode Specifies orientation for multipurpose feeder. Available orientations for multipurpose feeder are as follows: Landscape Landscape (Rotated) Portrait Portrait (Rotated) -Pon Specifies alternate tray. Available alternate trays are as follows: Use printer settings Display message...
- Page 282 5thTray/Tray 5 (Optional 1100-sheet feeder) Multipurpose Feeder Specifies printed separators. Available only when the paper tray for separators is specified. Specifies Skip Blank Pages. -Cm=mode Specifies output color. Available output colors are as follows: Color (CMYK) Black -Pr=mode Specifies print mode. Available print modes are as follows: High Speed High Quality...
- Page 283 This option is available only for color printing and when entry data is RGB data. -Sc=mode Specifies screen. Available screens are as follows: Fineness Standard Auto Gradation -Gg=mode Specifies gray guaranteed. Available gray guaranteed options are as follows: This option is available only for color printing. Specifies color transformation.
- Page 284 Bright 1 Normal Dark 1 Dark 2 Dark 3 Dark 4 Dark 5 -RGBc=mode Specifies RGB color correction. Available RGB color corrections are as follows: Perceptual Saturation RelativeC AbsoluteC This option is available only for color printing and when entry data is RGB data. -RGBPr=mode Specifies RGB input profile.
- Page 285 This option is available only for color printing and when entry data is RGB data. -Cb=cyan-low:cyan-middle:cyan-high:magenta-low:magenta-middle:magenta-high:yellow-low:yellow- middle:yellow high:black-low:black-middle:black-high Specifies adjustment value for color balance of each color/density. Available adjustment values are as follows: Dark 3 Dark 2 Dark 1 Normal Light 1 Light 2 Light 3...
- Page 286 This option is available only when the optional output expander is installed. -Lh=mode Specifies letterhead duplex mode settings. When letterhead duplex mode is enabled, a print sheet is always fed through duplex feeding path in a printer. As the result, a user can set sheets without caring about sheet orientation in an input slot. Available Letterhead duplex mode values are as follows: Auto -Tr=mode...
- Page 287 -Hld=proof:UserID::DocumentName -Hld=proof:UserID:: NOTICE: Make sure you specify Secure Print only when you directly print data to a printer. Secure Print may not be available if you specify it when data need to be printed through another server or data need to be handled by another program such as PostScript files.
- Page 288 If the output size option (-s, -S) is not specified, scaling will be executed taking one pixel of the raster data as one pixel of the printer. If the print position option specifies a point beyond the printable area of the printer, data beyond the printable area will not be printed.
- Page 289 A paper tray can be selected by directly specifying a tray or by specifying a paper size. When a paper size is specified, the tray loaded with paper of the specified size will be found and selected automatically. The parameters for selecting a paper tray are as follows: Feed paper from tray 1 (top tray).
- Page 290 If this option is not specified or the tray specified is not available, feed paper from the default tray. Turns on the save toner mode for printing. The print result will be fainter than that of normal printing. In some cases, this option will be ignored.
- Page 291 -Hd=ur -Hd=ur:uh -Hffont Specify the font to print header and footer. European fonts the same as half size alphanumeric fonts can be specified. Helvetica is specified as default. If the wrong font is specified, default European font of the printer can be used. If header/footer output option is specified, the font specification of header/footer is ignored.
- Page 292 Envelope If this option is not specified, multipurpose feeder Paper Type of the printer can be used. -Mfo=mode Specifies orientation for multipurpose feeder. Available orientations for multipurpose feeder are as follows: Landscape Landscape (Rotated) Portrait Portrait (Rotated) -Pon Specifies alternate tray. Available alternate trays are follows.
- Page 293 5thTray/Tray 5 (Optional 1100-sheet feeder) Multipurpose Feeder Specifies printed separators. Available only when the paper tray for separators is specified. Specifies Skip Blank Pages. -Cm=mode Specifies output color. Available output colors are as follows: Color (CMYK) Black -Pr=mode Specifies print mode. Available print modes are as follows: High Speed High Quality...
- Page 294 This option is available only for color printing and when entry data is RGB data. -Sc=mode Specifies screen. Available screens are as follows: Fineness Standard Auto Gradation -Gg=mode Specifies gray guaranteed. Available gray guaranteed options are as follows: This option is available only for color printing. Specifies color transformation.
- Page 295 Bright 2 Bright 1 Normal Dark 1 Dark 2 Dark 3 Dark 4 Dark 5 -RGBc=mode Specifies RGB color correction. Available RGB color corrections are as follows: Perceptual Saturation RelativeC AbsoluteC This option is available only for color printing and when entry data is RGB data. -RGBPr=mode Specifies RGB input profile.
- Page 296 9300K This option is available only for color printing and when entry data is RGB data. -Cb=cyan-low:cyan-middle:cyan-high:magenta-low:magenta-middle:magenta-high:yellow-low:yellow- middle:yellow high:black-low:black-middle:black-high Specifies adjustment value for color balance of each color/density. Available adjustment values are as follows: Dark 3 Dark 2 Dark 1 Normal Light 1 Light 2...
- Page 297 This option is available only when the optional output expander is installed. -Lh=mode Specifies letterhead duplex mode settings. When letterhead duplex mode is enabled, a print sheet is always fed through duplex feeding path in a printer. As the result, a user can set sheets without caring about sheet orientation in an input slot. Available Letterhead duplex mode values are as follows: Auto -Tr=mode...
- Page 298 -Hld=proof:UserID::DocumentName -Hld=proof:UserID:: NOTICE: Make sure you specify Secure Print only when you directly print data to a printer. Secure Print may not be available if you specify it when data need to be printed through another server or data need to be handled by another program such as PostScript files.
- Page 299 If the print position option (-lleft bottom) specifies a point beyond the printable area of the printer, data beyond the printable area will not be printed. xwd2ps2 (Solaris/HP-UX) Format /usr/local/dellbin5130/xwd2ps2 [-d] [-D] [-Itray-input] [-t] [-r] [-n] [-l=left,bottom] [- s=width,height] [-S=width] [-E] [-Nc=copies] [-Cl] [-Hd=position:format] [-Hffont] [-MSI] [-M=type] [-Mfo=mode] [-Pon] [-St=mode] [-Sp] [-Sb] [-Cm=mode] [-Pr=mode] [-Cc=mode] [-Gc=mode] [-Sc=mode] [- Gg=mode] [-Ct] [-Br= mode] [-RGBc= mode] [-RGBPr= mode] [-RGBTp= mode] [-Cb=cyan-low:cyan- middle:cyan-high:magentalow:magenta-middle:magenta-high:yellow-low;yellow-middle:yellow-high:black-...
- Page 300 Feed paper from tray 2 (the second tray from the top). Feed paper from tray 3 (the third tray from the top). Feed paper from tray 4 (the fourth tray from the top). Feed paper from tray 5 (the fifth tray from the top). Feed paper from the tray loaded with A4 (210 x 297 mm).
- Page 301 Disables the addition of the showpage. It is used when files converted to the PostScript language program are merged with files created with other applications. -l=left,bottom Specifies the print position. Printing will be executed from the left and bottom of the page. The default is 0.25 inches for both left and bottom.
- Page 302 FinePaper/Bond/Plain Paper 2 FinePaperBack/Bond/Plain Paper 2 - Side 2 Stationery/Plain/Plain Paper 1 StationeryBack/Plain/Plain Paper 1 - Side 2 Recycled Paper RecycledPaperBack/ Recycled Paper - Side 2 ThickPaper/Heavyweight 1/Covers 1 ThickPaperBack/Heavyweight 1/Covers 1 - Side 2 ThickPaper2/Heavyweight 2/Covers 2 ThickPaper2Back/Heavyweight 2/Covers 2 - Side 2 Transparency LabelPaper/Labels Coated/Coated 2/Coated Paper 2...
- Page 303 Portrait Portrait (Rotated) -Pon Specifies alternate tray. Available alternate trays are as follows: Use printer settings Display message Feed from multipurpose feeder Use nearest size (Adjust to fit) Use larger size (Adjust to fit) Use nearest size (No zoom) Use larger size (No zoom) -St=mode Specifies feed separators from.
- Page 304 -Cm=mode Specifies output color. Available output colors are as follows: Color (CMYK) Black -Pr=mode Specifies print mode. Available print modes are as follows: High Speed High Quality High Resolution -Cc=mode Specifies image types. Available image types are as follows: Photo Screen Display Standard/ Normal Business Graphics...
- Page 305 This option is available only for color printing and when entry data is RGB data. -Sc=mode Specifies screen. Available screens are as follows: Fineness Standard Auto Gradation -Gg=mode Specifies gray guaranteed. Available gray guaranteed options are as follows: This option is available only for color printing. Specifies color transformation.
- Page 306 Dark 4 Dark 5 -RGBc=mode Specifies RGB color correction. Available RGB color corrections are as follows: Perceptual Saturation RelativeC AbsoluteC This option is available only for color printing and when entry data is RGB data. -RGBPr=mode Specifies RGB input profile. Available RGB input profile option value are as follows: sRGB AdobeRGB...
- Page 307 Dark 1 Normal Light 1 Light 2 Light 3 Option value must be specified in the following order: Cyan low density, Cyan medium density, Cyan high density, Magenta low density, Magenta medium density, Magenta high density, Yellow low density, Yellow medium density, Yellow high density, Black low density, Black medium density, Black high density If no value is specified, it is treated as "0"(Normal).
- Page 308 -Tr=mode Specifies trapping settings. Available trapping option values are as follows: -Hld=PrintType:UserID:Password:DocumentName Secure Print PrintType secure Secure Print private Private MailBox Print public Public MailBox Print proof Proof Print UserID Up to eight single-byte characters from 0x20 to 0x7E, except 0x20 " " (blank) and 0x3A":" (colon). Password Up to 12 single-byte characters from 0x30 to 0x39 (numeric characters).
-
Page 309: Precautions And Limitations
When neither of job owner name nor password is specified (-Jown=:), login user name is used as job owner name, and authentication password is treated as not specified. When a job owner name exceeds allowable character length, the extra characters are ignored. When an unacceptable character is entered to specify a job owner name, "UnknownUser"... -
Page 310: During Printing
Solaris Use lpadmin command to register the default printer. # lpadmin -d PrinterName To inhibit the banner sheets output, change the value of nobanner=no to nobanner=yes that includes in the file corresponding to the printer name in /etc/lp/interfaces/. The printer registered by UX filter must not be changed by admintool. When Content types: postscript is displayed by typing lpstat -p printername -l, it's necessary to delete the printer and reinstall. - Page 311 description by inserting the line command (-Ilines). If a BS code is found at the beginning of a line, the print position of the next character will be on the left of the beginning of a line. When there are multiple tab codes in one line, the positions of tab may be off due to automatic line feed. If this happens, specify the -l or -w option.
- Page 312 To print image files from Solaris the user cannot specify the image file directly with the lp command for printing. Make use of sunras2ps2, tiff2ps2, xwd2ps2 and convert the file to a PostScript file. Output it using the lp command after the conversion.
-
Page 313: Setup Overview
3. Specify the default queue. 4. Specify the printing options. Installing the Printer Driver 1. Double-click Dell-5130cdn-Color-Laser-x.x-x.noarch.rpm in the Drivers and Utilities CD. 2. Type the administrator's password. 3. Click Continue in the Completed System Preparation window. Installation starts. When the installation is complete, the window is automatically closed. -
Page 314: Setting The Default Queue
Format: lpd://xxx.xxx.xxx.xxx (printer's IP address) 8. Select Dell from the Make menu, and then click Continue. 9. Select Dell 5130cdn Color Laser... from the Model menu, and then click Continue. The message Printer xxx has been added successfully. appears. The set up is complete. -
Page 315: Setting Up The Queue
Select the Do Local Filtering check box, and then click Next. g. Select DELL in Select manufacturer. Select 5130cdn Color Laser in Select Model, and then click Next. h. Confirm the settings in Edit configuration, and then click OK. -
Page 316: Specifying The Printing Options
Select the Do Local Filtering check box, and then click Next. g. Select DELL as Select manufacturer. Select 5130cdn Color Laser as Select Model, and then click Next. h. Confirm the settings in Edit configuration, and then click OK. -
Page 317: Setting The Password For Authority As The Printer Administrator
Uninstalling the Printer Driver 1. Select Computer® More Applications... and select Konsole on the Application Browser. 2. Type the following command on the terminal window. (Type the administrator's password) rpm -e Dell-5130cdn-Color-Laser The printer driver is uninstalled. Back to Contents Page... -
Page 318: Printer Specifications
If the manufacturer needs to be contacted, the customer must pay an additional fee for that support. The only time that Dell pays for the third-party support is when Dell is responsible for the issue. In the case of getting the printer installed and working, this is configuration and the customer would be responsible for paying. -
Page 319: Mib Compatibility
This information helps network administrators manage the network (analyze performance, traffic, errors, and so on). Dell 5130cdn Color Laser Printer complies with standard-industry MIB specifications, allowing the printer to be recognized and managed by various printer and network management software systems. - Page 320 Cables Your interconnection cable must meet the following requirements: Connection type Connection specifications and symbols 1 Ethernet 10 Base-T/100 Base-TX/1000 Base-T 2 Wireless IEEE802.11b/802.11g/802.11n 3 USB USB2.0 4 Parallel IEEE1284 Back to Contents Page...
-
Page 321: Maintaining Your Printer
Determining the Status of Supplies If your printer is connected to the network, the Dell™ Printer Configuration Web Tool can provide instant feedback on remaining toner levels. Type the printer's IP address in your web browser to view this information. To use the E-Mail Alert Setup feature that notifies you when the printer requires new supplies, type your name or the name of the key operator in the e-mail list box. -
Page 322: Storing Consumables
To order by phone, see "Contacting Dell." It is recommended that you use Dell toner cartridges for your printer. Dell does not provide warranty coverage for problems caused by using accessories, parts, or components not supplied by Dell. Removing the Toner Cartridges... -
Page 323: Installing A Toner Cartridge
2. Open the front cover. 3. Pull out the toner cartridge you want to replace. CAUTION: Always pull out the cartridge slowly so you do not spill any toner. NOTICE: Do not touch the parts shown in the illustration. Toner can dirty and stain your hands. NOTE: Be careful not to spill toner when handling the toner cartridge. -
Page 324: Replacing The Drum Cartridges
4. Close the front cover. Replacing the Drum Cartridges CAUTION: Before performing any of the following procedures, read and follow the safety instructions in your Product Information Guide provided with your product. CAUTION: To prevent electric shock, always turn off the printer and disconnect the power cable from the grounded outlet before performing maintenance. - Page 325 3. Rotate the lock levers of the inner cover to open it. 4. Grasp the handles on the drum cartridge you want to replace and pull out the cartridge halfway. 5. Grasp one side of the drum cartridge with the other hand and pull out the cartridge from the printer. NOTICE: Do not touch the parts shown in the illustration.
-
Page 326: Installing A Drum Cartridge
Installing a Drum Cartridge 1. Unpack a new drum cartridge. NOTICE: To protect the drum from overexposure to bright light, do not remove the orange protective covering until you have inserted the cartridge in the printer. NOTE: Be careful not to spill toner when handling the drum cartridge. 2. - Page 327 5. Close the inner cover. 6. Rotate the lock levers to secure the inner cover while pressing the cover with the other hand. 7. Remove the cleaning rod from the backside of the front cover. 8. Remove the cleaning pad by pressing the white tabs between your thumb and index finger. 9.
- Page 328 11. Insert the cleaning rod fully into one of the four holes until it clicks into the interior of the printer as illustrated below, and then pull it out. 12. Repeat Step 11 also on the other three holes. One time insertion is enough for each hole. 13.
-
Page 329: Replacing The Fuser
Dell fuser is available only through Dell. To order by phone, see "Contacting Dell." It is recommended to use a Dell fuser for your printer. Dell does not provide warranty coverage for problems caused by using accessories, parts, or components not supplied by Dell. Removing the Fuser... - Page 330 NOTE: Stand straight in front of the right hand cover and not in front of the front cover, whenever you replace the fuser. 3. Grasp both handles of the installed fuser with your hands and pull it out. Installing a Fuser 1.
- Page 331 CAUTION: To prevent electric shock, always turn off the printer and disconnect the power cable from the grounded outlet before performing maintenance. CAUTION: Before performing any of the following procedures, read and follow the safety instructions in your Product Information Guide provided with your product. NOTE: Video instructions are also available in the Maintenance Guide.
- Page 332 Installing a Separator Roller in a Tray 1. Turn the separator roller cover to the left to open it, and then hold the cover. 2. Slide the front axle, then the rear axle of the separator roller cartridge in the holes of the tray. 3.
- Page 333 5. Load paper in the tray and replace the tray in the printer. Removing the Separator Rollers Inside the Printer 1. Remove the tray from the printer. 2. Turn the separator roller until the roller hook is visible. NOTE: The roller is located approximately 165 mm (6.5 inches) inside the printer when measured from the face of the paper tray opening.
- Page 334 3. Pull the separator roller hook out of the groove on the axle, and then slide the separator roller to the front. 4. Repeat Step 2 Step 3 to remove other separator rollers from inside the printer. Installing Separator Rollers Inside the Printer 1.
-
Page 335: Replacing The Belt Unit
Dell belt units are available only through Dell. To order by phone, see "Contacting Dell." It is recommended to use a Dell belt unit for your printer. Dell does not provide warranty coverage for problems caused by using accessories, parts, or components not supplied by Dell. Removing the Belt Unit CAUTION: Do not touch the inside of the printer. - Page 336 3. Open the front cover. 4. Rotate the lock levers of the inner cover to open it. 5. Grasp the handle on the front of the belt unit. 6. Pull out the belt unit until the line on the unit becomes completely visible. 7.
- Page 337 NOTICE: Do not hold the parts shown in the illustration. 8. Slide the blue tab back-and-forth five times to clean the conductivity temperature depth sensor. CAUTION: Be careful not to touch the fuser. It can burn your fingers. Installing a Belt Unit 1.
- Page 338 2. Remove the protective parts shown in the illustration. 3. Grasp the handles on top of the belt unit. NOTICE: Do not hold the sides of the belt unit. It may degrade print quality. 4. Align the arrows on the belt unit with the arrows on the printer.
- Page 339 5. Slide the unit into the printer and stop when the visible line reaches the printer. 6. Lower the handles. 7. Push the front of the belt unit to reinstall it in the printer until it stops. 8. Close the inner cover.
-
Page 340: Replacing The Transfer Roller
9. Rotate the lock levers to secure the inner cover while pressing the cover with the other hand. 10. Close the front cover. 11. Close the right hand cover. NOTE: When closing the right hand cover, apply your hand in the vicinity of the handle as shown in the illustration, and then press the cover firmly toward the printer. -
Page 341: Removing The Transfer Roller
Removing the Transfer Roller 1. Turn off the printer. 2. Raise the latch of the right hand cover and open the cover. NOTE: Stand straight in front of the right hand cover and not in front of the front cover, whenever you open the right hand cover. -
Page 342: Replacing The Stapler Cartridge
3. Close the right hand cover. NOTE: When closing the right hand cover, apply your hand in the vicinity of the handle as shown in the illustration, and then press the cover firmly toward the printer. NOTE: Stand straight in front of the right hand cover and not in front of the front cover, whenever you close the right hand cover. - Page 343 2. Press the orange lever of the staple cartridge holder and pull out the cartridge. 3. Squeeze the sides of the empty staple case and remove it from the cartridge. Installing a Stapler Cartridge 1. Slide the tip of the new staple case into the cartridge and press the end into place. 2.
-
Page 344: Replacing The Waste Toner Box
3. Close the front door of the output expander. Replacing the Waste Toner Box CAUTION: Before performing any of the following procedures, read and follow the safety instructions in your Product Information Guide provided with your product. CAUTION: To prevent electric shock, always turn off the printer and disconnect the power cable from the grounded outlet before performing maintenance. -
Page 345: Installing A Waste Toner Box
3. Grasp the waste toner box with your other hand as shown in the illustration, and pull it out of the printer. NOTICE: Take care to avoid dropping the waste toner box while you are removing it. NOTICE: After removing the waste toner box, do not touch the parts shown in the illustration. Toner can dirty or stain your hands. -
Page 346: Cleaning Inside The Printer
2. Close the front cover. Cleaning Inside the Printer To prevent deterioration of printing quality due to stains inside the printer, clean inside the printer regularly by using the cleaning rod whenever you replace drum cartridges. CAUTION: To prevent electric shock, always turn off the printer and disconnect the power cable from the grounded outlet before performing maintenance. - Page 347 4. Repeat Step 3 also on the other three holes. 5. Return the cleaning rod to its original location. 6. Close the front cover. Cleaning the Conductivity Temperature Depth (CTD) Sensor CAUTION: To prevent electric shock, always turn off the printer and disconnect the power cable from the grounded outlet before performing maintenance.
- Page 348 NOTE: Belt unit can be replaced only when the right hand cover is open. NOTE: Stand straight in front of the right hand cover and not in front of the front cover, whenever you open the right hand cover. 3. Open the front cover. 4.
- Page 349 6. Pull out the belt unit until the line on the unit becomes completely visible. 7. Grasp the handles on the top of the belt unit. Pull out the unit to remove it from the printer. NOTICE: Do not hold the parts shown in the illustration. 8.
- Page 350 10. Align the arrows on the belt unit with the arrows on the printer. 11. Slide the unit into the printer and stop when the visible line reaches the printer. 12. Lower the handles. 13. Push the front of the belt unit to reinstall it in the printer and until it stops.
- Page 351 14. Close the inner cover. 15. Rotate the lock levers to secure the inner cover while pressing the cover with the other hand. 16. Close the front cover. 17. Close the right hand cover.
-
Page 352: Adjusting Color Registration
When Using the Dell Printer Configuration Web Tool 1. Enter the IP address of your printer into the web browser. If you do not know how to launch the Dell Printer Configuration Web Tool, see "Dell Printer Configuration Web Tool."... -
Page 353: Determining Values
6. Adjust all straight lines to a value of 0. Preview image of before and after adjustment will help. CAUTION: After printing the color registration chart, do not turn off the printer until the printer motor has stopped running. NOTE: If the straightest line does not line up perfectly with 0, then determine a value and adjust the color again. - Page 354 When Using the Dell™ Printer Configuration Web Tool 1. Enter the IP address of your printer into the web browser. If you do not know how to launch the Dell Printer Configuration Web Tool, see "Dell Printer Configuration Web Tool."...
-
Page 355: Removing Options
Back to Contents Page Removing Options Removing the 550-Sheet Feeder Removing the 1100-Sheet Feeder Removing an Output Expander Removing a Memory Removing a Hard Disk Removing the Wireless Adapter If the printer location needs to change or the printer and print media handling options need to be shipped to a new location, all print media handling options must be removed from the printer. - Page 356 4. Remove the two screws joining the printer and the sheet feeders by unscrewing them with a coin or similar object. 5. Gently lift the printer off the tray module, and place it on a level surface. CAUTION: To lift the printer safely, lift it with three people. 6.
- Page 357 7. Reconnect all cables including the power cable into the back of the printer and turn on the printer. Removing the 1100-Sheet Feeder CAUTION: If you are removing the 1100-sheet feeder, be sure to turn off the printer, unplug the power cable, and disconnect all cables from the back of the printer before completing these tasks.
- Page 358 4. Remove the plastic part and the longer screw provided with the feeder by unscrewing them with a coin or similar object. 5. Remove the two screws joining the printer and the sheet feeders by unscrewing them with a coin or similar object. 6.
- Page 359 7. Insert the tray into the printer, and push it until it stops. 8. Reconnect all cables including the power cable into the back of the printer and turn on the printer. Removing an Output Expander 1. Turn off the printer. 2.
- Page 360 4. Unplug the cables and the connector from the socket. 5. Remove connector cover 1. 6. Remove connector cover 2. 7. Unplug the cables and connector from the socket.
- Page 361 8. Unplug power cable as shown in the illustration. 9. Remove the stacker tray. 10. Gently lift up the output expander from the printer. 11. Unplug the cables.
- Page 362 12. Remove the two screws. 13. Remove the bracket. 14. Remove the H transport unit from the printer. 15. Insert the center output tray.
- Page 363 16. Attach the two parts to the printer. 17. Close the front cover. 18. Return the tray 1 to its original position.
-
Page 364: Removing A Memory
Removing a Memory 1. Ensure that the printer is turned off. 2. Rotate the screw counterclockwise on the metal casing to open the cover. 3. Remove the control board cover. 4. Push the latches on both edges of the socket at the same time to raise the memory up. - Page 365 5. Hold the memory and pull it out. 6. Replace the control board cover. 7. Close the control board cover and turn the screw clockwise.
-
Page 366: Removing A Hard Disk
Removing a Hard Disk 1. Ensure that the printer is turned off. 2. Rotate the screw counterclockwise on the metal casing to open the cover. 3. Remove the control board cover. 4. Remove the hard disk cables from the connectors of the control board. - Page 367 5. Remove the left side connector to the control board. 6. Remove the hard disk from the printer by releasing the hard disk's hook. 7. Replace the control board cover. 8. Close the control board cover and turn the screw clockwise.
- Page 368 Removing the Wireless Adapter 1. Turn off the printer and unplug the power cable. Then, disconnect all cables from the back of the printer. 2. Rotate the screw counterclockwise on the metal casing to open the cover. 3. Remove the control board cover.
- Page 369 4. Remove the wireless adapter from the printer by releasing the adapter's hook from underside of the wireless adapter socket. 5. Insert the cap into the wireless adapter socket. 6. Replace the control board cover. 7. Close the control board cover and turn the screw clockwise.
- Page 370 Back to Contents Page...
-
Page 371: Clearing Jams
Back to Contents Page Clearing Jams Avoiding Jams Identifying the Location of Paper Jams Clearing Paper Jams From the MPF Clearing Paper Jams From the Standard Tray Clearing Paper Jams From the Fuser Clearing Paper Jams From the Duplexer Clearing Paper Jams From the Optional Feeder Clearing Paper Jams From the Output Expander Careful selection of appropriate print media and proper loading allow you to avoid most jams. - Page 372 CAUTION: Do not attempt to clear any jams using tools or instruments. This may permanently damage the printer. 1 Fuser 2 Duplexer 3 Front Cover 4 MPF 5 550-Sheet Feeder (optional) 6 Tray 1 Clearing Paper Jams From the MPF NOTE: To resolve the error displayed on the operator panel, you must clear all print media from the print media path.
- Page 373 3. Raise the latch on the handle of the right hand cover to open the cover. 4. Remove any remaining pieces of paper jammed in the MPF. 5. Use the handle to lift the duplexer. 6. Remove any remaining pieces of paper.
- Page 374 7. Close the right hand cover. NOTE: When closing the right hand cover, apply your hand in the vicinity of the handle as shown in the illustration, and then press the cover firmly toward the printer. NOTE: Stand straight in front of the right hand cover and not in front of the front cover, whenever you close the right hand cover.
- Page 375 3. Use the handle to lift the duplexer. 4. Remove any remaining pieces of paper. 5. Close the right hand cover. NOTE: When closing the right hand cover, apply your hand in the vicinity of the handle as shown in the illustration, and then press the cover firmly toward the printer.
-
Page 376: Clearing Paper Jams From The Fuser
7. Remove any paper jammed, creased or both from tray 1. 8. Replace tray 1 in the printer. Clearing Paper Jams From the Fuser CAUTION: Before performing any of the following procedures, read and follow the safety instructions in your Product Information Guide. CAUTION: To prevent electric shock, always turn off the printer and disconnect the power cable from the grounded outlet before performing maintenance. - Page 377 2. Hold and lower the tab to open the inner part. CAUTION: Be careful not to touch the fuser. It can burn your fingers. 3. Remove the jammed paper. 4. Replace the inner part. 5. Close the right hand cover.
-
Page 378: Clearing Paper Jams From The Duplexer
NOTE: When closing the right hand cover, apply your hand in the vicinity of the handle as shown in the illustration, and then press the cover firmly toward the printer. NOTE: Stand straight in front of the right hand cover and not in front of the front cover, whenever you close the right hand cover. - Page 379 4. Close the right hand cover. NOTE: When closing the right hand cover, apply your hand in the vicinity of the handle as shown in the illustration, and then press the cover firmly toward the printer. NOTE: Stand straight in front of the right hand cover and not in front of the front cover, whenever you close the right hand cover.
- Page 380 3. Close the right hand cover of the optional feeder. 4. Remove the tray from the same feeder. 5. Remove any paper jammed, creased or both from the feeder. 6. Replace the feeder in the printer.
- Page 381 Clearing Paper Jams From the Output Expander Clearing Paper Jams From Inside the Output Expander NOTE: To resolve the error displayed on the operator panel, you must clear all print media from the print media path. 1. Ensure that the printer is not in operation, and open the front door of the output expander. 2.
- Page 382 4. If the paper jam message remains, repeat Step 1 Step 5. Close the front door of the output expander. Clearing Paper Jams From H Transport Unit NOTE: To resolve the error displayed on the operator panel, you must clear all print media from the print media path.
- Page 383 Clearing Staple Jams From the Output Expander 1. Ensure that the printer is not in operation, and open the front door of the output expander. 2. Grasp the orange lever on the stapler cartridge and pull out the cartridge. 3. Visually check inside the output expander for any remaining staples. 4.
- Page 384 7. Grasp the orange lever on the stapler cartridge and push the cartridge in the printer until it clicks into place. 8. Close the front door of the output expander. Back to Contents Page...
-
Page 385: Basic Printer Problems
Back to Contents Page Troubleshooting Basic Printer Problems Display Problems Printing Problems Print Quality Problems Jam/Alignment Problems Noise Digital Certificate Problem Problems with Installed Optional Accessories Other Problems Contacting Service Basic Printer Problems Some printer problems can be easy to resolve. If a problem occurs with your printer, check each of the following: The power cable is plugged into the printer and a properly grounded electrical outlet. - Page 386 Envelope misfeeds or Reduce the number of envelopes in the stack. multiple feeds occur. Page breaks in Increase the setting for Time-Out in the Printer Settings menu in the Dell Printer unexpected places. Configuration Web Tool. Job prints from the wrong...
-
Page 387: Print Quality Problems
If you are using non-Dell brand toner cartridges, enable the Non-Dell Toner option. 1. Launch the Dell Printer Configuration Web Tool by entering your printer's IP address in your web browser. (If you do not know how to launch the Dell Printer Configuration Web Tool, see "Dell Printer Configuration Web... -
Page 388: Toner Smears Or Print Comes Off
"Loading an Envelope in the MPF." Then raise the fixing temperature by turning up the value of Go to the Adjust Fuser of the Dell Configuration Web Tool. The task is complete. action NOTE: When you use the optional output expander, check if the lever of the output expander is pulled down (normal mode). -
Page 389: The Entire Output Is Blank
The task is complete. (The fuser you are Software." Contact using has been damaged. Replace it with a The Tool Box opens. Dell. new one.) 3. Select Chart Print from the left list. 4. Click the Pitch Configuration Chart button. The Pitch Configuration Chart is printed. -
Page 390: Streaks Appear On The Output
2. Replace the toner cartridges as necessary. Does this solve your problem? If you are using non-Dell brand toner cartridges, enable the Non-Dell Toner option. 1. Launch the Dell Printer Configuration Web Tool by entering your printer's IP address in your web browser. (If you do not know how to launch the Dell Printer Configuration Web Tool, see "Dell... -
Page 391: Part Or The Entire Output Is Black
2. Replace the toner cartridges as necessary. Does this solve your problem? If you are using non-Dell brand toner cartridges, enable the Non-Dell Toner option. 1. Launch the Dell Printer Configuration Web Tool by entering your printer's IP address in your web browser. (If you do not know how to launch the Dell Printer Configuration Web Tool, see "Dell... -
Page 392: Pitched Color Dots
2. Select Chart Print from the left list. Contact 3. Click the Pitch Configuration Chart button. Drum cartridge - 2 Dell. Fuser - 3 The Pitch Configuration Chart is printed. Belt unit - 4 4. Compare the pitch of the color spots on your output with that on the Pitch Configuration Chart, and locate the cause of the problem. -
Page 393: Vertical Blanks
Dell. new one.) 3. Select Chart Print from the left list. 4. Click the Pitch Configuration Chart button. The Pitch Configuration Chart is printed. Does this solve your problem? Vertical blanks Action Clean inside the printer by using the cleaning rod. - Page 394 Software." type of ghosting. Contact The Tool Box opens. Positive ghost - 2a Dell. 2. Select Chart Print from the left list. 3. Click the Ghost Configuration Chart button. Negative ghost - 2b The Ghost Configuration Chart is printed. Is the type of ghosting identified? Replace the drum cartridge if you have a spare.
- Page 395 Dell Printer Configuration Web Tool, see "Dell Printer Configuration Web Tool".) Go to 2. When the Dell Printer Configuration Web Tool starts, select Printer The task is complete. action Settings. 3. Click the Printer Maintenance tab.
-
Page 396: Jagged Characters
Replace it with Dell. 3. Select Chart Print from the left list. a new one.) 4. Click the 4 Color Configuration Chart button. The 4 Color Configuration Chart is printed. Does this solve your problem? Jagged characters Action Set Print Mode to High Quality in the printer driver. -
Page 397: Auger Mark
The task is complete. (The drum cartridge you Contact Printer Software." are using has been damaged. Replace it with a Dell. The Tool Box opens. new one.) 3. Select Chart Print from the left list. 4. Click the MQ Chart button. - Page 398 If using non-recommended print media, use the The print media you are print media recommended for the printer, and test using is not supported. Use Contact Dell. print your document again. another one. Does this solve your problem? Check if the envelope lever of the printer is down when you print on envelope, and test print your document again.
-
Page 399: Damage On The Leading Edge Of Paper
NOTE: Some of the following procedures that use the Tool Box can also be performed using the operator panel or Dell Printer Configuration Web Tool. For information on how to use the operator panel and Dell Configuration Web Tool, see "Understanding the Printer... -
Page 400: Color Registration Is Out Of Alignment
Ensure that the margin is installed correctly on the application being used. The task is complete. Go to action 2. Does this solve your problem? In Customer mode, correct the S-S direction KtoP parameter. The task is complete. Contact Dell. Does this solve your problem? The side margin is incorrect Action... -
Page 401: Images Are Skewed
Execute auto color registration adjustment. 1. Launch the Dell Printer Configuration Web Tool by entering your printer's IP address in your web browser. (If you do not know how to launch the Dell Printer Configuration "Dell Printer Configuration Web Tool".) - Page 402 Does this solve your problem? Wipe the separator rollers in tray 1 with a The task is cloth moistened with water. Contact Dell. complete. Does this solve your problem? Press the envelope to expel any remaining air The task is in it.
-
Page 403: Mpf Misfeed Jam
Does this solve your problem? Wipe the separator rollers in MPF with a cloth moistened with water. The task is Contact Dell. complete. Does this solve your problem? Press the envelope to expel any remaining air in it. The task is Go to action complete. - Page 404 Does this solve your problem? Wipe the separator rollers in tray with a cloth The task is moistened with water. Contact Dell. complete. Does this solve your problem? Turn over the print media. The task is Go to action 4a.
- Page 405 Printer Software." Contact using has been damaged. Replace it with a The Tool Box opens. Dell. new one.) 3. Select Chart Print from the left list. 4. Click the Pitch Configuration Chart button. The Pitch Configuration Chart is printed. Does this solve your problem?
- Page 406 Wipe the separator rollers in the MPF with a cloth moistened with water. The task is complete. Go to action 5. Does this solve your problem? Replace the separator rollers in the MPF if you have a spare. The task is complete. Contact Dell. Does this solve your problem? Noise Action...
-
Page 407: Digital Certificate Problem
The task is complete. (The drum cartridge (YMC) Replace the drum cartridge (YMC). Contact you are using has been damaged. Replace it with Dell. Does this solve your problem? a new one.) The task is complete. (The toner cartridge (K) Go to Replace the toner cartridge (K). - Page 408 016-404 is displayed when setting the encryption of the HDD to OFF. 016-404 is displayed when formatting the HDD. Security is set to OFF when The HDD is formatted and the certificate data is deleted setting when setting encryption of the HDD to OFF. Since a encryption of After initializing, import the certificate and certificate is required and the security function cannot be...
-
Page 409: Problems With Installed Optional Accessories
Remove the print media left in the H Transport Unit. The task is complete. Go to action 5. Does this solve your problem? Wipe the separator rollers in tray 1 with a cloth moistened with water. The task is complete. Contact Dell. Does this solve your problem? -
Page 410: Other Problems
Compile Exit SNR OFF Jam Action Remove the print media left in the H Transport Unit. The task is complete. Contact Dell. Does this solve your problem? Set Eject Jam Action If using non-recommended print media, use the print media recommended for... -
Page 411: Dell Technical Support Policy
Dell, as well as the verification of appropriate functionality of the printer and all Dell- installed hardware. In addition to this technician assisted technical support, online technical support is available at Dell Support. -
Page 412: Warranty And Return Policy
Dell catalog. Dell provides several online and telephone-based support and service options. Availability varies by country and product, and some services may not be available in your area. To contact Dell for sales, technical support, or customer service issues: 1.