Table of Contents
Advertisement
Quick Links
Advertisement
Table of Contents

Related Manuals for Echo SRM-400


Summary of Contents for Echo SRM-400
- Page 1 OPERATOR’S MANUAL WARNING READ INSTRUCTIONS CAREFULLY AND FOLLOW RULES FOR SAFE OPERATION. FAILURE TO DO SO COULD RESULT IN SERIOUS INJURY. ECHO, INCORPORATED 400 Oakwood Road, Lake Zurich, Illinois 60047-1564 Phone : 847-540-8400 TRIMMER/ BRUSHCUTTER SRM-400 DANGER ECHO X750-002 74 0...
-
Page 2: Table Of Contents
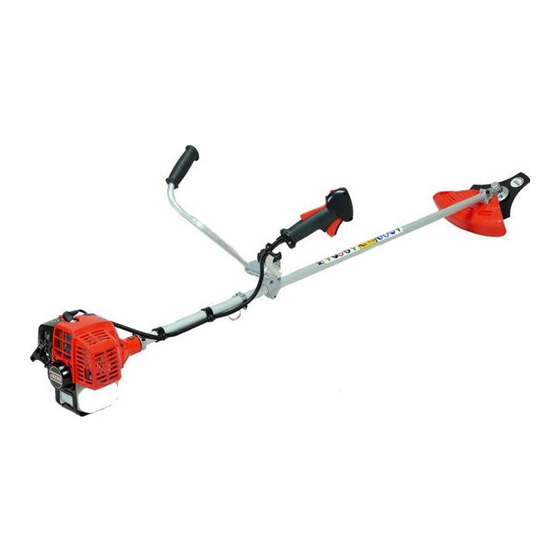
The ECHO Trimmer/Brushcutter, model SRM-400 is lightweight, high performance gasoline powered rotary trimmer which is designed for brushcutting, weed control and grass trimming in areas which are difficult to control by any other means. The trimmer is equipped with a safety shoulder harness, and the excellent balance characteristics plus the available power, ensures comfortable operation. -
Page 3: Rules For Safe Operation
9. Always use the cutting attachments as approved and supplied by ECHO Inc. for your unit. 10. Always remain alert when operating the unit to avoid possible injury to yourself and other people. -
Page 4: Nomenclature Have Parts
CHAMPION CJ-6Y Recoil starter Automatic centrifugal clutch Mixture of gasoline (Unleaded, 89 octane minimum) and specially blended 50 : 1 ECHO two cycle engine oil. 1.0 (33.8 US fl oz) Nylon line cutter head Circular saw, 25 cm (10 in) 8 cutter blade, 20 cm (8 in) 60 degree bevel gears, ratio 1 : 1.33 (Counter-clockwise) -
Page 5: Assembling
Bolts Right hand grip assembly Slot Right hand U-handle Grip assembling bolt Handle assembling bolt (8 mm) Bolt retainer tube Handle assembling bracket (upper) Handle assembling bolt (8 mm) Left handle Handle assembling bracket (lower) ASSEMBLING DRIVE SHAFT • Stand engine uprignt on a level floor. •... - Page 6 Right handle assembling bolt Right handle assembling bracket Right hand U-handle Adjustment of right handle inclination (left/right) Adjustment of right handle inclination (forward/ backward) Adjustment of left handle inclination (forward/ backward) Shoulder strap assembly Quick release latch Waist pad Loosen 4 right handle assembling bolts and insert right hand U-handle into right handle assembling bracket.
-
Page 7: Operation
10% ethyl (grain) alcohol or 15% MTBE (methyl tertiary-butyl ether). Gasohol containing methyl (wood) alcohol is not approved. OIL : ECHO brand premium two-stroke 50:1 oil is reguirred. Mix oil and gasoline /gasohol according to insturctions on the oil container label. -
Page 8: Starting Warm Engine
• Release throttle trigger and allow to run at an idle speed. • Side ignition switch to “STOP” position. OPERATING THE TRIMMER • Adjust handle to a convenient position for cutting as instructed on page 6. • Allow the engine to warm up at a fast idle for a few minutes. - Page 9 ECHO Operator’s Manual and by your ECHO Servicing Dealer. 4. Always wear eye protection that conforms to ANSI Z 87. 1-2000.
- Page 10 “right”, and separating parts. B. Thread a 6 m (20 feet) length of 2.4 mm (0.095 in) or 2.7 mm (0.105 in) ECHO line through hole in spool so that ends are the same length. C. Wind both ends of line tightly and evenly clockwise (see arrows on spool), and wind from side to side without twisting the lines.
- Page 11 • Attach the trimmer/brushcutter to the harness by means of the quick release latch. • Make some practice sweeps as with a trimmer and readjust the harness as necessary for comfort and to maintain the cutter parallel to the ground.
- Page 12 TO AVOID INJURY DUE TO KICKBACK OR BLADE FRACTURE, DO NOT USE THIS BLADE TO CUT BRUSH OR TREES. 3. ECHO INC. WILL NOT BE RESPONSIBLE FOR THE FAILURE OF CUTTING DEVICES WHICH HAVE NOT BEEN TESTED AND APPROVED BY ECHO FOR USE WITH THIS UNIT.
- Page 13 Install the harness over the both shoulders and adjust shoulder straps so that the quick release latch rests low on the right hand side. • Attach the trimmer/brushcutter to the harness by means of the quick release latch. • Make some practice sweeps as with a scythe...
- Page 14 Brush Blade Weed/Grass Blade (80 tooth) Upper fixing plate Locking tool Box wrench TIGHTEN Locking tool Lower fixing plate Split pin Assemble cutter blade properly Gear housing Locking tool Adapter plate (Upeer) Adapter plate (Lower) Split pin INSTALLING THE BLADE 1.
- Page 15 HEAVY WEED CUTTING • Install the 8 tooth 20 cm (8 in) blade. (option) • Observing all precautions as listed in this manual, start the engine and using full throttle, swing the blade in an arc as you move forward slowly.
-
Page 16: Maintenance And Care
MAINTENANCE AND CARE - ALWAYS KEEP THE UNIT CLEAN - Air filter Air cleaner cover Fuel strainer Muffler cover Screen Air intake AIR FILTER Latch • Clean before using the unit. - Close choke. Disengage latch and remove air cleaner cover. - Remove air filter. - Page 17 “Spark Arrestor Screen”. 2. Make sure the cutting attachment such as hedge clipper blades or circular saw are properly adjusted. Trimmer line should be extended to cut-off knife. 3. Start engine and run several minutes to bring to operating temperature.
-
Page 18: Trouble Shooting
Cutter edge Not sharpened Tooth bottom Poor performance of the engine and/or trimming mechanism can normally be prevented by carefully following instructions. Poor performances can easily be corrected even by a beginner. When the engine does not function properly check the following three (3) points first. •... - Page 19 Table 1 Fuel strainer clogged Fuel is not reaching Fuel pipe clogged carburetor Suction insufficient Fuel is not reaching Strainer clogged cylinder Carburetor out of order C.D.I. module defective Ignition coil defective No spark at high Wire connection defective tension cord end High-tension cord connection defective Switch is grounded...
-
Page 20: Long Term Storage
Table 2 Engine overheated Firing function defective Carburetor defective Other troubles Blade does not cut well Blade does not rotate • Inspect and adjust every part of the unit. - Completely clean every part, and repair, if necessary. - Apply thin coating of oil on metal parts to prevent rust.