Table of Contents
Advertisement
Available languages
Available languages
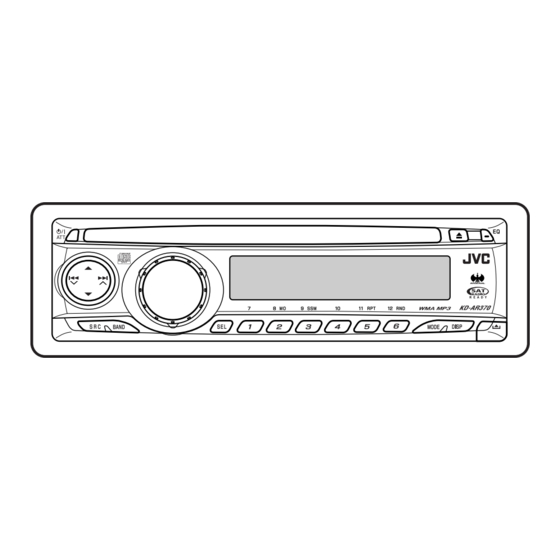
CD RECEIVER
RECEPTOR CON CD
RECEPTEUR CD
For canceling the display demonstration, see page 7.
Para cancelar la demostración en pantalla, consulte la página 7.
Pour annuler la démonstration des affichages, référez-vous à la page 7.
For installation and connections, refer to the separate manual.
Para la instalación y las conexiones, refiérase al manual separado.
Pour l'installation et les raccordements, se référer au manuel séparé.
INSTRUCTIONS
MANUAL DE INSTRUCCIONES
MANUEL D'INSTRUCTIONS
KD-AR370/KD-G320
KD-AR370/KD-G320
KD-AR370/KD-G320
For customer Use:
Enter below the Model
No. and Serial No. which
are located on the top or
bottom of the cabinet.
Retain this information
for future reference.
Model No.
Serial No.
GET0349-001A
[J]
Advertisement
Table of Contents

Related Manuals for JVC G320 - KD Radio / CD


Summary of Contents for JVC G320 - KD Radio / CD
- Page 1 CD RECEIVER KD-AR370/KD-G320 RECEPTOR CON CD KD-AR370/KD-G320 RECEPTEUR CD KD-AR370/KD-G320 For canceling the display demonstration, see page 7. Para cancelar la demostración en pantalla, consulte la página 7. Pour annuler la démonstration des affichages, référez-vous à la page 7. For installation and connections, refer to the separate manual. For customer Use: Para la instalación y las conexiones, refiérase al manual separado.
-
Page 2: How To Reset
INFORMATION (For U.S.A.) How to reset your unit • Your preset adjustments will also be erased. • If a disc is loaded, it will eject. Be careful not to drop the disc. How to forcibly eject a disc • If this does not work, reset your unit. •... - Page 3 CONTENTS Basic operations ............ 6 Playing a disc in the unit ........8 Playing discs in the CD changer ......9 Detaching... Attaching...
-
Page 4: Parts Identification
Control panel — Control panel — KD-G612/KD-G611/KD-G511 KD-AR370 and KD-G320 Parts identification Display window ¢ Display window ∞ Lights up only when CD-CH is selected as the playback source. Lights up for the built-in CD player. DO NOT expose the remote sensor to strong light (direct sunlight or artificial lighting). -
Page 5: Remote Controller
Remote controller — Main elements and features RM-RK50 Installing the lithium coin battery (CR2025) Aim the remote controller directly at the remote sensor on the unit. Make sure there is no obstacle in between. ∞ Warning: ∞ ∞ ∞ 2 Caution: Returns to the previous menu. -
Page 6: Getting Started
For FM/AM tuner For SIRIUS radio For XM radio ⁄ Adjust the volume. ∞ Volume level appears. Getting started Basic operations Volume level indicator Turn on the power. Adjust the sound as you want. (See pages 11 and 12.) Ÿ Caution on volume setting: To drop the volume in a moment (ATT) -
Page 7: Radio Operations
Radio operations Lights up when monaural mode is activated. Ÿ Lights up when receiving an FM stereo broadcast with sufficient signal strength. Selected band appears. -
Page 8: Disc Operations
Ô Disc operations Preset number flashes for a while. - Page 9 Ÿ...
-
Page 10: Other Main Functions
Other main functions Changing the display information Skipping tracks quickly during play While playing an audio CD or a CD Text Only possible on JVC MP3-compatible CD changer • For MP3 or WMA discs, you can skip tracks within the same folder. -
Page 11: Sound Adjustments
Sound adjustments Selecting the playback modes Select your desired playback mode. Repeat play Ex.: When “ROCK” is selected Mode Plays repeatedly Preset values LOUD TRK RPT (bass) (treble) (loudness) Indication (For) FLDR RPT* USER DISC RPT* ROCK RPT OFF Random play CLASSIC POPS Mode... -
Page 12: General Settings - Psm
General settings — PSM Indication [Range] BAS* TRE* Select a PSM item. FAD* BAL* Ex.: When “DIMMER” is selected LOUD* Adjust the PSM item selected. SUB.W* Repeat steps 2 and 3 to adjust other PSM items if necessary. Finish the procedure. - Page 13 Indications Selectable settings, [reference page] DEMO DEMO ON : DEMO OFF : CLOCK H CLOCK M CLK ADJ* AUTO T-ZONE* * “ ATLANTIC “ NEWFOUND “ ALASKA “ EASTERN PACIFIC “ MOUNTAIN “ CENTRAL “ DST* * SID* DIMMER TEL* MUTING 1/MUTING 2: SCROLL* ONCE...
- Page 14 Indications Selectable settings, [reference page] WOOFER* : [Initial]; HIGH EXT IN* CHANGER : [Initial]; EXT IN L/O MODE REAR : [Initial]; WOOFER TAG DISP TAG ON : [Initial]; TAG OFF AMP GAIN LOW PWR HIGH PWR : [Initial]; AREA AREA US : [Initial];...
-
Page 15: Satellite Radio Operations
Activate your SIRIUS subscription after Satellite radio operations connection: • • • Listening to the satellite radio Activate your XM subscription after connection:... - Page 16 Listening to the XM Satellite radio Listening to the SIRIUS Satellite radio Searching for category/channel...
-
Page 17: Storing Channels In Memory
Storing channels in memory Current channel number Ex.: When you select “COUNTRY” for Category Search Preset number flashes for a while. Listening to a preset channel Checking the XM Satellite radio ID To change the display information while listening to a channel Clock = Category name = Channel name = Artist name = Composer name* = Song/program name/title =... -
Page 18: Ipod®/D. Player Operations
⁄ iPod®/D. player operations Adjust the sound as you want. (See pages 11 and 12.) To pause stop playback Interface adapter for iPod D. player interface adapter To fast-forward or reverse the track To go to the next or previous tracks Caution: * For iPod * For D. -
Page 19: Selecting The Playback Modes
Confirm the selection. Random play To move back to the previous menu, press 5. ALBM RND* Functions the same as “Shuffle Albums” of • If a track is selected, playback starts the iPod. automatically. SONG RND/RND ON • If the selected item has another layer, you Functions the same as “Shuffle Songs”... -
Page 20: Other External Component Operations
Other external component More about this unit operations Basic operations Turning on the power Turning off the power Tuner operations Storing stations in memory Ÿ Turn on the connected component and start playing the source. Adjust the volume. Disc operations ⁄... - Page 21 ") To be continued...
- Page 22 iPod® or D. player operations Changing the source Ejecting a disc Notice: General settings—PSM For iPod users: For D. player users: Satellite radio operations...
-
Page 23: Maintenance
Maintenance Connector Do not use the following discs: Warped disc Sticker Sticker residue Stick-on label When removing a disc from Center holder its case, When storing a disc into its case,... -
Page 24: Troubleshooting
Troubleshooting Symptoms Remedies/Causes... - Page 25 Symptoms Remedies/Causes To be continued...
- Page 26 Symptoms Remedies/Causes...
-
Page 27: Specifications
Specifications AUDIO AMPLIFIER SECTION CD PLAYER SECTION × Ω ≤ Ω Ω Ω Ω Ω Ω GENERAL Ω TUNER SECTION × × × × × × " " " × × × × " " " [FM Tuner] Ω Design and specifications are subject to change without notice. - Page 28 • También se borrarán los ajustes preestablecidos por usted. • Se expulsará cualquier disco que esté cargado. Tenga la precaución de no dejar caer el disco. • Si esto no funciona, intente reposicionar su receptor. • Tenga cuidado de no dejar caer el disco al ser expulsado.
- Page 29 CONTENIDO Operaciones básicas ..........6 Para reproducir un disco en el receptor ....8 Para reproducir discos en el cambiador de CD ..9 Desmontando... Montando...
-
Page 30: Panel De Control
Panel de control — KD-AR370 y KD-G320 ¢ ∞ Se enciende sólo cuando se selecciona CD-CH como fuente de reproducción. Se enciende para el reproductor de NO exponga el sensor remoto a una luz CD incorporado. potente (luz solar directa o iluminación artificial). -
Page 31: Control Remoto
Control remoto — Elementos principales y funciones RM-RK50 Instalación de la pila botón de litio (CR2025) Apunte el control remoto directamente hacia el sensor remoto del receptor. Asegúrese de que no hayan obstáculos entremedio. Advertencia: ∞ ∞ ∞ Precaución: ∞ 2 Vuelve al menú... -
Page 32: Procedimientos Iniciales
⁄ ∞ Aparece el nivel de volumen. Procedimientos iniciales Indicador de nivel de volumen Ÿ... -
Page 33: Operaciones De La Radio
Operaciones de la radio Se enciende cuando se activa el modo monaural. Ÿ Se enciende cuando se recibe una radiodifusión FM estéreo con una intensidad de señal suficiente. Aparece la banda seleccionada. -
Page 34: Operaciones De Los Discos
Ô Operaciones de los discos El número de preajuste parpadea durante unos momentos. - Page 35 Ÿ...
-
Page 37: Ajustes Del Sonido
Ajustes del sonido Ej.: Cuando se selecciona “ROCK” (graves) (agudos) (sonoridad) TRK RPT FLDR RPT* USER DISC RPT* ROCK RPT OFF CLASSIC POPS FLDR RND* HIP HOP JAZZ DISC RND MAG RND* RND OFF... -
Page 38: Configuraciones Generales
Configuraciones generales — PSM Indicación [Margen] BAS* TRE* FAD* BAL* LOUD* Ej.: Cuando se selecciona “DIMMER” SUB.W*... - Page 39 Indicaciones Configuraciones seleccionables, [página de referencia] DEMO DEMO ON : DEMO OFF : CLOCK H CLOCK M CLK ADJ* AUTO T-ZONE* * “ ATLANTIC “ NEWFOUND “ ALASKA “ EASTERN PACIFIC “ MOUNTAIN “ CENTRAL “ DST* * SID* DIMMER TEL* MUTING 1/MUTING 2: SCROLL*...
- Page 40 Indicaciones Configuraciones seleccionables, [página de referencia] WOOFER* HIGH EXT IN* CHANGER EXT IN L/O MODE REAR WOOFER TAG DISP TAG ON TAG OFF AMP GAIN LOW PWR HIGH PWR AREA AREA US AREA SA AREA EU...
- Page 41 Active la suscripción de SIRIUS después de la Operaciones de la radio conexión: satelital • • • Para escuchar la radio satelital Active la suscripción de XM después de la conexión:...
- Page 42 Para escuchar la radio satelital XM Para escuchar la radio SIRIUS Satellite Búsqueda de categoría/canal...
-
Page 43: Cómo Almacenar Canales En La Memoria
Seleccione el canal de audición. Cómo almacenar canales en la memoria Número de canal actual Sintonice el canal que desee. Ej.: Cuando seleccione ”COUNTRY” para la búsqueda de categoría El número de preajuste parpadea durante unos momentos. Cómo escuchar un canal preajustado Seleccione la radio satelital SIRIUS o Para consultar el número de identificación de la radio satelital XM... -
Page 44: Operaciones Del Ipod®/ Reproductor D
⁄ Operaciones del iPod®/ Ajuste el sonido según se desee. (Consulte las páginas 11 y 12). reproductor D. Adaptador de interfaz para iPod Adaptador de interfaz del reproductor D. * Para iPod * Para el reproductor D. Ingrese al menú principal. Preparativos: 5 ∞... -
Page 45: Reproducción Aleatoria
Confirme la selección. Reproducción aleatoria ALBM RND* SONG RND/RND ON ¢ RND OFF * El modo de selección de menú será cancelado: * Para iPod: Sólo si se selecciona “ALL” en Si no se realiza ninguna operación durante “ALBUMS” del “MENU” principal. aproximadamente 5 segundos. -
Page 46: Operaciones Del Otro Componente Externo
Operaciones del otro Más sobre este receptor componente externo Ÿ Encienda el componente conectado y comience a reproducir la fuente. Ajuste el volumen. ⁄ Ajuste el sonido según se desee. (Consulte las páginas 11 y 12). Ô... - Page 47 Continúa...
- Page 48 Para usuarios de iPod: Para los usuarios del reproductor D.:...
-
Page 49: Mantenimiento
Para mantener los discos limpios Mantenimiento Un disco sucio podría no reproducirse correctamente. Cómo limpiar los conectores Si se llegara a ensuciar un disco, límpielo con un lienzo suave, en Un desmontaje frecuente producirá el deterioro línea recta desde el centro hacia el borde. de los conectores. -
Page 50: Localización De Averías
Localización de averías Síntomas Soluciones/Causas Continúa... - Page 51 Síntomas Soluciones/Causas Continúa...
- Page 52 Síntomas Soluciones/Causas...
-
Page 53: Especificaciones
Especificaciones SECCIÓN DEL AMPLIFICADOR DE AUDIO SECCIÓN DEL REPRODUCTOR DE CD × Ω ≤ Ω Ω Ω Ω Ω Ω Ω GENERAL SECCIÓN DEL SINTONIZADOR × × × × × × × × × × [Sintonizador de FM] Ω Ω El diseño y las especificaciones se encuentran sujetos a cambios sin previo aviso. - Page 54 • • • • 5 ∞ ATTENTION: Indicateur de compte à rebours Pour utiliser à nouveau ces touches pour leurs ATTENTION: fonctions originales après avoir appuyé sur MODE,...
- Page 55 TABLE DES MATIERES Opérations de base ..........6 Lecture d’un disque dans l’autoradio ....8 Lecture de disques dans le changeur de CD ..9 Détachement... Attachement...
-
Page 56: Panneau De Commande
Panneau de commande — KD-AR370 et KD-G320 ¢ ∞... -
Page 57: Composants Principaux Et Caractéristiques
Télécommande — Composants principaux et RM-RK50 caractéristiques Mise en place de la pile-bouton au lithium (CR2025) Dirigez la télécommande directement sur le capteur de télécommande de autoradio. Assurez-vous qu’il n’y a pas d’obstacle entre les deux. Avertissement: ∞ ∞ ∞ ∞... -
Page 58: Pour Commencer
⁄ ∞ Le niveau de volume apparaît. Pour commencer Indicateur de niveau de volume Ÿ... -
Page 59: Fonctionnement De La Radio
Fonctionnement de la radio S’allume quand le mode monophonique est mis en service. Ÿ S’allume lors de la réception d’une émission FM stereo avec un signal suffisamment fort. La bande choisie apparaît. -
Page 60: Opérations Des Disques
Ô Opérations des disques Le numéro de préréglage clignote un instant. - Page 61 Ÿ...
-
Page 63: Ajustements Sonores
Ajustements sonores Ex. : Quand “ROCK” est choisi TRK RPT (graves) (aigus) (loudness) FLDR RPT* USER DISC RPT* ROCK RPT OFF CLASSIC POPS HIP HOP FLDR RND* JAZZ DISC RND MAG RND* RND OFF... -
Page 64: Réglages Généraux - Psm
Réglages généraux — PSM Indication [Plage] BAS* TRE* FAD* BAL* Ex. : Quand “DIMMER” est choisi LOUD* SUB.W*... - Page 65 Indications Réglages pouvant être choisis, [page de référence] DEMO DEMO ON : DEMO OFF : CLOCK H CLOCK M CLK ADJ* AUTO T-ZONE* * “ ATLANTIC “ NEWFOUND “ ALASKA EASTERN “ PACIFIC “ MOUNTAIN “ CENTRAL “ DST* * SID* DIMMER TEL*...
- Page 66 Indications Réglages pouvant être choisis, [page de référence] WOOFER* HIGH EXT IN* CHANGER EXT IN L/O MODE REAR WOOFER TAG DISP TAG ON TAG OFF AMP GAIN LOW PWR HIGH PWR AREA AREA US AREA SA AREA EU...
-
Page 67: Utilisation De La Radio Satellite
Activez votre suscription SIRIUS après la Utilisation de la radio connexion: satellite • • • Écoute de la radio satellite Activez votre suscription XM après la connexion:... - Page 68 Écoute de la radio satellite XM Écoute de la radio satellite SIRIUS Recherche d’une catégorie/canal...
-
Page 69: Mémorisation Des Canaux
Mémorisation des canaux Numéro du canal actuel Ex.: Quand vous choisissez “COUNTRY” pour la recherche de catégorie Le numéro de préréglage clignote un instant. Écoute d’un canal préréglée Vérification du numéro d’identification de la radio satellite XM Pour changer les informations affichées lors de l’écoute d’un canal Horloge = Nom de la catégorie = Nom du canal = Nom de l’artiste = Nom du compositeur* =... -
Page 70: Utilisation De Ipod®/ Lecteur D
⁄ Utilisation de iPod®/ Ajustez le son comme vous le souhaitez. (Voir les pages 11 et 12.) lecteur D. Adaptateur d’interface pour iPod Adaptateur d’interface pour lecteur D. * Pour iPod * Pour le lecteur D. Préparations: Entrez dans le menu principal. Ÿ... -
Page 71: Lecture Aléatoire
Validez le choix. Lecture aléatoire ALBM RND* SONG RND/RND ON ¢ RND OFF * Pour iPod: Uniquement si vous choisissez * Le mode de sélection de menu est annulé: “ALL” dans “ALBUMS” du menu Si aucune opération n’est effectuée pendant principal “MENU”. -
Page 72: Utilisation D'un Autre Appareil Extérieur
Utilisation d’un autre Pour en savoir plus à appareil extérieur propos de cet autoradio Ÿ Mettez l’appareil connecté sous tension et démarrez la lecture de la source. Ajustez le volume. ⁄ Ajustez le son comme vous le souhaitez. (Voir les pages 11 et 12.) Ô... - Page 73 À suivre...
- Page 74 Pour les utilisateurs de iPod: Pour les utilisateurs d’un lecteur D.:...
-
Page 75: Entretien
Pour garder les disques propres Entretien Comment nettoyer les connecteurs Pour reproduire un disque neuf Connecteur Condensation d’humidité N’utilisez pas les disques suivants: Disque gondolé Autocollant Reste d’étiquette Étiquette autocollante Comment manipuler les disques Pour retirer un disque de sa Support central boîte, Pour remettre un disque dans sa boîte,... -
Page 76: Guide De Dépannage
Guide de dépannage Symptôme Remèdes/Causes À suivre... - Page 77 Symptôme Remèdes/Causes À suivre...
- Page 78 Symptôme Remèdes/Causes...
-
Page 79: Spécifications
Spécifications SECTION DE L’AMPLIFICATEUR AUDIO SECTION DU LECTEUR CD × Ω ≤ Ω Ω Ω Ω Ω Ω Ω GÉNÉRALITÉS SECTION DU TUNER × × × × × × × × × × [Tuner FM] Ω La conception et les spécifications sont sujettes à changement sans notification. - Page 80 Having TROUBLE with operation? Please reset your unit Refer to page of How to reset your unit Still having trouble?? USA ONLY Call 1-800-252-5722 http://www.jvc.com We can help you! EN, SP, FR © 2005 Victor Company of Japan, Limited 1105DTSMDTJEIN...