Samsung Galaxy Tab GT-P6210 User Manual
Android tablet 7.0 plus
Hide thumbs
Also See for Galaxy Tab GT-P6210:
- User manual (253 pages) ,
- Service manual (70 pages) ,
- Manual (52 pages)
Table of Contents
Advertisement
Quick Links
Download this manual
See also:
Service Manual
Advertisement
Table of Contents

Related Manuals for Samsung Galaxy Tab GT-P6210


Summary of Contents for Samsung Galaxy Tab GT-P6210
- Page 1 A N D R O I D T A B L E T User Manual Please read this manual before operating your device and keep it for future reference.
-
Page 2: Intellectual Property
All Intellectual Property, as defined below, owned by or which is otherwise the property of Samsung or its respective suppliers relating to the SAMSUNG Galaxy Tab, including but not limited to, accessories, parts, or software relating there to (the “Galaxy Tab System”), is proprietary to Samsung and protected under federal laws, state laws, and international treaty provisions. - Page 3 THERETO. NOTHING CONTAINED IN THE INSTRUCTION MANUAL SHALL BE CONSTRUED TO CREATE AN EXPRESS OR IMPLIED WARRANTY OF ANY KIND WHATSOEVER WITH RESPECT TO THE PRODUCT. IN ADDITION, SAMSUNG SHALL NOT BE LIABLE FOR ANY DAMAGES OF ANY KIND RESULTING FROM THE PURCHASE OR USE OF THE PRODUCT OR ARISING FROM THE BREACH OF THE EXPRESS WARRANTY, INCLUDING INCIDENTAL, SPECIAL OR CONSEQUENTIAL DAMAGES, OR LOSS OF ANTICIPATED PROFITS OR BENEFITS.
- Page 4 Do you have questions about your Samsung Mobile Device? For 24 hour information and assistance, we offer a new FAQ/ARS System (Automated Response System) at: www.samsung.com/us/support ® ® ® Nuance , VSuite , T9 Text Input, XT9 Smart Input, and the Nuance logo are trademarks or registered trademarks of Nuance ™...
- Page 5 ® ABOUT DIVX VIDEO-ON-DEMAND: This DivX Certified device must be registered in order to play purchased DivX Video-on- Demand (VOD) movies. To obtain your registration code, locate the DivX VOD section in your device setup menu (Apps > Settings > About device > Legal information > License settings > DivX® VOD > Register). Go to vod.divx.com for more information on how to complete your registration.
-
Page 6: Table Of Contents
Features ......18 Samsung Keypad ..... . .45 Front View . - Page 7 Entering Text Using Swype ....51 Navigation ......97 Using the Handwriting Feature .
- Page 8 Gallery ......156 Samsung Apps ..... . .167 Gmail .
- Page 9 Talk ....... 169 Samsung Mobile Products and Recycling . . . 216 Task Manager .
- Page 10 CHILDREN ......246 ACCURACY OF THE INFORMATION SECURITY OF THE INFORMATION WE COLLECT ..... . .247 WE COLLECT .
-
Page 11: Section 1: Getting Started
Section 1: Getting Started This section helps you to quickly start using your device. Note: Unless stated otherwise, instructions in this user manual Understanding This User Manual start with the device unlocked, at the Home screen. The sections of this manual generally follow the features of your device. -
Page 12: Battery
Text Conventions Warning! Use only approved charging devices. Approved This manual provides condensed information about how to accessories are designed to maximize battery life. use your device. To make this possible, the following text Using other accessories may invalidate your conventions are used to represent often-used steps: warranty and may cause damage. - Page 13 2. Insert the USB cable into the device’s Charger/ Note: The battery comes partially charged. You must fully Accessory Port (2). charge the battery before using your device for the first time. Correct After the first charge, you can use the device while charging.
-
Page 14: Turning Your Device On And Off
4. When charging is complete, unplug the Charging Head Note: Your device’s internal antenna is located along the top from the power outlet and remove the USB cable from back of the device. Do not block the antenna; doing so the device. - Page 15 Wi-Fi Make it Google Make sure the Wi-Fi OFF / ON icon is set to ON Your new device uses your Google account to fully use its choose one of the following options: Android features, including Gmail, Maps, Navigation, Google Talk, and Google Play Touch Add network to enter a Network SSID that is...
- Page 16 Enable Purchases This Tablet Belongs To ... This screen displays if you signed in to your Google account. To personalize the tablet with your name: 1. Touch the First and Last fields and use the on-screen Enter purchase information for your Google Play keyboard to enter you first and last name.
-
Page 17: Retrieving Your Google Account Password
Retrieving Your Google Account Task Manager Password Your device can run applications simultaneously and some applications run in the background. A Google account password is required for Google applications. If you misplace or forget your Google Account Use Task Manager to see which applications are running on password, follow these instructions to retrieve it: your device and to end running applications to extend battery life. - Page 18 2. Touch the Active applications tab to view applications – or – running on your device. Touch to end an Access Task Manager from the Task manager pop-up. application or End all to stop all running applications. For more information, refer to “Task Manager Pop-Up” 3.
-
Page 19: Memory Card
Memory Card Your device supports removable microSD™ or microSDHC™ memory cards with maximum capacities of 32 GB Correct Incorrect (depending on the memory card manufacturer and type). Memory cards are used to store music, photos, videos, and other files. Note: You can only store music files that you own (from a CD or purchased with the device) on a memory card. -
Page 20: Galaxy Tab Accessories
2. Under SD card, touch Unmount SD card. 3. Open the Memory Card Slot cover and turn to expose To find accessories for your Galaxy Tab: the slot. 1. Go to http://www.samsung.com/us/mobile/galaxy-tab- accessories. Galaxy Tab accessories display. 2. Use your model number to find compatible accessories. -
Page 21: Unlocking The Device
Locking the device manually 2. Swipe across the screen as shown. Press the Power/Lock Key Unlocking the Device 1. Press the Power/Lock Key The Lock screen displays. The last screen you accessed displays. Note: You can customize the Lock screen and set the type of Screen Unlock you want to use (Pattern, PIN, or Password). -
Page 22: Troubleshooting
Troubleshooting If your device has fatal errors, hangs up, or freezes, you may need to reset the device to regain functionality. If your device is frozen and unresponsive: Press and hold the Power/Lock Key for 10 to 15 seconds. -
Page 23: Section 2: Understanding Your Device
Preloaded applications such as AllShare Play , Google Play ® • Books, Google Play Store, Polaris Office, and Samsung Full integration of Google applications (Gmail, YouTube Media Hub. For more information, refer to “Applications” on Google Maps , and Voice Search) page 40. -
Page 24: Front View
Warning! This device does not support some USB storage media devices. For more information, refer to “Galaxy Tab Accessories” on page 15. Front View The following items can be found on the front of your device as illustrated. 1. Light Sensor: Used to control screen brightness automatically and when taking photos with the front-facing Camera. -
Page 25: Side Views
Side Views The following items can be found on the sides of your device. 1. Memory Card Slot: Install a memory card for storage of files. 2. Power/Lock Key: Press and hold to turn the device on or off. Press to lock the device or to wake the screen for unlocking. -
Page 26: Back And Bottom Views
Back and Bottom Views The following items can be found on the back of your device. 1. Camera Lens: Used when taking photos or recording videos. 2. Camera Flash: Used when taking photos. 3. 3.5mm Headset Jack: Plug in for headphones. 4. -
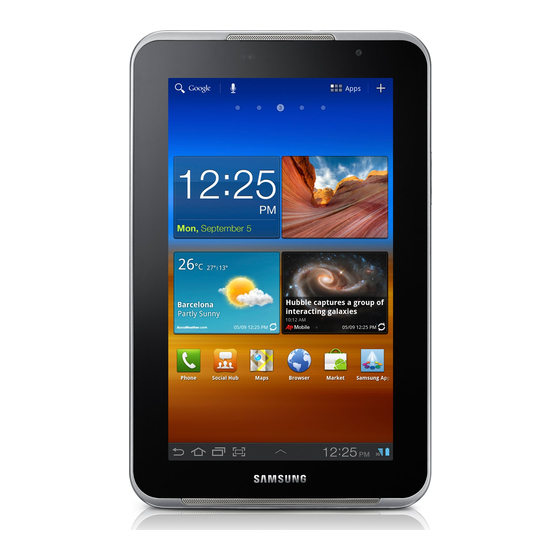
Page 27: Home Screen
Home Screen The Home screen is the starting point for using your device. Note: Unless stated otherwise, instructions in this user manual start with the device unlocked, at the Home screen. 1. Google Search: Search your tablet and the web by typing or speaking. - Page 28 5. App Shortcuts: Shortcuts to common applications. For 12. Mini App Tray: Shortcuts to apps that you can use more information, refer to “App Shortcuts” on anytime, such as a calculator, email, and a music page 36. player. For more information, refer to “Mini App Tray” on page 38.
-
Page 29: Extended Home Screen
Extended Home Screen • Page to add or remove a Home screen. For more information, refer to “Adding and Removing Home Screen Panels” The Home screen consists of the Home panel, plus four on page 24. panels that extend beyond the display width to provide more space for adding shortcuts and widgets. -
Page 30: Navigating Your Device
1. From a Home screen, Default Home Page: Touch the Home icon at pinch the screen from the the upper right corner of a panel to set it as left and right side to the the default home screen. center to display the editing screen. - Page 31 Other Buttons Touch Task manager to display the Task Manager. Screen Capture Google Search Touch Screen Capture to capture an image of the Touch Google to search the web or your device. Context-Sensitive Menus current screen and edit the image, then touch save the image.
-
Page 32: Notifications
Notifications Touch and Hold Activate on-screen items. For example: When you receive a notification, the Notification icon displays • Touch and hold a widget on the home screen to move it. in the System Bar, to the left of the Time. Notifications indicate the arrival of Gmail, Email, alarms, and more. -
Page 33: Quick Settings
2. Touch a notification summary to respond to it. 2. Touch the time at the top of the pop-up to display a Date and time pop-up. Touch Use 24-hour format to 3. Touch outside the Status Details screen to close the enable the 24-hour format. - Page 34 • Power saving: When enabled, your device automatically 4. Touch Clear to remove Notification Icons from the analyzes the screen and adjusts the brightness to conserve System Bar. battery power. For more information, refer to “Power 5. Touch a notification entry to display the details. Saving”...
-
Page 35: Status Bar
Device Power Critical: Battery has only three percent icon for additional information. power remaining. At about 15 percent power Samsung account: Set up your Samsung account. remaining, a popup is displayed to remind you to For more information, refer to “Signing In to your charge immediately. - Page 36 USB Connected: Device is connected to a computer Music player: A song is playing. Touch the Music using a USB cable. Displays in upper left corner of icon or touch the Status Details to see the song title screen. and music player controls. For more information, refer to “Viewing Your Music Library”...
-
Page 37: Primary Shortcuts
Note: Swipe across the screen horizontally to view all Widgets. The default Primary Shortcuts are: Media Hub, Social Hub, Smart Remote, Internet, Play Store, and Samsung Apps. 4. Touch and hold the widget’s icon, then slide your finger For more information, refer to “Applications” on page 40. -
Page 38: Removing Widgets
Removing Widgets • Calendar (mini today): Use Calendar to organize events and tasks for a day. For more information, refer to “Calendar” on Touch and hold the Widget until the Delete icon page 149. displays, then drag the Widget toward the top of the •... - Page 39 Touch the label to which you want to link. For more • Media Hub: Samsung Media Hub is your one stop for the hottest information, refer to “Setting Up Your Gmail Account” on movie and TV content. You can rent or purchase your favorite page 66.
- Page 40 • • Music playlist: Choose a music playlist to access from a home Pulse (small): Lets you add a topical Pulse widget, like Pulse screen. For more information, refer to “Playing, Renaming, or (large), but only the article titles are displayed. Touch a title block Deleting a Playlist”...
-
Page 41: App Shortcuts
• Yahoo! Finance: Search for and add stocks. For more 5. Touch and hold the App Shortcut and then drag the information, refer to “Yahoo! Finance” on page 171. application icon to reposition it on the Home screen. Removing App Shortcuts •... -
Page 42: Wallpapers
Managing Folders Wallpapers To name a folder: You can choose a picture to display on the Home Screen, Lock screen, or on both the Home and Lock screens. Choose Touch the folder, touch the Unnamed folder field, and from preloaded wallpaper images or select a photo you have use the keyboard to enter a name for the folder. -
Page 43: Mini App Tray
• Wallpapers: Choose from pre-loaded wallpaper images. Touch 2. Touch Edit at the right side of the tray to customize the an image to view it. Touch Set wallpaper to save it as Mini App Tray. For more information, refer to wallpaper. -
Page 44: Apps Screen
Customizing the Mini App Tray To manually change the order of the icons on the Apps screen: You can choose applications to display on the Mini App Tray 1. From a Home screen, touch Apps. and arrange them in any order. 2. -
Page 45: Applications
Application Information Calculator: The calculator provides the basic To view information about an App, such as the amount of arithmetic functions to solve simple arithmetic storage it uses, force the App to stop, uninstall updates, and problems and advanced operators to solve more clear data: complex problems. - Page 46 eBook: This application lets you access and read Local: Use Google Local and Google Maps to find books on your device. For more information, refer to places of interest and to add your own favorite “eBook” on page 145. places. For more information, refer to “Local” on page 93.
- Page 47 Moviefone: Browse a directory of movies, check the Pen memo: This app is not only useful, but lots of latest theater showtimes, find theater locations fun, if you like to draw. Pen memo lets you type nearest to you, buying tickets in advance, view memos or draw pictures.
- Page 48 Facebook, YouTube, and Twitter, all in one place. A networking, navigation, and more. A shortcut to shortcut to Social Hub displays on the Home screen Samsung Apps displays on the Home screen by by default. For more information, refer to “Social default. For more information, refer to “Samsung Hub”...
- Page 49 Task manager: View and manage active World clock: View the date and time in any time applications. For more information, refer to “Task zone. For more information, refer to “World Clock” Manager” on page 12. on page 170. Video player: Play and manage videos stored on YouTube: View and upload YouTube videos, right your tablet.
-
Page 50: Section 3: Entering Text
Your device uses a virtual QWERTY keypad for text entry using the Voice input feature. Your device recognizes your called the Samsung keypad. Use the keypad to enter letters, speech and enters text for you. For more information, refer punctuation, numbers, and other characters into text entry to “Using Speech Recognition”... -
Page 51: Changing The Input Method
3. Touch to display that input method’s settings. For more information, refer to “Keyboards and Input Methods” on page 194. Using the Samsung Keypad The Samsung keypad is a custom virtual QWERTY keypad, Shift Emoticons Handwriting Select featuring predictive text. Input characters by touching the... -
Page 52: Entering Upper And Lower Case Letters
Entering Upper and Lower Case Letters Touch to toggle between a large and small keypad. Touch and hold the Period key ( . ) to open a small window The default case is lower case (abc). Enter upper and lower with a set of common symbols. -
Page 53: Using Xt9 Predictive Text
For more information, refer to 7. Touch and then touch Add word to register a new “Configuring the Samsung Keypad” on page 195. word to XT9. To add more words, see “Adding Words To Your Word Note: The XT9 option is available only when ABC mode has List”... -
Page 54: Editing Text
The Language and input settings screen displays. Editing Existing Text 3. Touch next to Samsung keypad to display To edit text that you have entered: Samsung keypad settings. 1. Touch the text at the point you want to edit. - Page 55 2. Touch the Cursor. Tip: Touch Select all in the Application bar to select all text in A pop-up displays. the field. Touch on another area of the screen or touch Done to deselect the text. 3. Touch Paste in the pop-up. To paste text directly from the clipboard: 3.
-
Page 56: Entering Text Using Swype
Entering Text Using Swype This example shows how to enter the word “this”. Put your finger down on the “t” and, without lifting, glide it to the “h”, Swype™ is a new way to enter text on touch screens. then to the “i”, then over to the “s”. Instead of touching each key, use your finger to trace over each letter of a word. -
Page 57: Entering Symbols And Numbers
Configuring Swype Here are a few tips to get you started: • Auto-spacing: When you finish a word, just lift your finger and Configure Swype to your preferences. start the next word. While entering text, touch and hold the Swype Key •... -
Page 58: Using The Handwriting Feature
Editing Keypad 2. If necessary, touch Set up input methods in the Status bar and then touch Samsung keypad. The Editing Keypad provides a quick way to move the cursor The Samsung keypad displays. and highlight text. If the application in which you are working supports editing, you can cut, copy, or paste highlighted text. - Page 59 Touch the button marked 1/3, 2/3, or 3/3 to see more symbols and emoticons. Touch to exit the numbers and symbols keypad. • To return to the Samsung keypad, touch Handwriting Settings To change the Handwriting settings: 1. Touch Settings.
-
Page 60: Using Speech Recognition
You can use your voice to enter text using the Voice input • Pen colour: Change the pen color to black, red, blue, green, or feature, which lets you enter text by speaking. The Samsung brown. keypad recognizes your speech and enters text for you. -
Page 61: Section 4: Contacts And Accounts
Contacts, Calendar, and Email. • To access Contacts: Samsung account: Add your Samsung account. For more information, refer to “Signing In to your Samsung Account” From a Home screen, touch Apps on page 204. Contacts. Contacts and Accounts... - Page 62 Creating Contacts • Phone: Enter a telephone number, then touch the Label tab to choose a label from Mobile, Home, Work, Work Fax, 1. From a Home screen, touch Apps Home Fax, Pager, Other, Custom to create a custom label, or Contacts Callback.
-
Page 63: Updating Contacts
Updating Contacts 5. Touch to add additional fields.Touch to remove an unused field. To update an existing contact: 6. Touch Add another field to add these additional fields: 1. From a Home screen, touch Apps Phonetic name, Organization, IM, Notes, Nickname, Contacts. -
Page 64: Contacts Display Options
Managing Photo IDs • Groups: Displays the possible Groups, such as Not assigned, Co-workers, Family, Friends, and so on. The number of To remove or update a contact’s Photo ID: contacts in the group is displayed next to the group name. 1. - Page 65 • Print namecard: Check mark the fields you want to print and not be received. then touch Print. You can only print on a Samsung printer. - Send individual namecards: Allows you to transmit single • Contacts to display: Select the contacts you want to display in contacts, one at a time.
- Page 66 Joining Contacts • Send email: To send an email to one or more members of the group, touch and check mark the box next to each contact you 1. From a Home screen, touch Apps want to send to, or touch Select all, and touch Done.
-
Page 67: Importing And Exporting Contacts
Sharing Contact Information • Gmail: For more information, refer to “Composing and Sending Gmail” on page 69. You can send a contact’s information by way of Bluetooth to other Bluetooth devices or in an Email or Gmail as an • Wi-Fi Direct: To send Contacts entries directly to an external attachment. -
Page 68: Groups
Groups Renaming a Group To rename a group that you created: Assign contacts to Groups to make searching for contacts faster or to quickly send messages to group members. 1. From a Home screen, touch Apps Creating a New Group Contacts. -
Page 69: Favorites
Removing Group Members 4. Touch Select all, Starred in Android, or the name of each group to delete. To remove contacts from a group: 5. Touch Delete to delete the groups. Choose from 1. From a Home screen, touch Apps Group only or Group and group members. - Page 70 Removing Favorites 3. Touch the Star next to the contact name so that it turns gold To remove one or more contacts from your favorites list: 1. From a Home screen, touch Apps Tip: You do not have to edit the contact to change the Starred Contacts.
-
Page 71: Section 5: Messaging
Section 5: Messaging Gmail This section describes how to send and receive messages and other features associated with messaging. Send and receive email with Gmail, Google’s web-based Types of Messages email. Your device supports these types of messages: Tip: To set up your Google account on your device, use •... - Page 72 Refreshing Your Gmail Account 1. From a Home screen, touch Apps Gmail. The Add a Google Account screen displays. Refresh your account to update your device from the Gmail servers. 2. Touch Existing to sign in to an existing account. 1.
- Page 73 Managing Your Gmail Conversations 3. Touch Menu for these options: • Add star / Remove star: Mark (or unmark) conversations with In addition to managing your Gmail account, there are a yellow star. Starred conversations are listed in the Starred options for changing the status of one or more Gmail conversations in an account.
-
Page 74: Composing And Sending Gmail
Composing and Sending Gmail 8. Touch SEND to send this message. – or – 1. From a Home screen, touch Apps Gmail. 2. Touch Compose. Touch SAVE DRAFT to save a draft of this message. Gmail Account Settings 3. Touch the To field to enter recipients. As you enter names or email addresses, matching contacts display. - Page 75 • Ask to show pictures: Restores the default setting (do not • Signature: Create a text signature to add to outgoing show pictures automatically) for all the people who send you messages. email, including those whose Show pictures setting you may •...
-
Page 76: Email
Email • Off-peak schedule: Set how often to check for new email sent to this account during off-peak times. Options are: Push Use Email to view and manage all your email accounts in one (Automatic), Manual, every 5 or 15 minutes, or every 1, 4, or application. -
Page 77: Managing Your Email Accounts
• Sync Calendar: When enabled, events from your account are Note: To configure email account settings at any time, use synchronized with your device’s Calendar. Menu Settings. Touch the account to display • Sync Task: When enabled, tasks from your account are Account settings. -
Page 78: Composing And Sending Email
Managing Your Email Conversations 3. Touch Menu for these options: • Sort by: Choose a method for listing your email conversations. In addition to managing your Email account, there are options for changing the status of one or more Email •... - Page 79 3. Enter the recipient’s email address in the To field. Security options: Set the email security • If you are sending the email message to several recipients, options. Options are: Encrypt and Sign. separate the email addresses with a comma. You can add as Attach: Choose an attachment to add to the many message recipients as you want.
-
Page 80: Account Settings
2. Touch Menu Settings, then touch General Italics: This action italicizes the subsequent Preferences. The following options display: entered text. • Display after deleting message: Set the screen to show after Font color: Set the color of the text font. The deleting a message. - Page 81 • Add signature: Touch the box to enable or disable this option. • Auto download attachments: Enable or disable A check mark indicates that the following signature is auto-download of files attached to recent messages when added to emails. connected through Wi-Fi. •...
- Page 82 • Period to sync Calendar: When enabled, events from your • Outgoing settings: Configure outgoing server settings. For account are synchronized with your device’s Calendar. more information, refer to “Outgoing Server Settings” on page 78. • Security options: Set various security options for the account. •...
-
Page 83: Outgoing Server Settings
• • Password: The password for your email account, which should be Security type: Select the security type required by your email filled in. service provider. Select the SLL (Accept all certificates) option for your security type to accept a server certificate from your •... -
Page 84: Google Talk
Google Talk Note: If you have already set up your Google account, you are Talk is Google’s instant messaging and audio and video chat automatically logged in. Just touch the account. service. You can use it to communicate, in real time, with other people who also use Google Talk on another Android Once sign in is complete, the Talk main screen tablet or phone or on a computer. -
Page 85: Talk Options
View and Accept an Invitation to Become a 1. Touch to search your Talk messages or the current Friend message for a word. Use the on-screen keyboard to enter a search term. Touch on the keyboard to When a contact invites you to become a friend in Google Talk, search your Talk messages. - Page 86 Google Talk Settings • Go off the record/Stop chatting off the record: Set whether you want to stop saving your chat to the chat history. Use Google Talk Settings to configure your Talk account. If • Friend info: Display information about the friend with which you have more than one account, each maintains its own Talk settings.
-
Page 87: Messenger
• Notification ringtone: Set a ringtone to sound, or silent, when • Manage account: Opens the Accounts and sync settings. For you receive a text chat. more information, refer to “Accounts and Sync” on page 187. • Vibrate: Set how vibrate functions. Choices are: Always, Only when silent, or Never. -
Page 88: Section 6: Internet And Social Networking
Section 6: Internet and Social Networking This section describes the various Internet and social To get started: networking applications available on your device such as 1. From a Home screen, touch Apps Google+, Internet, Latitude, Local, Maps, Navigation, Google Google+. Play™... - Page 89 Entering Text in a Field • While browsing, touch a text field to display the virtual QWERTY keyboard to enter text. Zoom • Tap the screen twice to zoom in or out. • Use two fingers, such as your index finger and thumb, to zoom out by making an inward pinch motion on the screen.
- Page 90 Entering a URL – Copy link URL: Save the link’s URL to the clipboard. – Select text: Copy the link text to the clipboard. Access a website quickly by entering the URL. • Touch and hold an image for the additional options: 1.
-
Page 91: Using Bookmarks
Selecting, Copying, and Pasting Text 4. To paste the copied link or URL, navigate to the desired 1. From the Home screen, touch Internet. field (or to another application), then touch and hold in a text field and touch Paste on the pop-up menu. 2. - Page 92 Accessing Bookmarks and History 4. On the History tab, touch Today, Yesterday, Last month, Older, or Most visited to use these options: Launch a bookmarked page or reload recent pages. • Touch a page to reload it. 1. From the Home screen, touch Internet.
-
Page 93: Internet Settings
Address line 2: Enter any additional address information. • Downloads: View and manage recent downloads. – City/Town: Enter your city and town. • Print: Print the current screen or page to a Samsung printer. – County: Enter your county. Internet and Social Networking... - Page 94 – Zip code: Enter your ZIP code. • Remember passwords: When enabled, saves user names – and passwords for sites you visit, to make future visits easier. Country: Enter your country. – • Clear passwords: Clear all saved user names and passwords. Phone: Enter your telephone number.
- Page 95 Advanced • Reset to default: Clear all browser data and reset all settings to the factory defaults. • Select search engine: Choose a search engine from Google, Bandwidth management Yahoo!, or Bing. • Open in background: When enabled, new windows open •...
-
Page 96: Latitude
Internet Quick Controls 5. To cancel, display the Quick controls and touch Menu Settings Labs and touch Quick controls Use Quick Controls to maximize your viewing area while to uncheck it. browsing the internet. Latitude 1. From the Home screen, touch Internet. - Page 97 4. Log on to your Google account. 4. At the Send sharing requests prompt, touch Yes. To create a Google account or set up your Google Your friend will receive an email or text message with your account on your device use Accounts and sync settings. location marked on a map.
-
Page 98: Local
Local • Refresh friends: Update your Latitude list of friends. • Show stale friends / Hide stale friends: Show or hide friends Local is an application that uses Google Maps and your depending on the accuracy of their Latitude information. location to help you find Restaurants, Cafes, Bars, Attractions, and other businesses. -
Page 99: Maps
Navigating the Map 4. Touch a business in the list to see more details about it. Zooming The business details such as address, phone, website, • and location are displayed. You can also see reviews Double-tap on the screen to zoom in. from around the web and from Google users. - Page 100 Maps Menu Other Map Options 1. From the Home screen, touch Maps. Touch the indicated icon to use these additional Map options: 2. While viewing a map, touch Menu for these Search Maps: Use the keyboard to enter your request to Search the map for a city, location, and so on.
-
Page 101: Maps Settings
– Scale bar: If enabled, the scale bar is displayed on the map, Directions: Displays the Directions pop-up. Enter My which shows the scale of the map in feet and meters. Location and End point or touch the button to the right of the fields to choose your current location, a •... -
Page 102: Navigation
Navigation – Check-in notifications: Enables notifications that suggest places to check in. Use Google Navigation to find a destination and to get – Manage your places: View and modify your automatic check- walking or driving directions. ins and muted places. Note: You must first create a Wi-Fi connection to use •... - Page 103 • Settings: Display Navigation settings: SHOW MAP: Return to the map view after viewing – Screen dimming: Enable or disable screen dimming, which ROUTE AND ALTERNATES or the directions list. lets the screen dim between instructions to save power. Layers: Choose map layers to display. –...
-
Page 104: Play Books
Play Books Browse the selection of Google eBooks, which are arranged in categories like Featured, Top Selling, Top Use the Play Books app to read eBooks from the Rated, Top Free, and many more. Internet-based Google Play™ Books service. Google eBooks is a new way to discover, buy, and enjoy your favorite books 3. -
Page 105: Reading A Book
Reading a Book • Available offline: Touch the check box to make the book available offline. Once the book displays: • Read aloud / Stop reading aloud: Touch to let your device 1. Sweep across the screen to turn the page. read the book to you. -
Page 106: Search
Search 3. Touch a suggestion to search for that term. – or – Search the internet using the Google search engine. Touch on the keyboard to start the search. Tip: The Google Search widget displays by default on all Home A browser window displays the search results. - Page 107 5. Touch Search YouTube and use the keyboard to 3. Touch Menu for these options: enter a keyword or phrase to find a YouTube video. • Copy URL: Copy the URL of the video to the clipboard. For Touch on the keyboard to initiate the search. more information, refer to “Copying and Pasting a Hyperlink or URL”...
-
Page 108: Section 7: Music
Section 7: Music Accessing the Music App This section explains how to use the music features of your device including the Music app and the Music player. 1. From a Home screen, touch Apps Play Music App Play Music. The Play Music app contains a music player that plays music The Play Music app searches your online library and and other audio files that you copy from your computer or store your device’s internal storage for music and playlists;... -
Page 109: Searching For Music
2. Swipe left or right to spin the carousel and browse Note: The contents of your library display in a scrolling grid, through your new and recent music. list, or carousel, depending on the view. 3. Touch an album to open it. Searching for Music 4. - Page 110 Changing Music Settings • Offline music only: Display only the music that is available offline. To change settings in the Music application: • Hide labels / Show labels: Hide or show labels. This option is 1. From a Home screen, touch Apps not available in all library views.
-
Page 111: Playing Music
Options While Selecting a Song Playing Music The following options are available for playing songs, To play a song: albums, or playlist, finding more information about artists, 1. From a Home screen, touch Apps finding more music, and deleting songs: Play Music. - Page 112 Options While Playing a Song Note: If you navigate away from the Now playing screen in the When you play a song, the Now playing screen displays. Music application, the Now Playing bar displays at the There are various options and controls available while a song bottom of the screen.
- Page 113 – Open source licenses: Displays the open source licenses for Touch to advance to the next song. Touch and Google Play Music. hold to scan forward through the current song. – Music version: The Google Play Music app version is displayed.
-
Page 114: Playing, Renaming, Or Deleting A Playlist
Adding Songs To a Playlist 3. Touch next to a playlist title. • Touch Play to play the songs in the playlist. To add a song to a new or existing playlist while the song is playing: • Touch Rename and use the keyboard to enter a new name for 1. -
Page 115: Making Online Music Available Offline
Making Online Music Available Offline Gray pins appear next to the items you can make available offline. A bar at the bottom of the screen In addition to playing the music that you add to your online shows how much space is available on your device for library, you can play music stored on your device’s internal storage. -
Page 116: Viewing Your Music Library
Viewing Your Music Library Managing Your Music Searching for Music The Music player plays music and other audio files that you copy from your computer. To find music in your library: 1. From a Home screen, touch Apps 1. From a Home screen, touch Apps Music player. - Page 117 Renaming a Playlist 4. Touch Done to save the playlist. Removing Songs from Playlists 1. From a Home screen, touch Apps Music player. 1. From a Home screen, touch Apps 2. Touch Playlists, touch a playlist, and then touch Music player. Menu Rename playlist.
- Page 118 Playing a Playlist • Delete: Touch the box for any song or album you want to delete 1. From a Home screen, touch Apps or touch the box for Select all to select every song or album. A Music player. check mark indicates the song or album is to be deleted.
-
Page 119: Listening To Music
Listening to Music The song you touch starts to play. The tracks in the current list play in order until you reach the end of the You can listen to music by using your device’s built-in list (unless you choose a repeat option). Otherwise, speakers, through a wired headset or through a wireless Bluetooth stereo headset. -
Page 120: Music Player
Music Player Volume Info List Mode Music player plays music and other audio files that you copy from your computer. 1. From a Home screen, touch Apps Select Favorite Device Music player. Song 2. Touch a song or playlist to begin playback. Title SoundAlive The music player displays below (portrait mode) or to... - Page 121 Options While Playing a Song • Shuffle: When enabled, songs play in random order. When disabled, songs play in the order they appear in List view. There are various options and controls available while a song • Playback Controls: These buttons control the playback of is playing: songs: 1.
-
Page 122: Section 8: Photos And Video
Section 8: Photos and Video This section explains how to use your device’s built-in 2. Touch OK to change the storage location to memory camera and camcorder, the Video Player app to view and card. manage videos, and the Gallery app to view, capture, and –... -
Page 123: Taking Photos
4. Touch Back to leave the Camera and display the Storage Settings previous screen. Active Indicator Shortcuts Important! Do not take photos of people without their Mode permission. Do not take photos in places where cameras are not allowed. Do not take photos in places where you may Camera interfere with another person’s privacy. -
Page 124: Configuring Camera Settings
To customize these shortcuts: Warning! If the battery is low, the flash is not available. For 1. Touch Settings Edit shortcuts. more information, refer to “Charging the Battery” on – or – page 7. Touch and hold any of the shortcut icons to edit them. •... -
Page 125: Viewing Photos With The Image Viewer
• Timer: Set a timer for how long to wait before taking a photo. Caution! Be aware that your location may be present on a Options are: Off, 2 sec, 5 sec, and 10 sec. photo when posting your photos on the internet. •... - Page 126 5. Touch Select device to use AllShare to stream 10. Press Back to return to the Camera to take more photos to another device. For more information, refer to photos. Camcorder “AllShare” on page 147. 6. Touch Share via to use AllShare, Wi-Fi Direct, Use your device’s built-in Camcorder to record high- Picasa, Photo editor, Google+, Bluetooth, Social Hub, definition video in 1080p resolution.
-
Page 127: Recording Videos
Recording Videos Camcorder Settings 1. From the Home screen, touch Camera. Before you start taking videos, use the camcorder settings to configure the camcorder for best results. Camcorder settings 2. Slide the Mode button to the Camcorder are represented by icons on the left side of the screen. setting. -
Page 128: Viewing Videos With The Image Viewer
• Self-recording: Touch to switch to the front-facing camera Note: What you see on screen will not correspond to the lens and record a video of yourself. luminance of the actual video taken. • Flash: Touch Off or On to disable or enable the flash. •... -
Page 129: Video Player
5. Touch Share via to use AllShare, Wi-Fi Direct, 10. Touch and drag the white dot on the progress Google+, Bluetooth, Social Hub, YouTube, Email, or bar to fast forward or rewind the video. Touch the left Gmail to share the video. end of the progress bar to restart the video. - Page 130 4. While viewing the list, touch Menu for options: • Full-Screen View ( ): Changes the display mode to full • List by: Display videos by Name (default), Date, Size, or Type. screen. That is, the entire screen is used, which may cause some minor distortion.
-
Page 131: Gallery
• Settings: Touch this option to view the following: 2. Touch Albums to display other ways to group your – photos and videos. Options are: Play speed: Touch and drag the slider to decrease or increase • Albums: Based on the folder in which they are stored. play speed. -
Page 132: Viewing Photos And Videos
Viewing Groups of Photos and Videos 5. Sweep across the screen to display the next or previous photo or video. (Videos are indicated by the 1. From a Home screen, touch Apps Gallery. Play button.) The current photo or video is 2. - Page 133 Screen, or Wallpaper. Note: Photos are stored in the /Root/DCIM/Camera folder as • Print: Print the current photo to a Samsung printer. jpg files. For more information, refer to “My Files” on • Edit: Use Photo editor or Photo studio to edit photos.
- Page 134 There is only two options for videos that are not 3. Touch Menu Set picture as. playing: 4. Touch Contact photo and then touch a contact entry. – or – • Rename: Enter an new file name. Touch Home and lock screens, Home screen wallpaper, •...
-
Page 135: Playing Videos
Playing Videos Sharing Photos and Videos 1. From a Home screen, touch Apps Gallery. Share photos and videos with your friends. 2. Touch a category and then a group to view it, and then 1. From a Home screen, touch Apps Gallery. -
Page 136: Photo Editor
Photo Editor Inverse: Select the entire picture except for the selected area. The Photo editor application provides basic editing functions for photos that you take on your device. Along with basic Undo: Remove the last change. image tuning like brightness, contrast, and color, it also provides a wide variety of effects used for editing the photo. -
Page 137: Media Hub
• Set as: Use this photo as a Contact photo, a Home and lock The Media Hub screen displays. screens, Home screen wallpaper, or Lock screen wallpaper 3. To rent or buy media, you must have a Samsung image. Media Hub account. -
Page 138: Media Hub Notices
• 5. When you find media you want to view, use these You MUST be in network coverage to license Media Content you options: have acquired through the Service. • View trailer: View a short clip from the movie or show. •... - Page 139 – In no event will rented Media Content be available for a period of more than thirty (30) days (or shorter on a title-by-title basis) after the Media Content has been rented (e.g., if you begin viewing rented Media Content on the 29th day after the rental transaction, but do not finish viewing the entire title, that rented Media Content may not be available for the entire twenty-four (24) consecutive hour period if such period would extend the...
-
Page 140: Section 9: Connections
Section 9: Connections Finding Wi Fi Networks Your device includes features to connect to the internet and to other devices by using Wi-Fi, Bluetooth, or a USB cable. You can have your device automatically notify you of Wi-Fi available networks. For more information, refer to “Advanced Settings”... -
Page 141: Wi-Fi Direct
Scanning and Connecting to a Wi Fi Network Note: Depending on the Security protocol used by the WAP, When you turn on Wi-Fi, your device searches for available additional network information may be required, such as Wi-Fi connections, then displays them on screen. a Password. -
Page 142: Bluetooth
4. Touch the Wi-Fi Direct tab to display Available devices. 2. Touch the Wi-Fi Direct option. 5. Enable Wi-Fi Direct (similar to Steps 1 and 2) on the The Wi-Fi Direct settings screen displays, Wi-Fi Direct device to which you want to connect. is turned on, and your device scans for other devices. -
Page 143: Configuring Bluetooth Settings
Configuring Bluetooth Settings 1. From a Home screen, touch Apps Settings. Configure your device’s Bluetooth settings. For more information, refer to “Bluetooth” on page 176. 2. On the Bluetooth tab, touch the OFF / ON icon Turning Bluetooth On or Off to turn Bluetooth on. -
Page 144: Sharing Data With A Bluetooth Device
Sharing Data with a Bluetooth Device Receiving Data from a Bluetooth Device To send data to a Bluetooth device: To receive data from a Bluetooth device: 1. Select a file or item from an appropriate application. 1. Turn Bluetooth on. For more information, refer to “Turning Bluetooth On or Off”... -
Page 145: Managing Downloads
Managing Downloads Uninstalling an App Apps come pre-installed on your device and you can Files, apps, and other items you download in Internet, Gmail, download additional apps from Google Play. If you decide to, Email, or in other ways, are stored on your tablet’s internal you can uninstall apps you downloaded from Google Play and storage. -
Page 146: Kies Via Wi-Fi
Kies Via Wi-Fi 3. From a Home screen, touch Apps Settings. Samsung Kies is a software that enables you to update your 4. Touch More ... Kies via Wi-Fi. device firmware, synchronize files, and transfer data to and Select the source of the Wi-Fi connection for Kies air. -
Page 147: Memory Card
Memory Card Formatting a Memory Card Using Your Computer Consult your computer and/or memory card reader Your device supports removable microSD™ or microSDHC™ documentation for information about formatting memory memory cards for storing music, photos, videos, and files. cards. Installing and Removing a Memory Card Synchronizing with Windows Media For more information about installing and removing a Player... -
Page 148: Connecting As A Mass Storage Device
Connecting as a Mass Storage Device 3. Click the option to Open device to view files. You should see a Card and a Tablet folder. You can connect your device to a PC as a removable disk and access the file directory. If you insert a memory card in the 4. -
Page 149: Section 10: Applications And Widgets
Section 10: Applications and Widgets GPS Applications This section contains a description of each application that is available on the Apps screen, its function, and how to GPS applications allow you to achieve real-time, GPS- navigate through that particular application. If the application enabled, turn-by-turn navigation and to access local is already described in another section of this user manual, searches based on a variety of category parameters. -
Page 150: Alarm
Alarm Important! If you touch or cover the internal GPS antenna Set alarms for reminders or for wake-up times. while using GPS services, it may impede the GPS Adding and Configuring Alarms signal resulting in the GPS services not working in an optimal manner. -
Page 151: Alarm Settings
Activating Alarms Alarm Settings 1. From a Home screen, touch Apps Alarm. To configure general alarm settings: 2. Touch Turn alarm on to activate the alarm. A gray 1. From a Home screen, touch Apps Alarm. alarm means the alarm is deactivated. 2. -
Page 152: Allshare
Alarm Volume Configuring AllShare Alarm volume can also be set by using the Settings app. Connect to Wi-Fi, configure AllShare settings to identify your device as a server, and set treatment of copied files. 1. From a Home screen, touch Apps Settings 1. -
Page 153: Amazon Kindle
Calculator 4. Touch one of the device entries on the left of the AllShare screen. My device lists the Videos, Photos, and The calculator provides the basic arithmetic functions to Music files on your device. solve simple arithmetic problems and advanced operators to 5. -
Page 154: Calendar
Calendar • Task: Display your list of tasks. Touch the sort field to change how your tasks are sorted. Tasks can be sorted by due date, Your device includes a powerful planner to help you organize priority, date, week, month, or group. your schedules more conveniently and effectively. -
Page 155: Managing Events
• Go to: Use the Set date pop-up to enter a date and then touch 2. Double-tap the date for which you want to enter an all Set to display that date on your calendar. day event or task. • Touch the Add event or Add task tab. •... - Page 156 Calendar Settings Touch Menu Send via and then touch Bluetooth, Email, or Wi-Fi Direct to share the event. To set up Calendar preferences: 1. From a Home screen, touch Apps Touch Edit to update the event details. Calendar. – or – 2.
-
Page 157: Camera
Camera Event notification • Set alerts & notifications: Touch to select, which allows you to Take photos and record video with your device’s built in Camera. set the Alert, Status bar notification, or Off. For more information, refer to “Camera” on page 117. •... -
Page 158: Downloads
Downloads 5. Touch items you want to delete, to check them, and then touch Delete. Files, apps, and other items you download in Internet, Gmail, The items are deleted from your tablet. Email, or in other ways, are stored on your tablet’s internal storage. -
Page 159: Ebook
eBook 4. Touch Open. The eBook app Disclaimer screen displays. This application lets you access and read books on your device. 5. Read the disclaimer and touch Confirm. To open eBook for the first time and download and install the The eBook main screen displays. - Page 160 4. Touch and hold a word in a book to display the Note: For Bookmarks, Highlights, Memos, and Drawings, following options: Copy, Highlight, Memo, and Search. touch Delete and then touch entries or Select all to Touch and drag either tab to select more or less delete entries.
-
Page 161: Email
Gmail 5. To add more books to your library, touch Shop. A pop-up displays several book sellers and their Send and receive email with Gmail, Google’s web-based internet webpage addresses. Touch a link to shop for email. For more information, refer to “Gmail” on page 66. more books, touch Add store to add a new webpage, or From a Home screen, touch Apps... -
Page 162: Latitude
Latitude Media Hub Use Google Latitude to locate your friends on a map and Samsung Media Hub is your one stop for the hottest movie share or hide your location. For more information, refer to and TV content. “Latitude” on page 91. - Page 163 Delete: Delete this Memo. • Print: Select one or all memos, touch Print, and send the memos to a Samsung printer. Color: Choose a color for this memo. • Sync memo: Sign in to Google and use Google docs to back up your memos.
-
Page 164: Messenger
With Print: Send this memo to a Samsung printer. Moviefone and your Galaxy Tab, you have movies at your fingertips. Share via: Touch Bluetooth, Email, Email, or Wi-Fi 1. From a Home screen, touch Apps Direct to send the memo by the selected method. -
Page 165: Music Player
My Files 3. While viewing one of the options, touch Menu (at the bottom left of the screen) for these options: Find, view, and manage folders and files, such as music files, • Sort Movie: Sort the list of movies By Release Date, By MPAA photo files, video files, and so on, stored on your tablet. -
Page 166: Navigation
Navigation Display mode: Enable thumbnails for each file. Use Google Navigation to find a destination and get walking – or – or driving directions. For more information, refer to Enable list mode. “Navigation” on page 97. From a Home screen, touch Apps Root: Display the root directory. -
Page 167: Pen Memo
Pen Memo 5. Touch Done to save. For more information, refer to “Entering Text” on page 45. Create and manage memos that you create by typing text or Pen Memo List Options writing with your finger or a stylus. You can even draw and save pictures as a memo. - Page 168 5. Touch and hold a memo thumbnail or list entry to export the memo to the selected app. display the following options: • Print: Send the memo to a Samsung printer. • Delete: Delete the selected memo. • Set as: Use this memo as a Contact photo, Home and lock •...
-
Page 169: Photo Editor
Photo Editor Play Movies To perfect any photos stored on your tablet, use Photo editor The Play Movies app is a new application for select Android to crop, rotate, resize, adjust color and contrast, and much devices. Any movie you rent from the Google Play™ Store more. -
Page 170: Play Store
Play Store 2. The first time you open Play Store, read the Google Play™ Terms of Service and then touch Accept to Google Play Store provides access to downloadable continue. applications and games to install on your device. It also allows you to provide feedback and comments about an 3. -
Page 171: Polaris Office
4. Touch an app and then touch Allow automatic updating 4. Several options are listed under Category. Touch one of to enable automatic updating. the following: • Local Storage: Where you keep documents on this device. You 5. Touch Open to open the app on your device. can manage documents or send them to others, and upload 6. -
Page 172: Pulse
– Clear Recent Files: Touch to clear your recently opened Tip: A shortcut to Samsung Apps displays on the main Home documents list. screen by default. General settings – Live update: Touch to make sure you have the latest version of From the Home screen, touch Samsung Apps. -
Page 173: Settings
Instead of a long, boring channel grid, and SNS messages. Peel presents an easy-to-use mosaic of your favorite shows, filtered by type and genre in the order you like. 1. From a Home screen, touch Apps Smart Remote. The Samsung Disclaimer displays. Applications and Widgets... -
Page 174: Talk
Add an Account Social Hub Messages Options To add an account: To display Social Hub messages options: 1. Touch Add account. 1. Touch the Messages tab. The Add account screen displays. 2. Touch Menu. The following options display: 2. Touch the account you want to add and then enter the required information, such as email address and •... -
Page 175: Task Manager
Task Manager World Clock View and manage active applications on your device. View the date and time in any time zone. 1. From a Home screen, touch Apps For more information, refer to “Task Manager” on page 12. World clock. From a Home screen, touch Apps A map of the world displays with the locations you... -
Page 176: Yahoo! Finance
1. From a Home screen, touch the Yahoo! Finance widget. new position in the list. Touch Done to change the The Yahoo! Finance main screen displays with order. Samsung and Yahoo stocks listed by default. 6. Touch Remove to delete entries. Touch the box to 2. Touch Add. - Page 177 Additional Options 3. Touch Add to add another stock. For more information, refer to “Adding Your First Stock” on There are more options available from the full stock page 171. information screen. 4. Touch Menu to display the following options: 1.
-
Page 178: Youtube
YouTube View and upload YouTube videos, right from your device. For more information, refer to “YouTube” on page 101. From a Home screen, touch Apps YouTube. -
Page 179: Section 11: Settings
Section 11: Settings Wi-Fi This section explains Settings for customizing your device. Accessing Settings Your device supports Wi-Fi a/b/g/n. Use Wi-Fi settings to manage your device’s Wi-Fi connections. From a Home screen, touch Apps For more information about using your device’s Wi-Fi Settings. - Page 180 Add Wi-Fi Network Advanced Settings To open a dialog where you can add a Wi-Fi network by Set up and manage wireless access points. entering its Network SSID (the name it broadcasts), security 1. From a Home screen, touch Apps Settings type, and other properties: Wi-Fi.
- Page 181 Bluetooth Additional Bluetooth Settings When Bluetooth is on, additional settings are available. Use Bluetooth settings to manage Bluetooth connections, set your device’s name, and control your device’s visibility. 1. From a Home screen, touch Apps Settings Turning Bluetooth On or Off Bluetooth.
-
Page 182: Data Usage
Data Usage Airplane Mode Airplane mode allows you to use many of your tablet’s From this screen you can view the Wi-Fi or Ethernet data features, such as Camera, Games, and more, when you are usage. in an airplane or in any other area where accessing data is 1. - Page 183 4. Touch Save to save your VPN settings. Connecting To a VPN The VPN settings menu allows you to set up and manage Virtual Private Networks (VPNs). 1. From a Home screen, touch Apps Settings More ... VPN. Important! Before you can use a VPN you must establish and 2.
-
Page 184: Device
Wi-Fi Direct Settings Note: The target device must also have Wi-Fi Direct service You can configure your device to connect directly with other active and running before it is detected by your device. Wi-Fi capable devices. This is an easy way to transfer data between devices. - Page 185 Notifications 2. Touch and drag the sliders to set the volume for: • Music, video, games, and other media: Sounds made by Select a default ringtone for message, alarm, and other music apps, video apps, and more. notifications. 1. From a Home screen, touch Apps Settings •...
-
Page 186: Screen Display
2. Touch Touch sounds or Screen lock sound (both default 2. Touch Home screen wallpaper or Lock screen wallpaper. to On). The Select wallpaper from screen displays the When enabled, a check mark appears in the check following options: Gallery, Live wallpapers, and box. - Page 187 Screen Mode Quick Launch Set the screen mode. The Quick Launch feature allows you to set multifunctional softkey to open applications. 1. From a Home screen, touch Apps Settings 1. From a Home screen, touch Apps Settings Display Screen mode. Display.
-
Page 188: Power Saving
Screen Timeout Auto Adjust Screen Power Set the length of delay between the last key press or screen When enabled, your device automatically analyzes the touch and the automatic screen timeout (dim and lock). screen and adjusts the brightness to conserve battery power. 1. - Page 189 Device Memory 3. Touch Custom power saving settings to refine your power saving settings. From a Home screen, touch Apps Settings • Touch Power saving starts at to set when power saving starts. Storage. Options are: 10%, 20%, 30%, 40%, or 50% battery power. The Device memory displays as Total space, Apps, •...
- Page 190 Unmounting an SD Card 3. Touch Delete all. Battery 1. From a Home screen, touch Apps Settings Storage. See how much battery power is used for device activities. 2. Touch Unmount SD card. 1. From a Home screen, touch Apps Settings 3.
- Page 191 Applications Downloaded Displays apps you have downloaded onto your device. You can download and install applications from Google Play or create applications using the Android SDK and install them 1. From a Home screen, touch Apps Settings on your device. Use Applications settings to manage Applications.
-
Page 192: Personal
• Clear data: Clears application data from memory. 4. Touch one of the applications to view application information. • Clear cache: If the app stores data in a temporary area of the device's memory, and the amount of information stored is The following options display: displayed, touch this button to clearing the temporary storage. - Page 193 Adding an Account Synchronizing Account 1. From a Home screen, touch Apps Settings Select the items you want to synchronize on your account Accounts and sync. such as Books, Calendar, Contacts, and more. 1. From a Home screen, touch Apps Settings 2.
-
Page 194: Location Services
Use GPS Satellites 3. Touch Sync Now to synchronize all data for the selected account. 1. From a Home screen, touch Apps Settings – or – Location services. 2. Touch Use GPS satellites to enable the GPS satellite. Under Data and synchronization, touch the account Location and Google Search data to synchronize, such as, Calendar, Contacts, Email, and so on. -
Page 195: Owner Information
Vibrate On Screen Tap • Pattern: A screen unlock pattern is a touch gesture you create and use to unlock your device. Follow the prompts to create or 1. From a Home screen, touch Apps Settings change your screen unlock pattern. Security. - Page 196 – or – Tip: Make sure your battery is charged more than 80 percent. Encryption takes an hour or more. Touch Sign in, if you already have a Samsung account, enter your Email address and your Samsung account Find My Mobile password, and touch Sign in.
-
Page 197: Device Administration
Enable or Disable Remote Controls 2. Touch Make passwords visible to enable or disable brief displays of password characters. Once you have signed in to your Samsung Account, you can enable or disable Remote controls. When enabled, a check mark appears in the check 1. -
Page 198: Credential Storage
3. Touch a CA certificate to examine its details. Warning! Enabling this option causes your tablet and personal A scrolling screen displays the details. data to be more vulnerable to attack by applications from unknown sources. 4. Scroll to the bottom of the details screen and touch Disable to disable a System certificate or Remove to Credential Storage remove a User certificate. -
Page 199: Language And Input
Language and input. Clear Credentials 2. Touch Default and select a keyboard. Clear stored credentials. The options are: Samsung keypad and Swype. Note: This setting only appears if you have installed encrypted 3. Touch Configure input methods. certificates. 4. Touch Google voice typing to automatically use Google voice typing. - Page 200 Auto-substitution: When enabled, the system automatically To configure the Samsung keypad: replaces words you enter with words from the XT9 auto- Touch next to Samsung keypad to display the substitution list. following options: – Regional correction: When enabled, the system automatically •...
- Page 201 About: Displays information about the handwriting software. • Sound on keypress: Check to play a brief sound each time you • Tutorial: Displays help for using the Samsung keyboard and touch a key on the on-screen keyboard. XT9 predictive text.
- Page 202 Preferences About • Audio feedback: When enabled, plays sounds as you enter • Version: View the current Swype software version. text. Language Options • Vibrate on keypress: When enabled, the device vibrates on • Allows you to select the languages available from the Swype text entry.
-
Page 203: Back Up And Reset
Back Up and Reset Voice output provides audible readout of text, for example, Backup and Restore the contents of email messages. 1. From a Home screen, touch Apps Settings Back Up My Data Language and input. Enable or disable backup of your information to the Google 2. -
Page 204: System
3. Touch Reset device, then follow the prompts to perform the reset. When enabled, backed-up settings are restored when you reinstall an application. Note: If you have set up your Samsung account, it has to be 1. From a Home screen, touch Apps Settings deleted before performing this function. -
Page 205: Date And Time
Date and Time Accessibility By default, your device receives date and time information Accessibility services are special features to make using the from the wireless network. When you are outside network device easier for those with certain physical disabilities. Use coverage, you may want to set date and time information the Accessibility settings to activate these services. - Page 206 Motion Important! TalkBack can collect all of the text you enter, It is possible to control certain aspects of your tablet by except passwords, including personal data and simply tilting it. You can tilt your tablet to reduce or enlarge credit card numbers.
-
Page 207: Developer Options
Developer Options Note: This setting is used for development purposes. Set options for application development. USB Debugging 1. From a Home screen, touch Apps Settings When enabled, allows debugging when the device is Developer options. attached to a PC by a USB cable. 2. - Page 208 User Interface • Window animation scale: Configure the scale for animation (ranges from off to 10x). Configure the user interface by setting the behavior for the way the screen behaves when using applications or • Transition animation scale: Configure the scale for displaying data.
-
Page 209: About Device
® protected video, touch License settings DivX VOD. The Samsung account sign in screen displays. 4. Touch variety of services to display information about • Model number: Display your device’s model number. Samsung services that are available. • Android version: Display the firmware version of your device. - Page 210 Software Update Options The Country list of countries displays. • Touch a country in the list (for example, United States) and Once you have signed into your Samsung account, you can touch OK. check for a software update. The Samsung account Terms and conditions screen displays.
-
Page 211: Section 12: Health And Safety Information
Section 12: Health and Safety Information Do cell phones pose a health hazard? This section outlines the safety precautions associated with using your Galaxy Tab. The terms “GALAXY” or “mobile Many people are concerned that cell phone radiation will device” are used in this section to refer to your Galaxy Tab. cause cancer or other serious health hazards. - Page 212 Research Results to Date: Is there a connection The biological effects of radio frequency energy should not between RF and certain health problems? be confused with the effects from other types of electromagnetic energy. The results of most studies conducted to date say no. In Very high levels of electromagnetic energy, such as is found addition, attempts to replicate and confirm the few studies in X-rays and gamma rays, can ionize biological tissues.
- Page 213 Risk of Brain Cancer from Exposure to Radio slight increase in brain cancer. However, the authors Frequency Fields in Childhood and Adolescence determined that biases and errors prevented any conclusions (MOBI-KIDS) being drawn from this data. Additional information about Interphone can be found at MOBI-KIDS is an international study investigating the http://www.iarc.fr/en/media-centre/pr/2010/pdfs/pr200_E.pdf.
- Page 214 Reducing Exposure: Hands-Free Kits and Other Cell Phone Industry Actions Accessories Although the existing scientific data do not justify FDA Steps to Reduce Exposure to Radio Frequency Energy regulatory actions, the FDA has urged the cell phone industry to take a number of steps, including the following: If there is a risk from being exposed to radio frequency •...
- Page 215 Children and Cell Phones Because there are no known risks from exposure to RF emissions from cell phones, there is no reason to believe that The scientific evidence does not show a danger to any users hands-free kits reduce risks. Hands-free kits can be used for of cell phones from RF exposure, including children and convenience and comfort.
-
Page 216: Specific Absorption Rate (Sar) Certification Information
Specific Absorption Rate (SAR) • Environmental Protection Agency (EPA): Certification Information http://www.epa.gov/radtown/wireless-tech.html. • Occupational Safety and Health Administration (OSHA): Your wireless mobile device is a radio transmitter and http://www.osha.gov/SLTC/radiofrequencyradiation/. receiver. It is designed and manufactured not to exceed the (Note: This web address is case sensitive.) exposure limits for Radio Frequency (RF) energy set by the •... - Page 217 The FCC SAR limit incorporates a substantial margin of safety Use of other accessories may not ensure compliance with to give additional protection to the public and to account for FCC RF exposure guidelines. The FCC has granted an any variations in measurements. Equipment Authorization for this mobile device with all reported SAR levels evaluated as in compliance with the FCC SAR tests are conducted using standard operating positions...
-
Page 218: Fcc Part 15 Information To User
Connect the equipment into an outlet on a circuit different from Samsung could void your authority to operate the device. that to which the receiver is connected. This device complies with part 15 of the FCC Rules. -
Page 219: Battery Use And Safety
Check the laws and regulations on the use of mobile devices Laws in some states may prohibit mounting this device on or and their accessories in the areas where you drive. Always near the windshield of an automobile. In other states, the law obey them. - Page 220 GALAXY. safety hazard. If the GALAXY and/or battery get wet, have them checked by your service provider or contact Samsung, even if WARNING! they appear to be working properly.
-
Page 221: Samsung Mobile Products And Recycling
FAILURE TO FOLLOW THE INSTRUCTIONS OUTLINED MAY Recycling LEAD TO SERIOUS PERSONAL INJURY AND POSSIBLE PROPERTY DAMAGE. Samsung cares for the environment and encourages its IMPORTANT SAFETY INSTRUCTIONS - SAVE THESE customers to recycle Samsung mobile devices and genuine Samsung accessories. -
Page 222: Gps
Using excessive force or a metallic object when service provider, applications providers, Samsung, and other pressing on the touch-screen may damage the third-parties providing services. -
Page 223: Care And Maintenance
Do not use harsh chemicals, cleaning solvents, or strong years: detergents to clean the mobile device. Wipe it with a soft Keep your Samsung Mobile Device away from: cloth slightly dampened in a mild soap-and-water Liquids of any kind solution. -
Page 224: Responsible Listening
Paint hearing problem varies. Additionally, the amount of sound produced by a portable audio device varies depending on the Do not paint the mobile device. Paint can clog the nature of the sound, the device settings, and the headphones device’s moving parts or ventilation openings and prevent that are used. - Page 225 • Do not turn the volume up to block out noisy surroundings. If you You can obtain additional information on this subject from the following sources: choose to listen to your portable device in a noisy environment, use noise-cancelling headphones to block out background American Academy of Audiology environmental noise.
-
Page 226: Operating Environment
Using Your Mobile Device Near Other Electronic National Institute for Occupational Safety Devices and Health (NIOSH) Most modern electronic equipment is shielded from Radio 395 E Street, S.W., Suite 9200 Frequency (RF) signals. However, certain electronic Patriots Plaza Building equipment may not be shielded against the RF signals from Washington, DC 20201 your wireless mobile device. - Page 227 Posted Facilities • Should read and follow the directions from the manufacturer of your implantable medical device. If you have any questions about Switch your mobile device off in any facility where posted using your wireless mobile device with an implantable medical notices require you to do so.
-
Page 228: Restricting Children's Access To Your Mobile Device
When your Device is Wet the National Fire Protection Standard (NFPA-58). For a copy of this standard, contact the National Fire Protection Do not turn on your device if it is wet. If your device is Association. already on, turn it off and remove the battery immediately (if Cautions the device will not turn off or you cannot remove the battery, leave it as-is). - Page 229 • • Check regularly that all wireless mobile device equipment in your Failure to observe these instructions may lead to the suspension vehicle is mounted and operating properly. or denial of network services to the offender, or legal action, or both.
-
Page 230: Section 13: Warranty Information
1 Year conjunction or connection with accessories, products, or Internal Batteries) ancillary/peripheral equipment not furnished or approved by SAMSUNG; (g) defects or damage resulting from improper Case 90 Days testing, operation, maintenance, installation, service, or Other Tablet Accessories 1 Year adjustment not furnished or approved by SAMSUNG;... - Page 231 (iii) the battery has must return the Product to an authorized Tablet service been used in equipment other than the SAMSUNG Tablet for facility in an adequate container for shipping, accompanied which it is specified.
- Page 232 THIRD-PARTY SOFTWARE OR EQUIPMENT IS INCLUDED WITH THIS LIMITED WARRANTY. THE PRODUCT DISTRIBUTED BY SAMSUNG OR OTHERWISE. IN NO EVENT SHALL SAMSUNG BE LIABLE FOR DAMAGES IN RESPONSIBILITY FOR THE QUALITY, CAPABILITIES, EXCESS OF THE PURCHASE PRICE OF THE PRODUCT OR FOR, OPERATIONS, PERFORMANCE AND SUITABILITY OF ANY WITHOUT LIMITATION, COMMERCIAL LOSS OF ANY SORT;...
- Page 233 What is the procedure for resolving disputes? For any arbitration in which your total damage claims, ALL DISPUTES WITH SAMSUNG ARISING IN ANY WAY FROM exclusive of attorney fees and expert witness fees, are THIS LIMITED WARRANTY OR THE SALE, CONDITION OR $5,000.00 or less (“Small Claim”), the arbitrator may, if you...
- Page 234 You may opt out of this dispute resolution procedure by If any portion of this Limited Warranty is held to be illegal or providing notice to SAMSUNG no later than 30 calendar days unenforceable, such partial illegality or unenforceability shall from the date of the first consumer purchaser’s purchase of the...
-
Page 235: End User License Agreement For Software
DISCONTINUE USE OF THE SOFTWARE. © 2012 Samsung Electronics America, Inc. All rights 1. GRANT OF LICENSE. Samsung grants you the following reserved. rights provided that you comply with all terms and conditions No reproduction in whole or in part allowed without prior of this EULA: You may install, use, access, display and run written approval. - Page 236 (if any) of the Software that The Software is protected by copyright and other intellectual Samsung may provide to you or make available to you after property laws and treaties. Samsung or its suppliers own the the date you obtain your initial copy of the Software, unless title, copyright and other intellectual property rights in the we provide other terms along with such upgrade.
- Page 237 License will terminate automatically without third-party or its products and services. Purchaser agrees notice from Samsung if you fail to comply with any of the that SAMSUNG shall not be responsible or liable, directly or terms and conditions of this EULA. Upon termination of this...
- Page 238 DEVICE ARE PROVIDED “AS IS” AND ON AN “AS AVAILABLE” INFORMATION, WHETHER ORAL OR WRITTEN, OBTAINED BY BASIS, WITHOUT WARRANTIES OF ANY KIND FROM PURCHASER FROM SAMSUNG SHALL BE DEEMED TO ALTER SAMSUNG, EITHER EXPRESS OR IMPLIED. TO THE FULLEST THIS DISCLAIMER OF WARRANTY REGARDING THIRD-PARTY EXTENT POSSIBLE PURSUANT TO APPLICABLE LAW, APPLICATIONS, OR TO CREATE ANY WARRANTY.
- Page 239 11. Limitation of Liability. SAMSUNG WILL NOT BE LIABLE FOREGOING LIMITATIONS, EXCLUSIONS, AND DISCLAIMERS FOR ANY DAMAGES OF ANY KIND ARISING OUT OF OR (INCLUDING SECTIONS 9, 10, AND 11) SHALL APPLY TO THE RELATING TO THE USE OR THE INABILITY TO USE ANY...
-
Page 240: Social Hub
14. ENTIRE AGREEMENT; SEVERABILITY. This EULA is the the Service. entire agreement between you and Samsung relating to the By using the Service, you agree to be bound by the above Software and supersedes all prior or contemporaneous oral documents. - Page 241 When you first use the ("Amendments"). Service, you may be required to create a username and a Samsung may provide you with notice of the Amendments by password. sending an email message to the email address listed in your...
- Page 242 • Not submit unlawful, offensive, abusive, pornographic, harassing, libelous or other inappropriate Material; Except as set forth in the Social Hub Privacy Policy, Samsung • shall not be responsible for any removal of the information or Respect the privacy of others;...
- Page 243 Service. impersonate or falsely claim affiliation with any person or Samsung may restrict access to any part of the Service or entity, to misrepresent, harass, defraud or defame others, to...
- Page 244 Samsung expressly disclaims any responsibility or Samsung does not represent or warrant that the Service, or liability for any interruption or suspension of any third party any part thereof, is appropriate or available for use in any content or service.
-
Page 245: Limitation Of Liability
Samsung, for such as device serial number of the devices sold by the example your acceptance of the Terms, will be automatically operator with preinstalled software for the Service. - Page 246 ACCESSED THROUGH THE SERVICE, NOR SHALL SAMSUNG THESE STATUTORY PROVISIONS. IF THESE STATUTORY BE HELD RESPONSIBLE FOR MALICIOUS CODE CONTAINED PROVISIONS APPLY, TO THE EXTENT TO WHICH SAMSUNG IS ON OR DISTRIBUTED THROUGH BY THIRD PARTIES. ABLE TO DO SO, SAMSUNG LIMITS ITS LIABILITY UNDER...
- Page 247 Terms, ii) your Samsung, with respect to your use of the Service. Your use of infringement or violation of any intellectual property, other...
-
Page 248: Social Hub Privacy Policy
Samsung Electronics Co., Ltd. ("Samsung") is committed to in an electronic format. We may also combine personal protecting the online privacy of visitors, users and customers information we collect online with information available from to our Social Hub service. -
Page 249: Use Of Information We Collect
fully utilize all of the features or components of the Service if use aggregated non-personal information about our users to you choose not to provide certain information. If you do understand the demographics of users of the Service, such choose to give us personal information through the Service, as the percentage of male and female users, the geographic we will collect and retain that information. -
Page 250: Disclosure Of Information To Third Parties
at any time that we not e-mail you in future by clicking the We require these companies to use your personal "unsubscribe" link which is included at the bottom of any information only to provide the particular product or service e-mail that you receive from us. -
Page 251: Children
Service and Samsung, intercepted while being transmitted to us over the Internet. our users, or others. -
Page 252: Contests And Sweepstakes
If at any time you be directed via e-mail to s.dufresne@Samsung.com, or via wish to update your information or stop receiving regular mail to:... -
Page 253: Changes To Privacy Policy
This Privacy Policy is effective as of May 29, 2010 and are reserved to Licensor, and you agree not to take or permit complies with Samsung's Corporate Privacy Policy. We any action with respect to the Software that is not expressly reserve the right to change this Privacy Policy at any time, authorised under this License. - Page 254 3. OWNERSHIP OF INTELLECTUAL PROPERTY 4.2.2 already in your possession, provided that Licensee can RIGHTS show such possession from written records (other than as a result of a breach of this clause 4); or 3.1 Your only right to use the Software is by virtue of this 4.2.3 which you can demonstrate is in the public domain License and you acknowledge that all intellectual property (other than as a result of a breach of this clause 4).
- Page 255 6.4 Disclaimer of Certain Damages. IN NO EVENT SHALL LICENSE YOU ASSUME THE ENTIRE RISK AS TO THE QUALITY SAMSUNG BE LIABLE TO YOU OR ANY PARTY RELATED TO AND PERFORMANCE OF THE SOFTWARE. YOU FOR ANY INDIRECT, INCIDENTAL, CONSEQUENTIAL, 6.3 SUBJECT TO CLAUSE 6.1 LICENSOR WILL BE UNDER NO...
- Page 256 AND WAIVER ALSO APPLIES TO ANY CLAIMS YOU MAY BRING without prejudice to the rights, duties and liabilities of either AGAINST ANY OTHER PARTY TO THE EXTENT THAT SAMSUNG party accrued prior to termination. Clauses 2.2, 2.3, 3, 4, 5, WOULD BE REQUIRED TO INDEMNIFY THAT PARTY FOR SUCH 6, 7.3, 8, 9 and 10 of this License will continue to be...
- Page 257 will comply with the laws of any jurisdiction that apply to the 10.5 Licensor reserves the right to revise the terms of this Software, including without limitation any applicable export License by updating the License on its web site, or by laws or regulations.
-
Page 258: Index
Index Camera settings 118 Accounts Back button 25 taking photos 118 setting up 56 Battery Care and Maintenance 218 Adobe PDF 166 charging 7 Children and Cell Phones 210 AllShare indicator 7 Contacts configuring 147 installing and removing 7 creating 57 Android keyboard Battery Use &... - Page 259 Google+ 83 GPS 217 Display / Touch-Screen 216 Gallery 126 GPS Applications 144 Display settings sharing photos and video 130 Groups font style 183 viewing photos and video 127 creating 63 DivX® Gmail registration code 204 account settings 69 Do cell phones pose a composing and sending 69 Handwriting 53 health hazard? 206...
- Page 260 Music add songs to a playlist 109 Language and keyboard settings Pairing with Bluetooth 138 creating a playlist 108 select locale 194 Photo ID Music Player 111 Latitude Settings 96 setting 129 Music app 103 Location Services Settings 189 Photos Locking and Unlocking Gallery 126 unlocking the keypad 16...
- Page 261 Text entering text 46 Settings 174 changing input method 46 Samsung Kies 141 Location Services 189 entering 45 Samsung Mobile Products and Shortcuts 36 input methods 45 Recycling 216 Smart Practices While Driving 213 using Swype 51 SAR Values 212...
- Page 262 Windows Media Player synchronizing with 142 UL Certified Travel Charger 216 Warranty Information 225 Wireless Networking Update Available 144 Widgets 32 Bluetooth 137 USB connections Wi-Fi Wi-Fi 135 as a mass storage device 143 adding a connection World Clock 170 USB settings manually 136 as a mass storage device 143...