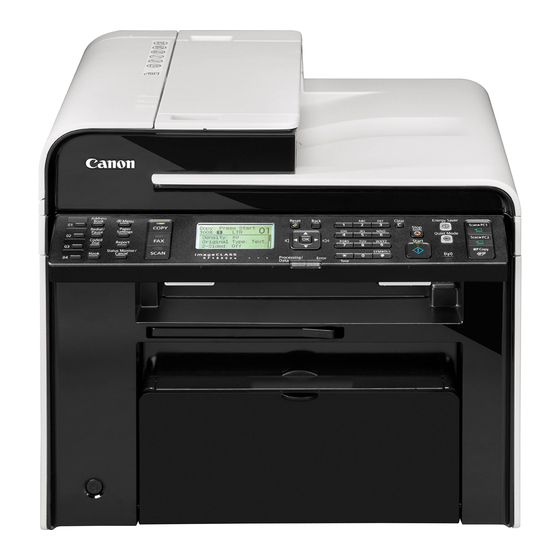
Canon imageCLASS MF4880dw Basic Operation Manual
Hide thumbs
Also See for imageCLASS MF4880dw:
- Starter manual (37 pages) ,
- Settings manual (25 pages) ,
- Service manual (511 pages)
Table of Contents
Advertisement
Quick Links
Basic Operation Guide
For information about machine setup and software
installation, see the Starter Guide.
This guide describes the basic use of
the machine. Read this guide after
finishing the machine setup.
Read Important Safety Instructions
first
p.
.
Keep this manual for future reference.
For information about advanced operations and
specifications, see the e-Manual included on the User
Software CD-ROM.
Advertisement
Table of Contents

Related Manuals for Canon imageCLASS MF4880dw


Summary of Contents for Canon imageCLASS MF4880dw
- Page 1 Basic Operation Guide For information about machine setup and software installation, see the Starter Guide. This guide describes the basic use of the machine. Read this guide after finishing the machine setup. Read Important Safety Instructions first Keep this manual for future reference. For information about advanced operations and specifications, see the e-Manual included on the User Software CD-ROM.
- Page 2 Manuals for the Machine Starter Guide The Starter Guide describes setting up the machine and installing the software. Be sure to read this manual before using the machine. Wireless LAN Setting Guide (MF4890dw/MF4880dw Only) This manual describes Wireless LAN setup procedures and causes and countermeasures for trouble you might face during the setup.
-
Page 3: How To Use This Manual
How to Use This Manual Symbols Used in This Manual Indicates a situation that may lead to death or injury to persons. WARNING To use the machine safely, always pay attention to these warnings. Indicates a situation that may lead to injury to persons or damage to equipment. -
Page 4: Main Functions
Main Functions Adjusting Quality Adjust image quality by setting the density, resolution, and sharpness. • → Copy P.32 • → P.52 Enlarging and Reducing • → Copy P.31 • → Print P.40 Multiple Documents onto Single Page Print multiple pages onto a single page. •... - Page 5 Copy <ON> <OFF> → → Collating Copies P.35 Copying ID Card P.36 Collate copies when copying multiple documents. Copy both sides of an ID card onto a single page. Print → → → Booklet Printing* P.43 Poster Printing P.44 Watermark Printing P.45 •...
-
Page 6: Table Of Contents
Contents Basic Operation Learn the Names and Functions of Each Part of the Machine ……… 10 Front Side …………………………………………………………… 10 Interior ……………………………………………………………… 12 Back Side …………………………………………………………… 13 Learn the Functions of the Operation Panel ………………………… 14 Switch to Copy/Fax/Scan Mode ……………………………………… 16 Enter Text ……………………………………………………………... - Page 7 Print Print a Document …………………………………………………… 40 Enlarge or Reduce a Document ……………………………………… 40 Print a Double-Sided Document (MF4890dw/MF4880dw Only) …… 41 Print Multiple Pages onto One Sheet ………………………………… 42 Print a Booklet (MF4890dw/MF4880dw Only) ……………………… 43 Print a Poster ………………………………………………………… 44 Add Watermarks to a Printout ………………………………………...
- Page 8 Scan → Understand the Scanning Method …………………………………… 74 p.105) Scan a Document with the Operation Panel ………………………… 75 You can see frequentely asked Scanning a Document Using a Shortcut Key ………………………… 77 questions about the scan function. Scan a Document with the MF Toolbox ……………………………… 78 Confi guring Scan Settings Using the MF Toolbox ……………………...
-
Page 9: Basic Operation
Basic Operation This chapter describes overall information about the machine, and how to place the documents and load the paper. Read this chapter fi rst. Learn the Names and Functions of Each Part of the Machine ……… 10 Front Side …………………………………………………………… 10 Interior ………………………………………………………………... -
Page 10: Learn The Names And Functions Of Each Part Of The Machine
Learn the Names and Functions of Each Part of the Machine Front Side Feeder Automatically feeds documents into the Document return tray → machine ( P.20). Returns documents after scanning. Tray extension Pull out to load large size documents. Document feeder tray Place your documents in this tray. -
Page 11: Output Tray
Platen glass Used to scan non-standard size paper or books, as well as standard size → paper ( P.20). Output tray Printed documents are output here Output tray extension Pull out the tray extension when using paper larger than LTR. Paper stopper Use the paper stopper to prevent paper from falling out... -
Page 12: Interior
Interior Toner cover Open this cover to access the toner cartridge or clear paper jams. Paper exit guide Open this guide to clear paper jams → P.96). Toner guides When inserting the toner cartridge, fi t the protrusions on the toner →... -
Page 13: Back Side
5-digit number) and the required voltage and current are specifi ed. Write the serial number on the back cover of this guide for reference when contacting the Canon Customer Center. USB port Connect to a computer via a USB cable. -
Page 14: Learn The Functions Of The Operation Panel
Learn the Functions of the Operation Panel Navigate the menu or options. (See “Navigating the Menu” on the next page.) Reset Press to return to standby mode ▲/▼ Press to scroll up and down, or to increase or decrease a value. •... - Page 15 → Enter letters and numbers ( p.17). 0 to 9 Press to enter letters and numbers. (Numeric Keys) > > Scan PC1/ Scan • Press to switch the character entry mode. Press to send the scanned documents to the • When sending a fax, press to switch registered computer for each keys.
-
Page 16: Switch To Copy/Fax/Scan Mode
Switch to Copy/Fax/Scan Mode Switch to Copy, Fax, or Scan mode fi rst to use each mode. Press the desired mode key. If you do not operate the machine for a while, the machine returns to the Copy mode (standby mode) automatically. Copy Mode Displays the copy ratio, paper source, Copy: Press Start... -
Page 17: Enter Text
Press [6] until the letter “N” appears on the screen. appears on the screen. appears on the screen. ▌ ▌ ▌ CANO CANON Press [ * ] to switch the entry Press [1] to enter “1.” mode to <12>. CANON1 ▌... -
Page 18: Set Date And Time
Set Date and Time If the incorrect date or time is printed on faxes or reports, change the date and time settings. Press [ ] (Menu). ▲ ▼ Press [ ] or [ ] to highlight <Timer Settings>, and then press [OK]. ▲... -
Page 19: Place Documents
Place Documents Choose the appropriate way to place documents according to the document’s type. When placing non-standard documents such as heavy paper, small paper, or Check available documents booklets: Size (Width X Length) Maximum Weight Maximum 4.4 lb (2 kg) Capacity 1 sheet →... -
Page 20: Placing Documents On The Platen Glass
Placing Documents on the Platen Glass Open the feeder. Place your document face down. Align the document with the appropriate paper size marks. • If the document does not match any of the paper size marks, align the upper left edge of your document with the arrow mark. - Page 21 Neatly place the documents face up. • Place the document under the load limit guides (A). • Make sure that the paper stack does not exceed the load limit marks (B). Align the document guides tightly to the width of the document. If the document guides are too loose or too tight, this may result in IMPORTANT IMPORTANT...
-
Page 22: Load Paper
Load Paper Before loading paper, check the paper is the right type. If you load inappropriate paper repeatedly, this may cause paper jams. Check if the type of paper is appropriate. Step Paper such as Legal, Letter, Statement, Executive, and envelopes can be used. For details about the available paper or precautions, see [Basic Operation] ... -
Page 23: Loading Paper In The Paper Cassette
Loading Paper in the Paper Cassette This section describes how to load letter paper in the Paper Cassette. When loading envelopes or paper with a letterhead, see ”Loading Envelopes or Paper with a Letterhead” → p.25). Lift the dust cover. Spread the paper guides a little wider than the paper size. -
Page 24: Loading Paper In The Multi-Purpose Tray
Adjust the paper guides tightly to the width and length of the paper. If the paper guides are too loose or too tight, this may result in misfeeds IMPORTANT IMPORTANT or paper jams. Close the dust cover. → Specify the loaded paper size and type ( p.25). -
Page 25: Loading Envelopes Or Paper With A Letterhead
Loading Envelopes or Paper with a Letterhead This section describes how to load envelopes and paper with a letterhead. Envelopes Before Loading Flatten envelopes Loosen any stiff corners of the to release any envelopes, and fl atten any remaining air. curls, as shown in the fi gure. -
Page 26: Setting A Paper Size And Type
Setting a Paper Size and Type Make sure that the Paper Settings match the size and the type of the loaded paper. Press [ ] (Paper Settings). ▲ ▼ Press [ ] or [ ] to highlight <MP Tray> or <Drawer 1>, and then press [OK]. -
Page 27: Switch To The Quiet Mode
Switch to the Quiet Mode You can switch to and cancel the Quiet mode, by pressing [ ] (Quiet Mode). • By default, the Quiet mode is set to <Off >. To change this setting to <On>, and specify the time to switch to the Quiet mode automatically, press ] (Menu) ... -
Page 28: Use The Toner Saver Mode
Use the Toner Saver Mode You can set whether or not to conserve toner when copying or faxing. When using the Toner Saver mode, the output may not be clear, as subtle details, such as thin lines and light colors, may not be clearly reproduced. Press [ ] (Menu). -
Page 29: Copy
Copy This chapter describes basic copy functions. Make a Basic Copy …………………………………………………… 30 Copy by Saving Paper ………………………………………………… 31 Enlarge or Reduce Copies …………………………………………… 31 Adjust the Image Quality for Copy …………………………………… 32 Adjusting the density ……………………………………………… 32 Selecting the Document Type ……………………………………… 32 Adjusting the sharpness ……………………………………………... -
Page 30: Make A Basic Copy
Make a Basic Copy → Place your documents ( p.19). If the document guides are too loose or too tight, this may result in IMPORTANT IMPORTANT misfeeds or paper jams. → Switch to the Copy mode ( p.16). Enter the desired copy quantity (1 to 99) with the alphanumeric keys. •... -
Page 31: Copy By Saving Paper
Copy by Saving Paper You can save paper with [ ] (Paper Save Copy) when making a copy. → Place your documents ( p.19) Press [ ] (Paper Save Copy). ▲ ▼ Press [ ] or [ ] to highlight the desired dcombination option, and then press [OK]. -
Page 32: Adjust The Image Quality For Copy
Adjust the Image Quality for Copy Relation between the density and document type: If <Density> is set to <Auto Density>, <Original Type> will be changed to <Text>. Adjusting the density You can make the density brighter or darker than the original documents. →... -
Page 33: Adjusting The Sharpness
Adjusting the sharpness You can sharpen or soften the edges of images by adjusting the sharpness. → Place your documents ( p.19). → Switch to the Copy mode ( p.16). ▲ ▼ Press [ ] or [ ] to highlight <Sharpness>, and then press [OK]. ◄... -
Page 34: Make Double-Sided Copies (Mf4890Dw/Mf4880Dw Only)
Make Double-Sided Copies (MF4890dw/MF4880dw Only) You can make double-sided copies from single-sided documents. When using the MF4890dw, you can also make double-sided or single-sided copies from double-sided documents. → Place your documents ( p.19). → Switch to the Copy mode ( p.16). -
Page 35: Copy Multiple Pages Onto One Sheet
Copy Multiple Pages onto One Sheet You can combine multiple pages (two or four pages) onto one copy sheet. → Place your documents ( p.19). → Switch to the Copy mode ( p.16). ▲ ▼ Press [ ] or [ ] to highlight <N on 1>, and then press [OK]. -
Page 36: Copy A Double-Sided Id Card
Copy a Double-Sided ID Card You can make a copy of a double-sided ID card onto single-sided paper. Place an ID on the platen glass. • Place the card at the center of the left edge of the platen glass, with a 1/4” (5 mm) space created. -
Page 37: View And Cancel Copy Jobs
View and Cancel Copy Jobs You can view or cancel copy jobs while the jobs are in progress. Press [ ] (Status Monitor/Cancel). ▲ ▼ Press [ ] or [ ] to highlight <Copy Job Status>, and then press [OK]. View the details of a copy job or cancel the job. - Page 38 Memo 38 38...
-
Page 39: Print
Print This chapter describes basic Print functions. Print a Document …………………………………………………… 40 Enlarge or Reduce a Document ……………………………………… 40 Print a Double-Sided Document (MF4890dw/MF4880dw Only) …… 41 Print Multiple Pages onto One Sheet ………………………………… 42 Print a Booklet (MF4890dw/MF4880dw Only) ……………………… 43 Print a Poster …………………………………………………………... -
Page 40: Print A Document
Print a Document Make sure that a computer and the machine are connected properly, and the MF Drivers are installed on the computer. Open a document from an application, and then open the Print window. Select your printer. Click [Print] to start printing. Canceling Print Jobs Press [ ] (Stop) twice. -
Page 41: Print A Double-Sided Document (Mf4890Dw/Mf4880Dw Only)
Click [OK] to return to the Print window. Click [OK] to start printing. Print a Double-Sided Document (MF4890dw/MF4880dw Only) You can print on both sides of paper. Open a document from an application, and then open the Print window. Select your print, and then open the Printing Preferences window. Click the [Finishing] tab, and then specify the settings for double-sided printing. -
Page 42: Print Multiple Pages Onto One Sheet
Print Multiple Pages onto One Sheet You can reduce and print 2, 4, 6, 8, 9, or 16 pages of an original document onto a single sheet of paper. This feature allows you to save paper or to view several pages at once. Open a document from an application, and then open the Print window. -
Page 43: Print A Booklet (Mf4890Dw/Mf4880Dw Only)
Print a Booklet (MF4890dw/MF4880dw Only) You can print pages side-by-side, and then fold them to create a booklet. Open a document from an application, and then open the Print window. Select your printer, and then open the Printing Preferences window. Click the [Finishing] tab, select [Booklet Printing], and then click [Booklet]. -
Page 44: Print A Poster
Print a Poster You can enlarge a one-page document and print it on multiple pages. You can then combine the printed pages to create a large poster. Open a document from an application, and then open the Print window. Select your printer, and then open the Printing Preferences window. Click [Page Setup] tab, and then select [Poster(N×N)] from the [Page Layout] drop-down menu. -
Page 45: Add Watermarks To A Printout
Add Watermarks to a Printout You can add watermarks, such as “DRAFT,” to a document. Open a document from an application, and then open the Print window. Select your printer, and then open the Printing Preferences window. Click the [Page Setup] tab, and then specify the settings for watermark printing. -
Page 46: View And Cancel Print Jobs
View and Cancel Print Jobs You can view or cancel print jobs that are waiting or in progress. Press [ ] (Status Monitor/Cancel). ▲ ▼ Press [ ] or [ ] to highlight <Print Job Status>, and then press [OK]. View the details of a print job or cancel the job. -
Page 47: Fax
This chapter describes the basic fax functions. Register Numbers in the Address Book ……………………………… 48 Registering Numbers to One-Touch Keys …………………………… 48 Registering Numbers to Coded Dialing Codes ……………………… 49 Registering Recipients for Group Dialing …………………………… 50 Editing and Deleting Registered Destinations ……………………… 52 Adjust the Image Quality for Fax ……………………………………... -
Page 48: Register Numbers In The Address Book
] (Address Book). ◄ ► Press [ ] or [ ] to switch to the menu screen CANON 0123456789 or a screen for searching registered destinations. GroupA 2 Destin : Display the address book menu. User01 01234567 : Display all registered destinations. -
Page 49: Registering Numbers To Coded Dialing Codes
▲ ▼ Enter a name for the destination, press [ ] or [ ] to highlight <Apply>, and then press [OK]. Name (Max 16 char.) CANON <Apply> Entry Mode: A ▲ ▼ Press [ ] or [ ] to highlight <Destination>, and then press [OK]. -
Page 50: Registering Recipients For Group Dialing
▲ ▼ Press [ ] or [ ] to highlight <Destination>, and then press [OK]. ▲ ▼ Enter the fax number, press [ ] or [ ] to highlight <Apply>, and then press [OK]. • Select <Set Details> to specify detailed options as needed. Destination (Max 40) 0123456789 <Apply>... - Page 51 ▲ ▼ Press [ ] or [ ] to highlight the destination you want to add, and then press [OK]. CANON 0123456789 GroupA 2 Destin User01 01234567 Repeat steps 10 and 11 to add more destinations as needed. Destination <Apply>...
-
Page 52: Editing And Deleting Registered Destinations
Editing and Deleting Registered Destinations You can edit or delete destinations registered in the address book. Switch to the Fax mode, and then press [ ] (Address Book). ◄ ► Press [ ] or [ ] to highlight < > (Menu). ▲... -
Page 53: Selecting The Resolution
Selecting the Resolution You can select a resolution that is appropriate for the document. Set a higher resolution for documents that contain small text. → Place your documents ( p.19). → Switch to the Fax mode ( p.16). ▲ ▼ Press [ ] or [ ] to highlight <Resolution>, and then press [OK]. -
Page 54: Specifying The Double-Sided Document Format (Mf4890Dw Only)
Specifying the Double-Sided Document Format (MF4890dw Only) You can set the document format to scan double-sided documents automatically. → Place your documents ( p.19). → Switch to the Fax mode ( p.16). ▲ ▼ Press [ ] or [ ] to highlight <2-Sided Original>, and then press [OK]. ▲... -
Page 55: Send A Fax
Send a Fax Entering a Fax Number with the Alphanumeric Keys → Place your documents ( p.19). If the document guides are too loose or too tight, this may result in IMPORTANT IMPORTANT misfeeds or paper jams. → Switch to the Fax mode ( p.16). -
Page 56: Using The One-Touch Keys
When specifi ed by one-touch keys or coded dialing codes, a screen for confi rming the destination may appear. After confi rmation, press [OK] to start sending a fax. Send: Press Start Enter coded dial no. Destinations: 001 Canon 0123456789 *001 RX Mode: Auto Resolution: 200 X 1 Press [... -
Page 57: Searching The Address Book
Press [ ] (Address Book). ◄ ► Press [ ] or [ ] to search for a recipient. CANON 0123456789 GroupA 2 Destin User01 01234567 Select <All> or an initial in the recipient’s name. ▲ ▼ Press [ ] or [ ] to highlight the desired recipient, and then press [OK]. -
Page 58: Sending A Fax To Multiple Destinations (Sequential Broadcast)
Sending a Fax to Multiple Destinations (Sequential Broadcast) You can send the same document to multiple recipients at once. → Place your documents ( p.19). → Switch to the Fax mode ( p.16). Specify the destination. ▲ ▼ Press [ ] or [ ] to select the desired method for specifying destinations. -
Page 59: Calling A Recipient Before Sending A Fax
Press [ ] (Redial/Pause), and then press [OK]. • A pause added to the end of the number is fi xed at 10 seconds. Press [ ] (Start). Calling a Recipient before Sending a Fax In the following cases, follow the procedure below to send faxes: •... -
Page 60: Receive A Fax (Receive Mode)
Receive a Fax (Receive Mode) Your machine provides multiple methods for automatically or manually receiving faxes. Select the receive mode that best suits your needs. → p.105) You can see frequantely asked questions about the receive mode. <Auto> mode Do you want to use a telephone (voice call)? See “Using the Machine for Fax... -
Page 61: Using The Machine For Fax Only
Using the Machine for Fax Only Set the fax receive mode to <Auto>. → Switch to the Fax mode ( p.16). ▲ ▼ Press [ ] or [ ] to highlight <RX Mode>, and then press [OK]. ▲ ▼ Press [ ] or [ ] to highlight <Auto>, and then press [OK]. -
Page 62: Using The Answering Machine
When a Fax or Call Comes In The machine automatically detects whether the call is a fax or voice call after two rings. If the call is a fax, the machine starts receiving the fax. If the call is a voice call, the machine rings until it is answered or the caller hangs up. -
Page 63: Receiving Faxes In Manual Mode
When a Fax or Call Comes In The machine continuously rings in Manual mode. Pick up the receiver of the external telephone to answer the call. If the call is a fax, you will hear a beep. See “Receiving Faxes in Manual Mode,”... -
Page 64: Receive A Fax From Memory
Receive a Fax from Memory If a fax is stored in memory, you can view the sender of the received fax and print or forward the fax. Switching to Memory Lock Mode Press [ ] (Menu). ▲ ▼ Press [ ] or [ ] to highlight <System Settings>, and then press [OK]. -
Page 65: Viewing And Canceling Received Fax Documents
Viewing and Canceling Received Fax Documents You can view the sender of the fax stored in memory. You can also delete unnecessary faxes or forward them to other destinations. Press [ ] (Status Monitor/Cancel). ▲ ▼ Press [ ] or [ ] to highlight <Fax Job Status/History>, and then press [OK]. -
Page 66: View And Cancel A Fax Job
View and Cancel a Fax Job You can view or cancel fax jobs that are waiting or in progress. Press [ ] (Status Monitor/Cancel). ▲ ▼ Press [ ] or [ ] to highlight <Fax Job Status/History>, and then press [OK]. - Page 67 Page Number Sending Date/Time (Unit Name) Above Image Mark No. as TEL/FAX: FAX, TEL 01/01/2012 02:07 PM FAX 123XXXXXXX CANON P.0001 Telephone Number Mark <Check Dial Tone Before When sending a fax, you can specify whether or not to verify Sending>...
-
Page 68: Restricting Fax Sending Functions
Restricting Fax Sending Functions Press [ ] (Menu). ▲ ▼ Press [ ] or [ ] to highlight <System Settings>, and then press [OK]. ▲ ▼ Press [ ] or [ ] to highlight <Restrict TX Function>, and then press [OK]. ▲... -
Page 69: Changing Fax Rx Settings
Changing Fax RX Settings Press [ ] (Menu). ▲ ▼ Press [ ] or [ ] to highlight <Fax RX Settings>, and then press [OK]. ▲ ▼ Press [ ] or [ ] to highlight <RX Function Settings> or <RX Print Settings>, and then press [OK]. ▲... -
Page 70: Changing Communication Management Settings
Options Settings Details Bold: Default settings Set to scale images automatically so they fi t the selected paper size or to reduce the image according to the specifi ed ratio. Reduction Ratio: Auto, 97%, <Reduce RX Size> 95%, 90%, 75% Reduction Direction: Vertical/ Horizontal, Vertical Only Specify whether or not to print a received date, day of the... - Page 71 Communication Management Settings Options Settings Details Bold: Default settings 33600 bps 14400 bps <TX Start Speed> 9600 bps Change the transmission or receiving start speed if you have diffi culty sending or receiving faxes. 7200 bps <RX Start Speed> 4800 bps 2400 bps Generally, received documents are immediately printed.
- Page 72 Memo 72 72...
-
Page 73: Scan
Scan This chapter describes the basic scan functions. Understand the Scanning Method …………………………………… 74 Scan a Document with the Operation Panel ………………………… 75 Scanning a Document Using a Shortcut Key ………………………… 77 Scan a Document with the MF Toolbox ……………………………… 78 Confi guring Scan Settings Using the MF Toolbox ……………………... -
Page 74: Understand The Scanning Method
Understand the Scanning Method Various scanning methods are provided. Scan a Document with the Operation → Panel ( p.75). You can use the operation panel to scan an image, and then send the image to a computer. Basic Basic Connect your computer to computer to Method... -
Page 75: Scan A Document With The Operation Panel
Scan a Document with the Operation Panel You can scan a document using the Scan mode. Make sure that a computer and the machine are connected (See the Starter Guide). → Place your documents ( p.19). → Switch to the Scan mode ( p.16). - Page 76 Press [OK] to start scanning. When placing your Scanning operation starts. documents in the feeder ▲ 1. To continuously scan the document, press [ ] or ▼ ] to highlight <Scan Next Original>, and then When placing your press [OK]. documents on the ▲...
-
Page 77: Scanning A Document Using A Shortcut Key
Scanning a Document Using a Shortcut Key You can perform a scan easily by registering destinations and frequently used settings in shortcut keys in advance. Registering a Shortcut Key Press [ ] (Menu). ▲ ▼ Press [ ] or [ ] to highlight <Scan Settings>, and then press [OK]. -
Page 78: Scan A Document With The Mf Toolbox
Switch to the Scan mode ( p.16). ▲ ▼ Press [ ] or [ ] to highlight <Remote Scanner>, and then press [OK]. Select the scan type. Computer Remote Scanner From your computer, double-click the [Canon MF Toolbox 4.9] icon. - Page 79 When the MF Toolbox appears, click the desired scan mode button. • The scan preset for an e-mail attachment is displayed. • [Mail] The scanned document will be attached to a new message in your e-mail application. • The scan preset for the OCR (Optical Character Reader) is displayed.
-
Page 80: Confi Guring Scan Settings Using The Mf Toolbox
Confi guring Scan Settings Using the MF Toolbox This section describes the layout and features of each setting dialog box of the MF Toolbox. → For more details, see [Scanning] [Using the MF Toolbox] in the e-Manual. • Set the location of a document to be scanned. - Page 81 • Select to specify the scan settings using the → scanner driver ( p.82). • When [Start] is clicked with this check box selected, the [ScanGear MF] dialog box appears. • This check box is not available when you scan using the [OCR] button.
-
Page 82: Scan A Document With The Scanner Driver
Press [ ] or [ ] to highlight <Remote Scanner>, and then press [OK]. From your computer, double-click the [Canon MF Toolbox 4.9] icon. When the MF Toolbox appears, click the desired scan mode button. • You may not use the ScanGear MF when using the [OCR] mode. -
Page 83: Maintenance And Management
Maintenance and Management This chapter describes how to clean the machine, replace the toner cartridge, and explains the report and list functions used for managing the machine. Clean the Machine …………………………………………………… 84 Cleaning the Exterior and Interior …………………………………… 84 Cleaning the Fixing Unit …………………………………………… 85 Cleaning the Platen Glass and Feeder ………………………………... -
Page 84: Clean The Machine
Clean the Machine Clean the exterior and interior of the machine, feeder, and the fi xing unit periodically. Cleaning the Exterior and Interior Clean the exterior and interior of the machine to prevent toner powder and paper dust from accumulating inside. For safety, be sure to turn OFF the machine and disconnect all cables from IMPORTANT IMPORTANT... -
Page 85: Cleaning The Fixing Unit
Remove any toner or paper debris from the interior of the machine, with a soft, dry cloth that is clean and lint-free. Insert the toner cartridge. Close the toner cover, and then lower the scanning platform. Reconnect all the cables, and then turn ON the power. CAUTION When closing the scanning platform: Be careful not to get your fi ngers caught. -
Page 86: Cleaning The Platen Glass And Feeder
Cleaning the Platen Glass and Feeder If a scanned image has unexpected specks, clean the platen glass and feeder. Cleaning the Platen Glass Turn OFF the machine and disconnect all the cables from the machine. Remove any documents from the platen glass. Open the feeder. -
Page 87: Check And Replace Toner Cartridges
Check and Replace Toner Cartridges Toner cartridges are consumable products. When the toner has almost run out, a message appears in the display and streaks may appear on printed pages. Check the toner level, and replace the toner cartridge if necessary. Toner is nearly out. -
Page 88: Conserving The Toner To Extend The Life Of Toner Cartridges
Insert the toner cartridge. stains. Close the toner cover, and then lower the scanning platform. Replacing the Toner Cartridge You can purchase replacement toner cartridges from your local authorized Canon dealer. Supported genuine Canon toner cartridge: Canon Cartridge 128 Starter... - Page 89 Open the operation panel and the toner cover, and then remove the toner cartridge. Prepare a new toner cartridge. • Store the protective bag. It is required when you remove the toner cartridge for printer maintenance or other purposes. Shake the toner cartridge 5-6 times to evenly distribute the toner.
- Page 90 Follow all local and federal regulations when disposing of the sealing tape removed from the new toner cartridge. • → Canon will collect and recycle your used toner cartridges ( p.108). • For more details about handling toner cartridges, see [Handling Toner...
-
Page 91: Manage Using The Report And List Functions
Manage Using the Report and List Functions Print out reports or lists to view communication status, address book information, or settings, for monitoring the machine. Press [ ] (Report). ▲ ▼ Press [ ] or [ ] to highlight <Print Report Lists>, and then press [OK]. ▲... -
Page 92: Confi Gure Settings Using The Remote Ui
Confi gure Settings Using the Remote UI If the machine is connected to a network, you can monitor and confi gure the machine from the computer using the Remote UI. Confi gure the network settings for the machine (See the Starter Guide) •... -
Page 93: Troubleshooting
Troubleshooting This chapter describes how to clear paper jams and off ers solutions to problems you may be having. Clear Jams …………………………………………………………… 94 Clearing Document Jams in the Feeder……………………………… 95 Clearing Paper Jams Inside the Machine …………………………… 96 Resolve a Displayed Message ………………………………………… 100 Resolve an Error Code …………………………………………………... -
Page 94: Clear Jams
Clear Jams When <Paper jam.> appears on the display, a paper jam has occurred in the feeder or inside the machine. To remove the jammed document or paper, follow the instructions on the display. Paper jam. Press [ ] to display steps. -
Page 95: Clearing Document Jams In The Feeder
Clearing Document Jams in the Feeder After removing any documents placed in the feeder, follow the procedure below to remove jammed documents. MF4890dw Open the feeder cover and lift the lock release lever. Remove any jammed document by pulling it gently. Hold the green grip, and then open the inner cover. -
Page 96: Clearing Paper Jams Inside The Machine
MF4880dw/MF4770n Open the feeder cover. Remove any jammed document by pulling it gently. Close the feeder cover. Clearing Paper Jams Inside the Machine Follow the procedure below to remove jammed paper. Check and remove the jammed paper inside the machine. Step Step Lift the scanning platform, and then open the toner cover. - Page 97 Push up the green colored part (A), and then pull the paper exit guide (B) to open. Remove any jammed paper by pulling it gently. Lift the paper exit guide, and then fi rmly close it. • Ensure that each end of the paper exit guide is closed. Gently pull any jammed paper downward from between the fi xing unit (A) and roller (B) until the leading edge emerges from the machine.
- Page 98 CAUTION Do not touch the fi xing unit (A). Touching the fi xing unit (A) may cause burns as it becomes very hot during use. Do not touch the transfer roller (B). Touching the transfer roller may damage the machine. Check and remove the jammed paper in the paper cassette.
- Page 99 Step Check and remove the jammed paper in the rear cover. (MF4890dw/MF4880dw only) Open the rear cover. Remove any jammed paper by pulling it gently. Close the rear cover.
-
Page 100: Resolve A Displayed Message
<Photo -> ... -> Text> order. The toner cartridge needs to be replaced soon. Prepare the replacement toner cartridge. If <Check toner Canon genuine toner cartridge is not used, this message can appear. cartridge.> We recommend Canon genuine toner cartridges as replacement toner cartridges. -
Page 101: Resolve An Error Code
Resolve an Error Code If an error occurs, a report that contains a 3-digit error code is printed. Locate the error code in the table and follow the recommended actions to resolve the problem. Job No. 0123 Address 0123456789 Name name Start Time 01/01 02:07 AM... -
Page 102: Improve Output Quality
Error Code Cause Action The machine’s memory is full. Print, send, or delete any documents stored in memory. #037 The data size exceeds the machine’s Reduce the data resolution or change the fi le format to reduce available memory. the data size. A user canceled a job that is #099 Try to send or receive the document again. - Page 103 Symptom Example Action • → Verify that the appropriate paper is being used ( p.22). • Print a test page with new paper. • If the machine is not in use for a long time after the toner cartridge has been replaced, change the <Special Mode B> settings from the operation panel.
-
Page 104: Resolve A Problem
→ Turn OFF the power immediately, disconnect the Remove any jammed paper ( p.94). power cord, and contact the Canon Customer Care • Turn OFF the power, wait for more than Center. Do not attempt to disassemble or repair the 10 seconds, and then turn it ON again. -
Page 105: Faq
Can I turn off the incoming ring when receiving a fax? └ Yes, but you can turn off the incoming ring for faxes only when you are using <Fax/Tel Auto Switch> mode. ] (Menu) <Fax RX Settings> To turn off the incoming ring for faxes, press [ <RX Function Settings>... - Page 106 No, you may not use the scan function when sharing drivers that are installed to another computer. To use the scan function, install the MF Drivers on your computer. You can use the supplied user software CD-ROM or download the drivers from the offi cial Canon Website site (http://www.usa.canon.com).
- Page 107 Can I change the folder that the scanned images are saved to? └ Yes, you can change the folder to save the scanned images when scanning with the MF Toolbox. To change, 1. From the MF Toolbox screen, click [Browse]. 2.
-
Page 108: If A Power Failure Occurs
PROGRAM Option B: Volume Box Return The Canon Cartridge Recycling Program fulfi lls the fi rst initiative We encourage you to use this option as a more effi cient way to of Canon’s Clean Earth Campaign, which supports four critical ship cartridges. -
Page 109: Important Safety Instructions
Canon collection box. Seal the box. • Maximum weight = 70 lb. (31.8 kg) Apply the Canon Canada Inc./Canada Post label provided in this brochure. Maximum length = 108” (2,743 mm) • Canon’s labels are specially marked so that Canon pays the Maximum girth (length + 2 x width + 2 x height) = 130”... -
Page 110: Power Supply
If toner spills from the toner cartridge, avoid inhaling it or • Please contact an authorized Canon dealer if the machine allowing it to come into contact with your skin. If the toner makes an unusual noise, emits an unusual smell, or emits smoke comes into contact with your skin, wash immediately with soap. -
Page 111: Legal Notices
If you make such changes or modifi cations, you could be required to stop operation of the equipment. Canon U.S.A., Inc. One Canon Plaza, Lake Success, NY 11042, U.S.A. TEL No. 1-800-OK-CANON... - Page 112 Canon Authorized Service Facilities for servicing of equipment, Information regarding Authorized Service Facility 3. Order a normal business line from your telephone company’s locations can be obtained by calling Canon Customer Care Center business representative. The line should be a regular voice (1-800-OK-CANON).
- Page 113 Ligne automatique internationale (si vous communiquez avec les pays étrangers) Notice • This product meets the applicable Industry Canada technical Canon vous conseille d’utiliser une ligne individuelle specifi cations. • conforme aux normes industrielles, à savoir: The Ringer Equivalence Number is an indication of the ligne téléphonique 2,500 (pour appareil à...
-
Page 114: Laser Safety
• Le nombre d’équivalents sonnerie (REN) de ce produit est 1,0. • Les réparations sur un appareil certifi é doivent être faites par une société d’entretien canadienne autorisée par le Gouvernement canadien et désignée par le fournisseur. Toute réparation ou modifi cation que pourrait faire I’utilisateur de cet appareil, ou tout mauvais fonctionnement, donne à... - Page 115 Memo...
- Page 116 30-2, Shimomaruko 3-chome, Ohta-ku, Tokyo 146-8501, Japan CANON MARKETING JAPAN INC. 16-6, Konan 2-chome, Minato-ku, Tokyo 108-8011, Japan CANON U.S.A., INC. One Canon Plaza, Lake Success, NY 11042, U.S.A. CANON EUROPA N.V. Bovenkerkerweg, 59-61, 1185 XB Amstelveen, The Netherlands CANON CHINA CO. LTD.