Table of Contents
Advertisement
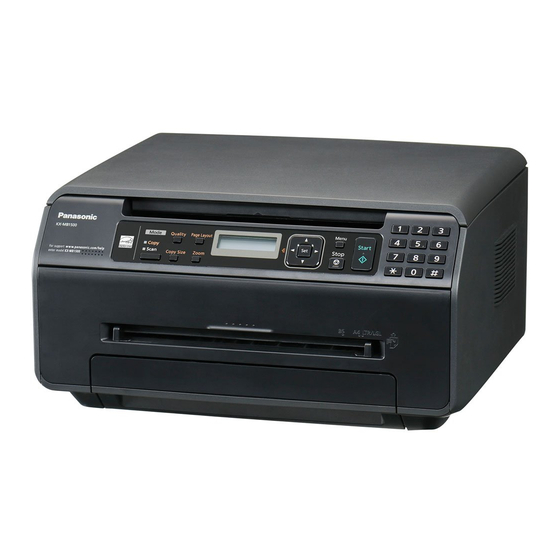
The pictured model is KX-MB1500.
Do NOT connect the unit to a computer with the USB cable until prompted to do so during the setup
of Multi-Function Station (CD-ROM).
For hearing or speech impaired TTY users, TTY: 1-877-833-8855
KX-MB1520 only:
R This unit is compatible with Caller ID. Subscription to the appropriate service through your service
provider/telephone company is required.
Operating Instructions
Model No.
Multi-Function Printer
KX-MB1500
KX-MB1520
Advertisement
Table of Contents

Related Manuals for Panasonic KX-MB1500


Summary of Contents for Panasonic KX-MB1500
-
Page 1: Operating Instructions
KX-MB1500 Model No. KX-MB1520 The pictured model is KX-MB1500. Do NOT connect the unit to a computer with the USB cable until prompted to do so during the setup of Multi-Function Station (CD-ROM). For hearing or speech impaired TTY users, TTY: 1-877-833-8855 KX-MB1520 only: R This unit is compatible with Caller ID. - Page 2 R All other trademarks identified herein are the property of their respective owners. Copyright: R This material is copyrighted by Panasonic System Networks Co., Ltd., and may be reproduced for internal use only. All other reproduction, in whole or in part, is prohibited without the written consent of Panasonic System Networks Co., Ltd.
-
Page 3: Important Information
R The printer of this unit utilizes a laser. Use of controls or adjustments or performance of procedures other R For optimal performance, genuine Panasonic toner than those specified herein may result in hazardous cartridge is recommended. We cannot be radiation exposure. -
Page 4: Moving The Unit
The following are examples of items that may be illegal to copy in your country. – Currency – Bank notes and checks – Bank and government bonds and securities – Passports and identification cards For assistance, please visit http://www.panasonic.com/help... -
Page 5: Table Of Contents
Table of Contents 1. Introduction and Installation Receiving a fax manually : Auto answer OFF .............38 Accessories Using the unit with an answering Supplied accessories ........7 machine ............39 Accessory information ........7 Junk fax prohibitor (preventing fax reception Finding the Controls from undesired callers) ........40 Button descriptions ........8 Receiving a fax on your computer ....41... - Page 6 Table of Contents 14. General Information Printed Reports 14.1 Reference lists and reports ......72 Specifications 14.2 Specifications ..........72 15. Index 15.1 Index............75...
-
Page 7: Introduction And Installation
Accessories for this unit can be ordered online, by fax, or by telephone. To ensure that the unit operates properly, we recommend the use of Panasonic toner cartridge. – Toner cartridge R Model No. (Part No.): KX-FAT407 R Prints about 2,500 pages at ISO/IEC 19752 standard page. -
Page 8: Button Descriptions
R To change from pulse to tone temporarily during R The built-in microphone. dialing when your line has rotary/pulse service. For beep sounds (KX-MB1500 only) R Key beeps etc. will be heard. MFax Auto AnswerN (KX-MB1520 only) R To turn the auto answer setting ON/OFF (page 37). -
Page 9: Overview
Remove the printed paper before the recording paper exit becomes full. Manual input tray Document cover Recording paper guides Paper input tray Front cover External telephone jack (KX-MB1520 only) Telephone line jack (KX-MB1520 only) For assistance, please visit http://www.panasonic.com/help... -
Page 10: Toner Cartridge
R Do not add toner to the toner cartridge. We cannot be responsible for any damage to the unit or degradation of print quality which may occur from the use of a non-Panasonic toner cartridge. Remove the toner cartridge from the protective bag. Open the front cover (A). - Page 11 Hold the toner cartridge (A) by the center handle, then insert firmly to lock into place. R To ensure that the unit operates properly, we recommend the use of Panasonic toner cartridge. See page 7 for accessory information. Waste disposal method...
-
Page 12: Connections
*1 KX-MB1520 only IMPORTANT NOTICE FOR THE USB CONNECTION R DO NOT CONNECT THE UNIT TO A COMPUTER WITH THE USB CABLE UNTIL PROMPTED TO DO SO DURING THE SETUP OF MULTI-FUNCTION STATION (page 20). For assistance, please visit http://www.panasonic.com/help... -
Page 13: Turning The Power On
– Up to 130 sheets of 90 g/m² (24 lb) paper. R A4, letter and 16K-size paper can be used. 16K-size paper can only be used when using the unit for printing or copying. R Please refer to page 73 for information on recording paper. For assistance, please visit http://www.panasonic.com/help... - Page 14 Before loading a stack of paper, fan the paper to R Make sure that the recording paper is under the prevent paper jams. paper limit mark (C), and the paper should not be loaded over the snubbers (D). For assistance, please visit http://www.panasonic.com/help...
- Page 15 R Hold the paper input tray with both hands when removing or installing. The paper input tray weighs approximately 1.5 kg (3.3 lb) when fully loaded with recording paper. Approx. 1.5 kg (3.3 lb) For assistance, please visit http://www.panasonic.com/help...
- Page 16 When printing on thick paper R When you use thick paper for the recording paper, be sure to open the rear cover before start printing. Thick paper will be printed out from the rear side. For assistance, please visit http://www.panasonic.com/help...
-
Page 17: Preparation
R The default operation mode is the copy mode. R You can change the default operation mode (feature #463 on page 49) and the timer before returning to the default operation mode (feature #464 on page 49) (KX-MB1520 only). For assistance, please visit http://www.panasonic.com/help... -
Page 18: Setting The Original
R Confirm that any ink, paste or correction fluid has dried completely. R Effective scanning area is shown by the shaded area: Effective scanning area 4 mm ") 208 mm ") 4 mm ") 4 mm 4 mm 289 mm ") ") ") For assistance, please visit http://www.panasonic.com/help... -
Page 19: Date And Time (Kx-Mb1520 Only)
The date and time will be automatically set according to the received caller information. R If the time has not previously been set, Caller ID will not adjust the clock. R You can turn this feature OFF (feature #226 on page 48). For assistance, please visit http://www.panasonic.com/help... -
Page 20: Your Fax Number (Kx-Mb1520 Only)
Station You can program your fax number so that it appears on 2.8.1 Required computer environment the top of each page sent. Panasonic Multi-Function Station software enables the MStopN MMenuN unit to carry out the following functions: – Printing on plain paper, thin and thick paper and labels –... - Page 21 [ ] on the Multi-Function Station launcher. To use another unit with the computer You need to add the printer driver for each unit, as follows. 1. Start Windows and insert the supplied CD-ROM into your CD-ROM drive. For assistance, please visit http://www.panasonic.com/help...
-
Page 22: Starting Multi-Function Station
You must be logged in as an administrator in order to uninstall Multi-Function Station. [Start] A [All Programs] or [Programs] A [Panasonic] A the unit’s name A [Uninstall]. Then follow the on-screen instructions. * The pictured model is KX-MB1520. [Scan] (page 27) R To scan and display the scanned images. - Page 23 [Outlook Express], etc. A [OK] For Windows XP: 1. [Start] A [Control Panel] A [Internet Options] A [Programs] A [E-mail] 2. Select the desired MAPI-compliant Email software such as [Outlook Express], etc. A [OK] For assistance, please visit http://www.panasonic.com/help...
-
Page 24: Printer
3. Printer Setting the printer properties 3.1 Printing from Windows You can change the printer setting in step 3. We applications recommend that you test paper (especially special sizes 3. . Printer and types of paper) on the unit before purchasing large You can print a file created in a Windows application. -
Page 25: Easy Print Utility
[Output]: Number of prints, paper source, media type 3.2 Easy Print Utility [Quality]: Color mode, toner save [Effects]: Header, watermark, footer By printing using the Panasonic Easy Print Utility instead of the printer driver, you can use useful printing features Combining multiple documents for your convenience. -
Page 26: Scanner
4. Scanner the software that is associated to open PDF files 4.1 Scanning from the unit (Push will start. Scan) R When scanning to email, the email software will automatically start and the scanned image will be 4. . Scanner You can easily scan the document by using the operation attached to a new email message. -
Page 27: Scanning From A Computer (Pull Scan)
4. Scanner The [Select...] button will not be displayed when 4.2 Scanning from a computer there is only one printer driver installed. R You can move, copy and delete a file or page. (Pull Scan) 4.2.3 Using other applications 4.2.1 Using Multi-Function scan application Multi-Function Station includes a TWAIN and WIA By clicking an application icon, the selected application compliant scanner driver. -
Page 28: Copier
5. Copier 2. Press MCN or MDN repeatedly to select the size of your 5.1 Making a copy original document. A MSetN 3. Press MCN or MDN repeatedly to select the size of recording paper size. 5. . Copier R When “#2” is selected, you can change the recording paper size by pressing MEN repeatedly. -
Page 29: More Copying Features
5. Copier Example: 150 % enlarged copy 5.2 More copying features Original document Enlarged copy R Make sure that the MCopyN light is ON. 5.2.1 Zoom copy (enlargement / reduction) Set the original (page 18). Press MZoomN repeatedly to select the zoom rate that Example: 70 % reduced copy fits the size of your document and recording paper. - Page 30 5. Copier Note: For quick ID copy feature R The unit will store the documents into memory while collating the copies. If the memory becomes full while Original document Page layout storing, the unit will only print out the stored pages. “2 in 1”...
- Page 31 5. Copier Note: Original document Page layout R You can save the previous page layout setting “4 in 1” (feature #467 on page 54). 5.2.5 N in 1 feature You can save paper by copying 2, 4 or 8 pages onto 1 page.
- Page 32 5. Copier Enter the desired edge width of long edge using the Original document Page layout dial keypad. A MSetN “8 in 1” “PORTRAIT” Press MCN or MDN repeatedly to select “SHORT EDGE”. A MSetN Enter the desired edge width of short edge using the dial keypad.
- Page 33 5. Copier – while the unit is printing received fax documents (KX-MB1520 only). Set the original (page 18). While “PC PRINTING” or “PRINTING” (KX-MB1520 only) is displayed, switch to copy mode by pressing MCopyN repeatedly (page 17), then press MStartN. Make necessary settings such as number of copies, resolution, zoom features and page layout features.
-
Page 34: Fax (Kx-Mb1520 Only)
6. Fax (KX-MB1520 only) To select the contrast 6.1 Sending a fax manually Adjust this setting depending on the darkness or lightness of the document. 5 levels (low to high) are 6. . Fax (KX-MB1520 only) available. 1. Press MQualityN repeatedly to display “CONTRAST”. 2. -
Page 35: Storing Items For The Phonebook
6. Fax (KX-MB1520 only) Press MCN or MDN repeatedly to display the desired Printing a journal report item. A MMenuN A MBN A journal report provides you with a printed record of the R To cancel erasing, press MStopN. 30 most recent faxes. To print it manually, see page 72. -
Page 36: Sending A Fax Using Phonebook
6. Fax (KX-MB1520 only) 6.3 Sending a fax using 6.4 Sending an electronic phonebook document as a fax message from your computer Before using this feature, store the desired names and telephone numbers into the phonebook (page 35). You can access the fax function from a Windows R Make sure that the MFaxN light is ON. -
Page 37: Receiving A Fax Automatically : Auto Answer On
6. Fax (KX-MB1520 only) – [Do not enter a fax number directly]: You can 6.5 Receiving a fax automatically : only select fax numbers stored in the phonebook. – [Re-enter to confirm the fax number]: When Auto answer ON entering the fax number using the dial keypad display, re-entry of the number is required. -
Page 38: Receiving A Fax Manually : Auto Answer Off
6. Fax (KX-MB1520 only) Note: 6.6 Receiving a fax manually : R To stop receiving, see page 58. Auto answer OFF R To receive fax documents using the extension telephone, make sure remote fax activation is turned R A4 or letter size recording paper can be used. ON (feature #434 on page 52) beforehand. -
Page 39: Using The Unit With An Answering Machine
6. Fax (KX-MB1520 only) – remote access to your phone company’s Voice 6.7 Using the unit with an Mail (if you subscribed) answering machine Note: R If the call is a phone call, the answering machine will record voice messages. 6.7.1 Setting up the unit and an answering If a fax calling tone is detected, the fax machine will machine... -
Page 40: Junk Fax Prohibitor (Preventing Fax Reception From Undesired Callers)
6. Fax (KX-MB1520 only) 2. Press MEN repeatedly to display “JUNK LIST 6.8 Junk fax prohibitor DISP.”. A MSetN (preventing fax reception from 3. Press MCN or MDN repeatedly to display the desired item. A MFN undesired callers) R To cancel erasing, press MStopN, then press MMenuN. -
Page 41: Receiving A Fax On Your Computer
6. Fax (KX-MB1520 only) 6.9 Receiving a fax on your computer You can receive a fax document on your computer. The received fax document is saved as an image file (TIFF-G4 format). Important: R Make sure the PC fax setting is set to “ALWAYS” or “CONNECTED”... -
Page 42: Caller Id (Kx-Mb1520 Only)
7. Caller ID (KX-MB1520 only) 7.1 Caller ID service 7.2 Viewing and calling back using caller information This unit is compatible with the Caller ID service 7. . Caller ID (KX-MB1520 only) offered by your local telephone company. To use this If the MFaxN light is OFF, turn it ON by pressing unit’s Caller ID features, you must subscribe to a MFaxN repeatedly. -
Page 43: Storing Caller Information Into The Phonebook
7. Caller ID (KX-MB1520 only) MSetN R To cancel erasing, press MStopN, then MMenuN. MSetN A MStopN 7.3.2 Erasing specific caller information R Make sure that the MFaxN light is ON. MCaller IDN Press MCN or MDN repeatedly to display the desired item. -
Page 44: Distinctive Ring (Kx-Mb1520 Only)
8. Distinctive Ring (KX-MB1520 only) To use one phone number for the fax, program the ring 8.1 Distinctive Ring service pattern assigned for the fax (feature #431 on page 44). In the example, the ring pattern assigned for fax is a triple When a call is made to one of your phone numbers, the ring, so you should program “C”... -
Page 45: Programmable Features
9. Programmable Features 9.1 Programming MMenuN 9. . Programmable Features MSetN MMenuN Press MBN and the 3-digit code (page 46 to page 56). Press the appropriate selection to display the desired setting. R This step will vary depending on the feature. MSetN Press MMenuN to exit. -
Page 46: Basic Features
9. Programmable Features 9.2 Basic features Feature/Code Selection Setting the quick setup You can print out the quick fax setup guide and select the desired receiving MBNM1NM0NM0N mode depending on your situation. (KX-MB1520 only) M1N “FAX ONLY” (default): Use only as a fax (page 37). M2N “DIST. - Page 47 9. Programmable Features Feature/Code Selection Setting the ADSL mode When you use a DSL/ADSL line, this feature improves the reliability by reducing MBNM1NM2NM4N the transmission speed. (KX-MB1520 only) M0N “OFF” (default) M1N “ON” Note: R Calling charges may be higher than usual. Changing the LCD display M1N “NORMAL”...
- Page 48 9. Programmable Features Feature/Code Selection Setting the beep sounds and M0N “OFF”: Deactivates this feature. keytones M1N “ON” (default): You will hear confirmation/error beep sounds and keytones. MBNM1NM6NM5N Note: R Even if this feature is set to “OFF”, the unit beeps in some cases. For example: –...
- Page 49 9. Programmable Features Feature/Code Selection Setting the recording paper M1N “PLAIN PAPER” (default): 75 g/m² to 90 g/m² (20 lb to 24 lb) paper. type for paper input tray M2N “THIN PAPER”: 64 g/m² to 75 g/m² (17 lb to 20 lb) paper. MBNM3NM8NM3N Note: R This setting will be deactivated when printing from a computer.
-
Page 50: Fax Features (Kx-Mb1520 Only)
9. Programmable Features 9.3 Fax features (KX-MB1520 only) Feature/Code Selection Erasing all items stored for M0N “NO” (default) the phonebook M1N “YES” MBNM2NM8NM9N R Disconnect the telephone line cord and USB cable before activating this feature. To erase all items: 1. - Page 51 9. Programmable Features Feature/Code Selection Sending a fax at a specific This feature allows you to take advantage of low-cost calling hours offered by time your telephone company. This feature can be set up to 24 hours in advance of MBNM4NM1NM2N the desired time.
- Page 52 9. Programmable Features Feature/Code Selection Setting dial keypad entry M0N “OFF” (default): Deactivates this feature. restriction M1N “ON”: If you do not wish to dial a fax number manually using the dial keypad, MBNM4NM2NM1N activate this feature. Note: R If you select “ON”, you cannot make redial calls to fax numbers entered using the dial keypad.
- Page 53 9. Programmable Features Feature/Code Selection Setting friendly reception To receive a fax automatically when you answer a call and hear a fax calling MBNM4NM3NM8N tone (slow beep). M0N “OFF”: You have to press MStartN, and then M2N for fax reception. M1N “ON”...
-
Page 54: Copy Features
9. Programmable Features 9.4 Copy features Feature/Code Selection Setting the input tray to use M1N “#1” (default): The paper input tray is selected. The displayed paper size for copy depends on the recording paper size setting (feature #380 on page 48). MBNM4NM6NM0N M2N “#2”: The manual input tray is selected. -
Page 55: Pc Print Features
9. Programmable Features 9.5 PC print features Feature/Code Selection Changing the data timeout The unit will automatically print the remaining data in memory when the setting computer does not send data to the unit during the set time. MBNM7NM7NM4N 1. MMenuN A MBNM7NM7NM4N A MSetN 2. -
Page 56: Scan Features
9. Programmable Features 9.6 Scan features Feature/Code Selection Setting the scan mode for M1N “VIEWER” (default): The scanned image will be displayed in the Push Scan [Multi-Function Viewer] window. MBNM4NM9NM3N M2N “FILE”: The scanned image will be saved as a file. M3N “EMAIL”: The scanned image will be saved for email attachment. -
Page 57: Useful Information
10. Useful Information 10.1 Character entry (KX-MB1520 10.2 Status of the unit only) 10. . Useful Information 10.2.1 Using Remote Control The dial keypad is used to enter characters and numbers. You can easily operate the following functions from your –... -
Page 58: Canceling The Operations
10. Useful Information 10.2.2 Using Device Monitor 10.3 Canceling the operations You can confirm the setting information and current You can cancel the current operation from the unit. You status of the unit from your computer. can also select the desired operation to cancel. Start Multi-Function Station. -
Page 59: Help
PRESSED THE ‘Stop’ KEY ----- R MStopN was pressed and fax communication was canceled. THE COVER WAS OPENED ----- R The front cover was opened. Close it and try again. ----- R Fax transmission or reception was successful. For assistance, please visit http://www.panasonic.com/help... -
Page 60: Display Messages
See the other displayed message instructions to continue copying. “LOW TEMP.” R The inside of the unit is extremely cold and cannot be operated. Use the unit in a warmer area. For assistance, please visit http://www.panasonic.com/help... - Page 61 R The toner is empty. Replace the toner cartridge immediately. “CHANGE CARTRIDGE” “TONER LOW” R The toner is reaching the end of its life. You will need to replace the toner cartridge soon. “REPLACE SOON” “TRANSMIT ERROR” R A transmission error occurred. Try again. For assistance, please visit http://www.panasonic.com/help...
-
Page 62: When A Function Does Not Work
R You may have changed the feature programming password. If you do not feature programming via remember it, assign a new password using feature #155 (page 47). When remote operation. required to enter the current password, enter “0101” instead. For assistance, please visit http://www.panasonic.com/help... -
Page 63: Printing Problems
R When your unit is connected to the computer by USB, if you cancel printing printer, the printing result is using your computer, then immediately re-start printing, the printing result distorted. may be distorted. To avoid this, you must wait for 60 seconds before re-printing. For assistance, please visit http://www.panasonic.com/help... - Page 64 Connect the unit to a line document are distorted. that does not have these services. R Another telephone on the same line is off the hook. Hang up the extension telephone and try again. For assistance, please visit http://www.panasonic.com/help...
- Page 65 AnswerN light. R If you want to set TEL mode: – press MFax Auto AnswerN repeatedly to turn OFF the MFax Auto AnswerN light. R The Distinctive Ring of feature #430 is activated (page 44). For assistance, please visit http://www.panasonic.com/help...
- Page 66 R The code may include “#” which is used for certain features provided by code to access the answering telephone companies. Change the code on the answering machine to machine remotely, but the line another number which does not include “#”. was disconnected. For assistance, please visit http://www.panasonic.com/help...
- Page 67 11.3.8 Notice for KX-MB200/KX-MB700/KX-FLB880 series users If you have already installed KX-MB200/KX-MB700/KX-FLB880 series Multi-Function Station on your computer, use the following instructions to modify or add the printer driver, which changes after installing the KX-MB1500 series Multi-Function Station. You can modify or add a printer driver, as follows: Start Windows and insert the KX-MB200/KX-MB700/KX-FLB880 series CD-ROM into your CD-ROM drive.
-
Page 68: Paper Jams
12. Paper Jams 2. Push down both green levers (A) until they stop. 12.1 Recording paper jam 12. . Paper Jams 12.1.1 When the recording paper has jammed inside of the unit The display will show the following: – “PAPER JAMMED” “OPEN REAR COVER”... - Page 69 12. Paper Jams 4. Push up the green levers (A) to the original position. 2. Remove the jammed paper (A) carefully by pulling it toward you. R If the recording paper has jammed behind the toner cartridge, remove the toner cartridge (A) first, and remove the jammed paper (B).
- Page 70 12. Paper Jams 3. Close the front cover. 12.1.2 When the recording paper is not fed into the unit properly The display will show the following: – “CHECK PAPER #1 PRESS START” Pull the paper input tray completely out. Re-load the recording paper. Insert the paper input tray into the unit.
-
Page 71: Cleaning
13. Cleaning Close the document cover. 13.1 Cleaning the white plates and glass 13. . Cleaning Clean the white plates and glass when a black line, a white line or a dirty pattern appears on: – your recording paper, – the original document, –... -
Page 72: General Information
14. General Information 14.1 Reference lists and reports 14.2 Specifications You can print out the following lists and reports for your n Applicable lines 14. . General Information reference. Public Switched Telephone Network – “SETUP LIST” n Document size: – “TEL NO. LIST” Max. - Page 73 14. General Information ITU-T No.1 Test Chart Standby: Approx. 3.3 W (KX-MB1500) Approx. 3.6 W (KX-MB1520) Preheat: Approx. 55 W Copy: Approx. 320 W Maximum: Approx. 900 W (When the fuser lamp turns n Power supply: 120 V AC, 60 Hz...
- Page 74 1.6 Document tray 1.7 Output tray1.8 Recording paper2. Preparation 2.1 Connections 2.2 Turning the power switch ON Help Button2.3 Help function Volume Thank you for purchasing a Panasonic fax machine. Things you should keep a record of Attach your sales receipt here.
- Page 75 15. Index #494 Scan parameter hold: 56 15.1 Index #774 Data timeout: 55 #776 Mutual A4/letter print: 55 #100 Quick setup: 46 ADSL mode (Feature #124): 47 #101 Date and time: 19 Answering machine: 39 #102 Your logo: 19 Auto reduction (Feature #432): 52 #103 Your fax number: 20 #110 Language: 46 #120 Dialing mode: 17...
- Page 76 15. Index Extension telephone: 38 PC fax setting (Feature #442): 53 PC print features: 55 Phonebook All erase (Feature #289): 50 Fax activation code (Feature #434): 52 Sending faxes: 36 Fax features: 50 Storing: 35 Fax number (Feature #103): 20 Power failure: 67 Fax number re-entry (Feature #422): 52 Power save (Feature #403): 49...
- Page 77 15. Index TEL mode: 38 Telephone number list: 72 Time adjustment (Feature #226): 48 Toner cartridge: 10 Toner cartridge life: 74 Toner save (Feature #482): 11, 49 Volume: 18 Zoom hold (Feature #468): 54...
- Page 78 Notes...
- Page 79 Notes...
- Page 80 For hearing or speech impaired TTY users, TTY: 1-877-833-8855 *MB1500* *MB1500* PNQX3900ZA C0711KU0-CD...