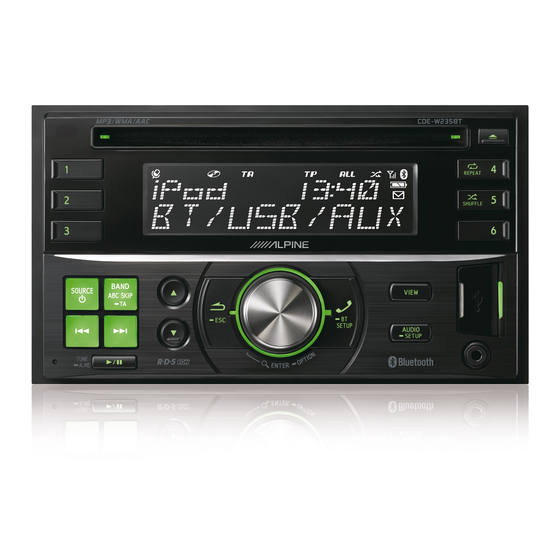
Alpine CDE-W235BT Owner's Manual
2-din cd receiver with advanced bluetooth
Hide thumbs
Also See for CDE-W235BT:
- Quick reference manual (80 pages) ,
- Mode d'emploi (45 pages) ,
- Manual de operación (44 pages)
Table of Contents
Advertisement
2-DIN CD RECEIVER WITH ADVANCED BLUETOOTH
Thank you for purchasing this Alpine product. Please take a moment to protect your purchase by
registering your product now at the following address: www.alpine-usa.com/registration.
You will be informed of product and software updates (if applicable), special promotions, news
about Alpine, and entered for a chance to win prizes.
Merci d'avoir acheté ce produit Alpine. Nous vous invitons à consacrer un moment à la protection
de votre achat en enregistrant votre produit dès maintenant à l'adresse suivante :
www.alpine-usa.com/registration.
Vous serez tenu informé des mises à jour des produits et des logiciels (le cas échéant), des
promotions spéciales, de l'actualité d'Alpine, et vous aurez une chance de remporter des prix.
Gracias por adquirir este producto Alpine. Con solo unos pocos pasos podrá proteger su producto,
registrándolo a través de la siguiente dirección: www.alpine-usa.com/registration.
Recibirá información sobre nuevos productos y software, promociones especiales, novedades sobre
Alpine y participará en el sorteo de premios.
ALPINE ELECTRONICS OF AMERICA, INC.
19145 Gramercy Place, Torrance,
California 90501, U.S.A.
Phone 1-800-ALPINE-1 (1-800-257-4631)
CDE-W235BT
• OWNER'S MANUAL
Please read before using this equipment.
• MODE D'EMPLOI
Veuillez lire avant d'utiliser cet appareil.
• MANUAL DE OPERACIÓN
Léalo antes de utilizar este equipo.
ALPINE ELECTRONICS OF CANADA, INC.
777 Supertest Road, Toronto,
Ontario M3J 2M9, Canada
Phone 1-800-ALPINE-1 (1-800-257-4631)
EN
R R
FR
ES
Designed by ALPINE Japan
68-21627Z62-A
Advertisement
Table of Contents

Related Manuals for Alpine CDE-W235BT


Summary of Contents for Alpine CDE-W235BT
- Page 1 • MANUAL DE OPERACIÓN Léalo antes de utilizar este equipo. Thank you for purchasing this Alpine product. Please take a moment to protect your purchase by registering your product now at the following address: www.alpine-usa.com/registration. You will be informed of product and software updates (if applicable), special promotions, news about Alpine, and entered for a chance to win prizes.
- Page 2 ALPINE ELECTRONICS MARKETING, INC. ALPINE ELECTRONICS OF AUSTRALIA PTY. LTD. ALPINE ITALIA S.p.A. 1-7, Yukigaya-Otsukamachi, Ota-ku, 161-165 Princes Highway, Hallam Viale C. Colombo 8, 20090 Trezzano Tokyo 145-0067, JAPAN Victoria 3803, Australia Sul Naviglio (MI), Italy Phone 03-5499-4531 Phone 03-8787-1200 Phone 02-484781 ALPINE ELECTRONICS FRANCE S.A.R.L.
-
Page 3: Table Of Contents
Contents ENGLISH Adjusting the High Pass Filter ......15 Operating Instructions Turning Subwoofer ON/OFF......15 Adjusting the Low Pass Filter ......15 WARNING Setting the Subwoofer Phase......15 Setting the Subwoofer System ......15 WARNING ............5 External Device............15 CAUTION ............5 Connecting to an External Amplifier PRECAUTIONS .......... - Page 4 Contents ENGLISH Setting the caller information display/text iPod/iPhone (optional) message indicator ON/OFF ......22 Connecting an iPod/iPhone........27 Setting text message indicator ON/OFF Setting the iPod Control.........28 (MSG ALERT) ..............22 Playback ...............28 Setting the caller information display ON/OFF (CALLER ID) ..............22 Searching for a desired Song .......28 Phone Book Auto Update ON/OFF....
-
Page 5: Operating Instructions
CHILDREN. If you have problems, do not attempt to repair the unit yourself. Swallowing them may result in serious injury. If swallowed, consult Return it to your Alpine dealer or the nearest Alpine Service Station a physician immediately. for servicing. - Page 6 We remove the bumps, rub the inside edge of the hole and outside edge recommend not using these accessories on discs played in Alpine of the disc with a ballpoint pen or other such instrument, and then CD players.
- Page 7 ” On Handling Flash Memory CAUTION Alpine accepts no responsibility for lost data, etc., even if data, etc., is lost while using this product. • To prevent malfunction or damage, note the following points. Read the Flash Memory Owner’s Manual thoroughly.
-
Page 8: Getting Started
Initial System Start-Up Getting Started Be sure to press the RESET button when using the unit for the first time, after changing the car battery, etc. Turn off the unit power. Press RESET with a ballpoint pen or similar pointed object. RESET button AUDIO/SETUP SOURCE/... -
Page 9: Radio
Controllable with Remote Control Radio This unit can be controlled with an optional Alpine remote control. For details, consult your Alpine dealer. Point the optional remote control transmitter at the remote-control sensor. Preset buttons Preset buttons Remote control sensor (1 through 3) -
Page 10: Presetting Stations Manually
Presetting Stations Manually CD/MP3/WMA Select the radio band and tune in a desired radio station you wish to store in the preset memory. /REPEAT 4 Press and hold, for at least 2 seconds, any one of the preset buttons (1 through 6) into which you wish to store the station. -
Page 11: Repeat Play
• The playback time may not be correctly displayed when a VBR Folder/File Name Search (Variable Bit Rate) recorded file is played back. • During CD/MP3/WMA playback, press , and then you can quickly (concerning MP3/WMA) return to the hierarchy level selected last time in the search mode. Folder and file names may be searched and displayed during playback. -
Page 12: About Mp3/Wma
This device also can play back discs in Joliet, Romeo, etc., and other About MP3/WMA standards that conform to ISO9660. However, sometimes the file names, folder names, etc., are not displayed correctly. Formats supported CAUTION This device supports CD-ROM XA, Mixed Mode CD, Enhanced CD Except for private use, duplicating audio data (including MP3/ (CD-Extra) and Multi-Session. -
Page 13: Sound Setting
Audio Setup Sound Setting You can flexibly customize the unit to suit your own preference and usage. From the AUDIO SETUP menu, Audio Setting can be modified. Use steps 1 to 5 to select one of the setting modes to modify. See the applicable section below for details about the selected setting item. -
Page 14: Adjusting The Parametric Equalizer Curve (3Band Eq)
Setting the Mid Bandwidth (WIDTH (Q)) Adjusting the Parametric Equalizer Curve (3BAND EQ) Turn the Rotary encoder to select the desired Mid bandwidth. You can modify the Equalizer settings to create a response curve more WIDE 0.75 MEDIUM 1.00 MEDIUM 1.25 NARROW 1.50 appealing to your personal taste. -
Page 15: Setting The Source Volume Level
Setting the Source Volume Level Setting the Subwoofer System The output level of each source is individually adjustable. For example, if When the subwoofer is on, you can select either SYS 1 or SYS 2 for the the TUNER level sounds lower than CD, its output can be adjusted desired subwoofer effect. -
Page 16: Other Functions
About the indication display Other Functions When displaying Text, the following indicators are lit according to the mode. Indicator/ MP3/WMA iPod/iPhone/ CD Mode Mode Mode BT AUDIO Mode Folder Name — — being displayed Artist Name Artist Name —... -
Page 17: Using The Front Aux Input Terminal
AUX mode: Using the Front AUX Input Terminal VOL LV ADJ AUX SET BT AUDIO mode: VOL LV ADJ BT SET Connect a portable music player, etc. by simply connecting it to the input on the front panel. An optional adapter cable is required (standard Phone mode (Non-calling mode): RCA to 3.5ø... -
Page 18: Setup
Notes SETUP • Press to return to the previous mode. • Pressing and holding for at least 2 seconds will return to normal mode. • If no operation is performed for 60 seconds, the unit will return to normal mode automatically. -
Page 19: Playing Mp3/Wma Data (Play Mode)
Playing MP3/WMA Data (PLAY MODE) iPod/iPhone Setting This unit can play back CDs containing both CD and MP3/WMA data “IPOD” is selected on the setup main menu in step 2. (created in Enhanced CD (CD Extra) format). However, in some situations, playback of an enhanced CD may be difficult. -
Page 20: Bt Hands Free Calling
• When you search this unit using the BLUETOOTH compatible phone, • After a successful pairing, the two devices should repair automatically the unit name is displayed as “Alpine CD Receiver” model name. whenever the vehicle’s ignition is turned ON. However, the repairing may fail. -
Page 21: Bluetooth Setup
Hands-Free Phone setting (HFP) BLUETOOTH SETUP Select when you want to pair your BLUETOOTH compatible phone with this unit. The following steps 1 to 5 are common to the various BLUETOOTH functions. For details, refer to each individual function. OFF: Hands-Free Phone function is not used. -
Page 22: Setting The Visible Mode
Sound Auto setting (AUTO SET) Setting the Visible Mode This unit provides 5 methods to improve the sound quality of calling. You can set whether this unit can be recognized or not from a You can choose the type according to your own preference. BLUETOOTH compatible device. -
Page 23: Phone Book Auto Update On/Off
• Depending on the character type some phone service provider name latest available information and are believed to be accurate at the time cannot be displayed. “ID UNSENT” will be displayed. of printing. Alpine reserves the right to change or modify any information or specifications without notice or obligation. -
Page 24: Answering A Call
Press ENTER. Answering a Call The selected telephone will be called. If one name has several numbers registered in the telephone Incoming calls are announced by the received call ring tone and a book, press ENTER after selecting the name , and then turn displayed message (PHONE). -
Page 25: Dialing A Number In The Phone Book
Dialing a Number In The Phone Book Call waiting function Up to 1,000 names (at most 5 telephone numbers for each name) are If a second call is received during a current call, you can have the first downloadable from a mobile phone. Dial a call by selecting a person caller wait momentarily while you take the second call. -
Page 26: Muting The Microphone Input Quickly (Voice Mute)
Muting the microphone input quickly Flash Memory (optional) (Voice Mute) While calling, activating the Voice Mute function will instantly mute the microphone input. Your voice will not be heard by the caller. While calling, press to mute the microphone input. Press ... -
Page 27: Flash Memory Connection (Optional)
Flash Memory Connection (optional) iPod/iPhone (optional) Connect Flash Memory /REPEAT 4 Preset buttons Preset buttons Open the cover of the USB Port. (1 through 3) (4 through 6) Connect the Flash Memory directly to the USB Port, or via the USB cable. This unit USB Connection Terminal Flash Memory... -
Page 28: Setting The Ipod Control
Notes Playback • An iPhone connected to this unit operates as an iPod. The iPhone can be used as a hands-free device using the integrated BLUETOOTH module. • Internet and telephone functions of iPod touch or iPhone, etc., can also Press SOURCE... -
Page 29: Alphabet Search Function
Turn the Rotary encoder to select the desired Artist, and Direct Search Function then press ENTER. Turn the Rotary encoder to select the desired Album, and The unit’s direct search function can be used to search for an album, then press ENTER. song, etc., more efficiently. -
Page 30: Random Play Shuffle (M.i.x.)
Otherwise, make sure the rest of your (playlist, album, etc.). The songs within the category are played just system is properly connected or consult your authorized Alpine dealer. once until all songs have been played. -
Page 31: Mp3/Wma
Press the button again for at least 2 seconds. • The CD has been damaged. If the disc still does not eject, consult your Alpine dealer. – Eject the CD and discard it; using a damaged CD in your unit can cause damage to the mechanism. -
Page 32: Indication For Flash Memory
Indication for Flash Memory Indication for iPod Mode • A USB device that is not supported by the unit is connected. • The iPod/iPhone is not connected. – Connect a USB device that is supported by the unit. – Make sure the iPod/iPhone is correctly connected (Refer to “Connections”... -
Page 33: Specifications
GENERAL Specifications Power Requirement 14.4 V DC (11 ~ 16 V allowable) Power Output 18 W RMS × 4 FM TUNER SECTION Maximum Pre-Output Voltage 2 V/10 k ohms Tuning Range 87.7 ~ 107.9 MHz Bass ±14 dB at 100 Hz Mono Usable Sensitivity 9.3 dBf (0.8 μV/75 ohms) ±14 dB at 1 kHz... -
Page 34: Installation And Connections
When connecting CHILDREN. the CDE-W235BT to the fuse box, make sure the fuse for the Swallowing them may result in serious injury. If swallowed, consult intended circuit of the CDE-W235BT has the appropriate amperage. -
Page 35: Installation
For the screw marked “ ”, use an appropriate screw for the chosen mounting location. Slide the CDE-W235BT into the dashboard until it clicks. The main unit must be mounted within 30 degrees of the This ensures that the unit is properly locked and will not horizontal plane, back to front. -
Page 36: Mounting The Microphone
Mounting the Microphone For the sake of safety, mount the microphone in the following location. • In a stable and secure location. • In a location that does not inhibit safely driving the vehicle. • Mount the microphone in a location where the driver’s voice can easily be picked up. -
Page 37: Connections
Connections Microphone (Included) (Blue) POWER ANT To power antenna REMOTE TURN-ON (Blue/White) To amplifier AUDIO INTERRUPT IN (Pink/Black) Not used (Orange) ILLUMINATION To the instrument cluster illumination lead (Red) IGNITION Ignition Key (Yellow) BATTERY (Black) Battery (Gray) Speakers SPEAKER RIGHT FRONT Front Right (Gray/Black) (Violet/Black) - Page 38 Not used. Illumination Lead (Orange) This lead may be connected to the vehicle’s instrument cluster illumination lead. This will allow the backlighting of the CDE-W235BT to dim whenever the vehicle’s lights are turned on. Switched Power Lead (Ignition) (Red) Connect this lead to an open terminal on the vehicle’s fuse box or...
-
Page 39: Limited Warranty
ALPINE ELECTRONICS OF AMERICA, INC. AND ALPINE OF CANADA INC. (“Alpine”), are dedicated to quality craftsmanship and are pleased to offer this Warranty. We suggest that you read it thoroughly. Should you have any questions, please contact your Dealer or contact Alpine at one of the telephone numbers listed below. - Page 40 N’oubliez pas de consacrer un moment à la protection de votre achat en enregistrant votre produit dès maintenant à l’adresse suivante : www.alpine-usa.com/registration. Recuerde que con solo unos pocos pasos podrá proteger su producto, registrándolo a través de la siguiente...