Asus V9280 Video Suite User Manual
V9280 series graphic card hardware & video drivers
Hide thumbs
Also See for V9280 Video Suite:
- Software reference manual (60 pages) ,
- Installation manual (38 pages) ,
- Software reference manual (56 pages)

Related Manuals for Asus V9280 Video Suite


Summary of Contents for Asus V9280 Video Suite
- Page 1 ® V9280 Series Graphics Card V9280 Video Suite V9280S TVD V9280 TD USER’S MANUAL Hardware & Video Drivers...
- Page 2 Product warranty or service will not be extended if: (1) the product is repaired, modified or altered, unless such repair, modification of alteration is authorized in writing by ASUS; or (2) the serial number of the product is defaced or missing.
-
Page 3: Asus Contact Information
Technical Support Support Fax: +1-510-608-4555 General Support: +1-502-933-8713 Web Site: www.asus.com Support Email: tsd@asus.com ASUS COMPUTER GmbH (Germany & Austria) Address: Harkortstr. 25, 40880 Ratingen, BRD, Germany General Fax: +49-2102-442066 General Email: sales@asuscom.de (for marketing requests only) Technical Support Support Hotline: MB/Others: +49-2102-9599-0... -
Page 4: Table Of Contents
3. Software Setup ..............13 Display Driver Installation ............. 13 Windows 98 ..................13 Method 1: ASUS Quick Setup Program ........13 Method 2: Display Property Page ..........14 Method 3: Plug and Play .............. 15 Windows 2000 ..................15 Method 1: ASUS Quick Setup Program ........ - Page 5 Custom color settings ..............45 GeForce4 ..................... 46 Additional Properties ..............46 ASUS Smart Doctor ................55 ASUS Tweak Utility ................58 5. Resolution Table ..............60 6. Troubleshooting ..............62 7. Index ..................63 ASUS V9280 Series User’s Manual...
- Page 6 Macrovision Corporation and other rights owners. Use of this copyright protection technology must be authorized by Macrovision Corporation, and is intended for home and other limited viewing uses only unless otherwise authorized by Macrovision Corporation. Reverse engineering or disassemby is prohibited. ASUS V9280 Series User’s Manual...
-
Page 7: Introduction
Enjoy superior image fidelity regardless of the CPU (central processing unit) employed by the computer system. With the ASUS AGP-V9280 series, you will not only see but also experience stunning, dynamic, realistic 3D worlds and characters.~ Ensures braod application... -
Page 8: Features
• Motion compensation allows for DVD decoding at low CPU usage • Multibuffering (double, triple, quad) for smooth animation and video playback • Multiple video windows with hardware color space conversion and filtering (YUV 4:2:2 and 4:2:0) ASUS V9280 Series User’s Manual... -
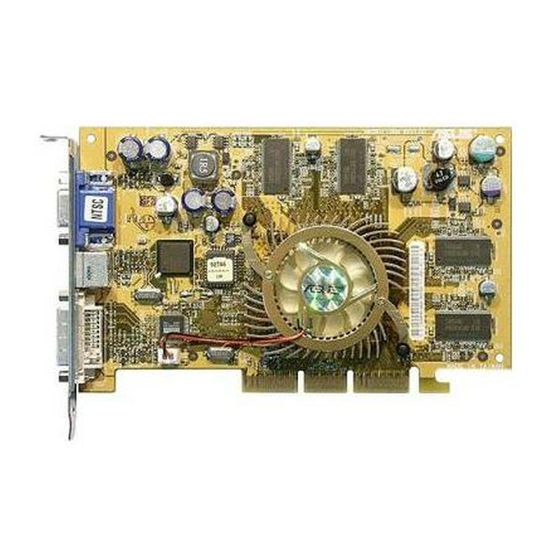
Page 9: Hardware Setup
2. Hardware Setup ASUS V9280 Series User’s Manual... - Page 10 2. Hardware Setup ® ASUS V9280 Series User’s Manual...
- Page 11 ASUS V9280 Series User’s Manual...
-
Page 12: Installation Procedures
1. Change your display driver to Standard VGA. 2. Shut down your computer and unplug all electrical cords. 3. Replace the existing VGA card with your graphics card. 4. Restart your computer. 5. Install the ASUS V9280 display driver. ASUS V9280 Series User’s Manual... -
Page 13: Operating System Requirements
Windows 98 includes VGARTD for the major chipsets but it is recommended that you install VGARTD from the ASUS support CD to make sure that you have the latest version of VGARTD (see 3. Software Setup | Install GART Driver). -
Page 14: Software Setup
Windows. 3. Insert the CD installation disc into your CD-ROM drive. 4. The autorun screen appears. Click Drivers and then click Install ASUS Enhanced Driver on the Drivers dialog box. 5. Follow the onscreen instructions to complete the setup. -
Page 15: Method 2: Display Property Page
OK. 9. The Update Driver Warning box appears. Click Yes to confirm the setting up of the ASUS enhanced display drivers and then follow the onscreen instructions to start the setup. 10. Setup will prompt you when it has finished installing all the necessary files on your computer. -
Page 16: Method 3: Plug And Play
4. Insert the CD installation disc into your CD-ROM drive. 5. The ASUS Windows 2000 autorun screen appears. Click Drivers and then click Install ASUS Enhanced Driver on the Driver dialog box. 6. Follow the onscreen instructions to complete the setup. -
Page 17: Method 2: Plug And Play
CD-ROM drive to bring up the Locate Driver Files item of the Found New Hardware Wizard dialog box. 6. Check CD-ROM drives, uncheck all other options and then click Next to search for the drivers of your graphics card. ASUS V9280 Series User’s Manual... - Page 18 10. When Setup has finished installing all the necessary files on your computer, it will prompt you to restart your computer. 11. Click OK to restart your computer and to complete Setup. ASUS V9280 Series User’s Manual...
-
Page 19: Windows Nt 4.0
8. Type D:\NT40 or click Browse to select the path of the display driver for Windows NT. Click OK. 9. Select ASUS V9280 and then click OK. 10. Windows NT will once again prompt for confirmation. All appropriate files are then copied to the hard disk. -
Page 20: Drivers
3. Setup will prompt when it has finished copying all the files to your computer. Click OK to finish the installation. NOTE: Some features of ASUS display card is not supported by this reference driver. ASUS V9280 Series User’s Manual... -
Page 21: Install Display Driver
DirectX. Make sure that your applications or games support DirectX before installing the DirectX runtime libraries. DirectX currently cannot be uninstalled by regular means, such as outlined in 3. Software Setup | Unin- stall Display Driver. ASUS V9280 Series User’s Manual... -
Page 22: Install Gart Driver
. C l i c k O K t o in stall the appropriate driver for your AGPset. ASUS V9280 Series User’s Manual... - Page 23 OK, you will be presented with a selection of other drivers. Make your driver selection and click Install. 5. When the Welcome screen appears, click Next to continue. 6. Once the driver installation is finished, click Finish. ASUS V9280 Series User’s Manual...
-
Page 24: Install Wdm Capture Driver
Setup dialog box appears, click Next> to install the appropri- ate driver for your VGA card. 4. Once the driver installation is finished, click Finish. NOTE: This feature only works on display cards with video-in function. ASUS V9280 Series User’s Manual... -
Page 25: Uninstall Display Driver
2. Click Control Panel. 3. Double-click the Add/Remove Programs icon. 4. Click the Install/Uninstall tab. 5. Click ASUS Display Drivers from the list. 6. Click Add/Remove. 7. The system will prompt you to restart your computer. Click Yes to restart. -
Page 26: Windows 2000
2. Click Control Panel. 3. Double-click the Add/Remove Programs icon. 4. Click the Install/Uninstall tab. 5. Click ASUS Display Drivers from the list. 6. Click Add/Remove. 7. The system will prompt you to restart your computer. Click Yes to restart. -
Page 27: Utilities
Install Smart Doctor to load Install Shield Wizard. 3. Click on Finish, after the setup is complete. Note: The Smart Doctor utility is available only for VGA card models with built-in monitor chipset, otherwise, ASUS Tweak utility will be installed. ASUS V9280 Series User’s Manual... - Page 28 ASUS V9280 Series User’s Manual...
-
Page 29: Software Reference
4. Software Reference ASUS Control Panel After installing the display drivers, look for an ASUS icon on the taskbar’s status area. Clicking this icon opens the ASUS Control Panel, a menu composed of shortcuts to the graphics board’s various enhanced functions. -
Page 30: More Resolution
Information Information lists pertinent data about the graphics card. It supplies links to the ASUSTeK COMPUTER, INC. web site for accessing updated data about the graphics board and its latest drivers. ASUS V9280 Series User’s Manual... -
Page 31: Color
D3D/Game lets you make your favorite OpenGL lets you make your favorite color settings for D3D games. color settings for OpenGL applications. NOTE: The color settings of D3D/Game and OpenGL are not adjustable below 8-bit color depth. ASUS V9280 Series User’s Manual... - Page 32 Important Note D3D/Game The color settings of D3D/Game take effect only when playing a full-screen DirectDraw/Direct3D type game. ASUS V9280 Series User’s Manual...
-
Page 33: Advanced
4. Software Reference Advanced This menu supplies sophisticated settings for use with the ASUS VR-100G 3D Glasses. These settings are available only with the Deluxe/TVR models with Video-In/TV-Out, or models with the ASUS VR-100 Optional Upgrade Kit. Direct3D VR Effect Lists all parameters to fine tune the stereoscopic effects for Direct 3D games. - Page 34 3. For race games, use embossment to make your car appear above the screen. 4. For first-person shooting games, use embossment to make only your hand/weapon appear above the screen. ASUS V9280 Series User’s Manual...
- Page 35 IMPORTANT: Before enabling D3D stereoscopic mode and using the stereoscopic or 3D glasses (ASUS VR-100G), make sure the monitor can support the selected refresh rate (interlaced mode) under the following display scales: 16 bits: 640 x 480, 800 x 600, 960 x 720, 1024 x 768, 1152 x 864...
- Page 36 ® 6.0 or earlier. Known Issues on Specific Games See the ASUS support CD for the latest information: D3DVR.TXT in the WIN9XME folder. All registered and unregistered trademarks are the property of their respective users. No intended endorsement of these products or games by ASUSTeK COMPUTER INC. and its subsidiaries is intended or implied.
- Page 37 Enable Stereoscopic Mode When selected, this enables the stereoscopic mode when using OpenGL 3D applications and games with the ASUS VR-100G 3D Glasses. These settings are available only with the Deluxe/TVR models with Video- In/TV-Out, or models with the ASUS VR-100 Optional Upgrade Kit.
- Page 38 NOTE: Hot keys will be available only if you selected the Enable OSD check box. IMPORTANT: Before enabling OpenGL stereoscopic mode and using the stereoscopic or 3D glasses (ASUS VR-100G), make sure the monitor can support the selected refresh rate (interlaced mode) under the following display scales: 16 bits: 2048x1536...
- Page 39 See the included support CD for the latest information: OPENGLVR.TXT in the WIN9XME folder. All registered and unregistered trademarks are the property of their respective users. No intended endorsement of these products or games by ASUSTeK COMPUTER INC. and its subsidiaries is intended or implied. ASUS V9280 Series User’s Manual...
- Page 40 4. Software Reference TaskBar Utility This utility gives convenient access to various features and presets that may be configured in the Display Properties Menu directly from the Windows taskbar. ASUS V9280 Series User’s Manual...
-
Page 41: Windows Display Properties
The display properties menu is useful to enable and configure the TwinView display and to make additional property adjustments. To use Windows Display Properties, click the ASUS icon on the taskbar’s status area to open the ASUS Control Panel Menu. Click Windows Display Properties, click the Settings tab, and then click Advanced. -
Page 42: Analog Monitor
General Timing Formula (GTF) GTF is a standard used by most new hardware. Discrete Monitor Timings (DMT) DMT is an older standard still in use on some hardware. Select this option if your hardware requries DMT. ASUS V9280 Series User’s Manual... -
Page 43: Digital Flat Panel
Adapter automatically scales the appearance of the display on the monitor. (default) Centered output Centers the image on the flat panel and does not adjust the scale. NOTE: This funciton is only available with DVI/2V1D cards. ASUS V9280 Series User’s Manual... - Page 44 PAL-D or NTSC-M. Device Adjustments Screen Positioning Selects the TV/video output format based on the four quadrants indicated by the arrows. Click on the arrows to reposition output on the TV monitor. ASUS V9280 Series User’s Manual...
-
Page 45: Color Correction
This field lists the new settings. These settings can be used to change the appearance of many screen elements simultaneously. Create and/or save current settings, or delete unwanted settings. A setting may be created, saved and reused for special situations. ASUS V9280 Series User’s Manual... -
Page 46: Geforce4
4x AA mode at very near the performance of the faster 2x AA mode. 4x: Enables the antialiasing using the 4x mode. Select this for the highest possible image quality at the expense of some performance drain in 3D applications. ASUS V9280 Series User’s Manual... -
Page 47: Direct3D Settings
The maximum amount of system memory for texture storage depends on the amount of physical memory installed on the system. Custom Direct3D settings This option lets you create or delete custom settings or “tweaks” you have saved. ASUS V9280 Series User’s Manual... -
Page 48: More Direct3D
Dragging the slider leftward positions the texel origin closer to its upper left corner and moving the slider rightward positions it closer to the center. Range: 0 to 7, default: 3. ASUS V9280 Series User’s Manual... -
Page 49: Opengl Settings
NOTE: This setting applies only to PCI display adapters or to AGP display adapters running in PCI compatibility mode. Custom OpenGL settings This option lets you create or delete custom settings or “tweaks” you have saved. ASUS V9280 Series User’s Manual... -
Page 50: Overlay Controls
NOTE: You can only access Overlay Controls while you are playing back videos, for example, .AVI files or DVD movies on your computer. ASUS V9280 Series User’s Manual... -
Page 51: Desktop Utilities
The menu also contains items for restoring default settings. Left click on the icon twice, and the Display Properties Menu appears. NOTE: An additional option appears on the popup menu to access the Desktop Display Manager setup menus. ASUS V9280 Series User’s Manual... -
Page 52: Desktop Display Manager
Check: Start this application at its last position and size restarts the program at its last position and sizes it to the same size as it was when last closed. ASUS V9280 Series User’s Manual... - Page 53 Hot keys Hightlight an item from Select an action, then assign a key or a combination of keys for the action. Click the Add button. Repeat the process for the other items. Click OK when done. ASUS V9280 Series User’s Manual...
- Page 54 32 different desktops to distribute the open applications among them. This prevents application clutter on your desktop. Click the Show taskbar Quick Tweak icon to add the NVIDIA Quick Tweak icon to the Windows taskbar. ASUS V9280 Series User’s Manual...
-
Page 55: Asus Smart Doctor
ASUS SmartDoctor (V9280 Video Suite only) ASUS SmartDoctor is designed to satisfy two major goals. One is to monitor the graphic chip status, alerting users about abnormal events, such as fan malfunction or chip overheat. The other, as the name “SmartDoctor” implies, is to “cool” down the graphic chip smartly when it is not necessary for it to be kept running at full speed. - Page 56 Enabling the graphic cooling option will cool down the graphic chip’s temperature when SmartDoctor detects that the graphic chip is idle. • Enable overheat protection lets you forcibly cool down the graphic chip when temperature is over the tolerable range or value. ASUS V9280 Series User’s Manual...
- Page 57 The component in question will also have a flashing red value. If you enabled overheat protection in SmartDoctor2 Settings dialog box, SmartDoctor will cool down the graphic chip in time to protect it from possible overheat damage. ASUS V9280 Series User’s Manual...
-
Page 58: Asus Tweak Utility
ASUS Tweak Utility ASUS Tweak is designed to adjust the working frequency of the graphic engine and video memory. Warning! Use ASUS Tweak Utility with extreme caution and only if you are well acquainted with your display card. Inappropriate use may damage your graphic card, its components and even your system. - Page 59 The default setting of ASUS Tweak is Run and keep resident, which means that Tweak will run every time Windows start and monitor the graphic card’s status or adjust the working frequency. If your graphics card is working properly, Tweak will terminate within 5 seconds.
-
Page 60: Resolution Table
140Hz 131.3 144Hz 135.2 150Hz 141.4 170Hz 162.9 200Hz 194.9 1280 x 960 60Hz 60.0 70Hz 69.9 72Hz 72.1 75Hz 75.2 85Hz 86.0 100Hz 101.7 120Hz 123.5 140Hz 145.1 144Hz 150.5 150Hz 157.2 170Hz 179.8 ASUS V9280 Series User’s Manual... - Page 61 74.6 70Hz 87.4 72Hz 90.0 75Hz 94.0 85Hz 106.7 100Hz 126.7 1920 x 1440 60Hz 89.4 70Hz 104.9 72Hz 108.5 75Hz 112.5 85Hz 129.4 2048 x 1536 60Hz 95.5 70Hz 111.9 72Hz 115.3 75Hz 121.3 ASUS V9280 Series User’s Manual...
-
Page 62: Troubleshooting
If disk space is exhausted, VideoSecurity will not store any information and give you a warning message. ASUS V9280 Series User’s Manual... -
Page 63: Index
Desktop utilities 51 31, 32, 36, 39, 44, 45 Display quick tweak icon 51 Buffer flipping mode 49 Using quick tweak icon 51 Device adjustments 44 Brightness / flicker filter / Centered output 43 contrast 44 ASUS V9280 Series User’s Manual... - Page 64 Display driver installation 15 GeForce3 46 Windows 2000 17 3D antialiasing settings 46 Windows 98 15 Additional properties 46 Windows NT 4.0 20 Desktop utilities 51 Display properties 29, 40, 41, 51 Direct3d settings 47 ASUS V9280 Series User’s Manual...
- Page 65 NTSC-M 44 NVIDIA icon 41 Layout V7100 Magic / Pure 11, 12 V7100 Magic / T 9, 10 Off 46, 49 V8200 Deluxe 9 On screen display 35, 38 Line interleave 34, 37 Advanced 35, 38 ASUS V9280 Series User’s Manual...
- Page 66 Taskbar 29, 40 PAL 44 ASUS icon 29 Product highlights 7 NVIDIA icon 51 Texel alignment 48 Timing adjustment 55, 56 Tips! Quick Tweak icon 51 For VR 34 Quincunx antialiasing 46 What's this? 41 ASUS V9280 Series User’s Manual...
- Page 67 13, 20, 22, 27, 29, 34, 38, 41, 55 Display adapter scaling 43 Windows desktop 29 Embossment 34 Properties and settings 29 Fast linear-mipmap 49 Windows display properties 41 Tweak settings 55 Up to X MB 49 Utilities Z-axis range 36 ASUS V9280 Series User’s Manual...
- Page 68 INDEX Zoom control 50, 54 ASUS V9280 Series User’s Manual...