Table of Contents
Advertisement
Advertisement
Table of Contents

Related Manuals for Dish Network Platinum Remote Control


Summary of Contents for Dish Network Platinum Remote Control
- Page 2 EGULATORY IRELESS EMOTE This device complies with Part 15 of FCC Rules. Operation is subject to the following two conditions: (1) this device may not cause harmful interference, and (2) this device must accept any interference received, including interference that may cause undesired operation.
-
Page 3: Table Of Contents
ONTENTS OF Remote Control Basics ... 2 Remote Control Batteries... 2 Remote Control Signals: UHF and IR ... 3 Install an Attenuator ... 4 Remote Control Modes ... 5 Remote Control Setup ... 6 Set Up the Remote Control ... 6 Setting Up to Control Other Devices ... -
Page 4: Remote Control Basics
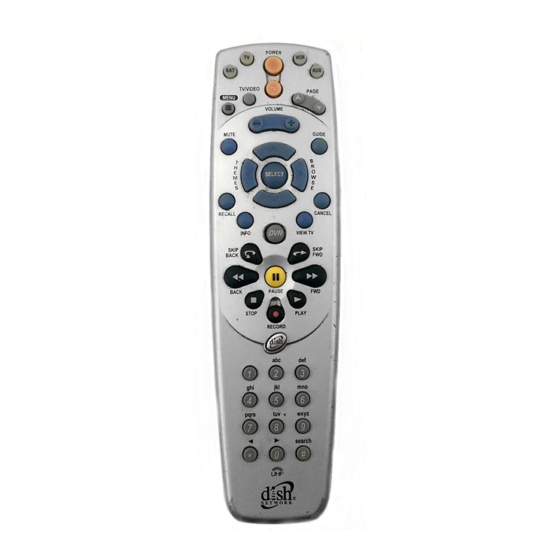
ONTROL This remote control gives you easy access to all the features of a DISH Network satellite TV receiver and lets you control PVR features of a DISH Network DishPVR satellite receiver. These PVR features let you record programming with full digital quality, without a VCR. -
Page 5: Remote Control Signals: Uhf And Ir
EMOTE ONTROL The remote control uses both Ultra High Frequency (UHF) radio signals and Infrared (IR) light signals to control the receiver but uses only IR signals to control other devices. • IR signals travel only short distances (40 feet or less), and can’t go through walls or other solid objects. -
Page 6: Install An Attenuator
NSTALL AN TTENUATOR Stray UHF signals can block signals from the remote control to the receiver. To prevent blocks, you can install a 10 dB attenuator (you can buy one from a consumer electronics parts store). Note: This will help keep out stray UHF signals, but also cut down how far away you can use the remote control. -
Page 7: Remote Control Modes
EMOTE ONTROL ODES EGULAR ODES You can set the remote to four different modes to control the receiver or other devices. Set up the remote to control a device like a TV or a VCR. See Set Up the Remote Control on page 6 for what to do. Note: The remote comes already set up to control the receiver, unless you have changed the address on your receiver. -
Page 8: Remote Control Setup
EMOTE ONTROL P THE EMOTE On the next few pages we tell you how to set up the remote to control a TV, a VCR, or other devices. When you get the remote it’s already set up to control the receiver, unless you have changed the address on your receiver. -
Page 9: Scan For Device Codes
7. Press the POUND (#) button. If you entered the code correctly, the mode button flashes three times. 8. Press the blank POWER button to test if the code works for the device. If it does, the device should turn off. 9. -
Page 10: Check The Device Codes
4. Press the blank POWER button. 5. Press the UP or DOWN ARROW button until the device turns off. You will have to do this repeatedly to scan through all codes. Note: Do not press the ARROW buttons too quickly because you could skip over the code for your device. -
Page 11: Change The Address
For AUX mode, the first group of flashes tells you what the AUX mode controls. A quick flash (zero) before the three-digit code is for a TV; one regular flash is for a VCR; and two flashes is for a tuner, amplifier, or cable box. For example, if the TV code is 570, the AUX mode button flashes once quickly, pauses, flashes five times, pauses, flashes seven times, pauses, and flashes once quickly. -
Page 12: Switch Between Tv And Device Volume Control
8. Press the SELECT button to close the Important System Information screen. WITCH ETWEEN When you set up the remote to control a TV, the MUTE and VOLUME buttons control the TV volume. However, if you want to use the AUX mode to control a tuner or amplifier and the device has a volume setting, you can set up the remote to control the device’s volume instead of the TV volume. -
Page 13: Remote Control Buttons
4. Press the 0 number button. 5. Press the POUND (#) button. The TV mode button flashes three times. 6. Press the SAT mode button. 7. Press the plus (+) and minus (-) sides of the VOLUME button. The TV’s volume changes and the TV mode button lights instead of the AUX mode button. - Page 14 OWER Press the blank POWER button to turn the receiver on or off. The POWER light on the receiver’s front panel turns on to show the receiver is on, and turns off to show it’s off. Press this button to open the Main Menu. Press the PAGE UP button or the PAGE DOWN button to scan, page by page, through the Program Guide, a Themes list, a Favorite List, an Event Timers list, or a list of channels.
- Page 15 • Change channels - Press the UP or DOWN arrow button to change channels. • Open the Browse Banner - Press the RIGHT arrow button. • Show Themes - Press the LEFT arrow button. • Move around within the Program Guide, menus, and Browse Banner - Press the UP, DOWN, LEFT, and RIGHT arrow buttons.
- Page 16 • When you watch a program, press this button to briefly display the Program Banner. • When you use a menu, press this button to cancel and go back to watch a program. ANCEL Press this button to cancel and go back to the previous menu or to watch a program.
- Page 17 • Use the frame advance feature. Press the PAUSE button and then press the SKIP AHEAD button to advance the recording one frame at a time. • Skip ahead one day at a time in the EPG. • Press the BACK button to: •...
- Page 18 • Press the RECORD button to start recording a program. Note: You also use this button if you change the remote control address. See page 9. Press the dish button to go to Dish Home for receivers that support Dish Home. •...
-
Page 19: Control A Tv (Or A Second Tv)
• Search - Use the letters above the NUMBER buttons while in the Search menu. For example, when looking for the channel and times to watch Rudy Fremmel Presents, you press 7 three times for an R, 8 two times for a U, 3 one time for a D, and 9 three times for a Y to spell the word “Rudy”... - Page 20 TV M UTTON You must first set up the remote to control the TV. See Set Up the Remote Control on page 6. Then press the TV mode button to set the remote to TV mode. The TV mode button will stay lit for two seconds to show you’ve set the remote to TV mode.
- Page 21 RROW UTTONS Use these buttons to change channels on the TV. Note: These buttons do not change the channels on the TV if the remote control is in limited mode. ELECT UTTON The SELECT button works as the ENTER button for a TV. ECALL UTTON Press this button to go back to the last TV channel you watched.
-
Page 22: Control A Vcr (Second Vcr Or A Dvd Player)
VCR ( ONTROL A LAYER Only the buttons we tell you about here control a VCR or DVD. Some of the buttons we tell you about here may not control your VCR. See your VCR’s user’s manual for information about the VCR’s features. You can set up the remote to control a second VCR in AUX mode, the same way it controls the first VCR in VCR mode. - Page 23 Use these buttons to change channels on the VCR. Note: If you are using the remote control in Limited Mode, the TV will not change channels. VCR B • Press the BACK button to rewind a videotape. • Press the PAUSE button to pause a videotape. Press this button or the PLAY button to play the tape.
-
Page 24: Control A Cable Tv Box
ONTROL A ABLE Only the buttons we tell you about here control a cable TV box. Some of the buttons we tell you about here may not control your cable TV box. See your cable box user’s manual for information about the box’s features. - Page 25 OLUME UTTON Press this button to raise (+) or lower (-) the sound volume from the cable box. Note: Program the remote to control the device’s volume by following the instructions on page 10. RROW UTTONS Use these buttons to change channels on the cable box. ELECT UTTON Press the SELECT button in place of the ENTER button for the...
-
Page 26: Control A Tuner Or Amplifier
Use these buttons to enter channel numbers. ONTROL A UNER OR Only the buttons described here control a tuner or amplifier. Some of the buttons described here may not control your tuner or amplifier. See the device user’s manual for information. You must first set up the remote to control the device. - Page 27 Press this button to turn on or off the sound. Note: Program the remote to control the device’s volume by following the instructions on page 10. Press this button to raise (+) or lower (-) the sound volume. Note: Program the remote to control the device’s volume by following the instructions on page 10.
-
Page 28: Device Codes
EVICE ODES These tables contain the manufacturer codes for programming the remote to control your TV, a VCR, DVD player, cable box, or audio amplifier. Every attempt has been made to include all codes. If your device brand is not listed or if the codes to not work, the remote may not control your device. -
Page 29: Television Codes
TELEVISION Jenson 556, 573 557, 558, 559, 560 Kawasho 548, 561, 712 Kenwood 506, 573, 712 Kloss 522, 561, 610, 698 526, 539, 540, 541, 691, 696, 712 Lloyds Lloytron Loewe Logik Luxman 503, 563, 566, 590, 595, 617, 625, 701 Magnasonic Magnavox 506, 520, 525, 536, 564,... -
Page 30: Vcr Codes
TELEVISION Symphonic 632, 692, 694 Tandy 605, 613 Tatung 509, 698 Technics Techwood 523, 573 Teknika 504, 505, 516, 518, 522, 523, 524, 525, 526, 534, 536, 541, 614, 615, 686, 691, 712 Teleavia Telefunken Teletech Tera Thomas Thompson Thomson 551, 616 523, 573, 695 Toshiba... -
Page 31: Cable Tv Box Codes
Magnavox 527, 553, 554, 556, 565, Marantz 530, 554, 565, 585, 592, 594, 600, 601, 603 Memorex 533, 549, 554, 566, 581, 585, 588, 608 567, 568, 609 Mitsubishi 562, 567, 568, 569, 570, 571, 609 544, 580, 588 Multitech 588, 589, 591 530, 531, 532, 562, 592, 594, 599, 600, 601, 602,... -
Page 32: Dvd Player Codes
DVD P LAYER ODES DVD Players Aiwa Hitachi 632, 635 Konka 637, 638 Magnavox Mitsubishi Panasonic Philips 640, 641, 642 Pioneer Sanyo Sony 617, 644, 645 Toshiba 616, 646, 647 Zenith Note: You must put the remote control in VCR mode to set it up to control a DVD player. -
Page 33: Troubleshoot The Remote Control
ROUBLESHOOT THE What’s Happening While you do • If you don’t press a remote procedure, the remote control “times out.” • If you hold a When you • Maybe the press the remote control Power button • Maybe you didn’t to turn the receiver on, the receiver’s... - Page 34 What’s Happening When you • Maybe you’re press a button on the remote control, the device doesn’t do what you expect. • Maybe the • Maybe you didn’t • Maybe you didn’t • UHF signals from When you • Maybe you have press the remote control Mute or...
-
Page 35: Limited Warranty
Proof of Purchase to be out of warranty. This warranty extends only to the original user of the DISH Network remote control (“you,” “your”) and is limited to the purchase price of the remote control. - Page 36 SERIAL OR CONDITIONAL ACCESS NUMBERS, HAS BEEN ALTERED OR REMOVED. THIS WARRANTY SHALL ALSO BE VOID IF THE DEVICE HAS BEEN OPENED BY AN UNAUTHORIZED PERSON (with the exception of opening the battery cover). This warranty gives you specific legal rights which may vary from state to state. Some states do not allow the exclusion or limitations of incidental or consequential damages, or allow limitations on the duration of an implied warranty, so those limitations may not apply to you.
-
Page 37: If You Need Help
CCESSORY An accessory is any DISH Network branded equipment, displaying the DISH Network logo, excluding the receiver, Smart Card, cables and hookups, and non-mechanical components. A one-year warranty becomes effective upon the activation of the DISH system or date of purchase, if bought separately. A proof of purchase is required to verify the purchase date. -
Page 38: Index
NDEX Address, Change the 9 Amplifier Codes 30 Amplifier, Control an 24 Antenna, Remote Control, Attach the Attenuator, Install an 4 Batteries, Remote Control 2 Buttons, Remote Control 11 Cable TV Box Codes 29 Cable TV Box, Control a 22 Change the Address 9 Check the Device Codes 8 Customer Service 35... - Page 39 EchoStar Technologies Corporation, Technical Publications, 94 Inverness Terrace East, Englewood, Colorado 80112 Part Number: 121716 Printed in the United States of America. DISH Network is a registered trademark of EchoStar Technologies Corporation. For information about DISH Network, visit our website at www.dishnetwork.com.