Table of Contents
Advertisement
Available languages
Available languages
It is important to read this instruction book prior to using your new product for the first time.
Es importante que lea este libro de instrucciones antes de comenzar a usar su nuevo producto.
IMPORTER:AVC Multimedia
© 2012 AVC Multimedia
http://www.RCAav.com
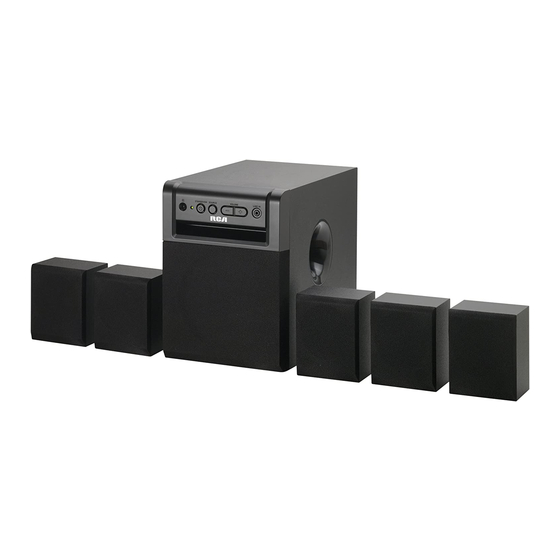
5.1 Home Theater System
Equipo Home Theater 5.1
User Manual
Manual de usuario
RT1511
EN
ES
Advertisement
Table of Contents

Related Manuals for RCA RT1511


Summary of Contents for RCA RT1511
-
Page 1: Home Theater System
User Manual Manual de usuario RT1511 5.1 Home Theater System Equipo Home Theater 5.1 It is important to read this instruction book prior to using your new product for the first time. Es importante que lea este libro de instrucciones antes de comenzar a usar su nuevo producto. -
Page 2: Safety Precautions
SAFETY PRECAUTIONS The lightning flash The exclamation point within a with an arrowhead triangle alerts you to the presence within a triangle alerts you to of important operating, maintenance and uninsulated dangerous voltage servicing instructions in this user’s manual. within the product’s enclosure The symbol for Class II that could cause an electric shock. -
Page 3: Important Safety Instructions
IMPORTANT SAFETY INSTRUCTIONS Please read and save for future reference Some of the following information may not apply not fit into your outlet, consult an electrician for replacement of the obsolete outlet. to your particular product; however, as with any 10) Protect the power cord from being walked on electronic product, precautions should be observed or pinched particularly at plugs, convenience... -
Page 4: Remote Control Reference Guide
Green Light : the unit is in turned ON. Connects to the Audio Out of Blu-ray DVD Players, Amber Light : the unit is in STANDBY. or other devices with RCA stereo audio outputs. 3. Remote Control Sensor 9. AUX IN jack 4. - Page 5 CONNECTIONS 1. POWER CONNECTION Note : • Before you plug in the unit, make sure that the rated • When the player is in the standby mode, it is still voltage of your unit matches your local voltage. consuming some power. If you wish to disconnect the •...
- Page 6 CONNECTIONS 4. CONNECTING TO TV • Connect the audio cable to the white jack of AUX IN You should now hear your TV’s audio over your Home (L) and red jack of AUX IN (R) on the rear of unit, and Theater’s speakers.
-
Page 7: Sound Adjustment
6. CONNECTING TO OTHER EQUIPMENT • Connect a 3.5mm-to-3.5mm audio cable (not included) to the LINE IN jack on the front of unit and the AUDIO OUT/HEADPHONE jack of your portable device. • Turn on your other equipment.This will allow your equipment’s sound to play through the unit. Press the SOURCE button to select LINE IN mode. -
Page 8: Limited Warranty
LIMITED WARRANTY AVC MULTIMEDIA (“AVC”) makes the following limited warranty. This limited warranty extends to the original consumer purchaser and is limited to non-commercial use of the product. One Year Parts & Labor Warranty AVC products purchased in the United States are warranted to be free from defects in materials or workmanship for a period of one year from the date of their original retail purchase. -
Page 9: Precauciones De Seguridad
PRECAUCIONES DE SEGURIDAD El símbolo de un rayo dentro de un triángulo equilátero está pensado para alertar al usuario de la presencia de PRECAUCION “voltaje peligroso” no aislado dentro de la carcasa del producto, el cual puede ser de una magnitud suficiente para provocar una descarga eléctrica. RIESGO DE CHOQUE ELÉCTRICO NO ABRIR El signo de admiración dentro de un triángulo equilátero está... -
Page 10: Instrucciones De Seguridad Importantes
INSTRUCCIONES DE SEGURIDAD IMPORTANTES Favor de leer y conservar para referencia futura reemplazar la toma de corriente obsoleta. Alguna parte de la siguiente información puede no 10. Proteja el cable de alimentación de ser pisado o aplicar a su producto en particular; sin embargo, al perforado específicamente en el área del enchufe, igual que con cualquier producto electrónico, se deben la toma de corriente y el punto en donde salen... -
Page 11: Cable De Alimentación
Luz verde: la unidad se enciende. los reproductores de DVD para Blu Ray, o a Luz ámbar: la unidad está en la modalidad de otros aparatos con enchufes RCA para salida de audio en modalidad estéreo suspensión STANDBY. 9. Enchufe AUX IN 3. -
Page 12: Conexión A La Corriente
CONEXIONES 1. CONEXIÓN A LA CORRIENTE Nota : de corriente • Antes de enchufar la unidad, asegúrese de que el voltaje , éste sigue consumiendo un poco de promedio de la unidad sea el mismo que el voltaje local. corriente. Si usted desea desconectar completamente • Mantenga sus manos secas al conectar el cable de la unidad de la red eléctrica, desenchufe el cable de alimentación del enchufe de CA de la pared. -
Page 13: Conexión Al Televisor
CONEXIONES 3. POSICIÓN DE LOS PARLANTES parlante parlante parlante FRONTAL FRONTAL CENTRAL (derecho) (izquierdo) parlante de frecuencias parlante de parlante de graves frecuencias frecuencias graves graves (izquierdo) (derecho) POSICIÓN PARA ESCUCHAR 4. CONEXIÓN AL TELEVISOR • Conecte el cable de audio al enchufe blanco AUX IN el sonido de su televisor a través de los parlantes del (izquierdo) y al enchufe rojo AUX IN (derecho) ubicados equipo Home Theater. -
Page 14: Conexión A Otro Equipo
CONEXIONES 5. CONEXIÓN A UN REPRODUCTOR DE BLU-RAY Y DVD / RECEPTORES DE TELEVISIÓN SATELITAL O DE TELEVISIÓN POR CABLE /CONSOLA DE JUEGOS/CÁMARA DE VIDEO. • Conecte el cable de audio al enchufe blanco DVD IN (izquierdo) y al enchufe rojo DVD IN (derecho) ubicados en la parte posterior de la unidad, y luego conecte a los enchufes AUDIO OUT correspondientes de su REPRODUCTOR DE Blu-ray y DVD / Receptores de televisión satelital o de televisión por cable / Consola de juegos / Cámara de video. -
Page 15: Ajuste Del Sonido
AJUSTE DEL SONIDO PARA AJUSTAR EL VOLUMEN PRINCIPAL PARA CAMBIAR EL CANAL DEL PARLANTE • Oprima los botones VOLUME +/- de la unidad o el • Oprima el botón CHANNELS del control remoto para botón VOLUME MASTER +/- del control remoto para seleccionar la modalidad de escucha. Ésta alternará ajustar el nivel de todos los parlantes. entre la modalidad 5.1 (SONIDO ENVOLVENTE) • Dirija el control remoto al SENSOR REMOTO ubicado y la modalidad 2.1 (ESTÉREO con PARLANTE DE... -
Page 16: Garantía Limitada
GARANTÍA LIMITADA AVC MULTIMEDIA (“AVC”) proporciona la siguiente garantía limitada. Esta garantía limitada se extiende al comprador consumidor original y está limitada al uso no comercial del producto. Garantía de Un Año en Partes y Mano de Obra Los productos AVC comprados en los Estados Unidos están garantizados y están libres de defectos en materiales o mano de obra por un periodo de un año desde la fecha de su compra al detalle original.