Table of Contents
Advertisement
Available languages
Available languages
Advertisement
Chapters
Table of Contents

Related Manuals for KitchenAid KG25H0XMC


Summary of Contents for KitchenAid KG25H0XMC
- Page 1 BOWL-LIFT STAND MIXER INSTRUCTIONS AND RECIPES BATTEUR À BOL AMOVIBLE INSTRUCTIONS ET RECETTES BATIDORA CON TAZÓN QUE SE LEVANTA INSTRUCCIONES Y RECETAS U.S.A./En EE.UU.: 1-800-541-6390 Canada/En Canadá: KitchenAid.com 1-800-807-6777 KitchenAid.ca 9709962C...
-
Page 2: Proof Of Purchase
Proof of Purchase Always keep a copy of the sales receipt This card will enable us to contact you showing the date of purchase of your in the unlikely event of a product safety stand mixer. Proof of purchase will notification and assist us in complying assure you of in-warranty service. -
Page 3: Table Of Contents
Attaching the Pouring Shield ............... 17 Using the Pouring Shield ..............17 Removing the Pouring Shield ............... 17 Cleaning the Pouring Shield ..............17 Using the KitchenAid Stand Mixer Accessories ........... 18 ® Bowl-Lift Stand Mixer Use ................19 Operating the Mixer ................19 Commercial Style Motor Protection ............. - Page 4 TABLE OF CONTENTS Mixing Tips ....................23 Egg Whites ....................24 Whipping Cream ..................24 Stand Mixer Attachments ................25 Mounting Attachments ............... 25 Removing Attachments ............... 25 Stand Mixer Accessories ................27 General Instructions for Mixing and Kneading Yeast Dough with the Rapid Mix Method ................
-
Page 5: Stand Mixer Safety
Return appliance to the nearest Authorized Service Center for examination, repair or electrical or mechanical adjustment. Call the KitchenAid Customer Satisfaction Center at 1-800-541-6390 for more information. 5 5 5 5... -
Page 6: Electrical Requirements
7. The use of attachments not recommended or sold by KitchenAid may cause fire, electrical shock or injury. 8. Do not use the stand mixer outdoors. 9. Do not let the cord hang over edge of table or counter. 10. Remove flat beater, wire whip or dough hook from stand mixer before washing. -
Page 7: Kitchenaid Stand Mixer Warranty
IF THIS PRODUCT FAILS TO WORK AS WARRANTED, CUSTOMER’S SOLE AND EXCLUSIVE REMEDY SHALL BE REPAIR OR REPLACEMENT ACCORDING TO THE TERMS OF THIS LIMITED WARRANTY. KITCHENAID AND KITCHENAID CANADA DO NOT ASSUME ANY RESPONSIBILITY FOR INCIDENTAL OR CONSEQUENTIAL DAMAGES. This warranty gives you specific legal rights and you may also have other rights which vary from state to state or province to province. -
Page 8: Hassle-Free Replacement Warranty - 50 United States And District Of Columbia
® our products meets the exacting should fail within the first year of standards of KitchenAid that, if your ownership, simply call our toll-free stand mixer should fail within the Customer Satisfaction Center at first year of ownership, KitchenAid... -
Page 9: How To Arrange For Warranty Service In Puerto Rico
Authorized warranty from the date of KitchenAid Service Center. Your purchase. KitchenAid will pay for repaired stand mixer will be returned replacement parts and labor costs prepaid and insured. If you are... -
Page 10: How To Order Accessories And Replacement Parts
10 a.m. to 5 p.m. Mississauga, ON L5N 0B7 Or write to: To order accessories or Customer Satisfaction Center replacement parts for your stand KitchenAid Portable Appliances mixer in Mexico, P.O. Box 218 call toll-free St. Joseph, MI 49085-0218 01-800-024-17-17... -
Page 11: Troubleshooting Problems
If the problem is not due to comfortably touch the top of the one of the above items, see stand mixer. This is normal. the KitchenAid stand mixer ® 2. The stand mixer may emit a Warranty. Do not return the pungent odor, especially when stand mixer to the retailer –... -
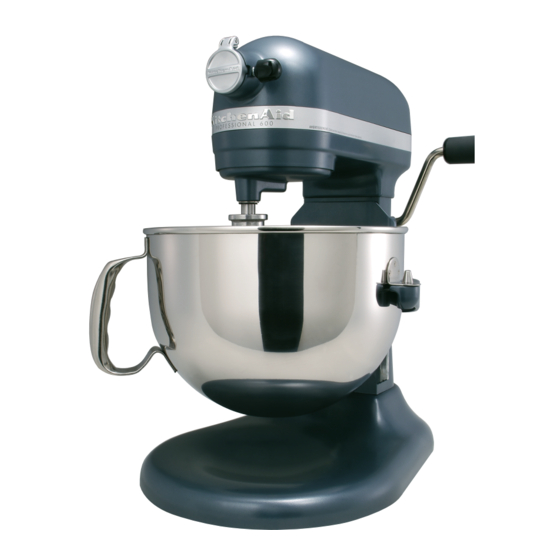
Page 12: Bowl-Lift Stand Mixer Features
Lift Stand Mixer Features“ section) Beater Shaft Locating Pins Bowl Support Flat Beater Stainless Steel Bowl PowerKnead™ Wire Whip* Spiral Dough Hook *Some models include the 11-Wire Whip instead of the Wire Whip. See “Using the KitchenAid ® Stand Mixer Accessories“ section. - Page 13 BOWL - LIFT STAND MIXER FEATURES Direct-Drive, Bowl-Height Adjustment Screw All-Steel Gear Transmission Screw adjusts the beater-to-bowl The motor head houses the clearance. Factory preset. powerful, high-performance motor Bowl Support and the direct-drive, all-steel gear transmission. Durable metal arms support the bowl for stable mixing.
- Page 14 BOWL - LIFT STAND MIXER FEATURES 11-Wire Whip Wide-Chute Pouring Shield (not shown) The 11-wire whip is ideal for achieving superior results when The dual-purpose pouring shield whipping smaller quantities of egg helps avoid ingredient splatter and whites and cream. The design of the minimizes flour puff.
-
Page 15: Assembling Your Bowl-Lift Stand Mixer
ASSEMBLING YOUR BOWL - LIFT STAND MIXER 4. Place bowl brackets over the Pre-Use Cleaning locating pins on the bowl support. Before using your stand mixer for 5. Press down on the back of the the first time, wash the mixing bowl bowl until bowl pin snaps into and accessories. -
Page 16: Attaching The Flat Beater, Wire Whip And Powerknead™ Spiral Dough Hook
ASSEMBLING YOUR BOWL - LIFT STAND MIXER Attaching the Flat Beater, Removing the Flat Beater, Wire Whip, and PowerKnead™ Wire Whip, and PowerKnead™ Spiral Dough Hook Spiral Dough Hook 1. Make sure the speed control 1. Make sure the speed control lever is set to the OFF/0 position. -
Page 17: Using The Pouring Shield (Not Included With All Models)
USING THE POURING SHIELD* Attaching the Pouring Shield* 1. Make sure the speed control lever is set to the OFF/0 position. Pouring 2. Unplug the stand mixer or Chute disconnect power. 3. Attach desired accessory and raise the mixing bowl. 4. -
Page 18: Using The Kitchenaid Stand Mixer Accessories
USING THE KITCHENAID ® STAND MIXER ACCESSORIES Flat Beater for normal to heavy mixtures: cakes biscuits creamed frostings quick breads candies meat loaf cookies mashed potatoes pie pastry Wire Whip or 11-Wire Whip for mixtures that need air incorporated: eggs... -
Page 19: Bowl-Lift Stand Mixer Use
BOWL - LIFT STAND MIXER USE Operating the Mixer 1. Before use, make sure the flat beater, wire whip, or the PowerKnead™ Spiral Dough Hook is properly attached and the bowl is raised into mixing position. 2. Plug the stand mixer into a grounded 3-prong outlet. -
Page 20: Speed Control Guide
SPEED CONTROL GUIDE The speed control lever can be set between the speeds listed below if a finer adjustment is required. IMPORTANT: Use Speed 2 when preparing yeast dough – using any other speed may damage the mixer. Speed Use For Description For slow stirring, combining, mashing, STIR... -
Page 21: Care And Cleaning
CARE AND CLEANING • All mixing bowls, coated (white) Cleaning the stand mixer and flat beaters, and coated (white) Accessories dough hooks are dishwasher safe. • Make sure the speed control • Wipe mixer with a soft, damp lever is set to the OFF/0 position. cloth. -
Page 22: Beater To Bowl Clearance
BEATER TO BOWL CLEARANCE Your stand mixer is adjusted at the 6. Raise the bowl into mixing position. factory so the flat beater just clears 7. Examine the clearance between the bottom of the bowl. If, for the beater and the bowl. The any reason, the flat beater hits the beater should just clear the bottom of the bowl, or is too far... -
Page 23: Mixing Tips
In general, solid materials For all cakes, mixing times may vary should be folded into the mix during because your KitchenAid stand mixer ® the last few seconds of mixing on mixes faster than most other mixers. -
Page 24: Egg Whites
Whipping Stages Watch the cream closely during Stiff whipping. Because your KitchenAid ® Cream stands in stiff, sharp peaks stand mixer whips so quickly, there when wire whip is removed. Use are just a few seconds between for topping on cakes or desserts, or whipping stages. -
Page 25: Stand Mixer Attachments
STAND MIXER ATTACHMENTS Attachments are designed to assure long life. The attachment KitchenAid ® power shaft and hub socket are of a square design, to eliminate any possibility of slipping during the transfer of power to the attachment. The hub and shaft housing are tapered to assure a snug fit, even after prolonged use. - Page 26 STAND MIXER ATTACHMENTS RAVIOLI MAKER GRAIN MILL Rolls pasta sheets The all-metal and filling into Grain Mill 3 rows of fresh, Attachment will large-pocket grind wheat, ravioli. Includes oats, corn, rice, specially designed and other low- filling scoop and cleaning brush. moisture, low- Accommodates 6-inch wide pasta oil grains.
-
Page 27: Stand Mixer Accessories
STAND MIXER ATTACHMENTS ICE CREAM MAKER CITRUS JUICER Makes up to Extract fresh 2 qt (1.9 L) of juice from the homemade smallest lime ice cream, to the largest sorbet, and other grapefruit, frozen dessert quickly and favorites within easily. A special strainer helps avoid 20-30 minutes. -
Page 28: General Instructions For Mixing And Kneading Yeast Dough With The Rapid Mix Method
GENERAL INSTRUCTIONS FOR MIXING AND KNEADING YEAST DOUGH WITH THE RAPID MIX METHOD “Rapid Mix” describes a bread baking method that calls for dry yeast to be mixed with other dry ingredients before liquid is added. In contrast, the traditional method is to dissolve yeast in warm water. -
Page 29: Bread Making Tips
Making bread with a mixer is quite different from making bread by hand. Therefore, it will take some practice before you are completely comfortable with the new process. For your convenience, we offer these tips to help you become accustomed to bread making the KitchenAid brand way. ®... -
Page 30: Shaping A Loaf
SHAPING A LOAF Pinch ends and turn under. Place, Divide dough in half. On lightly seam side down, in loaf pan. floured surface, roll each half Follow directions in recipe for rising into a rectangle, approximately and baking. 9 x 14" (22.5 x 35 cm). A rolling pin will smooth dough and remove gas bubbles. -
Page 31: Basic White Bread
BASIC WHITE BREAD cup (120 mL) Place milk, sugar, salt, and butter in small low-fat milk saucepan. Heat over low heat until butter melts and sugar dissolves. Cool to lukewarm. 3 tbs (45 mL) sugar 2 tsp (10 mL) salt Dissolve yeast in warm water in warmed mixer 3 tbs (45 mL) butter or bowl. -
Page 32: Whole Grain Wheat Bread
WHOLE GRAIN WHEAT BREAD cup plus 1 tbs Dissolve 1 tbs (15 mL) brown sugar in warm water (95 mL) in small bowl. Add yeast and let mixture stand. brown sugar Place 4 cups (945 mL) flour, powdered milk, 2 cups (475 mL) cup (80 mL) brown sugar, and salt in mixer warm water bowl. -
Page 33: French Bread
FRENCH BREAD 2 packages active Dissolve yeast in warm water in warmed mixer dry yeast bowl. Add salt, butter, and flour. Attach bowl and dough hook to mixer. Turn to Speed 2 cups (590 mL) and mix about 1 minute, or until well blended. warm water (105°F to 115°F Knead on Speed 2 about 2 minutes longer. -
Page 34: Honey Oatmeal Bread
HONEY OATMEAL BREAD cups (355 mL) water Place water, honey, and butter in small saucepan. Heat over low heat until mixture is cup (120 mL) honey very warm (120°F to 130°F [49°C to 54°C]). cup (80 mL) butter or margarine First place oats, then 5 cups (1.2 L) flour, salt, cups (1.32 to 1.62 L) and yeast in mixer bowl. -
Page 35: Crusty Pizza Dough
CRUSTY PIZZA DOUGH 1 package active Dissolve yeast in warm water in warmed mixer dry yeast bowl. Add salt, olive oil, and 2 cups (590 mL) flour. Attach bowl and dough hook to mixer. 1 cup (235 mL) Turn to Speed 2 and mix about 1 minute. warm water (105°F to 115°F Continuing on Speed 2, add remaining flour,... -
Page 36: Basic Sweet Dough
BASIC SWEET DOUGH cup (175 mL) Place milk, sugar, salt, and butter in small low-fat milk saucepan. Heat over low heat until butter melts and sugar dissolves. Cool to lukewarm. cup (120 mL) sugar tsp (6 ml) salt Dissolve yeast in warm water in warmed mixer cup (120 mL) butter bowl. -
Page 37: Cinnamon Swirl Rounds
CINNAMON SWIRL ROUNDS 1 cup (235 mL) firmly Place brown sugar, sugar, butter, flour, packed brown sugar cinnamon, and walnuts in mixer bowl. Attach bowl and flat beater to mixer. Turn to Speed 2 1 cup (235 mL) sugar and mix about 1 minute. cup (120 mL) butter or margarine, Turn dough onto lightly floured surface. - Page 38 Installer l’écran verseur ................ 52 Utiliser l’écran verseur ................. 52 Retirer l’écran verseur ................52 Nettoyer l’écran verseur ............... 52 Utiliser les accessoires du batteur sur socle KitchenAid ......53 ® Utilisation du batteur à bol amovible ............54 Mode d’emploi du batteur ..............54 Protection du moteur de style commercial ..........
- Page 39 TABLE DES MATIÈRES Conseils de mélange ................... 58 Blancs d’œufs ..................... 59 Crème fouettée ................... 59 Accessoires ajoutés du batteur sur socle ............60 Installer les accessoires ajoutés ............. 60 Retirer les accessoires ajoutés ............... 61 Accessoires du batteur sur socle..............63 Instructions générales pour mélanger et pétrir la pâte à...
-
Page 40: Sécurité Du Batteur Sur Socle
SÉCURITÉ DU BATTEUR SUR SOCLE Votre sécurité et celle des autres est très importante. Nous donnons de nombreux messages de sécurité importants dans ce manuel et sur votre appareil ménager. Assurez-vous de toujours lire tous les messages de sécurité et de vous y conformer. Voici le symbole d’alerte de sécurité. -
Page 41: Alimentation
Pour plus d’information, appelez le centre de satisfaction de la clientèle KitchenAid au 1-800-541-6390. 7. L’utilisation de tout accessoire non recommandé ou non vendu par KitchenAid peut provoquer des incendies, des chocs électriques ou des blessures. 8. Ne pas utiliser le batteur à bol amovible à l’extérieur. -
Page 42: Garantie Du Batteur Sur Socle Kitchenaid
SI CET APPAREIL NE FONCTIONNE PAS COMME GARANTI, LE SEUL ET EXCLUSIF RECOURS DES CLIENTS EST LA RÉPARATION OU LE REMPLACEMENT SELON LES DISPOSITIONS DE LA GARANTIE LIMITÉE. KITCHENAID ET KITCHENAID-CANADA N’ASSUMENT AUCUNE RESPONSABILITÉ EN CAS DE DOMMAGES ACCESSOIRES OU INDIRECTS. Cette garantie vous confère des droits spécifiques auxquels peuvent s’ajouter d’autres droits variant d’un État... -
Page 43: Garantie De Satisfaction Totale Et De Remplacement - 50 États Des États-Unis, District Fédéral De Columbia
KitchenAid que, si le batteur à (reçu de caisse, facture de règlement bol amovible cesse de fonctionner par carte de crédit, etc.) Le batteur au cours de la première année,... -
Page 44: Comment Obtenir Une Réparation Sous Garantie À Puerto Rico
COMMENT OBTENIR UNE RÉPARATION EN DEHORS DE CES TERRITOIRES Demandez à votre distributeur local Pour obtenir de l’information sur KitchenAid ou au détaillant où le les réparations au Mexique, batteur à bol amovible a été acheté appelez le numéro sans frais où... -
Page 45: Comment Commander Des Accessoires Et Des Pièces De Rechange
Ou écrivez à : Mississauga, ON L5N 0B7 Centre de satisfaction de la clientèle Pour commander des accessoires KitchenAid Portable Appliances ou des pièces de rechange pour P.O. Box 218 le batteur à bol amovible au St. Joseph, MI 49085-0218... -
Page 46: Dépannage
“Garantie du Cela se produit couramment “. Ne batteur sur socle KitchenAid ® avec les moteurs électriques. retournez pas le batteur chez le 3. Si le fouet plat frappe le bol, détaillant, car celui-ci n’offre pas... -
Page 47: Caractéristiques Du Batteur À Bol Amovible
Bol en acier inoxydable Crochet pétrisseur Fouet à fil * en spirale PowerKnead™ *Certains modèles incluent le fouet à 11 fils au lieu du fouet à fil. Voir la section “Utiliser les accessoires du batteur sur socle KitchenAid “ ®... - Page 48 CARACTÉRISTIQUES DU BATTEUR À BOL AMOVIBLE Transmission à engrenage Levier de contrôle de vitesse entièrement en acier, à Les dix vitesses de mélange offrent entraînement direct la polyvalence voulue pour toutes les La tête du moteur renferme le puissant recettes. Les vitesses vont de brassage moteur haute performance et la très lent à...
- Page 49 CARACTÉRISTIQUES DU BATTEUR À BOL AMOVIBLE Fouet à fil Écran verseur à large goulotte (Non illustré) Le conception du fouet à fil augmente rapidement la circulation d’air dans L’écran verseur à double usage les mélanges d’œufs pour des soufflés aide à prévenir l’éclaboussure des bien montés et des pointes rigides de ingrédients et à...
-
Page 50: Assembler Le Batteur À Bol Amovible
ASSEMBLER LE BATTEUR À BOL AMOVIBLE 3. Abaissez le support du bol en Nettoyage avant l’utilisation tournant le levier lève-bol dans Avant d’utiliser le batteur à bol le sens horaire. amovible pour la première fois, nettoyez le bol à mélanger et les accessoires (consultez la section “Entretien et nettoyage“.) Installer le bol à... -
Page 51: Retirer Le Bol À Mélanger
ASSEMBLER LE BATTEUR À BOL AMOVIBLE ..4. Tournez l'accessoire vers la droite Retirer le bol à mélanger en l'accrochant par-dessus la 1. Assurez-vous que le levier de goupille sur le batteur. contrôle de vitesse est réglé à la 5. Branchez l’appareil dans une position OFF/0. -
Page 52: Utiliser L'écran Verseur (Non Inclus Avec Tous Les Modèles)
UTILISER LʼÉCRAN VERSEUR* Installer l’écran verseur* 1. Assurez-vous que le levier de Goulotte de contrôle de vitesse est réglé à la versement position OFF/0. 2. Débranchez le batteur à bol amovible ou mettez-le hors tension. 3. Insérez l’accessoire voulu et relevez le bol de mélange. -
Page 53: Utiliser Les Accessoires Du Batteur Sur Socle Kitchenaid
UTILISER LES ACCESSOIRES DU BATTEUR SUR SOCLE KITCHENAID ® Batteur plat pour les mélanges normaux à épais : gâteaux biscotins glaçages crémeux préparations bonbons rapides pour pain biscuits pain de viande pâte à tarte pommes de terre en purée Fouet à fil ou fouet à 11 fils pour les mélanges qui ont besoin d’incorporer... -
Page 54: Utilisation Du Batteur À Bol Amovible
UTILISATION DU BATTEUR À BOL AMOVIBLE Mode d’emploi du batteur 1. Avant utilisation, assurez-vous que le batteur plat, le fouet à fil ou le crochet pétrisseur en spirale PowerKnead™ est bien installé et que le bol est soulevé en position de mélange. 2. -
Page 55: Guide De Contrôle De Vitesse
GUIDE DE CONTRÔLE DE VITESSE Le levier de contrôle de vitesse se règle entre les vitesses indiquées ci-dessous s’il faut un ajustement plus fin. IMPORTANT : Utilisez la vitesse 2 pour préparer la pâte à levure - utiliser toute autre vitesse pourrait endommager le batteur. Vitesse Utilisez pour Description Pour brasser lentement, combiner, écraser,... -
Page 56: Entretien Et Nettoyage
GUIDE DE CONTRÔLE DE VITESSE Vitesse Utilisez pour Description Pour fouetter la crème, les blancs d’œufs et BATTRE ET les glaçages bouillis. FOUETTER RAPIDEMENT Pour fouetter de petites quantités de crème FOUETTER ou de blancs d’œufs. RAPIDEMENT • Utiliser aussi avec la machine à pâtes alimentaires et le moulin à... -
Page 57: Jeu Entre Le Batteur Et Le Bol
JEU ENTRE LE BATTEUR ET LE BOL 6. Soulevez le bol à la position Votre batteur à bol amovible est de mélange. ajusté à l’usine pour que le batteur 7. Examinez le jeu entre le batteur plat dégage le bas du bol. Si, pour et le bol. -
Page 58: Conseils De Mélange
En général, mélanger épaisse pour éviter que les fruits ou une préparation de gâteau avec un les noix ne tombent au fond du plat batteur à bol amovible KitchenAid ® durant la cuisson. Les fruits collants prendra environ la moitié du temps doivent être saupoudrés de farine... -
Page 59: Blancs D'œufs
être intégrée à d’autres ingrédients dans la préparation de desserts et Surveillez attentivement la crème de sauces. durant le fouettage. Parce que votre batteur à bol amovible KitchenAid ® Rigide fouette si rapidement, il n’y a que La crème forme des pointes rigides, quelques secondes entre les étapes... -
Page 60: Accessoires Ajoutés Du Batteur Sur Socle
éliminer toute possibilité de glisser durant le transfert de courant à l’accessoire ajouté. Le boîtier de l’arbre et l’emboîtement sont effilés pour assurer un ajustement serré, même après une utilisation prolongée. Tous les accessoires ajoutés KitchenAid n’exigent aucune autre ®... -
Page 61: Retirer Les Accessoires Ajoutés
ACCESSOIRES AJOUTÉS DU BATTEUR SUR SOCLE Retirer les accessoires ajoutés ENSEMBLE ROULEAU ET MACHINES À PÂTES 1. Assurez-vous que le levier de ALIMENTAIRES contrôle de vitesse est réglé à la Cet ensemble position OFF/0. de trois pièces, 2. Débranchez le batteur à bol entièrement amovible ou mettez-le hors en métal,... - Page 62 ACCESSOIRES AJOUTÉS DU BATTEUR SUR SOCLE HACHOIR SORBETIÈRE Hachez Prépare jusqu’à rapidement 1,9 litres les viandes, les (2 pintes) de fruits fermes et crème glacée, les légumes, le sorbets et pain sec, et le autres desserts fromage. Inclut surgelés des plaques préférés en 20 à...
-
Page 63: Accessoires Du Batteur Sur Socle
ACCESSOIRES DU BATTEUR SUR SOCLE ÉCRAN VERSEUR COUVERCLES DE BATTEUR Cet écran est conçu avec une Protégez votre batteur contre les goulotte de versement et il réduit égratignures et la poussière avec les éclaboussures et les bouffées des couvercles en tissu. Ils ont tous de farine lorsqu’on ajoute des ont une bordure noire. -
Page 64: Instructions Générales Pour Mélanger Et Pétrir La Pâte À Levure Avec La Méthode De Mélange Rapide
INSTRUCTIONS GÉNÉRALES POUR MÉLANGER ET PÉTRIR LA PÂTE À LEVURE AVEC LA MÉTHODE DE MÉLANGE RAPIDE Le “mélange rapide“ décrit une méthode de préparation de pain avec une levure sèche à mélanger avec les autres ingrédients secs avant d’ajouter le liquide. En revanche, la méthode traditionnelle est de faire dissoudre la levure dans l’eau tiède. -
Page 65: Conseils De Préparation Du Pain
Il faudra donc un peu de pratique avant que vous ne soyez entièrement confortable avec le nouveau processus. Nous vous offrons donc ces conseils pour vous aider à vous habituer à la préparation du pain à la manière de KitchenAid ® • Commencez avec une recette •... -
Page 66: Former Un Pain
CONSEILS DE PRÉPARATION DU PAIN • La plupart des recettes de pain complètement dans la pâte. Si vous offrent une plage de quantité de avez ajouté trop de farine, le pain farine à utiliser. Vous avez ajouté sera sec. suffisamment de farine lorsque la •... -
Page 67: Pain Blanc De Base
PAIN BLANC DE BASE 120 mL ( tasse) de lait Placez le lait, le sucre, le sel et le beurre dans une petite casserole. Réchauffez à feu bas faible en matière jusqu’à ce que le beurre fonde et que le sucre grasse soit dissout. -
Page 68: Pain De Blé Entier
PAIN DE BLÉ ENTIER 95 mL ( tasse plus Faites dissoudre 15 mL (1 cuillerée à soupe) de 1 cuillerée à soupe) cassonade dans l’eau tiède dans un petit bol. de cassonade Ajoutez la levure et laissez reposer le mélange. 475 mL (2 tasses) d’eau Mettez 945 mL (4 tasses) de farine, le lait en tiède (40 °C à... -
Page 69: Pain Français
PAIN FRANÇAIS 2 sachets de levure Faites dissoudre la levure dans de l’eau tiède active sèche dans le bol du batteur réchauffé. Ajoutez le sel, le beurre et la farine. Installez le bol et le 590 mL (2 tasses) d’eau crochet pétrisseur au batteur. -
Page 70: Pain De Farine D'avoine Et Miel
PAIN DE FARINE DʼAVOINE ET MIEL 355 mL (1 tasse) d’eau Placez l’eau, le miel et le beurre dans une petite casserole. Chauffez à feu bas jusqu’à ce 120 mL ( tasse) de miel que le mélange soit très chaud, 49 à 54 °C 80 mL ( tasse) de (120 à... -
Page 71: Pâte À Pizza Croûtée
PÂTE À PIZZA CROÛTÉE 1 sachet de levure Faites dissoudre la levure dans de l’eau tiède active sèche dans le bol du batteur réchauffé. Ajoutez le sel, l’huile d’olive et 590 mL (2 tasses) de 235 mL (1 tasse) d’eau farine. -
Page 72: Pâte Sucrée De Base
PÂTE SUCRÉE DE BASE 175 mL ( tasse) de lait Placez le lait, le sucre, le sel et le beurre dans faible en matière une petite casserole. Réchauffez à feu bas grasse jusqu’à ce que le beurre fonde et le sucre soit dissout. -
Page 73: Tourbillons De Cannelle
TOURBILLONS DE CANNELLE 235 mL (1 tasse) de Placez la cassonade, le sucre, le beurre, la cassonade bien farine, la cannelle et les noix de Grenoble dans tassée le bol du batteur. Installez le bol et le batteur plat au batteur. Mettez le batteur à la vitesse 2 235 mL (1 tasse) de sucre et mélangez pendant 1 minute. - Page 74 Uso del vertedor antisalpicaduras ............88 Extracción del vertedor antisalpicaduras ..........88 Limpieza del vertedor antisalpicaduras ..........88 Uso de los accesorios de batidora con base KitchenAid ......89 ® Uso de la batidora con tazón que se levanta ..........90 Funcionamiento de la batidora ............
- Page 75 ÍNDICE Consejos para batir ..................94 Claras de huevo ..................95 Crema para batir ..................95 Aditamentos de la batidora con base ............96 Montaje de los aditamentos ..............96 Cómo retirar los aditamentos .............. 96 Accesorios de la batidora con base ............. 99 Instrucciones generales para batir y amasar masa de levadura con el método de batido rápido ...............
-
Page 76: Seguridad De La Batidora Con Base
SEGURIDAD DE LA BATIDORA CON BASE Su seguridad y la seguridad de los demás es muy importante. Hemos incluido muchos mensajes importantes de seguridad en este manual y en su electrodoméstico. Lea y obedezca siempre todos los mensajes de seguridad. Este es el símbolo de advertencia de seguridad. -
Page 77: Requisitos Eléctricos
KitchenAid al 1-800-541-6390 para obtener más información. 7. El uso de aditamentos no recomendados o que no sean vendidos por KitchenAid puede provocar un incendio, descarga eléctrica o lesión. 8. No utilice la batidora en exteriores. 9. No deje que el cable cuelgue del filo de la mesa o de la encimera. -
Page 78: Garantía De La Batidora Con Base Kitchenaid
EXCLUSIVO RECURSO DEL CLIENTE SERÁ LA REPARACIÓN O EL REEMPLAZO SEGÚN LOS TÉRMINOS Y LAS CONDICIONES DE ESTA GARANTÍA LIMITADA. KITCHENAID Y KITCHENAID CANADA NO ASUMEN NINGUNA RESPONSABILIDAD POR DAÑOS INCIDENTALES O CONSIGUIENTES. Esta garantía le otorga derechos legales específicos y es posible que usted goce de otros derechos... -
Page 79: Garantía De Reemplazo Sin Dificultades En Los 50 Estados De Los Estados Unidos Y En El Distrito De Columbia
En la caja, escriba de alta calidad. su nombre y dirección en un papel Si su batidora con base KitchenAid junto con la copia del comprobante ® presentara alguna falla durante de compra (recibo de compra, ticket el primer año de propiedad,... -
Page 80: Cómo Obtener El Servicio De Garantía En Puerto Rico
CÓMO OBTENER EL SERVICIO TÉCNICO EN OTROS LUGARES Consulte a su distribuidor de Para obtener información sobre KitchenAid local o a la tienda donde el servicio técnico en México, compró la batidora con base para llame de manera gratuita al obtener información sobre el... -
Page 81: Cómo Realizar Un Pedido De Accesorios Y Repuestos
200-6750 Century Ave. O escriba a: Mississauga, ON L5N 0B7 Customer Satisfaction Center Para solicitar accesorios o KitchenAid Portable Appliances repuestos para su batidora P.O. Box 218 con base en México, St. Joseph, MI 49085-0218 llame de manera gratuita al... -
Page 82: Solución De Problemas
Esto es normal. la batidora con base KitchenAid®. 2. Es posible que la batidora con base emita un fuerte olor No devuelva la batidora con base... -
Page 83: Características De La Batidora Con Tazón Que Se Levanta
Gancho para masa Batidor de alambre* en espiral PowerKnead™ * Algunos modelos incluyen el batidor de 11 alambres en lugar del batidor de alambre. Vea la sección “Uso de los accesorios de la batidora con base KitchenAid ”. ®... - Page 84 CARACTERÍSTICAS DE LA BATIDORA CON TAZÓN QUE SE LEVANTA Transmisión directa Tornillo para ajuste de la altura de velocidades hecha del tazón completamente de acero El tornillo ajusta la distancia entre La cabeza del motor alberga el el batidor y el tazón. Previamente poderoso motor de alto rendimiento ajustado de fábrica.
- Page 85 CARACTERÍSTICAS DE LA BATIDORA CON TAZÓN QUE SE LEVANTA Batidor de 11 alambres Vertedor antisalpicaduras ancho (No se muestra) El batidor de 11 alambres es ideal para obtener resultados superiores al El vertedor tiene el doble propósito batir cantidades más pequeñas de de ayudar a evitar la salpicadura de claras de huevo y crema.
-
Page 86: Ensamblaje De La Batidora Con Tazón Que Se Levanta
ENSAMBLAJE DE LA BATIDORA CON TAZÓN QUE SE LEVANTA 4. Coloque las horquillas del tazón Limpieza antes de usar sobre los pernos localizadores en Antes de usar su batidora con base el soporte del tazón. por primera vez, lave el tazón y 5. -
Page 87: Cómo Retirar El Tazón Para Batir
ENSAMBLAJE DE LA BATIDORA CON TAZÓN QUE SE LEVANTA 4. Gire el accesorio hacia la Cómo retirar el tazón para batir derecha, enganchándolo en el 1. Asegúrese que la palanca para perno del eje. control de velocidades esté en 5. Conecte a una toma de corriente la posición de apagado (OFF/0). -
Page 88: Uso Del Vertedor Antisalpicaduras (No Se Incluye En Todos Los Modelos)
USO DEL VERTEDOR ANTISALPICADURAS* Colocación del vertedor antisalpicaduras* 1. Asegúrese que la palanca para control de velocidades esté en la posición de apagado (OFF/0). Vertedor 2. Desconecte la batidora o la corriente. 3. Coloque el accesorio deseado y eleve el tazón para batir. 4. -
Page 89: Uso De Los Accesorios De Batidora Con Base Kitchenaid
USO DE LOS ACCESORIOS DE LA BATIDORA CON BASE KITCHENAID ® Batidor plano para mezclas normales a espesas: pasteles panecillos coberturas cremosas panes rápidos caramelos pastel de carne galletas puré de papas masa para pay Batidor de alambre o batidor de 11... -
Page 90: Uso De La Batidora Con Tazón Que Se Levanta
USO DE LA BATIDORA CON TAZÓN QUE SE LEVANTA Funcionamiento de la batidora 1. Antes de usar, asegúrese que el batidor plano, el batidor de alambre o el gancho para masa en espiral PowerKnead™ esté correctamente colocado y que el tazón esté levantado a la posición de batido. -
Page 91: Guía Para Control De Velocidades
GUÍA PARA CONTROL DE VELOCIDADES La palanca para control de velocidades se puede regular entre las velocidades que se mencionan a continuación si se requiere un ajuste más fino. IMPORTANTE: Use la Velocidad 2 cuando prepare masa con levadura - el uso de cualquier otra velocidad puede dañar la batidora. -
Page 92: Cuidado Y Limpieza
GUÍA PARA CONTROL DE VELOCIDADES Velocidad Uso Descripción Para montar crema, claras y BATIR O glaseados hervidos. MEZCLAR RÁPIDAMENTE Para montar pequeñas cantidades de crema o BATIR claras de huevo. RÁPIDAMENTE • También se usa con el aditamento fabricador de pastas y con el molino de granos. -
Page 93: Distancia Entre El Batidor Y El Tazón
DISTANCIA ENTRE EL BATIDOR Y EL TAZÓN La batidora con base se ajusta en 6. Levante el tazón hacia la fábrica de modo que el batidor plano posición de batido. apenas se acerque al fondo del tazón. 7. Examine la distancia entre el Si, por alguna razón, el batidor plano batidor y el tazón. -
Page 94: Consejos Para Batir
En general, batir un añadirse a la mezcla durante los pastel con una batidora KitchenAid ® últimos segundos del batido en la tomará aproximadamente la mitad velocidad STIR (Revolver). La pasta... -
Page 95: Crema Batida
8 las claras están suaves. Puntos de batido Rígido pero no seco Con su batidora KitchenAid , las ® Cuando se quita el batidor claras de huevo se baten rápidamente. de alambre, se forman picos Por lo tanto, tenga cuidado para no puntiagudos y rígidos. -
Page 96: Aditamentos De La Batidora Con Base
El receptáculo y el gabinete del eje son cónicos para garantizar un ajuste exacto, incluso después de usarlo durante mucho tiempo. Ningún aditamento KitchenAid requiere ®... - Page 97 ADITAMENTOS DE LA BATIDORA CON BASE FABRICADOR DE RAVIOLES MOLINO DE GRANOS Enrolla láminas de El aditamento pasta y su relleno molino de granos en 3 hileras de metálico muele grandes y frescos trigo, avena, ravioles. Incluye maíz, arroz y cuchara otros granos para rellenar y cepillo de limpieza de...
- Page 98 ADITAMENTOS DE LA BATIDORA CON BASE EMBUTIDOR ABRELATAS Prepare Este aditamento embutidos práctico es increíblemente perfecto para deliciosos y latas muy nutritivos. grandes y Incluye un tubo también para " latas pequeñas. El aditamento (1 cm) para embutidos pequeños Abrelatas dejará los bordes suaves y y un tubo de "...
-
Page 99: Accesorios De La Batidora Con Base
ACCESORIOS DE LA BATIDORA CON BASE VERTEDOR ANTISALPICADURAS FUNDAS PARA BATIDORA Diseñado con un vertedor que Proteja contra raspaduras y polvo con minimiza las salpicaduras y evita que estas fundas de tela. Todas vienen la harina vuele cuando se añaden con ribete negro. -
Page 100: Instrucciones Generales Para Batiry Amasar Masa De Levadura Con El Método De Batido Rápido
INSTRUCCIONES GENERALES PARA BATIR Y AMASAR MASA DE LEVADURA CON EL MÉTODO DE BATIDO RÁPIDO El “batido rápido” describe un método para hornear pan que requiere mezclar levadura seca con otros ingredientes secos antes de añadir líquido. En cambio, el método tradicional consiste en disolver la levadura en agua tibia. -
Page 101: Consejos Para Hacer Pan
Por lo tanto, tendrá que practicar antes de sentirse completamente cómodo con el nuevo procedimiento. Para su comodidad, ofrecemos estos consejos a fin de ayudarlo a acostumbrarse a la elaboración de pan a la manera de la marca KitchenAid ® • Comience con una receta sencilla, •... -
Page 102: Cómo Dar Forma Al Pan
CONSEJOS PARA HACER PAN o tiene mucha humedad, añada • Cuando estén listos, el pan y poco a poco más harina, los rollos con levadura deberán aproximadamente ½ taza adquirir un color tostado. Otras (120 mL) a la vez pero. No maneras de comprobar que el pan exceda la capacidad de harina está... -
Page 103: Pan Blanco Básico
PAN BLANCO BÁSICO ½ taza (120 mL) de Coloque la leche, el azúcar, la sal y la mantequilla leche descremada en una cacerola pequeña. Caliente a fuego lento hasta que la mantequilla se derrita y el azúcar se 3 cucharadas (45 mL) disuelva. -
Page 104: Pan De Trigo Integral
PAN DE TRIGO INTEGRAL taza más 1 cucharada Disuelva 1 cucharada (15 mL) de azúcar morena (95 mL) de azúcar en agua tibia en un recipiente pequeño. Añada la morena levadura y deje reposar la mezcla. 2 tazas (475 mL) de Coloque 4 tazas (945 mL) de harina, leche en agua tibia (105°F a polvo,... -
Page 105: Pan Francés
PAN FRANCÉS 2 paquetes de levadura Disuelva la levadura en agua tibia en el tazón seca activa de la batidora previamente calentado. Añada sal, mantequilla y harina. Coloque el tazón y el tazas (590 mL) gancho para masa en la batidora. Encienda en de agua tibia (105°F a 115°F velocidad 2 y bata aproximadamente 1 minuto,... -
Page 106: Pan De Avena Y Miel
PAN DE AVENA Y MIEL tazas (355 mL) Coloque el agua, la miel y la mantequilla en de agua una cacerola pequeña. Caliente a fuego lento hasta que la mezcla esté muy caliente (120°F a taza (120 mL) de miel 130°F [49°C a 54°C]). -
Page 107: Masa Crocante Para Pizza
MASA CROCANTE PARA PIZZA 1 paquete de levadura Disuelva la levadura en agua tibia en el tazón seca activa de la batidora previamente calentado. Añada la sal, el aceite de oliva y 2 tazas (590 mL) de 1 taza (235 mL) harina. -
Page 108: Masa Dulce Básica
MASA DULCE BÁSICA taza (175 mL) de Coloque la leche, el azúcar, la sal y la leche descremada mantequilla en una cacerola pequeña. Caliente a fuego lento hasta que la mantequilla se taza (120 mL) de derrita y el azúcar se disuelva. Enfríe hasta azúcar templar. -
Page 109: Roscas De Canela
ROSCAS DE CANELA 1 taza (235 mL) de Coloque el piloncillo, el azúcar, la mantequilla, piloncillo la harina, la canela y las nueces en el tazón de la batidora. Coloque el tazón y el batidor 1 taza (235 mL) de plano. - Page 112 ™ Marque de commerce/la forme du robot est une marque déposée de KitchenAid, États-Unis. ™ Marca de comercio/la forma de la batidora es una marca de comercio de KitchenAid, U.S.A., KitchenAid Canada licensee in Canada/Emploi licencié par KitchenAid Canada au Canada.