GAS GAS FSE 450 Service Manual
Hide thumbs
Also See for FSE 450:
- Workshop manual (104 pages) ,
- Service manual (75 pages) ,
- Service manual (60 pages)

Related Manuals for GAS GAS FSE 450


Summary of Contents for GAS GAS FSE 450
- Page 1 MANUAL DEL USUARIO MANUAL DEL USUARIO SERVICE MANUAL SERVICE MANUAL MANUEL D’ENTRETIEN MANUEL D’ENTRETIEN LIBRETTO D´USO LIBRETTO D´USO...
- Page 3 USER MANUAL USER MANUAL...
-
Page 5: Foreword
GAS GAS thanks you for your confidence. By choosing the new GAS GAS FSE / FSE SM 2005 you have just entered the great GAS GAS family and, as a user of the number one off-road motorbike manufacturer, you deserve the distinguished treatment that we wish to offer to you both in our after-sale relationship and in the explanations that we provide in this manual. -
Page 6: Important Notice
Read this manual carefully. This manual covers aspects that will contribute to your security and to that of others, as well as guaranteeing a correct conservation and maintenance of this GAS GAS motorcycle you have just acquired. TO PROTECT THE FUTURE OF YOUR SPORT, MAKE SURE... -
Page 7: Table Of Contents
TABLE OF CONTENTS ............. Chain guide Foreword..................3 ............ Tension adjustment Important notice ................4 ............. Handle bars Table of contents ................5 ..............Brakes General information ................6 ..............Steering Component locations ..............8 ............Steering lock Side stand..................10 ............... Front forks ..............Petrol ............ -
Page 8: General Information
GENERAL INFORMATION ENGINE Engine 4 stroke, single-cylinder DOHC 4 valves, liquid cooled Displacement in cubic centimetres 443 cc Bore and stroke 95 x 62.6 mm. Spark plug NGK CR8E or DENSO U24ESR-N Fuel supply Magneti Marelli electronic injection TRANSMISSION Transmission type 6 speed Clutch type Oil bath, multi-disk hydraulic action... - Page 9 Suspension Front Öhlins ø 48mm inverted fork. Marzocchi ø 45mm inverted fork. Rear Progressive system with single multi-adjustment ÖHLINS shock absorber. Suspension stroke Front 295 mm. Rear 320 mm. Front suspension oil MARZOCCHI SAE 7.5 ÖHLINS SAE 5 - 7.5 Front fork oil level Marzocchi: 110 mm (compressed, without spring).
-
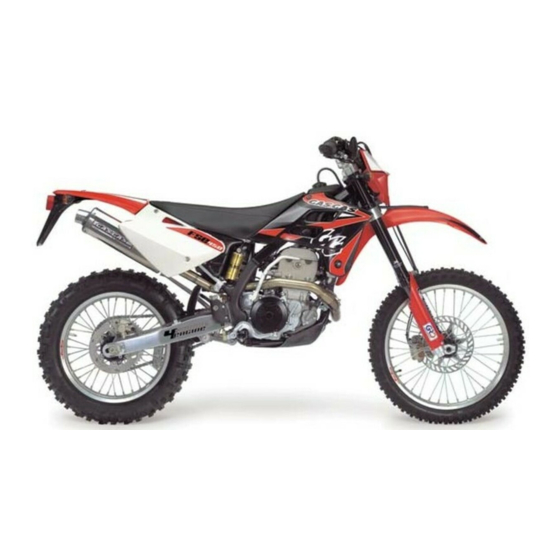
Page 10: Component Locations
LOCATION OF COMPONENTS GAS GAS FSE 450 1- Clutch handle 2- Engine start button 3- Fuel tank cap 4- Front brake fluid tank 5- Front brake handle 6- Throttle control GAS GAS FSE SM 450 1- Clutch handle 2- Engine start button... - Page 11 7- Front suspension 16- Rear shock absorber 8- Radiator 17- Chain guide 9- Fuel tank 18- Chain 10- Air filter 19- Silencer 11- Seat 20- Rear shock absorber gas tank 12- Front brake disk 21- Tie rod and rocker suspension 13- Front brake callipers 22- Rear brake pedal 14- Rear brake fluid tank...
-
Page 12: Side Stand
PETROL To unfold the side stand (A) the securing strap must be released The GAS GAS FSE / SM FSE 450 has a four stroke engine and (B) then the stand is opened to vertical position. requires 98 octane, unleaded petrol. -
Page 13: Serial Number And The Qualification Approval Plate
RECOMMENDED FUEL SERIAL NUMBER Use lead-free petrol with an octane rating equal to or higher than Printed on the steering tube. Indicates the frame number with which that shown in the table. the motorcycle is registered. Qualification approval plate OCTANE RATING METHOD OCTANE RATING (MIN) The motorcycle is fitted with its own corresponding qualification... -
Page 14: Starting And Stopping The Engine
STARTING THE ENGINE Stopping the engine - Ensure that the motorcycle is in neutral. - Change gear to neutral. - Rotate the starter key clockwise (ON (A) position), in this way the - After a slight acceleration, release the throttle completely and rotate electric circuits are active and the engine can start. -
Page 15: Cold Starting
COLD STARTING SHIFTING GEARS The transmission is a 6 speed, return shift type meaning that to go The cold start function is responsible for aiding the engine start if back to first gear from a higher gear, you must shift back through this is cold. -
Page 16: Stopping The Motorcycle
STOPPING THE MOTORCYCLE NOTE The slow speed necessary during the break-in period may cause For maximum deceleration, close the throttle (A) and apply both carbon to build up on the spark plug and soil it. If inspection front and rear brakes. Disengage the clutch as the motorcycle comes of the spark plug shows this to be the case, replace the standard to a stop. -
Page 17: Maintenance Chart
MAINTENANCE CHART Period Period Period Article First 5 hours Every 30 hours Every 60 hours Inspect each time that the motorcycle has run or when necessary Air filter *Exhaust connectors and bolts *Valve tolerances Spark plug Injection pump pipes *Revise every 4 years Engine oil and filter oil *Engine oil pipes Coolant... -
Page 18: Battery
BATTERY 3. Disconnect the terminals ensuring that they do not enter into contact with metal parts then extract the This battery is maintenance free and checking the fluid level is not battery. required. It is advisable to check the charge of the battery periodically WARNING To remove the battery, follow these steps: Hydrogen gas produced by the battery may explode if exposed to... -
Page 19: Cooling System
- Recommended charging duration = 5 - 8 hours. CAUTION Using a high pressure water source could damage the radiator fins - The product (charge current) X (charge duration) must be within and render it ineffective. the range: 0.5 - 0.8 Cn. Do not obstruct or deviate the radiator air intake by installing non- approved accessories. - Page 20 Coolant Level CAUTION Use of incorrect coolant solutions will cause severe engine and - Situate the motorcycle so that it is perpendicular to the ground. cooling system damage. - Remove the radiator cap in two stages. First turn the cap anti-clock Use coolant containing corrosion inhibitors made specifically for wise and wait for a few seconds.
-
Page 21: Changing The Coolant
NOTE Changing the coolant Check the level when the engine is cold. - The coolant should be changed periodically to ensure long engine life. - Wait for the engine to cool completely. - Situate the motorcycle so that it is perpendicular to the ground. - Remove the radiator cap. -
Page 22: Spark Plug
-Inspection of the coolant. If white cotton-like patches appear in the between electrodes using a gauge and adjust in case that it is not liquid then this means that the aluminium elements of the cooling correct by bending the outer electrode. If the spark plug electrodes system are corroded. - Page 23 3. Remove the bolts (C) CUIDADO (left and right). Un incorrecto montaje de la bujía o grado térmico incorrecto puede provocar grandes daños en el motor, y estos daños no son cubiertos por la garantía. Usar siempre las bujías recomendadas por la marca. Consultar a los concesionarios o a un mecánico cualificado para saber qué...
- Page 24 6. Separate the connectors from the electronics (F). 8. Remove the spark plug hood. 7. Separate the NOTE connector (G) from A cap protects the spark plug. the fuel pump and Keep this clean and dry. secure to one side of the tank.
-
Page 25: Air Filter
AIR FILTER An obstructed air filter restricts the air intake of the engine, increasing the petrol consumption and reducing the engine power as well as the destruction of the spark plug. WARNING An obstructed air filter may allow dirt to enter into the injector blocking it open;... -
Page 26: Accelerator Cable
- Clean the filter in a THROTTLE CABLE filter bath using a soft - Check that the throttle grip turns smoothly brush. - Check that the throttle grip has 2-3 mm of play. - If the play is incorrect, loosen the locknut on the upper end of the throttle cable, and turn the adjuster to obtain the correct amount of play. -
Page 27: Clutch
CLUTCH THE EXHAUST SYSTEM Proper clutch lever play is 2-3 mm. Play increases with the clutch The exhaust and the silencer reduce noise and carry the gasses wear and thus requires adjustment. away from the driver. When there is too much play, first try to adjust the level of the clutch If the exhaust is damaged, rusted, dented or split then change it. -
Page 28: Chain Guide
Changing the silencer packing WARNING - Remove the cover rivets (A). A chain that breaks or jumps off the sprockets could snag on the - Extract the silencer cover (B). engine sprocket or lock the rear wheel, severely damaging the - Pull out the inner silencer. -
Page 29: Tension Adjustment
NOTE In addition to checking the slack, rotate the rear wheel to inspect Wheel alignment can also be checked using the straightedge the drive chain and sprockets for damaged rollers, loose pins and links, unevenly or excessively worn and damaged teeth. or string method. - Page 30 NOTE Chain guide slide For maximum resistance and safety, a genuine part must be used for replacement. Visually inspect the upper and lower part of the chain slider on the To minimize any chance of the master link coming apart, the swing arm.
-
Page 31: Handlebars
Apply oil to the side of the links so that it will penetrate better. Wipe Tighten the bolts securely; first the forward bolts then the rear, to a off any excess oil. torque of 25 Nm. If the handlebar is correctly installed, there will be a minimal gap at the front and rear of the clamp after tightening (A). - Page 32 Front brake lever Adjust brake lever to a comfortable position. To adjust, loosen the nut under the rubber protection (B). Tighten after adjustment. Ensure that the brake responds correctly. (A). Brake pedal. (B). 10 mm of play. (C). Adjustment bolt. (D).
-
Page 33: Steering
If the thickness of either pad is less than 1 mm, replace both pads in the calliper as a set. Pad replacement should be done by an authorized GAS GAS dealer. STEERING The steering should always be kept adjusted so that the handlebar... -
Page 34: Steering Lock
To check the steering adjustment, lift the bike off the ground using - Install the upper suspension plate (D). a stand underneath the chassis. Push the handlebar lightly to either - Tighten the steering stem nut (B), the washers and bolts on the side;... -
Page 35: Front Forks
CAUTION - Using a stand underneath the chassis, stabilized the bike. Never leave the key in the lock. If the steering is turned to the left - Put something under the engine so that the front wheel does not with the key in the lock then this will be severely damaged. touch the ground. - Page 36 Adjust the return to the standard measures (rotating anti-clockwise, Standard oil level 6 positions). Marzocchi: 110 mm CAUTION WP: 120 mm The front fork left and right tubes must be at the same level and aligned with the plate. Adjusting the compression - To adjust the compression, rotate the adjustment control on the upper part of the front forks by hand.
- Page 37 (1). Spring. (2). Counter nut. (3). Suspension cap. (4). Cap spanner. (5). Counter nut spanner. Suspension rod spring Different springs can be used depending on the weight of the driver (A). Hydraulic rod and the track conditions. - Hard springs make the forks harder and the rebound faster. - Light springs make the forks softer and the rebound slower.
-
Page 38: Rear Suspension
Extension adjustment To adjust this, rotate the control on the rear of the shock by hand until noting a click. There is a possibility of 60 “Clicks” in total. The standard rebound is at : 25 “Clicks”. (Anti-clockwise from the completely closed position). (1). - Page 39 Suspension spring The standard spring is a 4.0. The length of the preloaded spring with the shock in rest position is 258 mm. (A). Nut (B). Spring. (C). Counter nut. (A). Compression adjustment. Spring adjustment - Remove the seat and the side covers. - Loosen the bolt of the air filter conduit clamp.
-
Page 40: Wheels
WARNING Improper removal of the spring from the rear shock absorber body may cause the spring and associated parts to be ejected at high velocity. Always wear eye and face protection. Removal and installation of spring should be performed by an official distributor. WHEELS Tyre (A). -
Page 41: Cleaning
Cleaning 3- After cleaning - Remove the plastic bags and clean the air filter intake. 1- Preparation for cleaning - Lubricate the locations listed in the lubrication section. - Start the engine and let it heat for 5 minutes. Before cleaning the motorcycle must be prepared so that water does - Check the brakes before driving the bike. -
Page 42: Tighten Bolts And Nuts
Tighten bolts and nuts Every day before using the bike, rapidly ensure that all bolts and nuts are tightened. Also make certain that all of the other fastenings are in place and in good condition. 20 21 22 28 27 29 1- Front and rear wheels 10- Front axle bolt 18- Rear axle bolt... -
Page 43: Tightening Torque Table
TIGHTENING TORQUE TABLE Tighten all of the bolts and nuts using the correct spanners. If not correctly tightened then motorcycle damage or even an accident could occur. PART NAME Engine drain plug Kick pedal bolt Kick pedal nut Shift pedal bolt Spark plug Water pump cover drain plug Calliper mounting bolts... -
Page 44: Lubrication
LUBRICATION Lubricate the points shown here, with either motor oil or regular grease, periodically or whenever the vehicle is wet, and especially after using a high-pressure spray washer. Before lubricating each part, clean off any rusty spots with rust remover and wipe off any grease, oil, dirt, or grime. -
Page 45: Engine Oil
Chain lubrication The recommended viscosity is SAE 10W-50; if an SAE 10W-50 oil is not possible use an alternative according to the table above. Lubricate the chain after wet terrain or when the chain looks dry. A high viscosity oil rather than low viscosity oil is better because it will Checking the oil level and making the changes periodically are two stay a long time in chain providing lubrication. - Page 46 The oil is pumped from the oil reservoir to the engine when the 4. Wipe the dipstick clean with a rag. engine is running. The engine oil reservoir is located in the top front 5. Keeping the motorcycle upright vertically, put the dip stick back part of the frame.
- Page 47 NOTE WARNING Put used motor oil in an appropriate container for recycling. The engine oil and the exhaust manifold can be very hot and cause burns Wait until the oil and the exhaust manifold are a little cooler. 3. Drain the engine oil by removing the cap (B), keep the WARNING...
- Page 48 Fit a new O-ring when the filter is being replaced. Using a filter with an incorrect design may cause engine malfunction. Use the oil filter with the genuine GAS GAS design or equivalent for your motorcycle. 7. Replace the filter cover and put the screws that secure the cover, but without tightening them too hard (do not exceed the recommended torque).
-
Page 49: Suspension Adjustment
TUNING THE SUSPENSION Front forks No area of machine adjustment is more critical than proper suspension The fork oil level is adjustable. A change in the oil level will not affect tuning; an incorrectly tuned suspension will keep even the best rider the lower part of the stroke, but it will affect the upper part. - Page 50 Changing incorrect adjustments Rear shock absorber symptoms Listed below are some symptoms of improper suspension settings - Too hard and the most adequate means of correcting them. 1. Rigid suspension. . High compression. The proper settings can be achieved by applying the information in .
- Page 51 Experience Front and rear compatibility Beginner: softer spring with more rebound damping. Use this procedure to determine if the suspension is balanced Experienced: Harder spring. reasonably well: Situate the motorcycle so that it is perpendicular to the ground. While standing next to the machine, pull on the front brake and place one foot on the brake firmly.
- Page 52 Front fork doesn’t respond to small potholes in wide turns Adjustments depending on the bottoming of the suspension - Front fork hard: (rear shock). 1. Decrease the compression damping or rebound damping. 2. Reduce the oil level 10 mm. - Bottoms at low speed: Increase spring preload to maximum. 3.
- Page 53 -As a result gears can be changed depending on the terrain on the SPARE PARTS AVAILIBLE day of the race. Ensure to correctly adjust the machine in order to Your Gas Gas dealer will provide any information you may require run the entire race. about spare parts.
-
Page 54: In Competition
DURING COMPETITION (2). Following a day of competition 1. Clean the air filter (1). Check 2. Adjust the chain tension / slack 3. Tighten the bolts of the rear sprocket 1. Tighten the front axle and disks 4. Tighten spokes 2. -
Page 55: Storage
STORAGE GAS GAS MULTIFUNCTION INSTRUCTIONS When the motorcycle is to be stored for any length of time, it should The multi-function display has two buttons, a mode button and a be prepared for storage as follows: reset button for certain functions. - Page 56 Trip distance in Km To program the trip distance in Km or Miles. Once the battery is connected the display indicates that the program is active (metric or imperial). To make the change connect the battery while holding in one of the buttons, the change will appear on the screen. This function 0000 remains completely in memory even though the battery may not be connected.
-
Page 57: Fault Diagnosis
FAULT DIAGNOSIS NOTE This is not an exhaustive list, it is meant simply as a rough guide to assist troubleshooting for some of the more common difficulties. CAUSE SOLUTION FAULT - The fuse for the starter relay is blown. The starter motor does not work - Remove the number plate on the right hand side and the - Battery discharged. - Page 58 FAULT CAUSE SOLUTION Engine rotates but does not start The ECU pin connector, generator or coil - Remove the seat and the fuel tank, clean the pin connector oxidised or in bad condition. and treat it using a contact spray. - Petrol / gas mixture incorrect (Trim - Clean the petrol tank ventilation.
- Page 59 FAULT CAUSE SOLUTION High oil consumption – Correct the engine oil level. Drain oil as necessary from - There is too much engine oil. the engine. - Empty the engine oil and fill with oil of the recommended - The quality or viscosity of the oil is viscosity.
- Page 60 FAULT CAUSE SOLUTION - Replace the down selector mechanism spring. Gears don’t engage - The spring of the selector is broken. - Cylinder change if broken. - Replace the gear drum. - Gear ratchet spring broken. - Replace the ratchet spring of the selector. - Change gear fork.
- Page 61 FAULT CAUSE SOLUTION Shock absorption too hard - Rear shock badly adjusted - Adjust the rear shock. Shock absorption too soft - Front forks low oil. - Add oil to the forks as required. - Front fork oil viscosity too low. - Empty the fork oil and fill with oil of the recommended - Front forks twisted.
- Page 62 FAULT CAUSE SOLUTION Motorcycle pulls to one side - Chassis twisted. - Change the chassis. Go to a specialist workshop. - Steering incorrectly adjusted. - Adjust the steering. Go to a specialist workshop. - Steering shaft bent. - Change steering shaft. Go to a specialist workshop. - Front forks twisted.
-
Page 63: Electrical Schemas
ELECTRIC SCHEMAS Black Br Brown Green Grey Blue Orange Sb Light blue Violet White Yellow... - Page 64 Black Br Brown Green Grey Blue Orange Sb Light blue Violet White Yellow...
-
Page 65: Guarantee Manual
Warranty terms of the manufacturer GASGAS Motos, S.A. The company GAS GAS MOTOS, S.A. (hereafter referred to as “GG”), with this present document guarantees the consumer, the purchaser of a vehicle manufactured by GG, that both the materials and the manufacturing are free of defects in accordance with the highest standards of quality. - Page 66 Obligation of the purchaser GG will have the right to reject any claims under Warranty in the event that: a) The purchaser has failed to submit the vehicle to any of the inspections and/or maintenance work required in the Users’ Manual, or has exceeded the date set for such inspections or maintenance work.
- Page 67 6.- In the case of used motorcycles sold by Gas Gas the Warranty Period will be one year from date of delivery of the goods. And...
- Page 68 Notes Notes...
- Page 69 Notes Notes...
- Page 71 RECOMIENDA EL USO DE ACEITE: RECOMMENDS THE USE OF OIL: RECOMMANDE L’USAGE DE L’HUILE: CONSIGLIA L’USO D’OLIO: FEBRERO / FEBRUARY / FEBRER 2005 C/ UNICEF nº 17 · Poligon Industrial Torremirona · 17190 Salt (Girona) SPAIN · Tel: +34 902 47 62 54 Fax: +34 902 47 61 60 E-mail: officegg @ gasgasmotos.es / partsgg @ gasgasmotos.es...
Need help?
Do you have a question about the FSE 450 and is the answer not in the manual?
Questions and answers
Привет.так сколько же масла заливать в двигатель ,вместе с заменой фильтра ,на мотоцикле gas gas fse 450 2009?
Approximately 1200 ml or the required amount should be added when replacing the oil and filter for a GAS GAS FSE 450 motorcycle.
This answer is automatically generated