Denon AVR-3808CI Owner's Manual
Denon home theater system - av surround receiver user manual
Hide thumbs
Also See for AVR-3808CI:
- Service manual (216 pages) ,
- Control protocol (44 pages) ,
- Owner's manual (22 pages)

Related Manuals for Denon AVR-3808CI


Summary of Contents for Denon AVR-3808CI
- Page 1 AV SURROUND RECEIVER AVR-3808CI Owner’s Manual raphical ser nterface Use this manual in combination with the operating guide displayed on the GUI screen. GUI Menu Operation (vpage 23) GUI Menu Map (vpage 24)
-
Page 2: Safety Instructions
SAFETY PRECAUTIONS CAUTION RISK OF ELECTRIC SHOCK DO NOT OPEN CAUTION: TO REDUCE THE RISK OF ELECTRIC SHOCK, DO NOT REMOVE COVER (OR BACK). NO USER-SERVICEABLE PARTS INSIDE. REFER SERVICING TO QUALIFIED SERVICE PERSONNEL. The lightning flash with arrowhead symbol, within an equilateral triangle, is intended to alert the user to the presence of uninsulated “dangerous voltage”... - Page 3 2. IMPORTANT NOTICE: DO NOT MODIFY THIS PRODUCT This product, when installed as indicated in the instructions contained in this manual, meets FCC requirements. Modification not expressly approved by DENON may void your authority, granted by the FCC, to use the product. 3. NOTE This product has been tested and found to comply with the limits for a Class B digital device, pursuant to Part 15 of the FCC Rules.
-
Page 4: Table Of Contents
Video Cassette Recorder ····························································· 15 CD Recorder / MD Recorder / Tape Deck ····································· 16 Connections to Other Devices ····················································· 16 Components Equipped with a DENON LINK connector ·············· 16 Video Camera / Game Console ···················································· 17 Component with Multi-channel Output connectors ····················· 17 External Power Amplifier ······························································... -
Page 5: Getting Started
Registering Internet Radio Stations as Your Favorites ··················53 Playing Files Stored on a Computer ·············································54 Playing Files Stored on USB Memory Devices ····························54 Operating the AVR-3808CI Using a Browser (Web control) ·········55 Other Operations and Functions Other Operations ··········································································55 Playing Super Audio CDs ·····························································55 Recording on an External Device (REC OUT mode) ·····················56... -
Page 6: Cautions On Handling
Note Wall About the Remote Control Unit In addition to the AVR-3808CI, the included main remote control unit (RC-1068) can also be used to operate the equipment listed below. q DENON system components w Non-DENON system components •... -
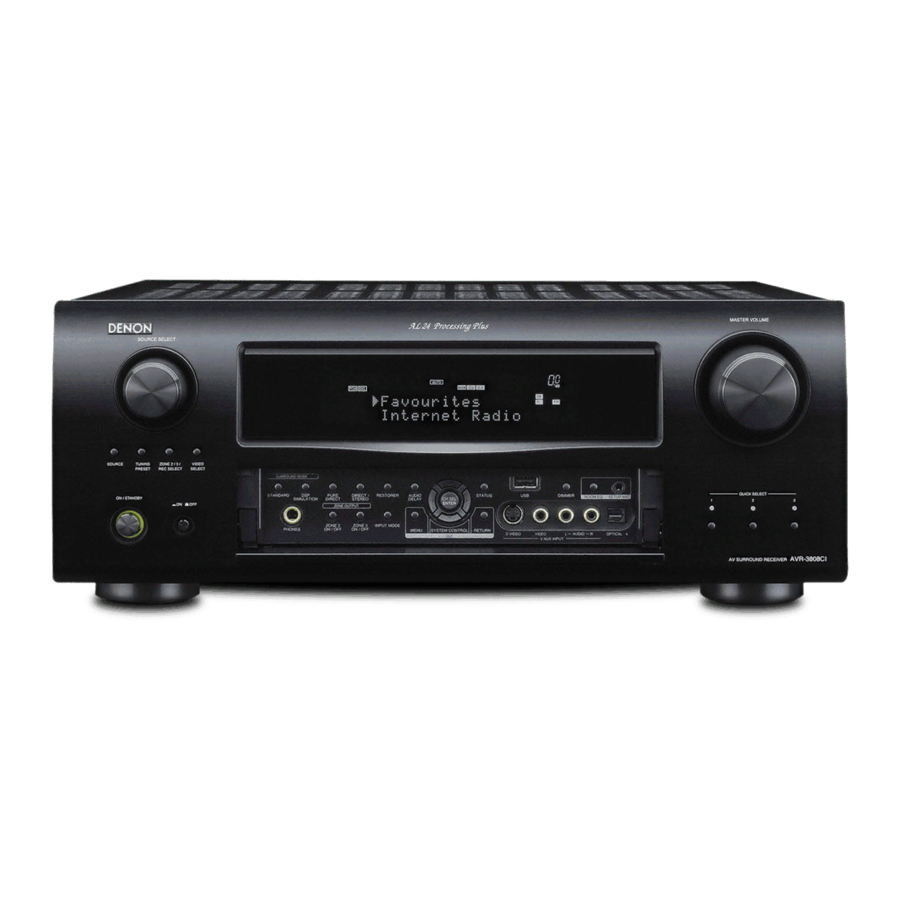
Page 7: Part Names And Functions
PURE DIRECT button ·································· (41) DSP SIMULATION button ·························· (41) STANDARD button ····································· (40) AL24 indicator This lights when AL24 Processing Plus is activated (vpage 74). D.LINK indicator This lights when playing using DENON LINK connections. Input mode indicators HDMI indicator This lights when playing connections. -
Page 8: Rear Panel
USB port ······················································ (18) DOCK CONTROL jack ································· (13) XM connector (SAT TU) ······························ (18) Speaker terminals (SPEAKERS) ·················· (9) DENON LINK connector ····························· (16) AC OUTLETS ··············································· (22) COMPONENT VIDEO connectors ·············· (12) HDMI connectors ·········································(11) VIDEO / S-VIDEO connectors ···················· (12) Analog audio connectors (AUDIO) ············... -
Page 9: Remote Control Unit
Remote Control Unit n Main remote control unit (RC-1068) Signal transmission indicator ··················· (59) Mode select buttons ·································· (59) Quick select / System call buttons ······(57 , 63) Surround mode buttons ······················ (40, 41) System buttons ···································· (60, 61) Audio delay button (A. DL) ························ (44) Tuner system buttons ································... -
Page 10: Connections
Please select the types of connections suited for the equipment you are connecting. With some types of connections, certain settings must be made on the AVR-3808CI. For details, refer to the instructions for the respective connection items below. NOTE •... -
Page 11: Video Conversion Function
Video Conversion Function • This function automatically converts various formats of video signals input to the AVR-3808CI into the format used to output the video signals from the AVR-3808CI to a monitor. • The AVR-3808CI’s video input/output circuitry is compatible with the following four types of video... -
Page 12: Speaker Connections
When using just one surround back speaker, connect it to the left channel (SBL). NOTE By default, the AVR-3808CI’s “Amp Assign” setting is set to “ZONE2” . To use as the surround back speaker for the main zone, change the “Amp Assign” setting (vpage 68, 69). - Page 13 If the protection circuit is activated again even though there are no problems in the ventilation around the set nor in the connections, the set may be damaged. Turn the power off, then contact a DENON service center.
-
Page 14: Connecting Equipment With Hdmi Connectors
• If the monitor does not support “Auto Lipsync Correction” function, this function will not work. 16/20/24 bits DVD-Video 2/5.1ch • When the AVR-3808CI and DVD player are connected using an HDMI cable, also connect the AVR-3808CI 2.8224 MHz SACD and monitor using an HDMI cable. -
Page 15: Connecting The Monitor
Connecting the Monitor • Connect the cables to be used (vpage 8 “Video Conversion Function”). • With HDMI connections, the video and audio signals can be transferred with a single cable. • To output the audio signals to the monitor with HDMI connections, set GUI menu “Manual Setup” –... -
Page 16: Record Player
(vpage 39). iPod ® Use a DENON Control Dock for iPod (ASD-1R, sold separately) to connect the iPod to the AVR-3808CI. For instructions on the Control Dock for iPod settings, refer to the Control Dock for iPod’s operating instructions. Example : iPod •... -
Page 17: Tv/Cable Tuner
TV/CABLE Tuner Connect the cables to be used. TV tuner When using an optical cable for the digital audio connection, make the settings at GUI menu “Source Select” – “TV/CBL ” – “Assign” – “Digital” (vpage 39). Satellite Receiver Connect the cables to be used. DBS / BS tuner •... -
Page 18: Connecting The Recording Components
• When recording to a digital video recorder, it is necessary that the type of cable used with the playback source equipment be the same type that is connected to the AVR-3808CI DVR OUT connector. Example: TV IN → S-Video cable : DVR OUT → S-Video cable TV IN →... -
Page 19: Cd Recorder / Md Recorder / Tape Deck
Components Equipped with a DENON LINK connector Multi-channel playback is possible with DVD-Audio discs, Super Audio CD, etc. DVD player To use with DENON LINK connections, make the settings at GUI menu “Source Select” – “Assign” – “Digital” – “DENON LINK” (vpage 39). -
Page 20: Video Camera / Game Console
Mode” – “Input Mode” – “EXT. IN” (vpage 37). • The video signal can be connected in the same way as a DVD player (vpage 12). • To play copyright-protected discs, connect the AVR-3808CI’s EXT. IN connector with the DVD player’s analog multi-channel output connector. -
Page 21: Usb Port
• Set to the USB port you want to use. • The AVR-3808CI is equipped with two USB ports, one each on the front and rear panels. It is not possible to use the set with USB memory devices connected to both the ports at the same time. Select the USB port you want to use at the “Source Select” – “NET/USB” – “Playback Mode”... -
Page 22: Antenna Terminals
Antenna terminals An F-type FM antenna cable plug can be connected directly. Direction of broadcasting station FM antenna 75 Ω/ohms Coaxial cable FM indoor antenna (supplied) Ground AM loop antenna assembly Connect to the AM antenna terminals. Remove the vinyl tie and take Bend in the reverse direction. -
Page 23: Network Audio
GUI menu “Manual Setup” – “Network Setup” (vpage 32). • With the AVR-3808CI, it is possible to use the DHCP and Auto IP functions to make the network settings automatically. • When using a broadband router (DHCP function), the AVR-3808CI sets the IP address, etc., automatically. -
Page 24: Multi Zone
(variable or fixed level) connectors can be used to play a different program source in ZONE2 or ZONE3 the same time (vpage 68 ~ 71). • When using an S-Video cable or a video cable for connection between the AVR-3808CI and an input device, connect to the video connectors. -
Page 25: Connecting The Power Cord
Connecting the Power Cord Wait until all connections have been completed before connecting the power cord. Power cord (included) • These outlets supply power to external audio devices. • The power supplied from these outlets turns on and off together with the set’s power switch. •... -
Page 26: Gui Menu Operations
GUI Menu Operations With the AVR-3808CI, settings and operations for most functions can be performed by operating while looking at the GUI menus displayed on the monitor screen. The GUI cannot be superimposed when xvYCC signals and component 1080p signal, computer’s resolution (e.g.VGA) are input. -
Page 27: Gui Menu Map
GUI Menu Map Information (vpage 44, 45) n Status • MAIN ZONE • ZONE2/3 n Audio Input Signal n HDMI Information n Auto Surround Mode n Quick Select n Preset Station Parameter (vpage 41 ~ 44) n Audio • Surround Parameters ·... -
Page 28: Preparations
Auto Setup ® • Audyssey MultEQ XT automatically measures the acoustical problems in the listening environment to create the best audio experience for your home theater. • It optimizes a large listening area where one or more listeners are seated. Measurements are performed by placing the calibrated microphone (DM-A405) successively at multiple positions throughout the listening area as shown in Example q. -
Page 29: Auto Setup
(subwoofers, etc.). This is because fi lters add electrical delay to the signal that should be compensated. STEP5: Store The auto setup measurement results are stored in the AVR-3808CI. NOTE Do not turn the power off while the settings are being stored. -
Page 30: Error Messages
Error Messages If the auto setup procedure could not be completed due to speaker installation, the measuring environment, etc., an error message is displayed. If this happens, check the relevant items, be sure to take the necessary measures, then perform the auto setup procedure over again. -
Page 31: Manual Setup
[Selectable items] 2spkrs 1spkr NOTE By default, the AVR-3808CI’s “Amp Assign” setting is set to “ZONE2” . To use as the surround back speaker for the main zone, change the “Amp Assign” setting (vpage 68, 69). Large : Select this for a large speaker with strong bass reproduction. -
Page 32: Channel Level
f Channel Level Adjust channel levels to obtain equal volume from all speakers. Mode Select test tone playback method. Auto Manual [Selectable items] Surround Select surround speaker from which test tone is output. [Selectable items] Start Output test tone. –12dB ~ ~ +12dB [Variable range] Operating from the main remote control unit... -
Page 33: Hdmi Setup
HDMI Setup Make settings for HDMI video/audio output. F Menu tree F Manual Setup HDMI Setup a i/p Scaler s Resolution d Progressive Mode f Aspect g Color Space h RGB Range j Auto Lip Sync k Audio a i/p Scaler Make settings for i/p scaler function. -
Page 34: S 2Ch Direct/Stereo
s 2ch Direct/Stereo Make speaker settings for 2-channel mode playback. Setting To change the settings, select “Custom” . [Selectable items] Basic Custom z: Use the same settings as in “Speaker Setup” . Front Select front speaker size. [Selectable items] Large Small Subwoofer Select subwoofer use. -
Page 35: Network Setup
Network Setup Make settings for LAN. Turn on the AVR-3808CI’s power. To acquire the IP address automatically using the DHCP function To not pass through the proxy server This completes the setting. Recheck the connections and settings if you cannot connect to the Internet (vpage 20). -
Page 36: Zone Setup
Zone Setup Make settings for audio playback in a multi- zone system. F Menu tree F Manual Setup Zone Setup a ZONE2 s ZONE3 a ZONE2 Make settings for audio playback in a ZONE2 system. s ZONE3 Make settings for audio playback in a ZONE3 system. Bass Adjust low frequency range (bass). -
Page 37: Volume Control
s Volume Control Set the main zone volume setting. Volume Limit Make a setting for maximum volume. [Selectable items] –20dB –10dB Power On Level This sets the volume set when the main zone’s power is turned on. [Selectable items] Last –... -
Page 38: Trigger Out 1
(For professional use only.) This function allows a DENON serviceperson or installer to check the AVR-3808CI’s status and make settings via the Internet. NOTE Only use this function if so instructed by a DENON serviceperson or installer. -
Page 39: A3 Firmware Update
⋅ The Firmware Update function is only used for updating the fi rmware (free or for a charge) via the Internet, for example for the purpose of adding functions to the AVR-3808CI in the future. ⋅ Information regarding the Firmware Update function will be announced on the DENON web site each time related plans are defi ned. -
Page 40: Settings Related To Playing Input Sources
To operate the AVR-3808CI using the main remote control unit, set the remote control unit to the AMP mode (vpage 59 “Remote Control Unit Operations”). Settings Related to Playing Input Sources F Menu tree F Source Select TUNER a Play... -
Page 41: Rename
Operating from the main unit or main remote control unit Press the INPUT MODE button on the main unit or the INPUT button on the main remote control unit. Auto HDMI Digital EXT. IN Analog z1: This can be selected for input sources for which the GUI menu “Assign”... -
Page 42: Assign
• With the default settings, the Control Dock for iPod can be used V.AUX connected to the VCR (iPod) connector. • Even if “iPod dock” is set to “Assign” , if the AVR-3808CI is not Optical Optical connected to a Control dock for iPod, the input source can be used as the normal input source. -
Page 43: A1 Antenna Aiming
MULTI CH IN 7 .1 z1 : This is displayed when the input signal is “DTS-ES Matrix 6.1” and the AVR-3808CI’s “AFDM” setting is set to “ON” . z2 : This is displayed when the input signal is “DTS-ES Discrete 6.1”... -
Page 44: Dsp Simulation Playback
DSP Simulation Playback The desired mode according to the program source and viewing situation can be selected from among 10 DENON original surround modes. The surround parameters can be adjusted (vpage 77 , 78) to achieve an even more realistic, powerful sound fi eld. - Page 45 Cinema EQ Soften treble range movie soundtracks understanding. [Selectable items] Compress dynamic range (difference between loud and soft sounds). [Selectable items] Auto Middle High This can be set in the Dolby TrueHD mode. D.COMP Compress dynamic range (difference between loud and soft sounds). Middle High [Selectable items]...
-
Page 46: Tone
Subwoofer Att. Attenuate subwoofer level when using EXT. IN mode. [Selectable items] Set this to “ON” if the subwoofer channel level seems too high when playing Super Audio CD. Subwoofer Turn subwoofer output on and off. [Selectable items] Default Resets the settings to the default values. s Tone Adjust the tonal quality of the sound. -
Page 47: Night Mode
g Night Mode Optimized setting for late-night listening. [Selectable items] Middle High Operating from the main remote control unit Press the NGT button. The “ ” indicator lights when “Low” , “Middle” or “High” is selected. Middle High h Audio Delay Compensate for mismatched timing between video and audio. -
Page 48: Audio Input Signal
Audio Input Signal Shows information about audio input signals. F Menu tree F Information Audio Input Signal [Items to be checked] Surround Mode : The currently set surround mode is displayed. Signal : The input signal type is displayed. : The input signal’s sampling... -
Page 49: Playback
<ON/STANDBY> [POWER ON]. Press The power indicator fl ashes green and the power turns on. To operate the AVR-3808CI using the main remote control unit, set the remote control unit to the AMP mode (vpage 59 “Remote Control Unit Operations”). -
Page 50: Listening To Fm/Am Broadcasts
<SOURCE SELECT> <TUNING PRESET> <STATUS> (DEVICE1 mode) (DEVICE2 mode) [A ~ G] [df] [df] [BAND] [MODE] [MEMO] [CHANNEL] [SAT TU] [1 ~ 8] (AMP mode) [TUNER] (AMP mode) [SHIFT] About the button names in these explanations < > : Buttons on the main unit : Buttons on the remote control unit Button name only: Buttons on the main unit and remote control unit... -
Page 51: Listening To Preset Stations
Listening to Preset Stations Operation on the Main Unit <TUNING PRESET> <SOURCE SELECT> Press , then turn to select the preset radio station. Operation on the Main Remote Control Unit [A ~ G] Press to select the memory block. [CHANNEL] [1 ~ 8] Press to select the desired preset... -
Page 52: Checking The Xm Signal Strength And Radio
<SOURCE SELECT> uiop <ON/STANDBY> ENTER <STATUS> [ iPod] (DEVICE2 [8], mode) [9], [6], [7], [1], [2] ENTER [ENTER] [uiop] uiop [SEARCH] [SEARCH] [CHANNEL +/–] [SAT TU] (AMP mode) [iPod] [NUMBER] (AMP mode) (Main remote control unit) [REPEAT] [RANDOM] (Sub remote control unit) About the button names in these explanations <... -
Page 53: Ipod ® Playback
• The title name, artist name and album name can be checked by pressing <STATUS> during playback. • On the AVR-3808CI, folder and fi le names can be displayed as titles. Any characters that cannot be displayed are replaced with “ . -
Page 54: Playing Network Audio Or Usb Memory Devices
Exclusive URL: http://www.radiodenon.com b The radio station database service may be suspended without notice. • The AVR-3808CI’s Internet radio station list is created using a radio station database service (vTuner). This database service provides a list edited and created for the AVR-3808CI. -
Page 55: Basic Operation
• “Server Full” or “Connection Down” is displayed if the station is busy or not broadcasting. • On the AVR-3808CI, folder and fi le names can be displayed as titles. Any characters that cannot be displayed are replaced with “ . -
Page 56: Presetting Internet Radio Stations
[A ~ G] With the input source set to “NET/USB”, press [1 ~ 8] then press The AVR-3808CI automatically connects to the Internet and playback begins. Registering Internet Radio Stations as Your Favorites Favorites are listed at the top of the menu screen, so when a station is registered as a favorite it can be tuned in easily. -
Page 57: Playing Files Stored On A Computer
AC adapter, we recommend using the AC adapter. • It is not possible to connect and use a computer via the AVR-3808CI’s USB port using a USB cable. -
Page 58: Operating The Avr-3808Ci Using A Browser (Web Control)
“Network Information” (vpage 32) Input the AVR-3808CI’s IP address in Internet Explorer. The AVR-3808CI can be operated in the same way as with regular Internet browsing. To use the web control function, set the GUI menu “Manual Setup”– “Network Setup” – “Other” – “Power Saving” setting to “OFF”... -
Page 59: Recording On An External Device (Rec Out Mode)
(OPTICAL/ COAXIAL) are PCM (2-channel) signals. • Digital audio signals input to the DENON LINK or HDMI connectors are not output to the REC OUT connectors, so connect using the OPTICAL or COAXIAL connectors. -
Page 60: Quick Select Function
<STANDARD> <DSP SIMULATION> <POWER> QUICK SELECT QUICK SELECT About the button names in these explanations < > : Buttons on the main unit : Buttons on the remote control unit Button name only: Buttons on the main unit and remote control unit Quick Select Function With this function, the currently playing input source, input mode, surround mode, room EQ settings and volume can... -
Page 61: Resetting The Microprocessor
Resetting the Microprocessor Perform this procedure if the display is abnormal or if operations cannot be performed. When the microprocessor is reset, all the settings are reset to their default values. <POWER> Turn off the power using <POWER> Press while simultaneously pressing <STANDARD>... -
Page 62: Remote Control Unit Operations
: VCR / TAPE DIGITAL TUNER z : TV : Satellite Receiver / Cable TV z The AVR-3808CI cannot be used in the ZONE4 or NET/DTU (DEVICE2) modes. b The mode switches each time [AMP] is pressed. GAMP modeG GZONE2 modeG... - Page 63 Functions of Buttons by Component EL Display [1], [8 9], [6 7], [3], [2], [SOURCE ON], [SOURCE OFF] [MENU] [ENTER] [uiop] [SETUP/ SEARCH] [RETURN] [CH + / SHUFFLE], [CH – / [0 ~ 9, +10] REPEAT] Buttons MODE SELECTOR Device Mode DEVICE 1 Device operated DVD Recorder...
- Page 64 EL Display [1], [8 9], [6 7], [3], [2], [SOURCE ON], [SOURCE OFF] [MENU] [ENTER] [uiop] [SETUP] [DISPLAY] [CH +/–] [0 ~ 9, +10] [TV/VCR] Buttons EL Display [A ~ G], [d f], [BAND], [MODE], [MEMO] [ENTER] [uiop] [SEARCH] [CH +/–] [0 ~ 9] [SHIFT] Buttons...
-
Page 65: Setting The Remote
XM remote ID for “DEVICE2” . Learning Function If your AV devices are of a brand other than DENON or if they cannot be operated with the preset memory function, their remote control signals can be transfered to stored in the AVR-3808CI’s main remote control unit. -
Page 66: System Call Function
Signal transmission indicator AMP] [MODE SELECTOR] [8], [SYSTEM [9], CALL] [6], [POWER [7], [1], [3], [CHANNEL +/–] [NUMBER] [RC SETUP] System Call Function This function lets you register a series of operations at a single button. For example, the amplifier can be turned on, the input source selected, the monitor’s power turned on, the source device’s power turned on and the play mode set all by pressing a single button. -
Page 67: Adjusting The Backlight's Brightness
Adjusting the Backlight’s Brightness The display’s brightness can be adjusted in 5 steps. (Default: Step 3) [RC SETUP] Press and hold in for at least 3 seconds. The signal transmission indicator flashes twice. [CHANNEL +] [CHANNEL –] Press The display gets one step brighter when [+] is pressed. The display gets one step darker when [–] is pressed. -
Page 68: Sub Remote Control Unit Operations
• The sub remote control unit can also be used for multi- zone, so you can use it to control the AVR-3808CI from other rooms. • The operations listed below can be performed with the sub remote control unit. - Page 69 Device operated NET / USB Zone selection ZONE SELECT Zone operation mode selection ZONE OFF Power turned off ( b 1) ZONE ON Power turned on ( b 1) SOURCE SELECT Input source selection ( b 2) CHANNEL + / – Preset channel selection Preset channel memory block SHIFT...
-
Page 70: Switching Zones
Use the tip of a pen to press The multi-zone indicator turns off. Setting the Remote ID When using multiple DENON AV receivers in the same room, make this setting so that no AV receiver other than the desired one operates. -
Page 71: Amp Assign / Multi Zone Connections And Operations
Multi-Zone Settings with the Amp Assign Function The amp assign function lets you assign the amplifiers for the different channels built into the AVR-3808CI to the speaker outputs for the different zones. Select the desired playback environment from among “Setting 1” to “Setting 4” , then set the corresponding “Amp Assign”... - Page 72 Setting 2 : 7.1-channel playback Main zone FL SW 7 .1ch Both A and B can be installed for SR and SL. n Amp Assign mode setting and speakers connected to the various speaker terminals Speaker terminal FRONT SURR-A CENTER Amp Assign mode 7 .1CH SR-A...
-
Page 73: Multi-Zone Settings And Operations With Zone Pre-Out Output
ZONE2 PRE OUT Stereo ZONE2 VIDEO OUT ZONE3 PRE OUT Stereo Main zone (7.1-channel system) ZONE2 Monitor Monitor Power amplifier ZONE2 AVR-3808CI video output Input ZONE2 audio output ZONE3 Remote Power amplifier control unit ZONE3 audio output : Multi-zone video cable : Multi-zone audio cable –... -
Page 74: Multi-Zone Operations
PCM (2-channel) format. • Digital audio signals input from the DENON LINK or HDMI connectors cannot be played in multi-zone. • When certain digital signals are being input, noise may be output from the ZONE2 and ZONE3 audio output connectors. -
Page 75: Other Information
Other Information About Speaker Installation Surround back speakers Sound positioning directly to the rear can be achieved easily by adding a surround back speaker to a 5.1-channel system. In addition, the acoustic image extending between the sides and the rear is narrowed, thus greatly improving the expression of the surround signals for sounds moving from the sides to the back and from the front to the point directly behind the listening position. - Page 76 G As seen from the side G Surround The AVR-3808CI is equipped with a digital signal processing circuit that lets you play program sources in the surround mode to achieve the same sense of presence as in a movie theater.
- Page 77 DENON LINK DENON LINK is a unique digital, balanced transfer type interface developed by DENON. It offers high speed, high quality transfer of digital audio data with low signal loss. It can be used together with DENON DVD players equipped with a special DENON LINK connector using a single cable to enable playback with high sound quality.
- Page 78 HDMI (High-Definition Multimedia Interface) HDMI is a digital interface standard for next generation TVs based on DVI (Digital Visual Interface) standards and optimized for use in consumer equipment. Non-compressed digital video and multi-channel audio signals are transmitted with a single connection. HDMI is also compatible with HDCP (High-bandwidth Digital Contents Protection), a technology for protecting copyrights that encrypts digital video signals in the same was as with DVI.
- Page 79 Surround Mode Mode Room Size Effect Level PURE DIRECT, DIRECT DSD DIRECT DSD MULTI DIRECT MULTI CH DIRECT STEREO EXT. IN MULTI CH IN WIDE SCREEN S (ON, 10) DOLBY PRO LOGIC gx S (Cinema) DOLBY PRO LOGIC g S (Cinema) DTS NEO:6 S (Cinema) DOLBY DIGITAL...
- Page 80 Differences in Surround Mode Names Depending on the Input Signals Button Note Surround Mode ANALOG STANDARD DTS SURROUND DTS ES DSCRT6.1 DTS ES MTRX6.1 DTS SURROUND DTS 96/24 DTS + PLgx CINEMA DTS + PLgx MUSIC DTS + NEO:6 DTS NEO:6 CINEMA DTS NEO:6 MUSIC DOLBY SURROUND DOLBY DIGITAL EX...
- Page 81 Button LINEAR Note Surround Mode ANALOG PCM / DIRECT DIRECT DSD DIRECT DSD MULTI DIRECT MULTI CH DIRECT M DIRECT + PLgx CINEMA M DIRECT + PLgx MUSIC M DIRECT 7 .1 PURE DIRECT PURE DIRECT DSD PURE DIRECT DSD MULTI PURE MULTI CH PURE DIRECT M PURE D + PLgx CINEMA M PURE D + PLgx MUSIC...
- Page 82 About Networks Windows Media Player ver.11 This is a media player distributed free of charge by Microsoft Corporation. It can be used to play playlists created with Windows Media Player ver. 11 as well as files in such formats as WMA, DRM WMA, MP3 and WAV.
- Page 83 Relationship Between Video Signals and Monitor Output n Main zone Input signal Video Convert HDMI COMPONENT S-VIDEO S (1080p) S (480p ~ 720p) S (480i/576i) S (1080p) S (480p ~ 720p) S (480i/576i) S (1080p) S (480p ~ 720p) S (480i/576i) S (1080p) S (480p ~ 720p) S (480i/576i)
- Page 84 SIGNAL IN Video Convert HDMI COMPONENT S-VIDEO S : Signal present A : No signal To display the GUI menu on an HDMI monitor, output with a resolution of 480p/576p. n ZONE2 Input MONITOR OUT S-VIDEO VIDEO VIDEO S (VIDEO) S (S-VIDEO) S (S-VIDEO) S : Signal present...
-
Page 85: Troubleshooting
• Set is damaged. • Turn off the power and contact a DENON service center. Cause Countermeasure • Batteries are worn. • Replace with new batteries. • You are operating outside of the •... - Page 86 • The format of the GUI and TV • Match the format of the GUI and (NTSC or PAL) do not match. • The connections between the • Check the connections. AVR-3808CI and monitor are faulty. • The monitor’s input setting is • Set properly. wrong.
- Page 87 • Connect to the port set at “USB port do not match. Select” . • A USB memory device that • This is not a malfunction. DENON the set cannot recognize is does not guarantee that all USB connected. memory devices will operate or receive power.
- Page 88 GXM Satellite RadioG Symptom Cause ”CHECK • AVR-3808CI’s XM connector and • Check that the connections are ANTENNA” is the XM Mini-Tuner and Home correct. displayed in the Dock is not properly connected. XM mode. ”NO SIGNAL ” is • The signal cannot be received.
- Page 89 Specifications Audio section • Power amplifier Rated output: Front: 130 W + 130 W (8 Ω/ohms, 20 Hz ~ 20 kHz with 0.05 % T.H.D.) 160 W + 160 W (6 Ω/ohms, 1 kHz with 0.7 % T.H.D.) Center: 130 W (8 Ω/ohms, 20 Hz ~ 20 kHz with 0.05 % T.H.D.) 160 W (6 Ω/ohms, 1 kHz with 0.7 % T.H.D.) Surround (A + B): 130 W + 130 W (8 Ω/ohms, 20 Hz ~ 20 kHz with 0.05 % T.H.D.)
- Page 90 81001, 82001, 83001, 84001 Gehua Denon Tuner General Instrument 00476, 00810, 00276, 00003 Gibralter Denon (Analog) 52863, 52795, 52800, 52805 Denon (XM Radio) 52864, 52812, 52813, 52814 GoldStar Hitachi Denon Digital Tuner Hongtian Jiangsu Denon (NET/USB) 62865, 62837, 62838, 62839...
- Page 91 40000, 40032, 40157, 40053, Wards Sanyo 40087, 40179 Yamaha 40490, 40868, 40032, 40036 Sharp Yorx 40000 Sherwood Sonic CD Recorder Sony TaeKwang Denon 40766, 42868 Tandberg 40072 40053, 40420 Teac Sony 40000, 40100, 41364 Technics Teac 40420 Technovox Thomson 40053...
- Page 92 Eurocrypt 00455 Hauppauge EuroLine 01251 Europa 00863 Europhon 00299 Hills Eurosky 00262, 00299 Hirschmann Eurostar 00818 Eutelsat 00713 Hisense Expressvu 00775, 01775 Hitachi Fenner 00713 Homecast Ferguson 00455, 01291, 01743 Hornet Finlandia 00455 Houston Finlux 00455 Flair Mate 00713 Hughes Network 01251, 01413, 01457 Systems Force...
- Page 93 Satstation 01083 Tantec 00455 Schaub Lorenz 01214 Tarbs 01225 Schneider 00710, 01206, 01251 Tatung 00455 00394, 00504, 00863, 01075, TBoston 01659 Schwaiger 01083, 01111, 01317, 01334, Teac 01225, 01227, 01251, 01322 01412, 01457 Tecatel 01200 00299 00262, 00455, 00863, 01099, Sedea Electronique 00125, 01206, 01283, 01626 TechniSat 01100, 01195, 01197, 01322...
- Page 94 Degraff Clarivox 10037, 10070, 10418 Deitron Classic 10030, 10092, 10499 Dell 10009, 10037, 10217, 10218, Denko Clatronic 10264, 10370, 10371, 10714 Denon Clayton 11037 Denver CMS Hightec 10217 Desmet 10047, 10054, 10017, 10060, Colortyme 10178, 10030 Diamant Commercial Solutions 11447, 10047...
- Page 95 Easy Living 11248 Finlux Eaton 10060 Ecco 10773 Firstar 10037 Edison-Minerva 10487 Firstline 10037, 10217, 10218, 10362, Elbe 10610 Elcit 10163 Fisher Electroband 10000 Electrograph 11755 Flint 10154, 10000, 10463, 10150, Electrohome Force 10178, 10030, 10073 Formenti Elekta 10009, 10264 Fortress Elfunk 11037, 11208...
- Page 96 10054, 10093, 10463, 10053, Kyoshu 10030, 10070, 10036, 10218, Kyoto 10371, 10418, 10508, 10606, 10650, 10653, 10683, 10731, L&S Electronic 11253, 11923 Lark Kaige 10009, 10264, 10817 LaSAT 10009, 10037, 10217, 10218, Kaisui Lavis 10455 Kambrook 10217 Leader Kamp 10017, 10180, 10217 Lecson 10001, 10009, 10264, 10374, Legend...
- Page 97 10054, 10000, 10156, 10250, Profex 10009, 10163, 10361 10051, 10236, 10030, 11947, Profi 10009 11946, 11941, 11480, 11310, Panasonic 11291, 11271, 10853, 10650, Profilo 11556 10548, 10508, 10367, 10361, Profitronic 10037 10226, 10208, 10163, 10108, 10037, 10073, 10625, 10634, 10037, 10035 Proline 11037 Panavision...
- Page 98 Strong 11149, 11163 Technics Studio Experience 10843 TechniSat Stylandia 10217 Technisson 10218, 10455, 10487, 10610, Sunkai Technosonic 10865 Sunstar 10009, 10037, 10264, 10371 Technovox Sunwatt 10455 Techview Sunwood 10037 Techwood Superla 10217 Tecnimagen Superscan 10093, 10864, 11944 Teco Supersonic 10009, 10208, 10455, 10805 SuperTech 10009, 10037, 10218, 10556 Tedelex...
- Page 99 Elfunk 11037 DMTech Ferguson 11037 Elfunk Finlux 11556 Emerson Goodmans 10587, 11037, 11900 Hitachi 11960 Ferguson 11982 Funai Jensen 11933 Goodmans 11962 Grandin Lenco 10587 Grundig Logik 11037 Hitachi Luker 11982 Insignia Luxor 11037 Matsui 11037 Maxim 11982 Konka Medion 11900 Logik Mirror...
- Page 100 20162, 20081, 20226 Degraff 20048, 20081, 20042, 20104 20037, 20209, 20278, 20348, Deitron 20278 20352, 20480, 20642, 20742, 21137 Dell 21972 20046 Denon 20081, 20042 20041, 20320 Derwent 20041 Diamant 20037 20209, 20348 Diamond 20348 20184, 20121, 20209, 20002, Digitor...
- Page 101 20048, 20047, 20104, 20043, Nebula Electronics Luxor 20046, 20106, 20315 20037, 20000, 20042, 20067 M Electronic 20037, 20240, 20000, 20038 Neckermann Magnadyne 20081 Nesco 20037, 20240, 20000, 20278, Magnasonic 21278 Neufunk 20035, 20037, 20048, 20039, Newave Magnavox 20081, 20240, 20000, 20226, Nikkai 20618, 20642, 21593, 21781 Magnin...
- Page 102 Daytek Brandt 30503, 30651, 30551 Dayton Broksonic 30695 30672, 30717, 30690, 30699, 30713, 30723, 30730, 30831, Decca Bush 30833, 30884, 31051, 31140, Denon 31483, 31695, 31832 Byd:sign 30872 Denver C-Tech 30798, 31152 Denzel California Audio Labs 30490 Desay Cambridge Audio...
- Page 103 Entivo 30503, 30539 Home Electronics Enzer 30784, 30770, 31228 Home Tech Industries 31224 30821, 31268 Hoyo EuroLine 30675, 30788, 31115, 31233 Humax Fenner 30651 Hyundai 30651, 30695, 30713, 30884, Ferguson 30898, 31695, 31730 Ingelen 30672, 30591, 30741, 30751, Finlux Ingersol 30770, 30783 30651, 30713, 30843, 30869, Initial...
- Page 104 31227 ProVision Classic 31730 Coby 31086 Commax 31321 Relisys Conia 31321 Roadstar CyberHome 31129, 31502 Sampo Cytron 31347 Samsung Denon 30490 ScanMagic Denver 31056 Schneider Digitrex 31056 31730 Sensory Science Durabrand 31502 Sharp E:max 31321 Sony Ellion 31421 Star Clusters...
- Page 105 DVD preset codes / Codes préréglés DVD 32134 (default / défaut) DVD-555 DVD-2910 DVD-755 DVD-2930CI DVD-900 DVD-3800 DVD-910 DVD-3910 DVD-955 DVD-3930CI DVD-1000 DVD-5900 DVD-1200 DVD-5910 DVD-1500 DVD-9000 DVD-1710 DVM-715 DVD-1910 DVM-1800 DVD-1930CI DVM-1805 DVD-2200 DVM-1815 DVD-2800 DVM-2815 DVD-2800g DVM-4800 DVD-2900 [ ] z : Preset codes set upon shipment from the factory.
- Page 108 Denon Brand Company, D&M Holdings Inc. Printed in Japan 00D 511 4649 103...