Denon DN-C680 Operating Instructions Manual
Denon operating instructions cd player dn-c680
Hide thumbs
Also See for DN-C680:
- Operating instructions manual (89 pages) ,
- Service manual (49 pages)
Table of Contents
Advertisement
Advertisement
Table of Contents

Related Manuals for Denon DN-C680


Summary of Contents for Denon DN-C680
- Page 1 CD PLAYER DN-C680 OPERATING INSTRUCTIONS...
- Page 2 Model No. C-680 Serial No. NOTE: This CD player uses the semiconductor laser. To allow you to enjoy music at a stable operation, it is recommended to use this in a room of 5°C (41 °F) - 35°C (95°F). LABELS (for U.S.A.
-
Page 3: Safety Instructions
Read Instructions – All the safety and operating instructions should be read before the applicance is operated. Retain Instructions – The safety and operating instructions should be retained for future reference. Heed Warning – All warnings on the applicance and in the operating instructions should be adhered to. - Page 4 FRONT PANEL REAR PANEL DIMENSIONS DISPLAY WINDOW...
- Page 5 Avoid high temperatures Allow for sufficient heat dispersion when installed on a rack. Handle the power cord carefully. Hold the plug when unplugging the cord. Keep the set free from moisture, water, and dust. Unplug the power cord when not using the set for long periods of time.
-
Page 6: Main Features
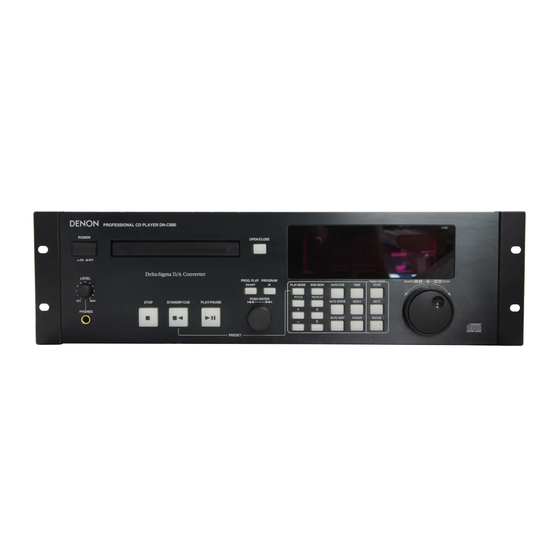
The DN-C680 CD player is a rack mount type CD player designed for use in broadcast stations, for production; etc. 19 inch Rack Mountable (Height 3U) • Large FL Display, Illuminated Rubber Button • Track Search Select knob (Easy track selection) •... -
Page 7: Table Of Contents
CAUTION: • The DN-C680 will work normally when the player unit is mounted with the front panel within 15 degrees of the vertical plane. If the unit is tilted excessively, discs may not load or unload properly. • DECLARATION OF CONFORMITY We declare under our sole responsibility that this product, to which this declaration relates, is in conformity with the following standards: EN60065, EN55013, EN55020, EN60555-2 and EN60555-3. -
Page 8: Part Names And Functions
PART NAMES AND FUNCTIONS (1) Front Panel POWER button • This turns the set on and off. Disc holder • Place discs in this holder. Press the OPEN/CLOSE button to open and close the disc holder. Load discs firmly inside the slot. OPEN/ CLOSE button •... -
Page 9: Rear Panel
AUTO CUE button • Press this button to find the beginning of the playback signals on a track and automatically set the standby mode at that point. (Auto Cue) • The button lights when the auto cue mode is set. •... -
Page 10: Display
Use this to switch the serial remote connector signal between RS232C and RS422A according to the external controller's signal. REMOTE connector This is a parallel remote connector. Use it to control the DN-C680 with dry contact circuit connections. Applicable connector: 25-pin D-sub (male) Connector signal layout: Pin no. -
Page 11: Remote Control Connection
REMOTE CONTROL CONNECTIONS To control the DN-C680 remotely, refer to the example of remote control connections given below. The rating of REMOTE connector pin 22 (TALLY POWER SUPPLY) is +5 V, 80 mA maximum. Avoid currents in excess of the rating. -
Page 12: Basic Operation
BASIC OPERATION... -
Page 13: Starting Playback
(2) Starting Playback (3) Stopping Playback Sleep mode The sleep mode is set if no operation is performed for 30 min- utes in the standby, pause or manual search mode. When in the sleep mode, press the PLAY/PAUSE button to search for the position before the sleep mode was set and start playback. -
Page 14: Handy Operations
HANDY OPERATIONS (1) Starting Playback from the Middle of a Track (Manual Search) • When a track is selected and the PLAY/PAUSE button is pressed, playback starts from the beginning of that track. To start from a different position in the track, use the procedure described below to find the desired position. -
Page 15: Playing A Specific Section Of The Disc (A-B Play)
(3) Playing a Specific Section of the Disc (A-B Play) • Use this function to set the play start and end positions and only play the desired section of the disc. NOTE: The A-B play mode cannot be set unless the A point, B point or both the A and B points are set. -
Page 16: Playing Repeatedly (Repeat)
(4) Playing Repeatedly (Repeat) A-B repeat play... -
Page 17: Inserting Blank Spaces Between Tracks (Auto Space)
(5) Inserting Blank Spaces Between Tracks (Auto Space) • Use this function to insert blank spaces of 4 seconds between tracks during continuous playback. NOTE: When non-consecutive tracks are played (when the search op- eration is performed), a blank space of over 4 seconds may be inserted automatically. -
Page 18: Programmed Playback
PROGRAMMED PLAYBACK • The tracks can be programmed to play in a certain order. • Up to 25 tracks can be programmed. • Programmed playback is performed according to the play mode (single or continuous) and finish mode (stop, next or recue) settings. (2) Changing the Program To exit the program editing mode, press the PROGRAM IN but- ton. -
Page 19: Playing Programs
(3) Playing Programs... -
Page 20: Presetting Programs
(4) Presetting Programs • Programs can be stored in the preset memory. When a disc for which a program is preset is loaded, the programmed playback mode is set automatically. • Programs can be stored for up to three discs. -
Page 21: Preset Functions And Operations
PRESET FUNCTIONS AND OPERATIONS (1) List of Preset Functions • Functions can be preset using the buttons on the front panel. These presettings are stored in a permanent memory, so they are not cleared even when the power is turned off. •... -
Page 22: Presetting Procedure
(2) Presetting Procedure • Functions can be preset using the buttons on the front panel. • The presettings can also be set using serial remote signals (RS232C/RS422A1. • Make the presettings with no disc loaded, in the stop or standby mode. -
Page 23: Detailed Description Of Preset Functions
(3) Detailed Description of Preset Functions (* = initial setting) "Preset Type (*1" (Three different sets (types) of presettings can be made and used for different purposes.) Preset Type1 Set to preset type 1. Preset Type2 Set to preset type 2. Preset Type3 Set to preset type 3. - Page 24 16) "Delay OFF (***ms)" Delay OFF (***ms) Set the time for delayed start after the play start operation. (*OFF/100m/200m/300m) 17) "PIayLock ON (OFF)" PIayLock ON Inhibit all operations other than the PLAY/ PAUSE, TIME and PLAY MODE buttons during playback. * PIayLock OFF Enable all functions during playback.
-
Page 25: Before Switching Off The Power
BEFORE SWITCHING OFF THE POWER When you have finished using the CD player, before switching off the power be sure that the disc holder has been closed with the OPEN/CLOSE button. CAUTION: Do not forcibly close the disc holder when the power is off. It may damage the unit when it is transported. -
Page 26: Troubleshooting
............, ..See Page 25 CD Player Standard Compact Discs (12 cm, 8 cm/5", 3")