Table of Contents
Advertisement
Advertisement
Table of Contents

Related Manuals for Cricket CROSSWAVE EC5805

Summary of Contents for Cricket CROSSWAVE EC5805
- Page 1 CRICKET CROSSWAVE™...
- Page 2 Thank You for Choosing the CRICKET CROSSWAVE™ • T he supported functions and actual appearance depend on the product you purchased. The following pictures are provided for illustration only. For details about your product selection, consult your service provider. • T his guide briefly describes the functions of the CRICKET CROSSWAVE™. For details about how to set the management parameters, refer to Help on the web management page. • I f the CRICKET CROSSWAVE™ is placed in an environment with poor ventilation, it may overheat after extended use. When it overheats, it will switch off or disconnect from the network automatically to protect itself. If this happens, place the CRICKET CROSSWAVE™ in a well-ventilated location, then restart the CRICKET CROSSWAVE™. • S upported web browser: Windows Internet Explorer 6.0, 7.0, or 8.0; Firefox 3.0 or later; Safari 3.0 or later; Chrome 2.0 or later.
-
Page 3: Getting To Know Your
Getting to Know Your CRICKET CROSSWAVE™ Packaging List The package should contain the following items. If any of the items are missing or damaged, contact your local dealer immediately. Main Unit Data Cable Battery Charger Quick Start Guide Warranty Exchange Safety Information Program Document To purchase optional accessories, contact Cricket. -
Page 4: Application Scenarios
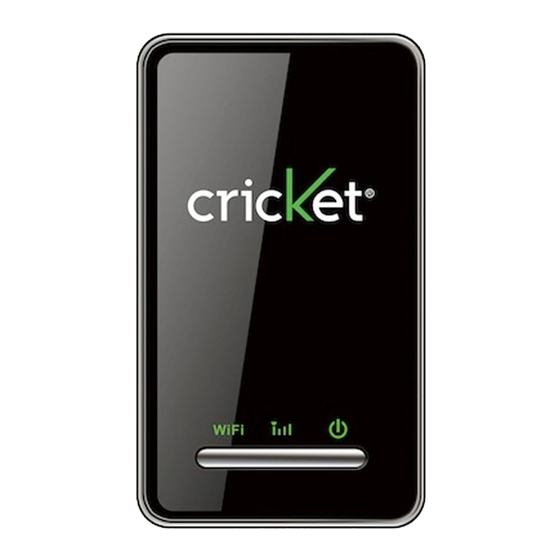
Application Scenarios A Wi-Fi device or computer can be connected to the Internet through the CRICKET CROSSWAVE™. The actual connection procedure depends on the operating system of the Wi-Fi device or computer. You can perform the connection operations as prompted. Game machine Scenario 1: Multi-device Smart phone access via Wi-Fi (Maximum 3 Wi-Fi connections at one time). Laptop Scenario 2: One-device access via USB. Game machine Smart phone Scenario 3: Multi-device access via Wi-Fi and USB Laptop at the same time (Maximum 3 Wi-Fi and 1 USB Connections at one time). - Page 5 1 Wi-Fi indicator 2 Wi-Fi button 3 Power button 4 Power indicator 5 Network signal indicator 6 USB connector 7 E xternal antenna interface 8 MicroSD card slot 9 Reset button 10 SSID and Wi-Fi key label IndICATOR STATuS WiFi • Off: Wi-Fi is disabled. • C ontinuously on green: Wi-Fi is enabled. Power • B linking red: Battery power level is • C ontinuously on red: low and must be charged immediately.
-
Page 6: Before You Start
Before You Start Installing the Battery Install the battery as shown. Installing the MicroSd Card Install the microSD card as shown. note: • T he microSD card is an optional accessory. You can purchase one yourself or at a Cricket store. • T o remove the microSD card, press in the card gently. The microSD card will pop out for removal. • D o not remove the card while in use. Doing so may damage the card and the CRICKET CROSSWAVE™, and data stored on the card may be lost. -
Page 7: Charging The Battery
Charging the Battery note: • If you have not used the battery for a long time, it must be charged first. • If the power indicator blinks red during the charging, you must wait for the power indicator to blink green, and then use the CRICKET CROSSWAVE™. Method 1: Charging by using the Charger. Caution: Use charger included with the CRICKET CROSSWAVE™. Only use chargers certified and tested with industry standard. Use of an incompatible charger, or one from uncertified or unidentified source may cause the CRICKET CROSSWAVE™ to malfunction, fail, or even cause a fire. Such use voids all warranties, whether expressed or implied, on the product. Method 2: Charging by Connecting to a PC. Connect the CRICKET CROSSWAVE™ to a PC using a compatible data cable. -
Page 8: Accessing The Internet Via Wi-Fi Connection
Accessing the Internet via Wi-Fi Connection Please be reminded that you need to activate the device before you can connect to internet through USB or Wi-Fi. Follow step by step instructions below for activation. Step 1: Power on the CRICKET CROSSWAVE™ Step 2: Establish a Wi-Fi Connection Step 3: Activate the device Step 4: Access the Internet... -
Page 9: Establish A Wi-Fi Connection
1. Power on the CRICKET CROSSWAVE™ Press and hold the power button until the indicators come on. The CRICKET CROSSWAVE™ is powered on. note: Press and hold the power button until the indicators turn off. This indicates that the CRICKET CROSSWAVE™ is powered off. 2. Establish a Wi-Fi Connection a. Establish a Wi-Fi Connection (on a PC). 1. W hen the CRICKET CROSSWAVE™ is powered on, Wi-Fi is enabled by default. (If the CRICKET CROSSWAVE™ is using battery power and has not been accessed for 10 minutes by default, Wi-Fi is disabled. - Page 10 4. S elect the network “CROSSWAVE-xxxx”, and then click . 5. I f the encryption parameter is already set for the CRICKET CROSSWAVE™, the Wireless Network Connection dialog box is displayed and requires you to enter the network key and its confirmation. The SSID and Network key (Wi-Fi key) label is affixed to the back of CRICKET CROSSWAVE™ under battery cover (See Picture for location reference). b. Establish a Wi-Fi Connection (on a MAC). 1. Make sure that the Wi-Fi indicator is continuously on green. 2. If AirPort is off, follow the steps below. • G o to AirPort icon and select Turn AirPort On. • A window of available Wi-Fi signals will be provided. Select the CRICKET CROSSWAVE™ device. • I nput the Wi-Fi KEY located under CRICKET CROSSWAVE™ battery cover as Password.
- Page 11 3. I f AirPort is on, follow the steps below. • G o to AirPort icon and select the CRICKET CROSSWAVE™ device. • I nput the Wi-Fi KEY located under CRICKET CROSSWAVE™ battery cover as Password. • Select OK. 3. Activate the device You can activate the device in either of the following ways: a. T he first time you use the device, you can activate the device on the automatic pop-up window. 1. Start the Internet browser and enter http://192.168.1.1 in the address bar. 2. Click on Activate on the OTA Information window.
- Page 12 3. T he Web Management Page will ask for OTA confirmation. Select OK. 4. O TA activation progress will show and take you through the process. 5. If the activation is successful, you will get confirmation on the activation.
- Page 13 b. If the automatic pop-up window does not appear due to some reason, you can choose Settings > System > OTA Activation to activate the device. 1. Start the Internet browser and enter http://192.168.1.1 in the address bar. 2. Click on on top right hand corner of the web page. 3. Enter User Name and Password. Note: The default user name is cricket. The default password is 0000. 4. Go to Settings > System > OTA Activation. 5. Select Activate to initiate OTA activation. 6. T he Web Management Page will ask for OTA confirmation. Select OK. 7. O TA activation progress will show and take you through the process. If the activation is successful, you will get confirmation on the activation.
- Page 14 4. Access the Internet After device has been successfully activated as above steps, access the Internet in either the On demand or Manual mode. The default mode is On demand. • On demand: If data transmission is required, the CRICKET will connect to the Internet automatically. If there CROSSWAVE™ is no data transmission over a period of time, the CRICKET automatically terminates the Internet connection. CROSSWAVE™ • Manual: Go to http://192.168.1.1. Select Connection tab and click to dial to the network.
- Page 15 Accessing the Internet via uSB Connection Please be reminded that you need to activate the device before you can connect to Internet through USB or Wi-Fi. Follow step by step instructions below for activation. Step 1: Power on the CRICKET CROSSWAVE™ Step 2: Establish uSB Connection Step 3: Install CROSSWAVE Step 4: Activate the device Step 5: Access the Internet...
- Page 16 1. Power on the CRICKET CROSSWAVE™ Press and hold the power button. When the indicators come on, this indicates that the CRICKET CROSSWAVE™ is powered on. note: Press and hold the power button until the indicators turn off. This indicates that the CRICKET CROSSWAVE™ is powered off. 2. Establish uSB Connection a. T urn off Wi-Fi connectivity on the computer when using USB connection. b. C onnect the CRICKET CROSSWAVE™ to computer with USB data cable provided in the kit. Computer will automatically detect the CRICKET CROSSWAVE™ and prompt installation window. 3. Install CROSSWAVE Install CROSSWAVE (Web Management Page) on PC. a. W hen USB is connected, computer will automatically detect the CRICKET CROSSWAVE™ and initiate AutoPlay. b. S elect Run AutoRun.exe.
- Page 17 2. Select next. 3. A ccept license agreement by selecting I Agree. 4. C hoose installation location. Default location is suggested. 5. Select Install to install the CROSSWAVE. 6. C heck Create web setting shortcut to have CROSSWAVE displayed on desktop. 7. S elect Finish for completing installation. 8. D evice would automatically initiate driver installation. Allow some time for the CRICKET CROSSWAVE™ driver to be automatically installed. 9. W hen driver installation is complete, restarting of the computer is required. Please restart your computer to finish the installation process.
- Page 18 b. S elect Cricket Broadband CROSSWAVE Driver to start program installation. c. W elcome to the driver Installer window appears. Then select Continue. d. P ress Continue on Software License Agreement window.
- Page 19 e. Read the license terms. Then select Agree to continue. f. Select Install.
- Page 20 g. F ollow installation process. h. Close summary to complete installation.
-
Page 21: Activate The Device
4. Activate the device You can activate the device in either of the following ways: a. The first time you use the device, you can activate the device on the automatic pop-up window. 1. Select Cricket CROSSWAVE icon on desktop. Default browser would launch. 2. Click on Activate on the OTA Information window. - Page 22 3. T he Web Management Page will ask for OTA confirmation. Select OK. 4. O TA activation progress will show and take you through the process. 5. If the activation is successful, you will get confirmation on the activation.
- Page 23 b. If the automatic pop-up window does not appear due to some reason, you can choose choose Settings > System > OTA Activation to activate the device. 1. Select Cricket CROSSWAVE icon on desktop. Default browser would launch. 2. C lick on on top right hand corner of the web page. 3. Enter User Name and Password. Note: The default user name is cricket. The default password is 0000. 4. Go to Settings > System > OTA Activation. 5. Select Activate to initiate OTA activation. 6. T he Web Management Page will ask for OTA confirmation. Select OK. 7. O TA activation progress will show and take you through the process. If the activation is successful, you will get confirmation on the activation.
-
Page 24: Access The Internet
5. Access the Internet A fter device has been successfully activated as above steps, access the Internet in either the On demand or Manual mode. The default mode is On demand. • On demand: If data transmission is required, the CRICKET CROSSWAVE™ will connect to the Internet automatically. If there is no data transmission over a period of time, the CRICKET CROSSWAVE™ automatically terminates the Internet connection. • Manual: Go to http://192.168.1.1. Select Connection tab and click to dial to the network. -
Page 25: Power Saving Mode
daily use daily use Power Saving Mode If no operation is performed on the CRICKET CROSSWAVE™ for a while, the power indicator slowly blinks green, and all other indicators are off. If the CRICKET CROSSWAVE™ is using battery power and has not been accessed for 10 minutes (by default), it goes into the hibernate state and Wi-Fi is disabled. When the CRICKET CROSSWAVE™ is in the hibernate state, press and hold Wi-Fi button to enable Wi-Fi. Enabling/disabling the Wi-Fi Function When the CRICKET CROSSWAVE™ is powered on, Wi-Fi is enabled by default. Press and hold the Wi-Fi button until the Wi-Fi indicator is continuously on green. This indicates that the Wi-Fi is enabled. note: Press and hold the Wi-Fi button until the Wi-Fi indicator is off. Wi-Fi is now disabled. -
Page 26: Restoring Factory Defaults
Restoring Factory defaults If you forget the changes you made to some parameters, you can choose to restore the factory defaults and reconfigure the CRICKET CROSSWAVE™. To restore the factory defaults, press and hold the RESET button until all the indicators are off. All factory default settings are successfully restored. note: After this operation, all personal configuration settings are deleted and all web-based management settings and parameters are restored to their default values. Tips If you are experiencing trouble using the CRICKET CROSSWAVE™, do the following: • Go to Help on the web management page. • Restart the CRICKET CROSSWAVE™ and repeat the instructions. • Restore the factory defaults and repeat the instructions. • Contact your service provider. - Page 27 Example 1: Wi-Fi Connection Example 1: Wi-Fi Connection on Game Machine (PSP) on Game Machine (PSP) 1. Turn on the PSP WLAN switch. 2. S elect Settings > network Settings. 3. S elect Infrastructure Mode to connect your local Wi-Fi access point. 4. S elect new Connection to specify a mnemonic connection name (such as CRICKET CROSSWAVE™). 5. S elect Scan to detect all networks within range. The access point list is displayed.
- Page 28 Inc. Microsoft, Windows, and Windows logo are trademarks of Microsoft group of companies. Windows® is a registered trademark of Microsoft Corporation in the United States. Mac is a registered trademark of Apple, Inc. © Huawei Technologies Co., Ltd. 2010. All rights reserved. 3034A 5/10...