Table of Contents
Advertisement
Available languages
Available languages
f
12 GALLON
MODEL
NO.
113.177650
OR
16 GALLON
MODEL
NO.
113.177611
Serial
Number
Model and serial num-
bers may be found on
the handle.
You should
record
both model and serial
numbers
in a safe
place for future use.
,_kWARNING:
FOR YOUR
SAFETY,
READ ALL
INSTRUCTIONS
CAREFULLY
SAVETHIS
MANUAL
FOR FUTURE
REFERENCE
J
CRRFT lVlRH°
t2
GALLON
OR
t 6 GALLON
WET/DRY
VAC
• safety
• assembly
• operating
• maintenance
• repair parts
• EspaSol
- pagina 17
Sears, Roebuck and Co., Hoffman
Estates, IL 60179 U.S.A.
Part No. SP6579
Printed in Mexico
Advertisement
Chapters
Table of Contents

Related Manuals for Craftsman 17765 - 5.0 Peak HP Wet/Dry Vac


Summary of Contents for Craftsman 17765 - 5.0 Peak HP Wet/Dry Vac
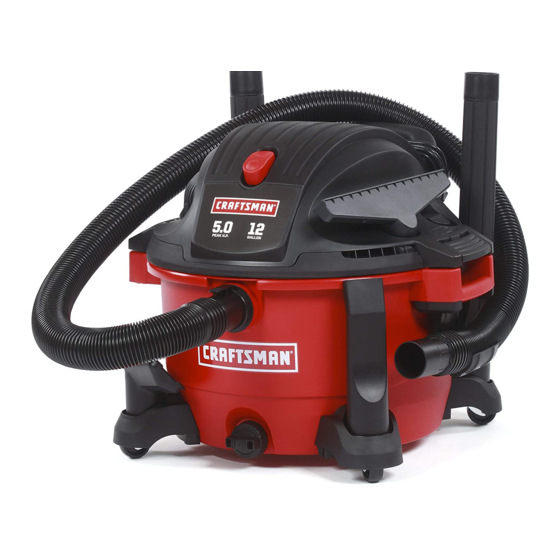
- Page 1 12 GALLON MODEL 113.177650 16 GALLON MODEL 113.177611 Serial Number Model and serial num- bers may be found on CRRFT lVlRH° the handle. You should record both model and serial numbers in a safe place for future use. GALLON t 6 GALLON ,_kWARNING: WET/DRY FOR YOUR...
-
Page 2: Table Of Contents
Sears store, Sears Service Center, or other Craftsman outlet for free repair (or replace= merit if repair proves impossible). This warranty... -
Page 3: Important Safety Instructions
iMPORTANT SAFETY iNSTRUCTiONS To reduce the risk of electric shock, do Safety is a combination of common sense staying alert, and knowing how your not expose to rain or allow liquid to wet/dry vacuum cleaner ("Vac") works. enter motor compartment. Store indoors. - Page 4 • Toreduce t heriskofback injury or Extension Cord Length Gauge A.W.G. falls, d onotliftaVac thatisheavy w ith 0-50 Ft. liquid ordebris. P artially empty t heVac 50-100 Ft. byscooping ordraining l iquid tomake itcomfortable tolift. • Toreduce t heriskofpersonal injury or ,_.
-
Page 5: Introduction
Introduction Read this owner's manual to familiarize This Wet/Dry Vac is intended for house- hold use. It may be used for vacuuming of yourself with the product features and to wet or dry media and may be used as a understand the specific usage of your new blower. -
Page 6: Replacement Filter Assembly
Replacement Filter Assembly ,_ WARNING: To avoid personal ,A WARNING: For your own safety, never connect plug to power source injury or damage to vac be sure to outlet until all assembly steps are keep hands, fingers, or any other for- complete and you have read and eign objects out of the center opening understood the safety and operation... -
Page 7: Caster!Caster Foot Assembly
Caster/Caster Foot Assembly 1. Remove the power assembly from the dust drum and set aside. 2. Turn the dust drum upside down on the floor. 3. Insert the caster feet into the bottom of Stem drum, as shown (4 places). Ball 4. -
Page 8: Accessory And Hose Storage
Wet/Dry Vac Assembly (continued) Cord Wrap Press ;e and The wet/dry vac has a convenient cord Pull wrap area designed on the rear of the vac. Simply, wrap the power cord around the push/pull handle and cord wrap, then snap the connector on the plug to a wrap of the cord. -
Page 9: Operation
If the through the vac will help dry the filter. plug does not fit fully in the outlet, reverse The optional Craftsman HEPA Rated the plug. If it still does not fit, contact a Material Filter, stock number 9-17912 will... -
Page 10: Emptying The Drum
Operation (continued) 3. After using the vac to pick up liquids, Moving the Wet/Dry the filter must be dried to reduce the Should it become necessary to pick the risk of possible mildew and damage to vac up to move it, the handle on the sides the filter. - Page 11 Handle 4. Turn vac on and you are ready to use Hose End your vac as a blower. Slowing Craftsman recommended accessories Port available at Sears retail stores. The Sears Blower Nozzle Stock No. 9-16933 is rec- ommended for blowing debris.
-
Page 12: Maintenance
Maintenance To remove the filter for cleaning or Filter replacement, unscrew the filter nut from ,_ WARNING: To reduce the risk of the filter cage, remove filter plate and lift off filter. injury from accidental starting, unplug power cord before changing or clean- IMPORTANT: To reduce the risk of dam- ing filter. -
Page 13: Cleaning A Wet Filter
Cleaning A Wet Filter 1. Pour 1 gallon of water and 1 teaspoon chlorine bleach into the drum. After filter is removed, run water through 2. Let solution stand for 20 minutes, care- the filter from a hose or spigot. Take care fully swishing every few minutes, mak- that water pressure from the hose is not ing sure to wet all inside surfaces of... -
Page 14: Repair Parts
Repair Parts 12 Gallon Wet/Dry 16 Gallon Wet/Dry Model No. 113.177650 Model No. 113.177611 Always order by Part Number = Not by Key Number A WARNING SERViCiNG OF DOUBLE=INSULATED WET/DRY In a double-insulated Wet/Dry Vac, two systems of insulation are provided instead of grounding. - Page 15 Repair Parts 12 Gallon Wet/Dry 16 Gallon Wet/Dry IViodel No. 113.177650 IViodel No. 113.177611...
- Page 16 Notes...
- Page 17 ",, manual del usuario 12 GALONES NO. DE MODELO 113.177650 16 GALONES NO. DE MODELO 113.177611 NOmero de serie Los nOmerosde modelo y de serie se pueden {RRFTSMRH ° encontrar en el asa. Usted debe anotar los mimeros tanto de modelo como de serie en un lugar ASPIP, A DOP, A PAPA seguro para uso futuro.
- Page 18 Si este producto Cra_manfalladebido a undefecto d ematerial o defabricaci6n d entro delplazo deun anoapadirdelafechadecompra,devu_lvalo a cualquier t ienda Sears, C en_odeServicio Sears u ob'o punto deventa Craftsman p araqueseareparado gratuitamente ( oreemplazado s ilareparaci6n resul- ta imposiNe). Estagarantia seaplicasolamente durante 9 0 diasa partir d e lafechade compra, s i esteproducto se utilizaalguna vezparafinescomersiales odealquiler.
-
Page 19: Instrucciones De Seguridad
INSTRUCCiONES DESEGURiDAD I MPORTANTES La seguridades unacombinaci6n de sentido , No useni almacene laaspiradoracercade com[in, permanecer a lertay saberc6mofunciona materiales peligrosos. laaspiradoraparamojado/seco("la aspiradora"). , Parareducirel riesgodedescargas el6ctricas, no expongalaaspiradoraa la Iluvianideje que Palabrasde sepal de seguridad entrenliquidosen el compartimiento del motor. _, PELIGRO: i ndicaunasituaci6ninminentemente Guardelaaspiradora en un lugarinterior. - Page 20 . Mantenga elpelo, laropa holgada, los dedos y contactocon liquido.Paramantenerlap6rdida todas las partes del cuerpo alejados de las aber- al minimo, utilicelatablaqueaparece a conti- turas yde las piezas m6viles. nuaci6nparaseleccionar e l cord6nde extensi6n . Para reducir elriesgo de caidas, tenga cuidado con eltamaiio de cableminimo.
-
Page 21: Desempaquetado Y Comprobaci6N Del Contenidode La Caja De Cart6N
/ntroducci6n Estaaspiradora para mojado/seco est,. disei_ada Leaeste manualdel operadorparafamiliarizarse solamenteparauso dom_stico.Sepuedeutilizar con lascaracteristicas delproducto y paraentender para recogermaterialesmojadoso secosy se la utilizaci6nespecificade su nuevaaspiradora. puedeusarcomo soplador. Desempaquetadoy comprobaci6n del contenido de la caja de cart6n Saque todo el contenido de la caja de cart6n. Aseg[irese de que no falte ning[in articulo utilizando la lista del contenido de la caja. - Page 22 uesto Ensamblaje de/filtro de re AI)VERTENCIA: Paraevitarlesiones ,_ ADVERTENCIA: Parasu propiaseguridad, no conectenuncael enchufea un tomacorriente corporaleso daiios a la aspiradora,asegOrese d e ] de la fuentede energiahastaque sehayan mantenerlas manos,los dedoso cualquierotro ] completadotodos los pasosde ensamblaje y objetoextra_ofuerade la aberturacentral ustedhayaleidoy entendidolasinstruccionesde cuandoensambleel soplador.
-
Page 23: Ensamblaje De Las Ruedecillas/Patas Para Ruedecilla
Ensamb/ajede las ruedecillas/pataspareruedecilla-- 1. Quiteel ensamblaje del motor deltambor para polvo y p6ngaloa un lado. 2. Pongaeltambor parapolvo en posici6n invertidasobreel piso. 3. Introduzca laspataspararuedecilla en la partein- V;_stagede la ruedecilla feriordeltambor,tal comosemuestra(4 lugares). 4. Ejerza presiOnsobrela patapararuedecillahasta quela pataest6 al ras con laparteinferiordel tambor parapolvo. -
Page 24: Almacenamientode Los Accesorios Y La Manguera
Ensamb/ajede la aspiradom (continuaci6n) EnroJJadordeJ cord6n Bet6.de el bot6n Optima La aspiradora paramojado/seco tieneunaconve- liheracibn Y tire dela niente_.rea de enrolladordel cord6ndise_ada en su partetrasera.Simplemente e nrolleel cord6nde energia alrededor delasade empuje!tracci6n y del enrolladordelcord6n,y luegoacoplea presi6nel conectorubicadoenel enchufea unavueltadel cord6n.Unavezhechoesto,el cord6nestar_. -
Page 25: Funcionamiento
Funcionamiento ,_ ADVERTENCiA Para reducirel riesgo de incendioso explosi6n,no hagafuncionar esta aspiradoraen 6,reas en las que hayagasesinflamables,o vaporesinflamableso polvo explosivoen el aire. Entre los gasesy vaporesinflamablesse incluye, pero sin limitarse a ellos, liquidos de encendedor, l impiadores a base de disolventes,pinturasa basede aceite,gasolina,alcohol o rociadoresaerosoles.Entre los polvos explosivosse incluye, pero sin limitarse a ellos, el carb6n,magnesio,aluminio, polvo de granoso )61vora.Norecoja con laaspiradorapolvo explosivo,liquidos inflamableso combustibles,ni cenizas calientes.No useesta aspiradoracomo rociador.A fin de reducirlos peligros para la salud debidos a... -
Page 26: Transportede La Aspiradora
Funcionamiento (continuaci6n) 3. Despu6sde utilizarla aspiradora para recoger Transportede la aspiradora para liquidos,se debesecarel filtro paraevitaruna mojado/seco posibleformaci6nde mohoy posiblesdaiios al En caso de que seanecesariolevantarla filtro. aspiradoraparatrasladarla,las asas ubicadasen 4. Cuandoel liquidocontenidoenel tambor de la los lados deltambor para polvo se utilizan para aspiradora alcanceun nivelpredeterminado, el levantarlaaspiradora. - Page 27 4.Encienda laaspiradora yestar_, listo para utilizarla como soplador. Los a ccesorios Craftsman recomendados pueden conseguir en las tiendas minoristas Sears. Se recomienda laboquilla de soplador Sears, ntimero de existencia...
-
Page 28: Mantenimiento
Mantenimiento Filtro Rernoci6n del filtro Paraquitarel filtro con el fin de limpiarlo o reemplazarlo, q uitelatuercadel filtro deltornillo ubicadoen lajauladel filtro, quitela placadel filtro lesionespor causade un arranqueaccidental, y levante el filtro. desenchufe el cord6n de energiaantesde cam- ADVERTENCIA: Parareducirel riesgo de biar o limpiar elfiltro. -
Page 29: Instalaci6N
Para desinfectarel tambor: Lirnpiezade un fiitro rnojado 1. Eche1 gal6n de aguay 1 cucharaditade Despu6sde quitar el filtro, haga pasaragua a blanqueadorde cloro en el tambor. trav6s de 61usandouna manguerao desdeuna 2. Dejeque lasoluci6n reposedurante 20 espita.Tengacuidado de que la presi6ndel agua procedentede la manguerano sea tan fuerte minutos y ag[telacuidadosamente cadapocos como para daiiar el filtro. -
Page 30: Almacenamiento
Piezasde repuesto Aspiradora para rnojado/seco De 12 galones De 15 galones N_rnerode rnodelo113.177650 N_mero de rnodelo113.177611 Pida siempre pot n_mero de pieza=no pot n_mero de cJave ,_ ADVERTENCIA SERViCIO DEAJUSTES Y REPARACiONES DEUNAASPiRADORA CON AiSLAMiENTO D OBLE En una aspiradora para mojado/seco con aislamiento doble se proporcionan dos sistemas de aislamiento en vez de conexiOna tierra. - Page 31 Piezasde repuesto Aspiradorapara mojado/seco De 12 galones De 18 galones N_mero de modelo 113.177650 N_mero de modelo 113.177611...
- Page 32 Your Home For repair - in your home - of all major brand appliances, lawn and garden equipment, or heating and cooling systems, no matter who made it, no matter who sold it! For the replacement parts, accessories and owner's manuals that you need to do-it-yourself. For Sears professional installation of home appliances and items like garage door openers and water heaters.