Table of Contents
Advertisement
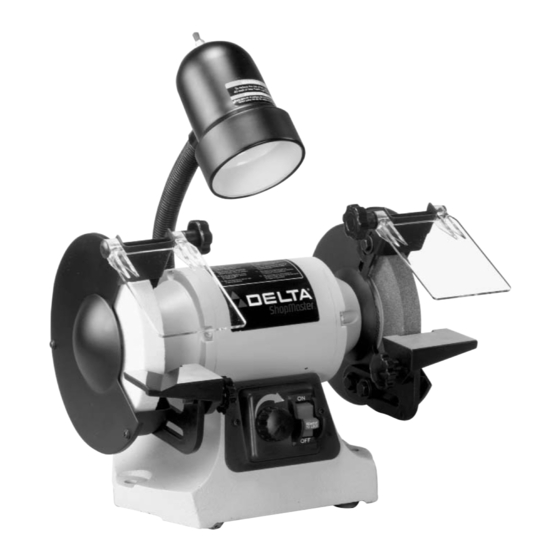
6" Variable Speed
Grinder / Sharpener
(Model GR250)
PART NO. 905595 - 05-03-02
Copyright © 2002 Delta Machinery
To learn more about DELTA MACHINERY
ESPAÑOL: PÁGINA 13
visit our website at: www.deltamachinery.com.
For Parts, Service, Warranty or other Assistance,
1-800-223-7278 (
1-800-463-3582).
please call
In Canada call
Advertisement
Table of Contents

Related Manuals for Delta SHOPMASTER GR250


Summary of Contents for Delta SHOPMASTER GR250
- Page 1 6" Variable Speed Grinder / Sharpener (Model GR250) PART NO. 905595 - 05-03-02 Copyright © 2002 Delta Machinery To learn more about DELTA MACHINERY ESPAÑOL: PÁGINA 13 visit our website at: www.deltamachinery.com. For Parts, Service, Warranty or other Assistance, 1-800-223-7278 ( 1-800-463-3582).
-
Page 2: General Safety Rules
If you have any questions relative to a particular application, DO NOT use the machine until you have first contacted Delta to determine if it can or should be performed on the product. -
Page 3: Additional Safety Rules For Grinders
12. STAND TO ONE SIDE before turning the machine “ON”. 13. NEVER GRIND ON A COLD GRINDING WHEEL. Run the grinder at idle speed for one full minute before applying the workpiece. 14. NEVER START THE MACHINE with the workpiece against the grinding wheel. -
Page 4: Motor Specifications
A separate electrical circuit should be used for your machines. This circuit should not be less than #12 wire and should be protected with a 20 Amp time lag fuse. If an extension cord is used, use only 3-wire extension cords which have 3- prong grounding type plugs and matching receptacle which will accept the machine’s plug. -
Page 5: Extension Cords
12-16 OPERATING INSTRUCTIONS FOREWORD The Delta ShopMaster Model GR250 is a 6"Variable Speed Grinder / Sharpener. The Model GR250 comes with a flexible lamp, adjustable tool rests, and two large eye shields for added safety. UNPACKING AND CLEANING Carefully unpack the machine and all loose items from the shipping container(s). Remove the protective coating from all unpainted surfaces. - Page 6 1. Grinder 2. 1/4-20x1/4" hex head screw (2) 3. 5/16-18x5/8" hex head screw (4) 4. Eye shield bolt (2) 5. 5/16-18x3/4" knob (2) 6. Eye shield knob (2) 7. Eye shield spacer (2) 8. 5/16" flat washer (6) 9. 1/4" flat washer (4) GRINDER PARTS Fig.
-
Page 7: Tool Rests
Fig. 5, on the side of the spark guard (A), must be placed in slot (E), before attaching the spark guard (A) to the grinder. The spark guard (A) should be adjusted as close as possible to the grinding wheel so that sparks never strike the operator’s hand. -
Page 8: Locking Switch In The "Off" Position
STOPPING GRINDER The switch (A) Fig. 10, is located on the front of the grinder. To turn the grinder “ON” move the switch up to the “ON” position. To turn the grinder “OFF” move the switch down to the “OFF” position. -
Page 9: Variable Speed Control
It is recommended that only balanced wheels be used with your grinder. The use of balanced wheels adds years to the life of the bearings on the grinder and by eliminating the most common source of vibration, more accurate work is accomplished. ALWAYS maintain a distance of 1/8"... -
Page 10: Changing Grinding Wheels
3. To prevent shaft rotation, place a wedge between the grinding wheel and the tool rest. NOTE: Facing the front of the grinder: to replace the wheel on the left side of the grinder, turn the arbor nut clockwise to loosen;... - Page 11 NOTES...
-
Page 12: Parts, Service Or Warranty Assistance
1-800-223-7278 (In Canada call 1-800-463-3582). Delta will repair or replace, at its expense and at its option, any Delta machine, machine part, or machine accessory which in normal use has proven to be defective in workmanship or material, provided that the customer returns the product prepaid to a Delta factory service center or authorized service station with proof of purchase of the product within two years and provides Delta with reasonable opportunity to verify the alleged defect by inspection.