Kenwood KDC-X396 Instruction Manual
Cd-receiver
Hide thumbs
Also See for KDC-X396:
- Instruction manual (25 pages) ,
- Installation instructions manual (10 pages) ,
- Instruction manual (62 pages)
Table of Contents
Advertisement
Available languages
Available languages
Take the time to read through this instruction manual.
Familiarity with installation and operation procedures will help you obtain the best performance from
your new CD-receiver.
For your records
Record the serial number, found on the back of the unit, in the spaces designated on the warranty card, and in the
space provided below. Refer to the model and serial numbers whenever you call upon your Kenwood dealer for
information or service on the product.
Model KDC-X396/ KDC-352U/ KDC-252U/ KDC-202U/ KDC-MP252U/ KDC-MP152U/ KMR-350U Serial number
US Residents Only
Register your Kenwood product at www.Kenwoodusa.com
© 2011 JVC KENWOOD Corporation
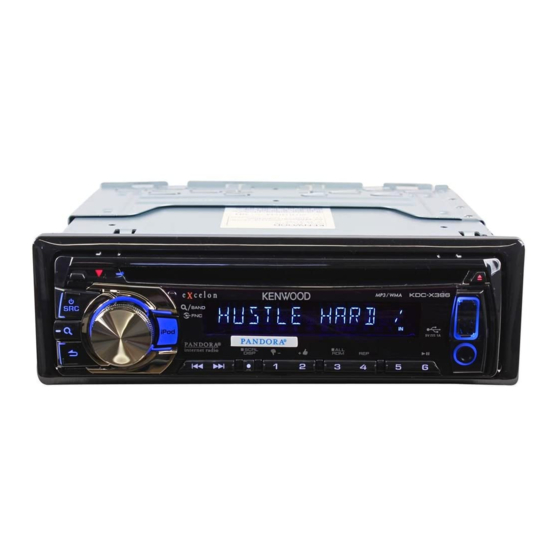
KDC-X396
KDC-352U
KDC-252U
KDC-202U
KDC-MP252U
KDC-MP152U
KMR-350U
CD-RECEIVER
INSTRUCTION MANUAL
AMPLI-TUNER LECTEUR DE CD
MODE D'EMPLOI
REPRODUCTOR DE DISCOS COMPACTOS RECEPTOR DE FM/AM
MANUAL DE INSTRUCCIONES
Register Online
GET0743-001A (KW/K0)
Advertisement
Chapters
Table of Contents

Related Manuals for Kenwood KDC-X396


Summary of Contents for Kenwood KDC-X396
-
Page 1: Instruction Manual
Record the serial number, found on the back of the unit, in the spaces designated on the warranty card, and in the space provided below. Refer to the model and serial numbers whenever you call upon your Kenwood dealer for information or service on the product. -
Page 2: Table Of Contents
CONTENTS Safety Listening to Pandora® internet radio 13 (For Preparation How to attach/detach the faceplate Station Search mode How to reset your unit Using the remote controller (RC-405) How to prepare the remote controller Listening to the other external (RC-405) (except for components Basic operations Function settings... -
Page 3: Safety
When you purchase external components, laser lens. This may cause disc read errors. check with your Kenwood dealer to make In this case, remove the disc and wait for sure that they work with your model and in the moisture to evaporate. -
Page 4: Preparation
Preparation How to attach/detach the faceplate If the effectiveness of the remote controller decreases, replace the battery. Do not expose the faceplate to direct sunlight, excessive heat, or humidity. Also CALIFORNIA, USA ONLY avoid places with too much dust or the This perchlorate WARNING applies only possibility of water splashing. -
Page 5: Basic Operations
Basic operations Display window Remote sensor Do not expose to bright sunlight. Loading slot Ejects the disc Volume knob USB terminal Detaches the faceplate (Not used.) Auxiliary input jack The following indicator lights up when... ST: A stereo broadcast is received (FM). IN: A disc is in the unit. -
Page 6: Buttons Description
The illustration and button names used for explanation in this manual are of (unless mentioned otherwise). Refer to the table below for the difference: iPod iPod 1 ( – ) 1 ( – ) 1 ( –) 2 (+ ) 2 ( + ) 2 ( + ) 3 (ALL RDM) -
Page 7: Getting Started
Remote Main unit General operation controller Changes the display information. Scrolls the display information if pressed and held. SCRL DISP — Enters clock adjustment mode directly (page 8) if pressed and held while in clock display screen. Selects “iPod” source. iPod —... -
Page 8: Adjusting The Clock
This unit supports the PC application “KENWOOD Music Editor Light ver1.1” or later. When you use the audio file with database information added by the “KENWOOD Music Editor Light ver1.1,” you can search a file by title, album or artist name using Music Search. -
Page 9: Listening To The Radio
Listening to the radio Hold for about 2 seconds to memorize the current station. Press briefly to recall memorized station. 1 Press SRC to select “TUNER.” 2 Press repeatedly to select a band (FM1/ FM2/ FM3/ AM). 3 Press 4 / ¢ to search for a station. Adjust [SETTINGS] mode settings While listening to the radio... -
Page 10: Listening To A Disc/ Usb Device/ Ipod
Listening to a disc/ USB device/ iPod Ejects the disc. (“NO DISC” appears and “IN” indicator goes off.) Loading slot Press to select track/file. USB terminal Hold to fast-forwards/reverses. Slide open the cover, then make the following Press to select previous/next folder. connection. -
Page 11: Direct Music Search
In playback mode: • Not available if Random Play is selected. FM+ / AM– : Selects folder. • Not applicable for iPod and Kenwood Music 4 / ¢ ( + ) : Selects track/file. Editor. : Pauses/resumes playback. 1 Press DIRECT to enter Direct Music Search Mode. - Page 12 In this case, “RESUMING” is displayed without displaying – iPhone 4 a folder name, etc. Changing the browse item will – iPhone 3GS display a correct title, etc. – iPhone 3G You cannot operate iPod if “KENWOOD” or “✓” – iPhone displayed on iPod.
-
Page 13: Listening To Pandora® Internet Radio
Listening to Pandora® internet radio (For Preparation : Make sure [ON] is selected for [PANDORA SRC]. (page 8) 1 Open the Pandora® application on USB terminal your device. 2 Connect the device to the USB terminal. Apple iPhone/ iPod touch The source switches, and broadcasting starts (commercially available) automatically from your current station. -
Page 14: Listening To The Other External Components
Listening to the other external components Preparation : Make sure [ON] is selected for [BUILT-IN AUX] / [BUILTIN AUX]. (page 8) Auxiliary input jack 1 Press SRC to select “AUX.” 2 Turn on the external component and start playing. 3 Turn the volume knob to adjust the volume. - Page 15 Item Selectable setting (Preset: *) EQ PRO (for BASS ADJUST BASS CTR FRQ 60/ 80/ 100 */ 200: Selects the center frequency. BASS LEVEL –8 — +8 (Preset: 0): Adjusts the level. BASS Q FACTOR 1.00 */ 1.25/ 1.50/ 2.00: Adjusts the quality factor. BASS EXTEND ON: Turns on the extended bass.
-
Page 16: Troubleshooting
[SETTINGS] Item Selectable setting (Preset: *) AUX NAME SET/ AUX */ DVD/ PORTABLE/ GAME/ VIDEO/ TV: Selects the desired name for the connected component. AUX NAME (Selectable only if “AUX” is selected as the source.) CLOCK CLOCK ADJUST/ CLOCK ADJ: (For details, see page 8.) DISP &... - Page 17 Symptom Remedy/Cause “IN” flashes. The CD player is not operating properly. Reinsert the disc properly. If the condition did not improve, turn off the unit and consult your nearest service center. CD-R/CD-RW cannot be played back and Insert a finalized CD-R/CD-RW (finalize with the component which you used tracks cannot be skipped.
-
Page 18: Installation/Connection
For safety‘s sake, leave Be sure to ground this unit to the car's this work to professionals. chassis again after installation. If you experience problems during installation, consult your Kenwood dealer. -
Page 19: Wiring Connection
P. CONT To the terminal that is grounded when either the telephone rings Brown or during conversation. (To connect the Kenwood navigation (Mute control wire) MUTE system, consult your navigation manual.) -
Page 20: Installing The Unit
Installing the unit Connect the wiring harness to the unit. Other wiring connection has been completed earlier. (page 19) Before attaching, make sure the direction of the escutcheon is correct. Dashboard of your car (Wider hooks on the top side.) Bend the appropriate tabs to hold the mounting sleeve firmly in place. -
Page 21: Specifications
Specifications FM tuner section Audio section Maximum output power: 50 W × 4 Frequency range: Full bandwidth power (at less than 1 % THD): 22 W × 4 200 kHz space: 87.9 MHz — 107.9 MHz Speaker impedance: 4 Ω — 8 Ω Tone action: Bass: 100 Hz ±8 dB 50 kHz space: 87.5 MHz —... - Page 22 TABLE DES MATIERES Sécurité Écoute de la radio internet Pandora® 13 (Pour Préparation Comment attacher/détacher la façade Mode de recherche de station Comment réinitialiser votre appareil Utilisation de la télécommande (RC-405) Comment préparer la télécommande Écoute d’un autre appareil extérieur 14 (RC-405) (sauf pour Fonctionnement basique Réglages des fonctions...
-
Page 23: Sécurité
Cela peut extérieurs, vérifiez auprès de votre être la cause d’une erreur de lecture du revendeur Kenwood que ces accessoires disque. Dans ce cas, retirez le disque et fonctionnent avec votre modèle dans votre attendez que l’humidité... -
Page 24: Préparation
Préparation Comment attacher/détacher la Si la télécommande perd de son efficacité, remplacez la pile. façade N’exposez pas la façade à la lumière directe du soleil, à trop de chaleur ou d’humidité. Attention: Évitez également les endroits trop Ne pas placer la télécommande dans des poussiéreux ou exposés aux éclaboussures. -
Page 25: Fonctionnement Basique
Fonctionnement basique Fenêtre d’affichage Capteur de télécommande Éjection d’un NE l’exposez PAS à la lumière directe du soleil. Fente d’insertion disque Bouton de volume Borne USB Détacher la façade (Non utilisé.) Prise d’entrée auxiliaire L’indicateur suivant s’allume quand... ST: Une émission stéréo est reçue (FM). IN: Un disque se trouve dans l’appareil. - Page 26 Les illustrations et les noms des touches utilisés pour les explications de ce mode d’emploi sont du (sauf mention contraire). Reportez-vous au tableau ci-dessous pour connaître les différences: iPod iPod 1 ( – ) 1 ( – ) 1 ( –) 2 (+ ) 2 ( + ) 2 ( + )
-
Page 27: Pour Commencer
Appareil Télécommande Opérations générales principal Change l’information sur l’affichage. Maintenez la touche pressée pour faire défiler les informations affichées. SCRL DISP — Permet d’accéder directement au mode de réglage de l’horloge (page 8) si la touche est maintenue pressée pendant que l’horloge est affichée. -
Page 28: Réglage De L'horloge
Lorsque vous utilisez des fichiers audio possédant des informations de base de données ajoutées par le programme “KENWOOD Music Editor Light ver1.1”, vous pouvez chercher un fichier par titre, par album ou par nom d’artiste à l’aide de la Recherche de morceau. -
Page 29: Écoute De La Radio
Écoute de la radio Maintenez la touche pressée pendant environ 2 secondes pour mémoriser la station actuelle. Appuyez brièvement pour rappeler la station mémorisée. 1 Appuyez sur SRC pour choisir “TUNER”. 2 Appuyez répétitivement sur pour choisir une bande (FM1/ FM2/ FM3/ AM). 3 Appuyez sur 4 / ¢... -
Page 30: Écoute D'un Disque/ Périphérique Usb/ Ipod
Écoute d’un disque/ périphérique USB/ iPod Éjection d’un disque. (“NO DISC” apparaît et l’indicateur “IN” s’éteint.) Fente d’insertion Appuyez sur cette touche pour Borne USB choisir une plage ou un fichier. Maintenez pressée cette touche Faites glisser le pour faire une avance/retour rapide. couvercle pour l'ouvrir, puis réaliser les Appuyez sur cette touche pour... - Page 31 “ALL RANDOM”. données créée à l’aide du programme Music – Applicable uniquement si “RANDOM Editor de Kenwood. (page 8) OFF” est déjà choisi. À propos du périphérique USB – Pour Cet appareil peut reproduire les fichiers MP3/WMA : Change mémorisés sur un périphérique USB à...
- Page 32 Dans ce cas, “RESUMING” s’affiche sans afficher de nom – iPhone 3GS de dossier, etc. En changeant le paramètre de recherche, – iPhone 3G le titre correct etc. s’affichera. – iPhone Il n’est pas possible d’utiliser iPod lorsque “KENWOOD” ou “✓” est affiché sur l’iPod.
-
Page 33: Écoute De La Radio Internet Pandora
Écoute de la radio internet Pandora® (Pour Préparation : Assurez-vous que [ON] est choisi pour [PANDORA SRC]. (page 8) 1 Ouvre l’application Pandora® sur votre Borne USB appareil. 2 Connectez l’appareil à la prise USB. La source est commutée et la diffusion iPhone/ iPod touch Apple démarre automatiquement sur la station (en vente dans le commerce) -
Page 34: Écoute D'un Autre Appareil Extérieur
Écoute d’un autre appareil extérieur Préparation : Assurez-vous que [ON] est choisi pour [BUILT-IN AUX] / [BUILTIN AUX]. (page 8) Prise d’entrée auxiliaire 1 Appuyez sur SRC pour choisir “AUX”. 2 Mettez l’appareil extérieur sous tension et démarrez la lecture. 3 Tournez le bouton de volume pour régler le volume. - Page 35 Élément Réglage sélectionnable (Préréglage: *) EQ PRO (pour BASS ADJUST BASS CTR FRQ 60/ 80/ 100 */ 200: Choisit la fréquence centrale. BASS LEVEL –8 — +8 (Préréglage: 0): Règle le niveau. BASS Q FACTOR 1.00 */ 1.25/ 1.50/ 2.00: Règle le facteur de qualité. BASS EXTEND ON: Met en service les graves étendus.
-
Page 36: Guide De Dépannage
[SETTINGS] Élément Réglage sélectionnable (Préréglage: *) AUX NAME SET/ AUX */ DVD/ PORTABLE/ GAME/ VIDEO/ TV: Choisit le nom souhaité pour l’appareil connecté. (Peut être choisi uniquement si “AUX” est choisi comme source.) AUX NAME CLOCK CLOCK ADJUST/ CLOCK ADJ: (Pour les détails, référez-vous à la page 8.) DISP &... - Page 37 Symptôme Remède/Cause “IN” clignote. Le lecteur CD ne fonctionne pas correctement. Réinsérez le disque correctement. La condition n’est pas améliorée, mettez l’appareil hors tension et consultez votre centre de service le plus proche. Un CD-R/CD-RW ne peut pas être reproduit Insérez un CD-R/CD-RW finalisé...
-
Page 38: Installation/Raccordement
Pour des raison de sécurité, Assurez-vous de raccorder de nouveau la laissez ce travail à des professionnels. mise à la masse de cet appareil au châssis Si vous rencontrez des problèmes pendant de la voiture après l’installation. l’installation, consultez votre revendeur Kenwood. -
Page 39: Connexions
Bleu clair/Jaune REMOTE INPUT télécommande volant (Fil de télécommande de volant) REMOTE CONT Pour : À la télécommande marine à fil Kenwood Bleu clair/Jaune (accessoire en option) (Fil de télécommande marine) MARINE Pour les dernières informations sur les accessoires marins,... -
Page 40: Installation De L'appareil
Installation de l’appareil Connectez le faisceau de câbles à l’appareil. Les autres connexions ont déjà été réalisées précédemment. (page 19) Avant la fixation, assurez-vous que la direction de l’écusson est correcte. (Crochets plus larges sur le côté Tableau de bord de supérieur.) votre voiture Tordez les languettes... -
Page 41: Caractéristiques Techniques
Caractéristiques techniques Section tuner FM Section audio Puissance de sortie maximum: 50 W × 4 Bande de fréquences: Pour Pleine Puissance de Largeur de Bande (avec une DHT inférieure à 1 %): 22 W × 4 Plage de 200 kHz: 87,9 MHz — 107,9 MHz Impédance d’enceinte: 4 Ω... - Page 42 CONTENIDO Seguridad Para escuchar la radio por Internet Pandora® Preparativos (Para Cómo instalar/desmontar la placa frontal Cómo reposicionar su unidad Modo de búsqueda de emisora Cómo preparar el mando a distancia Empleo del mando a distancia (RC-405) (RC-405) (excepto para Escuchando otros componentes Funciones básicas externos...
-
Page 43: Seguridad
Si conduce con el volumen demasiado alto Si tiene problemas durante la instalación, podría provocar un accidente. consulte con su distribuidor Kenwood. Condensación: Cuando funciona el Cuando compre componentes externos, acondicionador de aire del automóvil verifique antes con su distribuidor... -
Page 44: Preparativos
Preparativos Cómo instalar/desmontar la placa Si la efectividad del mando a distancia disminuye, cambie la batería. frontal No exponga la placa frontal a la luz directa del sol, calor excesivo ni humedad. Además Precaución: deberá evitar sitios con mucho polvo o la No deje el mando a distancia en superficies posibilidad de que se derrame agua sobre calientes como el salpicadero. -
Page 45: Funciones Básicas
Funciones básicas Ventanilla de visualización Sensor remoto DO lo exponga a la luz solar brillante. Ranura de carga Expulsa el disco Rueda de volumen Terminal USB Desmonte la placa frontal (Sin utilizar.) Toma de entrada auxiliar El siguiente indicador se enciende cuando... ST: se recibe una difusión en estéreo (FM). - Page 46 Las ilustraciones y los nombres de los botones utilizados en las explicaciones de este manual son de los modelos (a menos que se indique de otro modo). Remítase a la siguiente tabla para conocer las diferencias: iPod iPod 1 ( – ) 1 ( –...
-
Page 47: Procedimientos Iniciales
Unidad Mando a Operaciones generales principal distancia Cambia la información en pantalla. Si lo pulsa y mantiene pulsado desplaza la información en pantalla. SCRL DISP — Si lo pulsa y mantiene pulsado en la pantalla de visualización del reloj, ingresa directamente en el modo de ajuste del reloj (página 8). -
Page 48: Ajuste Del Reloj
Esta unidad es compatible con la aplicación informática “KENWOOD Music Editor Light ver1.1” o superior. Cuando se utiliza el archivo de audio con información de la base de datos agregada mediante “KENWOOD Music Editor Editor Light ver1.1,” puede buscar un archivo por título, álbum o nombre del artista utilizando la búsqueda de música. -
Page 49: Para Escuchar La Radio
Para escuchar la radio Mantenga pulsado durante aproximadamente 2 segundos para memorizar la emisora actual. Pulse brevemente para recuperar la emisora memorizada. 1 Pulse SRC para seleccionar “TUNER”. 2 Pulse repetidamente para seleccionar una banda (FM1/ FM2/ FM3/ AM). 3 Pulse 4 / ¢ para buscar una emisora. Ajuste de la configuración del modo [SETTINGS] Cuando escucha la radio... -
Page 50: Escucha De Un Disco/ Dispositivo Usb/ Ipod
Escucha de un disco/ dispositivo USB/ iPod Expulsa el disco. (Aparece el mensaje “NO DISC” Ranura de carga (sin disco) y el indicador “IN” se apaga.) Pulse para seleccionar una pista o Terminal USB archivo. Abra la cubierta y, a Mantenga pulsado para adelantar continuación, realice la o retroceder rápidamente. - Page 51 FM+ / AM– : Selecciona una carpeta. aleatoria. 4 / ¢ ( + ) : Selecciona una pista/ • No aplicable a iPod y Kenwood Music Editor. archivo. 1 Pulse DIRECT para ingresar en el modo : Pausa/reanuda la de búsqueda directa de música.
- Page 52 Si se cambia el elemento de – iPhone 3GS exploración se visualizará un título correcto, etc. – iPhone 3G No es posible utilizar el iPod si en éste se visualiza “KENWOOD” – iPhone o “✓”.
-
Page 53: Para Escuchar La Radio Por Internet Pandora
Para escuchar la radio por Internet Pandora® (Para Preparativos : Asegúrese de haber seleccionado [ON] para [PANDORA SRC]. (página 8) 1 Abra la aplicación Pandora® en su Terminal USB dispositivo. 2 Conecte el dispositivo al terminal USB. Apple iPhone/ iPod touch (disponible en los La fuente cambiará... -
Page 54: Escuchando Otros Componentes Externos
Escuchando otros componentes externos Preparativos : Asegúrese de haber seleccionado [ON] para [BUILT-IN AUX] / [BUILTIN AUX]. (página 8) Toma de entrada auxiliar 1 Pulse SRC para seleccionar “AUX”. 2 Encienda el componente externo y comience la reproducción. 3 Gire la rueda de volumen para ajustar el volumen. - Page 55 Opción Ajuste seleccionable (Predefinido: *) EQ PRO (para BASS ADJUST BASS CTR FRQ 60/ 80/ 100 */ 200: Selecciona la frecuencia central. BASS LEVEL –8 — +8 (Predefinido: 0): Ajusta el nivel. BASS Q FACTOR 1.00 */ 1.25/ 1.50/ 2.00: Ajusta el factor de calidad. BASS EXTEND ON: Activa la ampliación de graves.
-
Page 56: Localización De Averías
[SETTINGS] Opción Ajuste seleccionable (Predefinido: *) AUX NAME SET/ AUX */ DVD/ PORTABLE/ GAME/ VIDEO/ TV: Selecciona el nombre deseado para el componente conectado. (Solo puede seleccionarse si se selecciona “AUX” como fuente.) AUX NAME CLOCK CLOCK ADJUST/ CLOCK ADJ: (Para los detalles, consulte la página 8.) DISP &... - Page 57 Síntoma Soluciones/Causas “IN” parpadea. El reproductor de CD no está funcionando apropiadamente. Vuelva a colocar el disco correctamente. Si el problema no mejora, apague la unidad y consulte al centro de servicio más cercano. El CD-R/CD-RW no puede reproducirse ni Inserte un CD-R/CD-RW finalizado (finalícelo con el componente que utilizó...
-
Page 58: Instalación/Conexión
Asegúrese de volver a conectar a masa esta este trabajo. unidad al chasis del automóvil después de Si tiene problemas durante la instalación, la instalación. consulte con su distribuidor Kenwood. -
Page 59: Conexión Del Cableado
P. CONT el vehículo. Al terminal de tierra cuando suena el teléfono o durante la Marrón conversación. (Para conectar el sistema de navegación Kenwood, (Silenciar cable del control) MUTE consulte el manual del sistema de navegación.) Caja de fusibles del vehículo... -
Page 60: Instalación De La Unidad
Instalación de la unidad Conecte el mazo de conductores a la unidad. El resto de la conexión de conductores fue finalizada anteriormente. (página 19) Antes de fijarlo, compruebe si la dirección del escudete es correcta. (Ganchos Salpicadero del más anchos en el lado automóvil. -
Page 61: Especificaciones
Especificaciones Sección del sintonizador de FM Sección de audio Potencia de salida máxima: 50 W × 4 Gama de frecuencias: Para Potencia completa de todo el ancho de banda (a menos del 1 % THD): 22 W × 4 Espacio de 200 kHz: 87,9 MHz — 107,9 MHz Impedancia del altavoz: 4 Ω... - Page 62 FCC WARNING This equipment may generate or use radio frequency energy. Changes or modifications to this equipment may cause harmful interference unless the modifications are expressly approved in the instruction manual. The user could lose the authority to operate this equipment if an unauthorized change or modification is made. FCC NOTE This equipment has been tested and found to comply with the limits for a Class B digital device, pursuant to Part 15 of the FCC Rules.