
Related Manuals for Panasonic KX-TS108W


Summary of Contents for Panasonic KX-TS108W
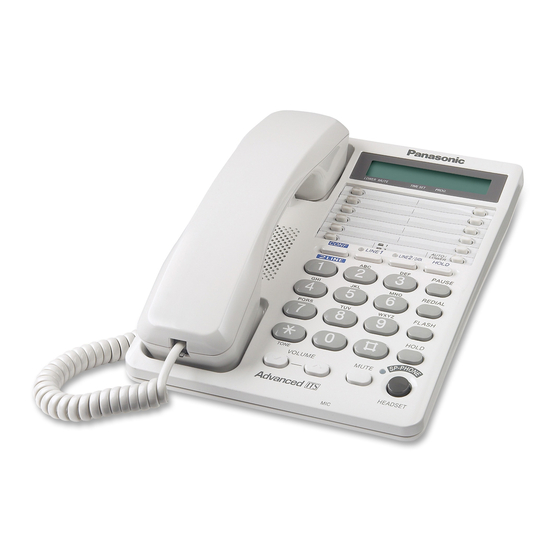
- Page 1 Integrated Telephone System KX-TS108W Model No. Pulse-or-tone dialing capability Operating Instructions PLEASE READ BEFORE USE AND SAVE. Panasonic World Wide Web address: http://www.panasonic.com for customers in the USA or Puerto Rico...
-
Page 2: Before Initial Use
Before Initial Use Please read IMPORTANT SAFETY INSTRUCTIONS on page 34 before use. Read and understand all instructions. Thank you for purchasing your new Panasonic integrated telephone. Attach your purchase receipt here. For your future reference Serial No. Date of purchase... -
Page 3: Accessories
Accessories (included) For extra orders, call 1-800-332-5368. ∑ Handset (p. 8) ∑ Handset Cord (p. 8) Order No. PQJXC0102Z Order No. PQJA212M ∑ Telephone Line Cord (p. 8) ∑ Wall Mounting Adaptor (p. 14) Order No. PQKL10038Y1 For assistance, please call: 1-800-211-PANA(7262) -
Page 4: Table Of Contents
Contents Preparation Location of Controls ....... . . Display ..........17 Settings. - Page 5 Special Features........23 For Call Waiting Service Users ......23 Temporary Tone Dialing (For Rotary or Pulse Service Users) .
-
Page 6: Location Of Controls
Location of Controls (DIAL\LOCK) Button (p. 27) (PROGRAM) Button (p. 10, 18) Display (p. 7) Headset Jack (p. 29) RINGER Selector (p. 13) (TONE) Button (p. 23) One-Touch Auto Dial Buttons (p. 20) (AUTO/LOWER) Button (p. 18, 21) Ringer Indicator (p. 17) (_) (^) VOLUME Buttons (p. -
Page 7: Display
Display (This display shows all of the possible configurations.) : In the standby mode, the display shows the current time. (Ex. 12:00AM) : During a conversation, the call duration is displayed. (Ex. 2 hours, 14 minutes, 30 seconds) (FLASH) was pressed. (PAUSE) was pressed while storing phone numbers. -
Page 8: Settings
≥—Programming (p. 10) Connecting the Handset/Telephone Line Cord After connection, lift the handset to check for a dial tone. Handset Handset Cord Single-Line Telephone Jack (RJ11C) LINE LINE DATA Telephone Line Cord ≥Use only a Panasonic Handset for the KX-TS108W. -
Page 9: Connecting A Communication Device
“ Connecting a Communication Device If you connect a communication device (computer, modem, fax, answering machine, etc.) to the telephone line, you can connect it through this unit using the DATA jack. After connecting the handset and telephone line cord (p. 8), connect the communication device telephone line cord to the DATA jack. -
Page 10: Programming Summary
“ Settings Programming Summary You can program the following functions. The display shows the programming instructions. See the corresponding pages for function details. Make sure that a call is not put on hold. (PROGRAM) Press (MUTE) Press ≥To set the call restriction, press (1). (page 28) ≥To change the flash time, press (2). -
Page 11: Dialing Mode
“ Dialing Mode You can select the dialing mode by programming. If you have touch tone service, set to “Tone”. If rotary or pulse service is used, set to “Pulse”. Your phone comes from the factory set to “Tone”. Make sure that a call is not put on hold. (PROGRAM) Press (MUTE) -
Page 12: Time Adjustment
“ Settings Time Adjustment You can select AM/PM or military time by programming. Make sure that a call is not put on hold. (PROGRAM) Press (MUTE) Press Press Enter the current time (hour and minute) using a 4-digit number. (Ex. To set 9:30, enter “0930”.) Press to select AM, PM or military time. -
Page 13: Lcd Contrast
“ LCD Contrast You can select the LCD contrast level from 1 to 4 by programming. Your phone comes from the factory set to 3. Make sure that a call is not put on hold. (PROGRAM) Press (MUTE) Press Press ≥The current setting is displayed. -
Page 14: Wall Mounting
“ Settings Wall Mounting The unit can be mounted on a wall phone plate. Pull down the handset hook until it locks, so the tab holds the handset. Tuck the telephone line cord inside the wall mounting adaptor, and push it in the direction of the arrow. ≥“UP”... -
Page 15: Making Calls
Making Calls “ You can make a call by simply lifting the handset. To hang up, place the handset on the cradle. (REDIAL) (HOLD) VOLUME (_), (^) (SP-PHONE/HEADSET) and Indicator MIC (Microphone) Using the speakerphone (SP-PHONE/HEADSET) Press ≥The indicator lights. Dial a phone number. - Page 16 “ Making Calls To adjust the handset volume (4 levels) or the speaker volume (8 levels) while talking To increase, press VOLUME . To decrease, press VOLUME Ex. Handset volume level: 2 Ex. Speaker volume level: 3 ≥One level of the handset volume is ≥One level of the speaker volume is shown by “...
-
Page 17: Answering Calls
Answering Calls While a call is being received, the unit rings and the ringer indicator flashes. You can answer it by simply lifting the handset. Ringer Indicator (SP-PHONE/HEADSET) and Indicator Using the speakerphone (SP-PHONE/HEADSET) Press ≥The indicator lights. Talk into the MIC (microphone). (SP-PHONE/HEADSET) To hang up, press ≥The indicator light goes out. -
Page 18: Speed Dialer
Speed Dialer Storing Phone Numbers You can store up to 10 phone numbers in memory. The dialing buttons ) function as memory stations. Do not press any memory stations before storing to prevent misoperation. Make sure that a call is not put on hold. Memory Station Numbers (PROGRAM) (AUTO/LOWER) -
Page 19: Dialing A Stored Number
To erase a stored number (PROGRAM) Press (AUTO/LOWER) Press Press a memory station number ( ) for the phone number to be erased. ≥A long beep sounds. ≥The unit will return to the standby mode. Dialing a Stored Number Lift the handset or press (SP-PHONE/HEADSET) (AUTO/LOWER) Press... -
Page 20: One-Touch Dialer
One-Touch Dialer Storing Phone Numbers You can store up to 20 phone numbers in the one-touch auto dial buttons (10 numbers in UPPER memory locations, 10 numbers in LOWER memory locations). Do not press any one-touch auto dial buttons before storing to prevent misoperation. - Page 21 “ To store in a LOWER memory location (PROGRAM) Press Enter a phone number, up to 22 digits. ≥If you enter a wrong number, press (PROGRAM) and start again from step 1. (AUTO/LOWER) Press Press one of the one-touch auto dial buttons.
-
Page 22: Dialing A Stored Number
“ One-Touch Dialer Dialing a Stored Number From an UPPER memory location: (SP-PHONE/HEADSET) Lift the handset or press Press the required one-touch auto dial button. ≥The stored number is displayed and dialed. From a LOWER memory location: (SP-PHONE/HEADSET) Lift the handset or press (AUTO/LOWER) Press Press the required one-touch auto dial button. -
Page 23: Special Features
Special Features “ (DIAL\LOCK) (PROGRAM) (TONE) (PAUSE) (FLASH) (MUTE) For Call Waiting Service Users (FLASH) Press if you hear a call-waiting tone while talking. ≥The first call is put on hold and you can answer the second call. ” is displayed. ≥“... -
Page 24: How To Use The Pause Button (For Analog Pbx Line/Long Distance Service Users)
“ Special Features How to Use the PAUSE Button (For Analog PBX Line/Long Distance Service Users) (PAUSE) We recommend you press if a pause is required for dialing with a PBX or to access a long distance service. Ex. Line access number (PBX) ¤... -
Page 25: Flash Button
“ FLASH Button (FLASH) Pressing allows you to use special features of your host PBX such as transferring an extension call or accessing special telephone services (optional) such as call waiting. Selecting the flash time The flash time depends on your telephone exchange or host PBX. You can select the following flash times: “80, 90, 100, 110, 200, 250, 300, 400, 600, 700 ms (milliseconds)”. -
Page 26: Pin Code
“ Special Features PIN Code A 4-digit PIN Code (Personal Identification Number) prevents unauthorized persons from using your unit. The PIN Code is required for the dial lock and call restriction to be set or canceled. The factory preset PIN code is “1111”. Make sure that a call is not put on hold. -
Page 27: Dial Lock
“ Dial Lock You can prevent others from making a call to any number except the one pre-programmed in the memory of the EMERGENCY button. Once you locked the dialing buttons, even emergency numbers cannot be dialed. Only incoming calls are accepted until the dial lock is canceled. Before using this feature, we recommend storing an emergency number in the (EMERGENCY) -
Page 28: Call Restriction
“ Special Features Call Restriction You can prevent the unit from dialing phone numbers beginning with specified digit(s) (1 digit or 2 digits). Phone numbers with the restricted leading digits cannot be dialed out. To set the call restriction Make sure that a call is not put on hold. (PROGRAM) Press (MUTE) -
Page 29: Optional Headset
Optional Headset “ Plugging an optional headset into the unit allows a hands-free phone conversation. Please use only a Panasonic KX-TCA87 or KX-TCA90 headset. To order, call the accessories telephone number on page 3. Connecting an Optional Headset to the Unit Connect an optional headset to the headset jack as shown below. -
Page 30: Making/Answering Calls
“ Optional Headset Making/Answering Calls Make sure to install the batteries. VOLUME (_), (^) (SP-PHONE/HEADSET) and Indicator (SP-PHONE/HEADSET) Press to make or answer a call. ≥The SP-PHONE/HEADSET indicator flashes. ≥If you misdial when making a call, press (SP-PHONE/HEADSET) twice and dial again. -
Page 31: Battery Replacement
Battery Replacement If “ ” flashes, the battery power is low. Install new batteries. Replace the batteries within 1 minute to keep the programmed settings. But the programmed time setting will be cleared. Disconnect the telephone line cord from the unit. Press down in the direction of the arrow and remove the cover. -
Page 32: Troubleshooting
Troubleshooting Problem Remedy The unit does not work. ≥Check the settings (p. 8–14). ≥Remove the batteries and reinstall them to reset the unit. The unit does not ring. ≥The RINGER selector is set to OFF. Set to HIGH or LOW (p. 13). You cannot dial. - Page 33 After the batteries are replaced, reprogram if necessary. If you cannot solve your ≥Call our customer call center at problem 1-800-211-PANA(7262). ≥Panasonic’s e-mail address for customer inquiries: consumerproducts@panasonic.com for customers in the USA or Puerto Rico ONLY For assistance, please call: 1-800-211-PANA(7262)
-
Page 34: Important Safety Instructions
Important Safety Instructions When using this unit, basic safety precautions should always be followed to reduce the risk of fire, electric shock, or personal injury. 11. Read and understand all instructions. 12. Follow all warnings and instructions marked on this unit. 13. - Page 35 WARNING: TO PREVENT FIRE OR SHOCK HAZARD, DO NOT EXPOSE THIS PRODUCT TO RAIN OR ANY TYPE OF MOISTURE. CAUTION: To reduce the risk of fire or injury to persons, read and follow these instructions. 11. Use only the battery(ies) specified. 12.
-
Page 36: Fcc And Other Information
FCC and Other Information If requested by the telephone company, inform them as follows: FCC Registration No..... .(found on the bottom of the unit) Ringer Equivalence . - Page 37 ≥If there is any trouble—disconnect the unit from the telephone line and connect a known working phone. If the known working phone operates properly, have your unit repaired by one of the authorized Panasonic Factory Service Centers. If the known working phone does not operate properly, consult your telephone company.
-
Page 38: Index
Index Making Calls....15 Accessories ....3 Mute ..... 24 Answering calls. - Page 39 ≥Send the unit to an authorized servicenter, prepaid and adequately insured. ≥Do not send your unit to the Panasonic Consumer Electronics Company listed on the back cover or to executive or regional sales offices. These locations do not repair consumer products.
- Page 40 If you need assistance with the set-up or operation, please call 1-800-211-PANA(7262) Panasonic Consumer Electronics Company, Division of Panasonic Corporation of North America One Panasonic Way, Secaucus, New Jersey 07094 Panasonic Puerto Rico, Inc. San Gabriel Industrial Park, Ave. 65 de Infantería, Km. 9.5,...