VDO PN 4000 User Manual
Hide thumbs
Also See for PN 4000:
- Quick start manual (10 pages) ,
- Software installation manual (1 page) ,
- Product information (2 pages)
Table of Contents
Advertisement
Advertisement
Table of Contents

Related Manuals for VDO PN 4000


Summary of Contents for VDO PN 4000
- Page 1 PN 4000 PN 6000 User Manual...
-
Page 2: Table Of Contents
Content Content General advice ............54 Safety advice and important information . -
Page 3: General Advice
General advice Safety advice and important information Before you start to install and use this navigation system, please familiarise yourself with its various components and functions. Please also read through the safety instructions carefully to avoid personal injury to yourself and others. Do not expose the navigation system to high temperatures or extreme sunlight. - Page 4 General advice WEEE compliance All electrical and electronic equipment must be disposed of separately from general household waste using the sites designated by local authorities. If a product displays this symbol of a crossed-out rubbish bin, the product is subject to European Directive 2002/96/EC.
-
Page 5: Overview Of Device
Overview of device What's included? Your navigation system package includes the following parts: Navigation system Lithium ion battery Mount with suction cup for attaching the device to the windscreen 12 V DC cable to power the navigation system from within the vehicle (adapter for cigarette lighter) 100/240 V AC adapter You must not use any cables other than the supplied AC adapter and DC cable to... -
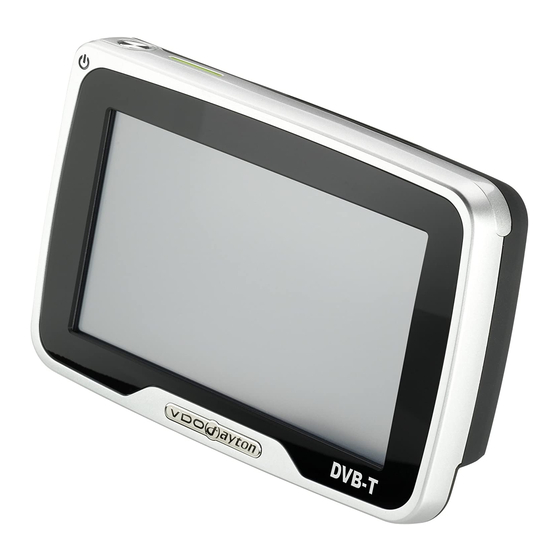
Page 6: Controls And Connection Ports
Controls and connection ports Power button • Briefly press the power button to switch the navigation system to stand-by mode • Briefly press the button a second time to turn the system on again • Press and hold the button for approx. 3 seconds to turn off the navigation system •... - Page 7 Controls and connection ports Back Compartment for lithium ion battery (cover) External GPS port Loudspeaker Grooves for cradle fixation 10 DVB-T aerial port (cover) 11 Foot (extractable) left side right side 12 Slot for SD card 13 Earphone socket Earphones/volume control: High volumes can damage or decrease the sensitivity of your hearing.
- Page 8 Controls and connection ports Bottom side 15 Serial port – only for active cradle (optional) 16 USB port for connection to your PC 17 Reset button: If the navigation system stops responding to your entries, you can reset the system by pressing this button (e.g. with a straightened-out paper clip or a pencil). The data you have saved will NOT be lost! Restart the navigation system by pressing the power button.
- Page 9 Controls and connection ports 24 25 22 Active cradle (optional) 23 Car connectivity cable socket 24 100 V/240 V power adapter (optional) or 12 V cigarette lighter port 25 Line-out/audio 26 TMC aerial port 27 Microphone-in/Bluetooth (optional) TMC active cradle: Features marked with this symbol are only active if you have purchased a TMC active cradle and the navigation device is mounted in this cradle.
-
Page 10: Rcs 5100 Remote Control (Optional)
Steering wheel remote control RCS 5100 remote control (optional) With the remote control placed on your steering wheel, you can easily operate the navi- gation system while driving. Set the mode switch (3) to Navigation. If you press this button briefly the voice message will repeat itself. If you press and hold the button the alternative route planning menu is displayed. -
Page 11: Setup And Installation
The battery life without external power supply is approx. 5 hours for navigation and approx. 2 hours for DVB-T with the PN 4000 (approx. 6 hours for navigation and approx. 4 hours for DVB-T with the PN 6000). The battery life also depends on the display brightness you have se- lected. -
Page 12: Installation
Setup and installation Installation • Before attaching the cradle to the windscreen, clean the relevant windscreen area as well as the cradle's suction pad, and ensure they are free from grease and dust. • Differences between daytime and nighttime temperatures and/or humidity and mois- ture may cause the vacuum under the suction cup to disintegrate. -
Page 13: Configuration
Settings Configuration • After switching on the navigation system, the legal disclaimer screen appears. • Tap OK after reading the screen. • As soon as the system is ready, the Main menu will appear on the screen. Touchscreen: The navigation system is equipped with a touchscreen. -
Page 14: Settings
Settings Settings (page 65) Tap the Settings button to change basic settings e.g. language, volume, bright- ness, unit of measurement (kilometres or miles). A submenu appears with further guidance settings and further navigation system functions. Multimedia (page 85) Tap the Multimedia button to open the multimedia selection. A submenu opens with further Multimedia options and applications such as music playback or DVB-T TV. - Page 15 Settings Auto scale: Activate this function to automatically scale the map view. Scaling is carried out depending on the speed, and when approaching a crossing. Full route display: Activate this option to clearly display the full remaining route with active guidance on the screen. The selected mode is indicated by a green tick.
-
Page 16: Screen Settings
Settings Screen settings Tap this button to make your preferred screen settings. The selected settings are marked and activated with a green tick. Colours: You can select various different colours for the background of the screen display. Tap this button and select a colour scheme from the list. All of the menus on the screen are then displayed in the chosen colour scheme. -
Page 17: Regional Settings
Settings Regional settings Tap this button to display the regional settings options. The settings are split over two submenus. To open the second submenu, tap the bottom right arrow. Language: Select your preferred language for the menu and map display. The user interface is displayed in the selected language. -
Page 18: Address Book
Settings Address book You can save your preferred destinations in your Address book. You can select saved addresses as the guidance destination at any time. This menu selection al- lows you to add new addresses, delete old addresses and import addresses from/ export addresses to the SD card. - Page 19 SD card into your address book. This means you can easily transfer an address book to a different PN 4000/PN 6000. The export function also allows you to archive a copy of your address book on the SD card. When importing or exporting the address book you have to make sure that an SD card is inserted in the card slot.
-
Page 20: Information
Settings Information Tapping the TMC Info button provides you with traffic information, provided TMC is activated and the navigation device is inserted in the MA3000T/MA3000TB cradle. Problems on route: Tap this button to open the list of current traffic problems that the TMC provider has registered for your route. -
Page 21: Change Route - Avoid Traffic Jams
Settings Change route – avoid traffic jams This function effectively helps you to change your planned or current route and avoid other traffic problems. If you are using the optional TMC cradle, you can have a new route calculated that takes into account the traffic information. A corresponding new route is suggested. -
Page 22: Simulation
Settings Simulation This menu allows you to simulate a guidance from any start location to any destination. Please note that a simulation takes the same amount of time as the actual guidance. In this mode, "Simulation" appears on the screen. The simulation can also be used to plan routes and the travel time from A to B in various different condi- tions. -
Page 23: Tmc (Traffic Message Channel)
Settings TMC (Traffic Message Channel) If you are using the optional TMC cradle, you can receive traffic information from the available TMC providers. During guidance, the system regularly accesses the latest TMC traffic information, provided this information is available in the coun- try you are in. -
Page 24: Default Settings
Settings Default settings This button allows you to completely delete data such as the address book or Bluetooth pairing data and, if necessary, reset the factory defaults. These options can be used if you want to pass the navigation system on to someone else with- out your personal settings or addresses. -
Page 25: Bluetooth Settings
Settings Bluetooth settings Bluetooth functions such as handsfree calling and pairing can only be used when the navigation system is placed in the MA3000TB Bluetooth cradle. If the naviga- tion system is not placed in the cradle, the Bluetooth functions are not available and the Bluetooth buttons on the screen are deactivated. - Page 26 Settings As soon as the Bluetooth phone starts to pair, it requests a PIN code. The PIN code for the cradle is 1234. Caution: The cradle can remember up to five paired Bluetooth devices. If you attempt to pair a sixth device, the pairing data of the least used Bluetooth phone is deleted and replaced with the pairing data of the new Bluetooth device.
-
Page 27: Toolbar
Settings Toolbar The toolbar provides a shortcut to different func- tions and information (e.g. mute, volume setting, day/night mode, route changes and information). You can open and close the toolbar by tap- ping the logo in the bottom right of the screen. -
Page 28: Set Route Criteria/Route Profile
Settings Set route criteria/route profile The Toolbar allows you to select the latest Route criteria that you require. You can activate various route options independently of the selected route criteria in order to set the route calculations for your particular needs. A suitable route is calculated based on your preferences. -
Page 29: Navigation
Navigation Navigation The purpose of the navigation system is to guide you from your present location to your desired destination. The navigation system automatically determines your present location using the GPS signal. All you have to do is enter your destination and the guidance process starts with spoken and visual instructions. -
Page 30: Address Book - Selecting An Address
Navigation This button allows you to switch between entering a house number or a crossing. Instead of entering a house number, you can select to enter a crossing, e.g. instead of 15 Oxford Street, London, you can enter the crossroad Oxford Street/Regent Street, London. -
Page 31: Geographical Coordinates Destination
Navigation Geographical coordinates destination Coordinates: Tap this button to display the geo-coordinates of your current location. Tapping the individual coordinates allows you to enter the destination coordinates. When entering geographic coordinates, you must also select the northern or southern hemisphere through the globe in the bottom right of the screen. -
Page 32: Guidance - Map Display
Navigation Guidance – Confirming a destination When you have entered the destination, all ele- ments for the desired destination appear on the Confirmation screen; the system will confirm your selection. The Crosshairs button allows you to vary the destination manually. Tap on the desired location in the map display and "drag"... - Page 33 Navigation Zooming in/out of the map display (zoom function) buttons allow you to adjust the scale of the displayed map. These buttons are not displayed if the Full route display is activated. When Auto scale is activated, the screen reverts back to the original zoom level a set time after a manual zoom change is made with the +/–...
-
Page 34: Multimedia Menu
Multimedia Multimedia menu The navigation system offers the possi- bility of playing MP3 files, viewing JPEG images or playing games. To use these multimedia functions, the MP3 or JPEG files in question must be saved on an SD card. If you have an SD card reader/writer, you can copy your MP3 files and JPG pictures directly from your PC to the SD card. -
Page 35: Music Playback
Multimedia Music playback Tap the Music Player button. On the screen you see the list of all titles in the alphabetical order Current playlist. You can select a title directly by tapping the requested title. • Tap the up arrow (top right) to scroll up through this folder and all other folders. - Page 36 Multimedia Selection menu Tapping the icons on the left in the Menu allows you to perform the following functions: Album Switch to the list and the album selection. Artist Switch to the list and the artist selection. Genre Switch to the list and the genre selection. Playlist Switch to your individual playlist selection.
-
Page 37: Picture Viewer
Multimedia Picture viewer Tap the Picture viewer button. • On the screen, you will see the picture and the number of the picture in the upper bar within the corresponding folder. Tapping the icons on the left in the selection menu allows you to perform the following functions: Slide Start slide show... -
Page 38: Games
Multimedia Games Open the game selection list by tapping this button. Video player Tapping this button allows you to play back WMV files (WMV simple profile) ® that have been synchronised on the navigation system with the Microsoft ® ® Windows Media Player MTP protocol. -
Page 39: Handsfree Calling
Bluetooth Callback/Redial Tap this button to call the last phone number to have been dialled. The redial function may vary depending on your phone. Handsfree calling Accepting an incoming call: When a Bluetooth phone is connected to a Bluetooth cradle a dialogue box appears as soon as the call is received. - Page 40 Please note: The Bluetooth trademark and logo are the property of Bluetooth SIG, Inc. and use of this trademark and logo is licensed by VDO Dayton. Other brand logos and brand names are the property of the respective owners.
-
Page 41: Dvb-T Digital Television
DVB-T television DVB-T digital television You can use your PN 4000/6000 to receive television programmes via DVB-T (Digital Video Broadcasting Terrestrial). There may not be as many channels available as there are on your home set, and the DVB-T standard is not available in all countries. The reception quality also depends on a number of factors, e.g.:... - Page 42 DVB-T television Scanning for and selecting a channel Access the scanning and channel selection functions by tapping the Channels bar at the top of the screen. Tap the Channels bar to open the relevant sub- menu. Tap the Scanning channels button to start scanning.
- Page 43 DVB-T television Operation and control The motion bar in the top right of the screen above the date and time indicates that the device is scan- ning for channels. The button below the date and time allows you to adjust the volume. Tap the [+] button to increase the volume and the [–] to decrease the volume.
- Page 44 DVB-T television To switch to full screen mode, tap on the screen to hide the controls. Tap on the screen again to show the controls. Tapping on the Back button in the top left takes you back to the previous menu. Settings The Settings submenu allows you to make the following basic settings.
- Page 45 DVB-T television Tap the Subtitle button to make the corresponding settings. Tap the Auto button to automatically dis- play subtitles (where available) in the language se- lected in Audio settings. Some channels broadcast programmes that offer foreign language subtitles, e.g. German. If this is the case for any of the active channels, the available languages are displayed in the language selection.
- Page 46 DVB-T television Saving favourite channels Tap the Display button to display all the channels that have been found so you can make your selection. The list on the left shows all detected channels, and your favourite channels are listed on the right. To add a channel to your list of favour- ites, first tap on the channel name you want to save and then on the Add but-...
- Page 47 DVB-T television Channel and programme selection – Electronic Program Guide (EPG) The DVBT module of your PN 4000/6000 uses electronic programme guidance to make pro- gramme selection very easy and convenient for you. In the main screen, tap on Channel and...
- Page 48 DVB-T television Teletext When a channel is active you can also view the teletext pages for that channel. In the main screen, tap the Teletext but- ton to open the teletext ("Start page 100") for the current channel. The buttons on the left of the screen allow you to: Scroll up through the teletext pages in Scroll to the next subpage ascending order.
-
Page 49: Gps And Tmc
GPS and TMC GPS status and quality When you switch on the device for the first time, it may take several minutes for the GPS reception to reach a sufficient level and to determine your current position. If you are unable to obtain a sufficient GPS signal, please read the "Troubleshooting"... - Page 50 GPS and TMC TMC status and quality (only active TMC cradle) The TMC device offers you the additional function of dynamically avoiding traffic jams. During navigation, the system regularly accesses the latest TMC traffic information, provided this information is available in the country you are in. TMC information is displayed in the status bar.
-
Page 51: Troubleshooting
Troubleshooting Troubleshooting Problem Solution No GPS signal in vehicle The GPS signal can be blocked by heated wind- screens or tinted windscreens with a vacuum- metallised coating. In this case, you will need external aerial (available from accessory dealers, article no. MA2010/00). No GPS signal Ensure that the GPS aerial on the top of the navigation system is not obstructed by other... -
Page 52: Technical Data
The device specifications and package content may deviate from what is stated in this document. Service For current information on VDO Dayton Multimedia Systems, service addresses and software updates please visit our website: www.vdodayton.com or contact a VDO Dayton dealer. - Page 53 PN 4000/6000 © 11/2007 Siemens VDO Trading GmbH...