
Related Manuals for VDO CD 1537 X


Summary of Contents for VDO CD 1537 X
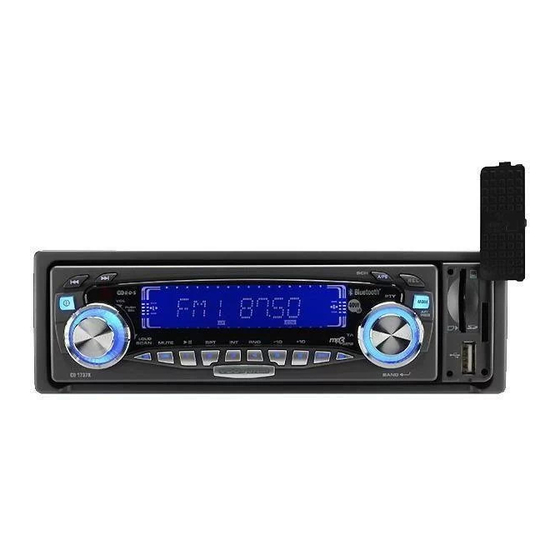
- Page 1 A/PS MODE PUSH LOUD SCAN MUTE DISP CD 1737X BAND...
- Page 2 Ant. Rout Lout...
- Page 3 188mm 58mm...
-
Page 5: Table Of Contents
Before Starting Connecting the Radio (fig. C) ....13 Mounting the Radio (fig. G and H) ..13 Thank you for purchasing this VDO Dayton Removing the Radio (using the two product which has been designed and manu- removal keys supplied) (fig. J) ....13... -
Page 6: General Information
BLUETOOTH® CAR UNIT ....... 19 Do not damage cables of the safety systems (airbag etc.). (Lines are normally specially General ..........19 marked, e.g. by labels.) Controls (fig. D) ........19 Do not use inspection lamps to test the volt- Pairing your cell phone and Bluetooth®... -
Page 7: Notes On Mp3 Files
CD-ROM (in accordance with Yellow Book) Files are compatible with the ID3 Tag Ver. 1.0, CD-ROM XA (mode 2, form 1, in accordance 1.1, 2.2, 2.3 and 2.4 formats for display of with Green Book) album (disc title), track (track title), artist (track CD-R/RW (in accordance with Orange Book, artist) and comments. -
Page 8: Notes On Ogg Files
Notes on OGG files When playing discs with MP3/WMA/OGG files and audio data (CD-DA) such as CD-EXTRA The following OGG files are supported by the and MIXED-MODE CDs, both CD player: types can be played only by switching mode Files conform with Vorbis I specifications. between MP3/WMA/OGG and CD-DA. -
Page 9: Notes On Bluetooth
Notes Important Never use force or grip the display and the This unit assigns folder numbers. The user buttons too tightly when removing or attach- cannot assign folder numbers. ing. It is not possible to check folders that do not Avoid subjecting the front panel to excessive include MP3/WMA/OGG files. -
Page 10: Installation
Cleaning the unit Connection in vehicles equipped with standard ISO connectors Do not clean using cleaning fluid, alcohol or other solvents. Use only a damp cloth. The radio may be installed without major prepa- CD-R/CD-RW discs ration in vehicles equipped with ISO connec- tors. -
Page 11: Mounting
Connector B Mounting the Radio (fig. G and H) Loudspeakers (use 4 ohm loudspeakers only) This radio can be properly installed either from Do not connect any of the loudspeaker leads to conventional Front Mounting and/or from Rear earth or directly to a booster/amplifier without Mounting. -
Page 12: Front Panel And Remote Control14
FRONT PANEL AND REMOTE 8. DISP Toggle the display modes CONTROL 9. VOL/SEL Turn: increase/decrease See fig. A and E. volume Short press: select sound Front Panel Remote Control controls (VOLume, Function(s) BALance, FADer) Long press: select special Switch On / Off the set functions (Start IN, VOLume, Time ADJust, TA VOLume, EON,... -
Page 13: Security
Selecting a Source Short press: select Mono/ Stereo Your car radio is designed for different types Long press: select Local/ of sources. Distant Reception RADIO Toggle sound equalization SD/MMC Increase/decrease volume Press the MODE button to select the source. SECURITY Sound Controls Volume Removing the Front (fig. -
Page 14: Radio Operation
Equalizer Auto Store Press the EQ button on the remote control to Long press the SCH/ A /PS button, the radio will select one of the programmed equalizer set- search for the six strongest stations and store tings. them automatically under the preset memory None (NONE) buttons 1 through 6. -
Page 15: Display Of Station Name (Ps)
Display of Station Name (PS) 1. Short press this button to display the PTY information, the display is flashing. The radio displays the name of the station in- 2. Press either the button to search stead of its frequency. for PTY stations. Automatic frequency (AF) 3. -
Page 16: Playing A Cd-R Or Cd-Rw
Playing a CD-R or CD-RW Skipping Track or Files 1. Long press the –10 button to skip backward Depending on the type of CD-R/CD-RW CD, 10 tracks or files. surface condition of the disc, as well as the 2. Long press the +10 button to skip forward 10 performance and condition of the CD writer, tracks or files. -
Page 17: Bluetooth Car Unit
Intro Feature Important Notes on SD/MMC/USB The unit can read up to 2 Gb. 1. Long press the INT button to scan the files. Each file will be played for 10 seconds. Smart Card or Multimedia Card 2. To stop scanning, press the button again and Insert the flash memory card into the SD/MMC the current file will be played. -
Page 18: Pairing Your Cell Phone And Bluetooth Remote Box
Pairing your cell phone and Note: The Bluetooth ® compatibility depends on the Bluetooth ® remote box ® solution integrated into the Bluetooth car unit ® 1. Press the VOL+ on the Bluetooth remote box. and the cell phone to be paired with. The The LED on the remote box will start flashing firmware of the cell phone may vary from re- fast, the pairing mode is activated. -
Page 19: Troubleshooting
CD ERRORS Verify: TROUBLESHOOTING During the use of the CD player, the set does May be, it will happen that your car radio will not function and displays CD ERROR. not functioning as you expected it to. Before The CD is properly inserted into the CD player. calling for service, please read this user The player contains at last one CD.