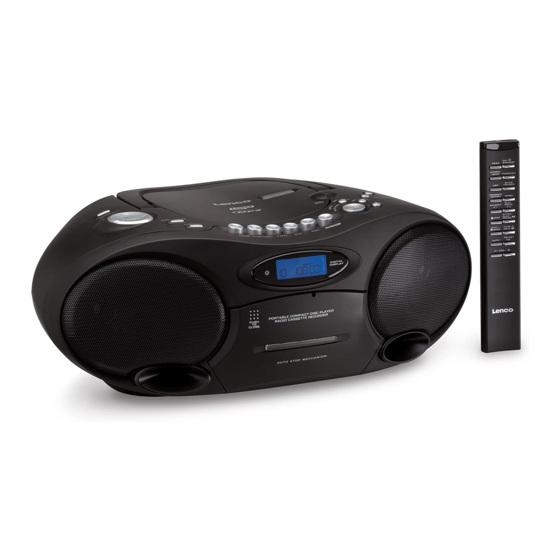
Summary of Contents for LENCO SCR-187
- Page 1 STEREO RADIO MP3/WMA/CD/USB PLAYER WITH CASSETTE RECORDER SCR-186 INSTRUCTION MANUAL SCR186-AMFM ENG-MP3-WMA-USB-LENC1 1 7/7/2006 5:53:06 PM...
- Page 2 WARNING CLASS 1 LASER PRODUCT CAUTION CLASS 1 LASER PRODUCT INVISIBLE LASER RADIATION APPAREIL Á LASER DE CLASSE 1 WHEN OPEN AND INTERLOCKS PRODUCTO LASER DE CLASE 1 DEFEATED. AVOID EXPOSURE TO BEAM This product contains a low power laser device. Warning: Do not touch the lens.
-
Page 3: Product View And Controls
CONTROLS CARRYING HANDLE CASSETTE RECORD CASSETTE PLAY CASSETTE REWIND CASSETTE F.FWD CASSETTE STOP/EJECT CASSETTE PAUSE CD DISPLAY REMOTE SENSOR INDICATOR 10. SPEAKER 11. CASSETTE DOOR 12. PHONES JACK 13. ON / STANDBY BUTTON 14. MENU BUTTON 15. VOLUME CONTROL + / - 16. -
Page 4: Power Supply
POWER SUPPLY USING HOUSE CURRENT Before use, check that the rated voltage of your unit matches your local voltage. To AC socket USING BATTERIES Disconnect the AC power cord from the AC inlet of the To AC outlet unit. Battery power is cut automatically when the cord is connected. When the volume decrease, or the sound distorts, replace all of the batteries with new ones. -
Page 5: Compact Disc Playback
RADIO MEMORY FUNCTION Tune to a desired radio station. Press RANDOM / P - / PROGRAM / MEMORY button ( 2 seconds ) to enter tuning saving mode. The “MEMORY” icon will be turned on. Program number “01” on the left hand side will be flashing. Within 10 seconds, press PLAY MODE / P+ or RANDOM / P - / PROGRAM / MEMORY button to select the desired program number. Press ENTER / PLAY/PAUSE button to confirm the Program number. Press RANDOM / P - / PROGRAM / MEMORY button ( 2 seconds ) to confirm the memory. If there is no button pressed within 10 seconds, it will exit tuning save mode and the “MEMORY” icon will be turned off. COMPACT DISC PLAYBACK Lift the CD door up. - Page 6 REPEAT , REPEAT ALL , REPEAT A B , REPEAT FOLDER PLAYBACK Press PLAY MODE button during stop mode. For CD : Total number of tracks and time will be shown. For MP3/WMA/USB: Total number of tracks and folder will be shown. FOR NORMAL COMPACT DISC PLAYBACK FOR MP3 / WMA / USB PLAYBACK Mode sequence REPEAT >> REPEAT ALL >> CLEAR.
-
Page 7: Usb Operation
FOR MP3/WMA/USB PLAYBACK Programmed playback enables tracks on a disc to be played in the desired order. Up to 20 tracks can be programmed. 1. Program mode works in STOP mode only. 2. Holding RANDOM / P - / PROGRAM / MEMORY button for 2 seconds to enter program mode. The “PROG” icon will be turned on. “00 000 P01” will be shown with “00” flashing. “000” represents track number and “P:01” represents program location number. MP3/WMA/USB display 3. Press the TUNE + / NEXT or TUNE - / BACK button to select the desired folder. 4. Press TUNE + / NEXT or TUNE - / BACK button to select the required track number. 5. Press RANDOM / P - / PROGRAM / MEMORY button to confirm the track number. The display will show the next program number “000 P02”. The track number will be flashing again and waiting for track number input. 6. Repeat steps 3 and 4 until all the desired tracks has been programmed or all the program memories have been used. It will loop back to P01 after all the program memories have been used. Same track number can be programmed more than once. 7. -
Page 8: Tape Playback
ID3 Display Press MENU button repeatedly unit ID3 shown on the display. 2. Press ENTER/PLAY/PAUSE button to enter ID3 setting mode. Press MENU button to select " ID3 ON " or " ID3 OFF ". Press ENTER/PLAY/PAUSE button to confirm. INTRO In CD mode, press to play only the first 10 seconds of each track on the disc. Press MENU button repeatedly unit BASS shown on The bass boost on / off is changed cyclically by pushing the display. -
Page 9: Maintenance
MAINTENANCE CLEANING THE CD LENS CLEANING CD If the CD lens is dusty, clean it with a brush-blower. Blow several If the CD skips or will not play, the disc may need cleaning. Before times on the lens and remove the dust with the brush. Finger prints playing, wipe the disc from the centre out with a cleaning cloth. may be removed with a cotton swab moistened with alcohol. After playing, store the disc in its case. CLEANING THE UNIT CLEANING THE TAPE HEADS Do not use volatile chemicals on this unit. Clean by lightly wiping To maintain optimum sound quality, clean the playback/record with a soft cloth.


