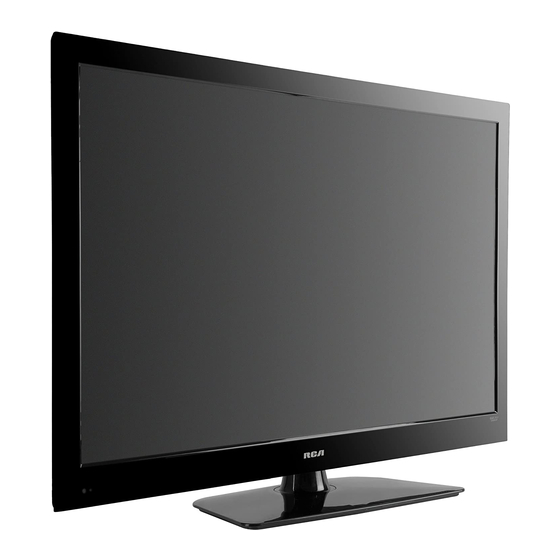
RCA LED42A45RQ User Manual
Led lcd tv
Hide thumbs
Also See for LED42A45RQ:
- User manual (84 pages) ,
- Specifications (2 pages) ,
- Dimensions (1 page)
Table of Contents
Advertisement
Available languages
Available languages
Quick Links
Advertisement
Chapters
Table of Contents

Related Manuals for RCA LED42A45RQ


Summary of Contents for RCA LED42A45RQ
- Page 1 English Español...
-
Page 2: Child Safety Guide
Child Safety Guide English- 1... -
Page 3: Table Of Contents
Table of Contents Child Safety Guide ............................Caution and Warning ........................... FCC Notice ..............................Safety Precautions ............................ Preparation for Your New TV .................................................... Check Accessories ..........................Setup TV Table Stand ............................Select TV Location ..........................Connection and Using TV Stand Installation ............................ - Page 4 Table of Contents OSD Menu Operations .................................................... Adjust the OSD Screen ............................. Picture Menu ............................. Sound Menu ............................Channel Menu ............................Parental Menu ..............................Setup Menu ............................. Others Menu Frequently Asked Questions (FAQs) ...................... Troubleshooting ............................V-Chip Rating Explanations ........................
-
Page 5: Caution And Warning
Caution and Warning CAUTION RISK OF ELECTRIC SHOCK DO NOT OPEN Caution: To reduce the risk of electric shock, do not remove cover or back. No user-serviceable parts inside. Refer servicing to qualified service personnel. The lightning flash with arrowhead The exclamation point within an symbol, within an equilateral triangle equilateral triangle is intended to... -
Page 6: Safety Precautions
Safety Precautions 1. Read these instructions. 2. Keep these instructions. 3. Heed all warnings. 4. Follow all instructions. 5. Do not use this apparatus near water. For example, do not use near a laundry tub, in a wet basement, or near a swimming pool, and the like. - Page 7 Safety Precautions 23. WARNING: To prevent injury, this apparatus must be securely attached to the floor/wall in accordance with the installation instructions. 24. To reduce the risk of electric shock, the grounding of center pin of plug must be maintained. 25.
- Page 8 English Español CH LIST Part No.:RN4142G030 PICTURE SOUND English- 7...
-
Page 9: Tv Stand Installation
TV Stand Installation TV LED42A45RQ is packaged with the bottom of TV stand separated from the cabinet. To setup the bottom of TV table stand, please carry out the installation according to the instructions below. Step One Place the TV faced down on a soft cloth or cushion to prevent the LED LCD panel from being damaged. -
Page 10: Tv Signal Connection
TV Signal Connection The first step in connecting your TV is obtaining the signal. Your TV LED42A45RQ has a side panel, which allows you to receive analog and/or digital television channels via ANT/CABLE jack. Before connecting your TV, determine using an antenna or a cable service to obtain the signal. -
Page 11: Cable Connections
Cable Connections Choose Your Connections TV supports various of connecting ways from other devices (such as DVD, VCR, Set-top box, ect.). Please follow the table sheet to choose the cables which adapt to your device. Jacks Cables Further Information Go to page 11 Video/Audio cable AV IN VIDEO, R-AUDIO-L S-Video In... -
Page 12: Side Panel Connections
Side Panel Connections Connecting AV Composite device (Good Video Quality) To connect an composite AV device, such as a DVD player, follow these steps: 1. Connect the Video jack on the back of TV to the video output jacks of device via video cable (yellow). 2. -
Page 13: Connecting Ypbpr Component Device (Better Video Quality)
Side Panel Connections Connecting YPbPr Component device (Better Video Quality) To connect a component device, such as a DVD player, follow these steps: 1. Connect the COMPONENT IN Y/Pb/Pr jack on the side of TV to the video output jacks of device via video cable (green, blue and red). -
Page 14: Connecting Hdmi Device (Best Video Quality)
1. Connect the HDMI1/DVI, 2, or 3 jack on the back of TV to the DVI port of device via HDMI-DVI cable. 2. Connect the SOUND/DVI jack on the back of TV to the audio output jack of device with audio cable (dual-channel RCA jacks to 3.5mm stereo jack). -
Page 15: Connecting A Computer
2. Connect the SOUND/DVI jack on the back of TV to the audio output jack of computer with audio cable (3.5mm). Note: If you want to use your TV as a monitor, please notice that the maximum resolution for LED42A45RQ is 1920*1080. -
Page 16: Tv Jacks Explanation
TV Jacks Explanation HEAD PHONE: Connect a 3.5mm headphone for personal audio. DIGITAL AUDIO OUT: Connect a coaxial cable for digital audio output. SERVICE: For service use only. Do not connect any device. R-AUDIO-L OUT: Connect double-channel coaxial cables for analog audio output. Note:•... -
Page 17: Side Keypad And Front Panel
Side Keypad and Front Panel Side Keypad Buttons If you cannot locate your remote, you can use the side keypad buttons on your TV to operate many TV features. INPUT: Displays the Source Select List. MENU: Displays the TV Main Menu. CH : Scans up through the channel list. -
Page 18: Remote Control Instructions
Remote Control Instructions Inserting Batteries in the Remote • Remove the cover of battery cabin on the back of the remote control by lifting the cover. • Insert two AAA batteries, making sure the polarities (+ and -) are aligned correctly. •... -
Page 19: Learning About Remote Control
Learning about Remote Control Remote Control Buttons ): Reduces the TV volume to its minimum level. Press again to restore the volume. MUTE ( CH LIST POWER ( ): Turns the TV on or off. CH.LIST: Displays the channel list. FAV.: Adds the current channel to your favorite list, or erases the current channel from your favorite list (if this channel is a favorite channel already). -
Page 20: Initial Setup
Initial Setup If it is the first time you turn on your TV, or you have done Clear Channel List option (see page 29), the initial setup menu appears automatically. Menu Language To choose your menu language, press the left/right arrow until the language you need appears. Available languages: English, French and Spanish. -
Page 21: Basic Operations
Basic Operations Turning On and Off Connect the AC cord to power the LED LCD TV. At this time the TV will enter standby mode and power indicator shows red. Use Power button ( ) on the top panel of TV or on the remote control to turn on the TV. After switching off the TV for 5 seconds, you can turn on TV again. -
Page 22: Channel Bar
Basic Operations Channel Bar Press the DISPLAY button on the remote control, the channel bar will appear on the right top of screen. It displays the current channel’s information. The following list describes the items on the channel bar. D50 - 1 KOCE-HD English Mono... - Page 23 PICTURE SOUND CHANNEL PARENTAL SETUP OTHERS PICTURE Picture Settings Screen Settings PC Settings Color Temperature Normal Advanced Picture Settings :Return :Select Menu :Go to Next Menu MENU ENTER PICTURE SETTINGS Picture Mode Standard Brightness Contrast Color Tint Sharpness :Return :Select Menu :Change Setting MENU English-22...
- Page 24 SCREEN SETTINGS Screen Size Full Auto Wide :Return :Select Menu :Change Setting MENU PC SETTINGS Auto Adjust Execute Horizontal Position Vertical Position Clock Phase Reset Execute :Return :Select Menu :Press to Execute MENU ADVANCED PICTURE SETTINGS Dynamic Contrast Film Mode Noise Reduction MPEG Noise Reduction :Return...
-
Page 25: Osd Menu Operations
OSD Menu Operations Sound Menu The Sound Menu lets you adjust audio output. To access the Sound Menu, press MENU on the remote, and then select SOUND from the Main Menu. Press ENTER button to proceed to SOUND menu. SOUND Use up/down to choose the function you need, press Sound Settings ENTER or right arrow to adjust or enter a sub-menu. -
Page 26: Channel Menu
OSD Menu Operations Equalizer Settings EQUALIZER SETTINGS The seven-band graphic equalizer allows you to adjust the audio frequency Mode settings. You can select one of the equalizer presets (OFF, POP, ROCK, JAZZ) or create your own personal preset (USER). Press the left or right arrow to select the frequency (100Hz, 250Hz, 500Hz, 1KHz, 2KHz, 4KHz, 10KHz) you want to adjust. -
Page 27: Parental Menu
OSD Menu Operations Signal Type Select your TV signal type: Air or Cable. Auto Channel Search Execute an auto channel search (see page 19). Parental Menu The Setup Menu enables you to lock program with special content, panel key board and input source. Press MENU and choose PARENTAL from the Main menu. -
Page 28: Movie Rating
OSD Menu Operations Movie Rating MOVIE RATING Use arrow keys to select the rating level you want to block, press ENTER to lock/unlock the rating level. If you have blocked a lower level rating, the higher ratings will be PG-13 blocked too. - Page 29 OSD Menu Operations Canada V-Chip Press ENTER or right arrow to enter US V-Chip ratings menu, which contains two sub-menus: English Rating and French Rating. English Rating Press ENTER or right arrow to enter English rating menu. ENGLISH RATING Use arrow keys to select the rating level you want to block, press ENTER to lock/unlock the rating level.
-
Page 30: Change Password
OSD Menu Operations Change Password Change the password of parental menu. Change Password Input the old password. Old PIN Input the new password. New PIN Input the new password again to confirm. Confirm :Return :Password MENU DIGITAL Front Panel Lock Select this option to block or unblock the TV’s side panel buttons so that they can’t be used. -
Page 31: Setup Menu
OSD Menu Operations Setup Menu The Setup Menu lets you config the TV with your preferences. Select SETUP from the Main Menu. Press ENTER button to proceed to SETUP menu. SETUP Use up/down to choose the function you need, press Closed Caption ENTER or right arrow to adjust or enter a sub-menu. -
Page 32: Digital Cc Style
OSD Menu Operations Digital CC Style DIGITAL CC STYLE Select the item you want to adjust in Digital CC Style menu CC Size Default with up/down arrows. CC Font Default CC Opacity Default Text Color Default CC Background Opacity Default CC Background Color Default CLOSE CAPTION... -
Page 33: Others Menu
OSD Menu Operations Others Menu The Others Menu lets you config the TV with your preferences in other features. Choose OTHERS from the Main Menu. Press ENTER button to proceed to SETUP menu. OTHERS Use up/down to choose the function you need, press Blue Background ENTER or right arrow to adjust or enter a sub-menu. -
Page 34: Frequently Asked Questions (Faqs)
Frequently Asked Questions (FAQs) What’s the most convenient way to view High Definition (HD) video? Connect an antenna to the TV Input jack to view free local digital channels. You may need to purchase an antenna. (See page 9 for more information about antenna setup). Visit www.antennaweb.org for assistance in deciding what type of antenna to use to receive the local digital channels available to you. -
Page 35: Troubleshooting
Troubleshooting Identifying Problems If there are any problems when using the product, please consult the list below. If the list does not solve the problem, call our Customer Service Center immediately. TV Problems The TV can’t be turned on. • Make sure the AC cord is plugged in. •... - Page 36 Keep your TV unplugged for about 5 minutes. Then plug in the TV and turn it on. See if the problem is fixed. If the problem remains, then please visit the Customer Support Menu at www.rca.com or updated FAQs or contact RCA Customer Support at the support number provided in your Warranty card.
-
Page 37: V-Chip Rating Explanations
V-Chip Rating Explanations US V-Chip Rating System TV-MA (Mature Audience Only): Specifically designed to be viewed by adults and may be unsuitable for children under 17. It contains one or more of the following content themes: crude indecent language (L), explicit sexual activity (S), or graphic violence (V). TV-14 (Parents Strongly Cautioned): Contains some material that many parents would find unsuitable for children under 14. -
Page 38: Canadian French Rating System
V-Chip Rating Explanations C8+ (Children 8 and older): Programming generally considered acceptable for children 8 years and over to watch on their own. Violence Guidelines: Violence will not be portrayed as the preferred, acceptable, or only way to resolve conflict or encourage children to imitate dangerous acts which they may see on television. -
Page 39: Wall Mounting Unit Specification
Wall Mounting Unit Specification Model Unit Dimension (unit:mm) Screw LED42A45RQ VESA 200 x200 M6 screws, length 14mm 200 mm 200 mm Note: A. The wall mount is not contained in the accessories sold with television. We only provide the installing specifications but not the wall mount itself. -
Page 40: Product Specification
Digital Cable (64/256QAM): 1~135 Power Supply AC 110 V, 60Hz RF Input Cable/Antenna x 1 HDMI Component 3 x 1 + Audio R, L (RCA) Video + Audio R, L (RCA) AV-IN S-Video + Audio R, L (RCA) Connection (Composite) Interface... - Page 41 Limited Warranty for USA and Mexico Coverage – Labor For a period of 12 months from date of purchase of your RCA product, we will pay an authorized RCA service center the labor charge to repair any defects in materials or workmanship in your television.
- Page 42 PARTICULAR PURPOSE IS LIMITED TO APPLICABLE LIMITED WARRANTY PERIOD(S) SET FORTH ABOVE. THIS WARRANTY GIVES YOU SPECIFIC LEGAL RIGHTS AND YOU ALSO MAY HAVE OTHER RIGHTS THAT VARY FROM STATE TO STATE. RCA is a trademark of RCA Trademark Management SAS and used under license by ON Corporation English-41...
- Page 44 Questa pagina è stata lasciata intenzionalmente vuota.
- Page 45 Seguridad de niños Use una montura que se ha recomendado por el fabricante de monitor y/o listado por un laboratorio independiente (como UL, CSA, ETL). Siga todas las instrucciones ofrecidas por el fabricante de monitor y montaje de pared. Español-...
- Page 46 CONTENIDO Seguridad de niños ........................... Precauciones y Advertencias ........................Notas FCC ..............................Precauciones ............................46,47 Preparacion para su nueva TV ....................................................Accessorios Ajuste de mesa de TV ......................................................Seleccione lugar ............................ Connexiones y Uso Instalacion de base TV ..........................
- Page 47 CONTENIDO Menu de Operaciones OSD ..................................................Ajustar pantalla OSD Menu Imagen ........................................................... Menu Sonido ............................. Menu Canales .............................. Menu Padres .............................. Ajustar Menu .............................. Otros Menus Preguntas mas Frecuentes (FAQs) ......................Problemas de funcion ..........................Explicando Rango V-Chip .........................
-
Page 48: Precauciones Y Advertencias
Precauciones y Advertencias PRECAUCION RISK OF ELECTRIC SHOCK DO NOT OPEN Precaucion: Para reducir el riesgo de choques electricos, no retire la cubierta o tapa. No contiene partes reusables en el interior. Para cualquier servicio acuda a personal calificado. La luz en forma de flash con simbolo El signo de exclamacion dentro de de flecha, con un triangulo equilatero un an triangulo equilatero es una... -
Page 49: Precauciones
Precauciones 1. Leer estas instrucciones. 2. Conserve las instrucciones. 3. Guarde sus precauciones. 4. Siga todas las instrucciones indicadas en este instructivo. 5. No use este aparato cerca del agua. Tampoco lo use, cerca de tuberias, en pisos mojados, o cerca de una alberca o algo similar. - Page 50 Precauciones 23. PRECAUCION: Para prevenir daños, este aparato debe ser asegurado al piso o pared siguiendo las instrucciones de instalacion. 24. Para reducir el riesgo de choques electricos, el perno central de tierra debe mantenerse. 25. Si un sistema de antena o cable es conectado a la TV, asegurese que estos esten dotados con puesta a tierra para proteger contra sobrecargas de volltaje y cargas de estatica.
- Page 51 English Español CH LIST Part No.:RN4142G030 PICTURE SOUND Español-...
-
Page 52: Instalacion De Base Tv
Instalacion de Base de TV TV LED42A45RQ se empaqueta con la parte inferior de la televisión que están separados del gabinete. Para configurar la parte inferior del soporte de la TV de mesa, por favor, llevar a cabo la instalación de acuerdo con las instrucciones de abajo. -
Page 53: Conexion De Señal Tv
Conexion de señal TV El primer paso al conectar su TV es obtener la señal. Su TV LED42A45RQ tiene un panel lateral, el cual le permite recibir canales de TV analogos y/o digitales via entrada ANT/CABLE. Antes de conectar su TV, determine el uso de antena o servicio de cable para obtener la señal. -
Page 54: Conexion De Cable
Conexion de cable Elija sus Conexiones La TV LED42A45RQ suporta varias formas de conexion desde otros aparatos (tal como DVD, VCR, cable, ect.). Favor siga el listado para elegir los cables que pueden adaptarse a su aparato. Jacks Cables Further Information... -
Page 55: Conexiones Traseras
Conexiones traseras Conexion Aparato Compuesto AV (Buena Calidad de Video) Para conectar un aparato compuesto AV, como un reproductor DVD, siga los siguientes pasos: 1. Conecte la entrada Video al costado de la TV a la salida video del aparato via cable de video (amarillo). 2. - Page 56 Conexiones traseras Conectando aparato con salida YPbPr (Mejor Calidad de Video) Para conectar un aparato componente, tal como un reproductor DVD, siga los pasos siguientes: 1. Conecte terminal COMPONENT IN Y/Pb/Pr al costado de la TV a la salida de video del aparato via cable de video (verde, azu y rojo).
- Page 57 2. Conecte SOUND/DVI al enchufe de lado de la TV a la toma de salida de audio del dispositivo con el cable de audio (dual-channel RCA a la toma estéreo de 3,5 mm). Nota: 1. HDMI (High-Definition Multimedia Interface) es un compacto interface de audio / vídeo para transmitir audio descomprimido.
- Page 58 2. Conecte terminal SOUOND/DVI del costado de la TV a la salida de audio de computadora con cable de audio (3,5mm). Nota: Si desea usar su TV como un monitor, favor checar que la maxima resolucion para LED42A45RQ is 1920*1080.
-
Page 59: Explicacion De Entradas A Tv
Explicacion de entradas a TV HEAD PHONE: Conecte un audifono de 3,5mm para audio personal. DIGITAL AUDIO OUT: Conecte un cable coaxial para salida de audio digital. SERVICE: Solo para el uso de servicio. No conecte ningun aparato. R-AUDIO-L OUT: Conecte cables coaxiales de doble canal para salida analoga de audio. Note:•... -
Page 60: Teclado Lateral Y Panel Frontal
Teclado lateral y panel Frontal Botones Laterales Si no localiza su control remoto, puede usar los botones laterales de su TV para operar varias funciones de la TV. INPUT: Despliega la lista de Seleccion . MENU: Despliega Menu principal de la TV. CH : Incrementa cambio en la lista de canales. -
Page 61: Instrucciones Del Control Remoto
Instrucciones del control remoto Instalando Baterias en el Control • Retire la tapa del compartimento de atras del control remoto levantando la tapa. • Inserte dos pilas "AAA", asegurese que la polaridad (+ y -) esten alineadas correctamente. Coloque la tapa trasera. •... -
Page 62: Conociendo El Control Remoto
Conociendo el Control Remoto Botones del Control Remoto ): Reduce el volumen de la TV a su minimo nivel. Presione otra vez para restaurar MUTE ( CH LIST volumen ): Enciende y apaga laTV. POWER ( CH.LIST: Despliega la listade canales. FAV.: Adiciona el canal actual a su lista de favoritos, o elimina el canal actual de la lista de favoritos (si ya existia este canal en el listado de favoritos). -
Page 63: Iniciar Ajustes
Iniciar Ajustes Si es la primera vez que enciende su TV, o ha borrado la opcion eliminar canal (Clear Channel) (ver pag. 70), el ajuste inicial del menu aparecera automaticamente. MENU Idioma Para elegir su menu lenguaje, presione la flecha izquierda/derecha hasta que aparezca su lenguaje. Lenguajes disponibles: Ingles, Frances y Español. -
Page 64: Operaciones Basicas
Operaciones Basicas Apagar y Encender Conecte el cable de corriente de su TV LED LCD, esta entrara al modo "standby" y el indicador de encendido aparecera en rojo. Use el boton de encendido ( ) del panel lateral de su TV o del control remoto para encenderla. Apaguela despues por 5 segundos, y enciendala nuevamente. -
Page 65: Barra De Canales
Operaciones Basicas Barra de Canales Presione el boton DISPLAY del control remoto, la barra de canales aparecera arriba a la derecha de la pantalla. Desplegando la informacion de los canales actuales. La lista siguiente describe toda los items de la barra de canales. D50 - 1 KOCE-HD Ingles... - Page 66 IMAGEN SONIDO CAUCE Padres Configuracion OTROS IMAGEN Poniendo del Cuadro Poniendo del Pantallo Config de PC La Temperatura colorida Neutro Advanced Picture Settings :Retorno :Menu selecto :Siguiente Menu MENU ENTER PONIENDO DEL CUADRO Escena del cuadro Estandar Brillo Contraste COLOR Tinte Nitidez :Retorno...
- Page 67 PONIENDO DEL PANTALLO ñ Tama o de la pantalla LIeno EI automovil Extensamente : Retorno Menu selecto :Poniendo del Cambio MENU Config.de PC EI automovil Extensamente Execute La Posicion horizontal La Posicion vertical Reloj Fase Reajustar Execute : Retorno Menu selecto :Apriete para Ejecutar MENU ADVANCED PICTURE SETTINGS...
-
Page 68: Menu De Operaciones Osd
Menu de Operaciones OSD Menu de Sonido El menu de Sonido le permite ajustar las salidas de audio. Para accesarlo, presione MENU del control remoto, y luego elija SOUND del Menu principal. Presione el boton ENTER para proceder al menu SOUND (Sonido). SONIDO Use subir/bajar para la funcion que requiera, presione SONIDO Poniendo... -
Page 69: Equalizer Settings
Menu de Operaciones OSD Equalizer Settings EQUALIZER SETTINGS El ecualizador grafico de 7-bandas le permite ajustar la frecuencia de audio. Mode Puede seleccionar uno de los ajustes predeterminados (Apagado, PIEDRA, POP JAZZ, Usuario) o crear su propio ajuste personal (USER). Presione la flecha izquierda o derecha para seleccionar frecuencia (100Hz,250Hz, 500 Hz,1KHz, 2KHz, 4KHz, 10KHz) que desee para ajustes. -
Page 70: Menu Padres
Menu de Operaciones OSD Fuente Señal Seleccione su tipo de señal: Antena o Cable. Auto-Busca Ejecute busqueda de auto canal (ver pag. 60). Menu de Padres El ajuste del Menu le permitira restringir programas con contenidos especiales, en los botones teclee fuente de entrada. Presione MENU y elija PARENTAL del Menu principal. - Page 71 Menu de Operaciones OSD Valuacion pelicula Valuacion pelicula Use las flechas para seleccionar nivel de rango a bloquear, presione ENTER para bloquear/desbloquear el nivel. Si ha blo-queado un nivel inferior, el nivel mas PG-13 alto se bloqueara tambien. NC-17 Por ejemplo, cuando PG-13 es bloqueado, R, NC-17 y X se bloquearan al mismo tiempo.
- Page 72 Menu de Operaciones OSD V-Chip Canada Presione ENTER o flecha derecha para el rango US V-Chip, el cual contiene 2 sub-menus: Rango Ingles y Rango Frances. Valuacion Inglesa Presione ENTER o flecha derecha para el menu en Ingles. VALUACION INGLESA Use las flechas para seleccionar el nivel que desea bloquear, luego ENTER para bloquear/desbloquear nivel.
- Page 73 Menu de Operaciones OSD Cambiar Contrasena Cambiar password de menu paternal. Cambiar contrasena Teclee ultimo password. Viejo Contrasena Teclee nuevo password. Nuevo Contrasena Teclee de nuevo password para confirmar. Confirm Retorno :Contrasena MENU DIGITAL Blq.Pnl.Fr Elegir para bloquear o desbloquear botones del panel de la TV para que no puedan ser usados. ’...
- Page 74 Menu de Operaciones OSD Configuracion El Menu de ajuste le permite configurar la TV con sus preferencias. Seleccione SETUP del Menu principal. Presione ENTER para accesar al menu SETUP. Configuracion Use subir/bajar para elegir la funcion requerida, presione Subtitulos Menu Language English Clock ENTER o flecha derecha Idioma Espanol para ajustar o entrar a sub-menu.
- Page 75 Menu de Operaciones OSD Digital CC Style DIGITAL CC STYLE Seleccione el item deseado para ajuste en el menu el estilo Tama ñ o Valor Digital CC con las flechas subir/bajar. Fuente Valor Opacidad Valor Color del Texto Valor La Opacidad de Fondo Valor EI Color De Fondo Valor...
-
Page 76: Otros Menus
Menu de Operaciones OSD Otros Menus Los Otros Menus le permite configurar la TV con sus preferencias en otras opciones. Elija OTHERS del Menu principal. Presione el boton ENTER para proceder al menu SETUP. OTROS Use subir/bajar para elegir la funcion requerida, presione Azule Atras ENTER o flecha derecha para ajustar o entrar a Ningun Sig.P-FUERA... -
Page 77: Preguntas Mas Frecuentes (Faqs)
Preguntas mas Frecuentes (FAQs) Cual es la forma mas conveniente para ver en video de Alta Definicion (HD) ? Conecte una antena a la entrada de la TV para ver los canales digitales locales. Necesita comprar una antena. (Ver pag. 50 para mayor informacion sobre ajustes de la antena). Visite www.antennaweb.org para asistencia para decidir el tipo de antena a usar para recibir los canales locales digitales del area. -
Page 78: Problemas De Funcion
Problemas de funcion Identificar Problemas Si hubiera problemas cuando use el producto, favor consultar la lista de abajo. Si esta lista no resuelve el problema, llame a nuestro Centro de Servicio al Cliente de inmediato. Problemas en TV La TV no puede encender. •... - Page 79 Mantenga su TV desconectada por cerca de 5 minutos. Luego conecte y encienda la TV. Verifique si el problema se resolvio. Si el problema persiste, favor visite el Menu de Soporte al Cliente en www.rca.com o vea seccion FAQ o contacte Soporte a Clientes RCA en el numero de soporte proporcionado en su Garantia.
-
Page 80: Explicando Rango V-Chip
Explicando Rango V-Chip US V-Chip Rating System Diseñado Especificamente para ser vista por adultos y puede ser no apta para menores de 17 años. TV-MA (Solo Adultos): Contiene uno o mas de los siguientes contenidos: lenguaje indecente y soez (L), actividad sexual explicita (S), o violencia grafica (V). - Page 81 Explicando Rango V-Chip C8+ (niños mayores de 8): Programacion generalmente considerada aceptable para niños mayores de 8 años. Violencia Guiada: Violencia no sera mostrada como favorita, aceptable sino solo comoforma de resolver conflict os de coraje. los niños imitan actos peligrosos que ven en television. Algunas escenas con violencia seran frecuentes, discretas y de baja intensidad y consecuencias de los hechos.
-
Page 82: Unidad De Montaje De Pared
Unidad de Montaje de pared Modelo Dimensiones de la unidad(mm) Tornillos LED42A45RQ VESA 200 x 200 Tornillos M6,14mm largo 200 mm 200 mm Nota: A. El montaje no esta incluido en los accessorios de la television. Solo se incluyen las especificaciones de instalacion pero no el montaje en si. -
Page 83: Especificacion De Unidad
Alimentacion AC 110 V, 60Hz Entrada RF Cable/Antena x 1 HDMI Componente 3 x 1 + Audio R, L (RCA) Video + Audio R, L (RCA) AV-IN S-Video + Audio R, L (RCA) Entrada RF (Compuesto) (La entrada S-Video, y la de COMPONENTE (Y, Pb, Pr) Interfase comparten la misma entrada de audio R-AUDIO-L.) - Page 84 Garantía limitada para EE.UU y Mexico. Cobertura-Trabajo Durante un período de 12 meses desde la fecha de compra de su producto RCA, pagaremos a un centro autorizado de servicio de RCA el cargo de mano de obra para reparar cualquier defecto en materiales o mano de obra en el te levisor.
- Page 85 PARTICULAR ESTARÁ LIMITADA A LIMITADA período de garantía (S) mencionado anteriormente. Esta garantía le otorga derechos legales específicos y USTED TAMBIÉN PUEDE TENER OTROS DERECHOS, QUE PUEDEN VARIAR DE ESTADO. RCA es una marca registrada de SAS bajo licencia de ON Corporation Español-...