Table of Contents
Advertisement
Available languages
Available languages
Table of contents
Placement of speakers ............................3
Getting started .........................................4
Overview of controls ...............................6
Discs .........................................................7
Cassette tape - Play and record ..........11
Radio .......................................................13
Microphone mixing ................................14
Timer .......................................................15
Sound adjustment .................................16
External unit ...........................................17
Maintenance ...........................................17
When moving the unit ...........................17
Troubleshooting guide ..........................18
Specifi cations ........................................19
Before connecting, operating or adjusting this product,
please read the instructions completely.
Please keep this manual for future reference.
Operations in these instructions are described mainly
using remote control, but you can do the operations on
the main unit if the controls are the same.
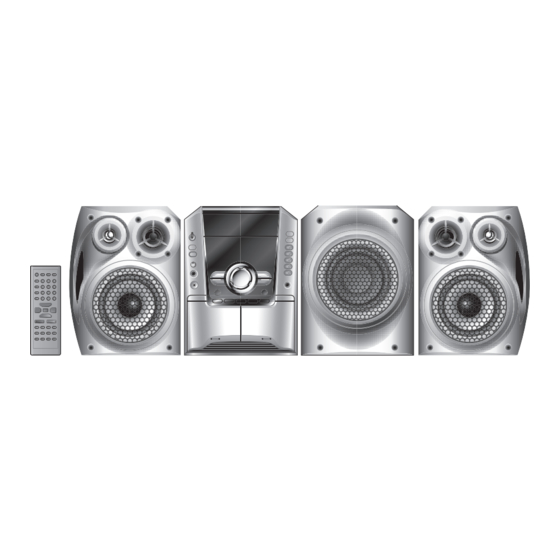
Your unit may not look exactly the same as illustrated.
GCP
En
Sp
Operating Instructions
CD Stereo System
Model No.
SUPPLIED ACCESSORIES
SUPPLIED ACCESSORIES
Please check and identify the supplied accessories.
1 x AC power supply cord
2 x Remote control batteries
1 x Power plug adaptor
1 x FM indoor antenna
1 x AM loop antenna
1 x Remote Control
(N2QAHB000064)
SC-AK640
RQTV0079-M
L0106KE0
Advertisement
Table of Contents

Related Manuals for Panasonic SC-AK640


Summary of Contents for Panasonic SC-AK640
-
Page 1: Table Of Contents
Operating Instructions CD Stereo System SC-AK640 Model No. SUPPLIED ACCESSORIES SUPPLIED ACCESSORIES Please check and identify the supplied accessories. 1 x AC power supply cord Table of contents IMPORTANT SAFETY INSTRUCTIONS ..3 2 x Remote control batteries Placement of speakers ......3 Getting started .........4... - Page 2 Dear customer Thank you for purchasing this product. For optimum performance and safety, please read these instructions carefully. These operating instructions are applicable to the following system. System SC-AK640 Main unit SA-AK640 Front speakers SB-AK640 Subwoofer SB-WAK640 Inside of product...
-
Page 3: Important Safety Instructions
IMPORTANT SAFETY INSTRUCTIONS Placement of speakers Use only the supplied speakers. Tweeter Place the Tweeter The combination of the main unit and speakers provide the subwoofer on the best sound. Using other speakers can damage the unit and fl oor or a sturdy sound quality will be negatively affected. -
Page 4: Making The Connections
Getting started Step 1 Step 1 - Making the connections - Making the connections Connect the AC power supply cord only after all other connections have been made. Connect the AC power supply cord. Insertion of connector Even when the connector is perfectly inserted, depending on the type of inlet used, the front part of the connector may jut out as shown in the drawing. - Page 5 Optional antenna connections Optional antenna connections Use outdoor antenna if radio reception is poor. Note: Disconnect the outdoor antenna when the unit is not in use. Do not use the outdoor antenna during a lightning storm. FM outdoor antenna AM outdoor antenna FM outdoor antenna AM outdoor antenna (not included) (not included)
-
Page 6: Overview Of Controls
Overview of controls Main unit Main unit Refer to the numbers in parentheses for page reference. AC supply indicator [AC IN] Remote control signal This indicator lights when the unit is connected sensor to the AC power supply. Disc trays 1 Standby/on switch [y/l, POWER] (10, 18) Press to switch the unit from on to standby Disc tray open/close (7) -
Page 7: Discs
Discs skip tracks Press [4, REW / ] or [¢, / FF]. • During random play (\ see below, “Play Mode function”), you cannot skip to tracks which have been played. During 1-ALBUM and 1-ALBUM RANDOM mode, track skipping can only be done within the current album. - Page 8 Discs (Continued) Note: • When track number 25 or greater is playing, remaining play time display shows “– –:– –”. • When a title is longer than 9 characters, it will scroll across the display. The scrolling will start after every 3 seconds. •...
- Page 9 Action Advanced function ( Advanced function ( only) only) add to the program Album scan Album scan Repeat steps 3 to 4 in the stop mode. This function allows you to fi nd an album by listening to the fi rst track of all albums in the current disc for 10 seconds Repeat steps 4 to 6 in the stop mode.
- Page 10 Discs (Continued) NOTE on CDs • This unit can access up to 99 tracks. • Choose disc with this mark. • This unit can play MP3 or WMA fi les and CD-DA format audio CD-R/RW that have been fi nalized. •...
-
Page 11: Cassette Tape - Play And Record
Cassette tape – Play and record The buttons described for “Cassette tape – Play and NOTE on MP3 or WMA record” are mainly for the main unit unless indicated • Files are treated as tracks and folders are treated as albums. otherwise. - Page 12 Cassette tape – Play and record (Continued) By remote control only record 1) Press [DISC] and then [1] ~ [5] to select specifi c the disc. discs/tracks Ensure disc is stopped. 2) Press [PLAY MODE] to select the desired mode (\ page 7). For 1-ALBUM mode and 1-SONG mode: Press [ALBUM ( )] to select the...
-
Page 13: Radio
Radio Manual tuning Manual tuning Memory preset Memory preset Up to 15 stations each can be set in the FM and AM bands. Press [TUNER, BAND] to select “FM” or “AM”. Preparation Press [PLAY MODE] to select “MANUAL”. Press [TUNER, BAND] to select “FM” or “AM”. Press [4, REW / ] or [¢, / FF] to select the frequency of the required station. -
Page 14: Microphone Mixing
Microphone mixing Record microphone mixing Record microphone mixing Press [OPEN 0] for DECK 2 and insert the cassette to be recorded. Insert with the side to be recorded facing towards you and the exposed tape facing down. Lower the volume with [MIC VOL], then connect the microphone. -
Page 15: Timer
Timer Repeat steps 2 to 3 to set the finishing time. Setting the clock Setting the clock This is a 24-hour clock. Press and hold [– CLOCK/TIMER] to select “CLOCK”. Each time you press and hold the button: ˚ PLAY ˚... -
Page 16: Sound Adjustment
Timer (Continued) Sound adjustment Selecting sound effects Selecting sound effects Preset EQ Preset EQ Press [PRESET EQ] repeatedly to select your desired MUSIC setting. PORT HEAVY SOFT CLEAR VOCAL DISCO ➞ ➞ ➞ ➞ jack ➞ ➞ FLAT (off) HALL LIVE Setting Effect... -
Page 17: External Unit
External unit Connecting to a portable audio equipment Connecting to a portable audio equipment Playing from a portable audio equipment Playing from a portable audio equipment This feature enables you to enjoy music from a portable Switch off the equalizer function (if there is any) of the audio equipment. -
Page 18: Troubleshooting Guide
Troubleshooting guide Before requesting service, make the following checks. If you can’t fi x the system as described below, or if something not listed here occurs, refer to the enclosed directory to locate an Authorized Service Center convenient to you or contact your dealer. -
Page 19: Specifi Cations
Specifi cations AMPLIFIER SECTION SPEAKER SECTION RMS output power Front speakers SB-AK640 THD 10% Type 3 way, 3 speaker system (Bass refl ex) 1 kHz Speaker(s) (Low channel-both channels driven) 90 W per channel (3 Ω) Woofer 16 cm cone type 10 kHz Tweeter 6 cm cone type... - Page 20 Matsushita Electric Industrial Co., Ltd. Web Site: http://www.panasonic.co.jp/global/ RQTV0066-B L1005KE0 RQT8043...
- Page 21 Matsushita Electric Industrial Co., Ltd. Web Site: http://www.panasonic.co.jp/global/ RQTV0066-B L1005KE0 RQT8043...
- Page 22 Especifi caciones SECCIÓN DEL AMPLIFICADOR SECCIÓN DE ALTAVOCES Potencia de salida RMS Altavoces delanteros SB-AK640 Distorsión armónica total 10% Tipo Sistema de 3 altavoces de 3 vías (Refl ejo de bajos) 1 kHz Altavoces (Canal bajo-ambos canales excitados) 90 W por canal (3 Ω) Altavoz para graves Tipo cónico de 16 cm 10 kHz...
- Page 23 Guía para la solución de problemas Antes de solicitar el servicio de reparaciones, haga las comprobaciones de la tabla siguiente. Si no puede solucionar el problema como se describe a continuación, o si se produce algo que no se indica en la tabla, consulte el directorio adjunto para localizar el Centro de Servicio Autorizado más conveniente o póngase en contacto con su concesionario.
- Page 24 Equipo externo Reproduciendo desde un equipo portátil Reproduciendo desde un equipo portátil Conectando con un equipo portátil de Conectando con un equipo portátil de de música de música audio audio Desconecte la función ecualizador (si existe) del equipo de Esta característica le permite disfrutar de la música desde audio portátil antes de introducir el conector del puerto de un equipo portátil de audio.
-
Page 25: Ajuste Del Sonido
Temporizador (Continuación) Ajuste del sonido Selección de efectos de sonido Selección de efectos de sonido Ecualizador preajustado Ecualizador preajustado Pulse [PRESET EQ] repetidamente para seleccionar el ajuste deseado. Toma de MUSIC HEAVY ➞ SOFT ➞ CLEAR ➞ VOCAL ➞ DISCO PORT ➞... - Page 26 Temporizador Repita los pasos 2 a 3 para ajustar la hora de Puesta en hora Puesta en hora finalización. Éste es un reloj de sistema de 24 horas. Mantenga pulsado [– CLOCK/TIMER] para seleccionar “CLOCK”. Cada vez que pulse y mantenga pulsado el botón: Hora de fi...
- Page 27 Mezcla de micrófono Grabar la mezcla de micrófono Grabar la mezcla de micrófono Pulse [OPEN 0] para la platina 2 (DECK 2) e inserte la cinta que hay que grabar. Inserte con el lado que va a grabar hacia usted y con la cinta expuesta hacia abajo.
- Page 28 Radio Sintonización manual Sintonización manual Grabación de emisoras en memoria Grabación de emisoras en memoria Se puede presintonizar un máximo de 15 emisoras en cada Pulse [TUNER, BAND] para seleccionar “FM” o banda, FM y AM. “AM”. Pulse [PLAY MODE] para seleccionar “MANUAL”. Preparación Pulse [TUNER, BAND] para seleccionar “FM”...
- Page 29 Cintas de casete – reproducción y grabación (Continuación) Mando a distancia solamente grabar 1) Pulse [DISC] y luego [1] ~ [5] para discos/pistas seleccionar el disco. específi cas Asegúrese de que el disco esté parado. 2) Pulse [PLAY MODE] para seleccionar el modo deseado (\ página 7).
- Page 30 Cintas de casete – reproducción y grabación NOTA sobre MP3 o WMA • Los archivos son tratados como pistas y las carpetas como Los botones descritos para “Cintas de casete – álbumes. reproducción y grabación” son principalmente para la • Este aparato puede tener acceso a un máximo de 999 pistas, 255 unidad a no ser que se indique lo contrario.
- Page 31 Discos (Continuación) NOTA sobre CDs • Este aparato puede tener acceso a un máximo de 99 pistas. • Busque el disco con esta marca. • Esta unidad puede reproducir archivos MP3 o WMA y formato de audio CD-DA CD-R/RW en discos que hayan sido cerrados. •...
- Page 32 Para Acción Funciones avanzadas (solo Funciones avanzadas (solo añadir al programa Exploración de álbumes Exploración de álbumes Repita pasos 3 a 4 en el modo paro. Esta función le permite encontrar un álbum escuchando durante 10 segundos la primera pista de todos los álbumes Repita pasos 4 a 6 en el modo paro.
- Page 33 Discos (Continuación) Nota: • Cuando se reproduce la pista número 25 u otra de número superior, la visualización del tiempo de reproducción restante mostrará “– –:– –”. • Cuando un título tenga más de 9 caracteres, éste se desplazará de un lado a otro del visualizador. El avance/retroceso comenzará cada 3 segundos.
- Page 34 Discos saltar pistas Pulse [4, REW / ] o [¢, / FF]. • Durante la reproducción aleatoria (\ ver abajo, “Función de modo de reproducción”), no se puede saltar a pistas que ya han sido reproducidas. Durante el modo 1-ALBUM y 1-ALBUM RANDOM, el salto de pista sólo puede realizarse dentro del álbum actual.
- Page 35 Controles Aparato principal Aparato principal Los números entre paréntesis indican la página de referencia. Indicador de alimentación de CA [AC IN] Sensor de señal del Este indicador se encenderá cuando el aparato mando a distancia esté conectado a la red de CA. Bandeja de discos 1 Interruptor de alimentación en espera/ conectada [y/l, POWER] (10, 18)
- Page 36 Conexiones de antenas opcionales Conexiones de antenas opcionales Utilice una antena exterior si la recepción de la radio no es adecuada. Nota: Desconecte la antena exterior cuando no utilice el aparato. No utilice la antena exterior durante una tormenta eléctrica. Antena exterior de FM Antena exterior de AM Antena exterior de FM...
-
Page 37: Preparativos Iniciales
Preparativos iniciales Paso Paso 1 1 - Conexiones - Conexiones Conecte el cable de alimentación de CA sólo después de haber hecho todas las demás conexiones. Conecte el cable de alimentación de CA. Inserción del conector Incluso cuando conector está bien insertado, dependiendo del tipo de toma usada, la parte delantera del... -
Page 38: Instrucciones Importantes De Seguridad
INSTRUCCIONES IMPORTANTES DE SEGURIDAD Colocación de los altavoces Utilice solamente los altavoces suministrados. Agudos Ponga el altavoz Agudos La combinación de la unidad principal y los altavoces de subgraves en proporciona el mejor sonido. Utilizando otros altavoces se el suelo o en una puede estropear la unidad y el sonido quedará... - Page 39 Muchísimas gracias por haber adquirido este aparato. Lea con atención estas instrucciones para obtener las máximas prestaciones y seguridad. Estas instrucciones de funcionamiento son para el sistema siquiente. Sistema SC-AK640 Aparato principal SA-AK640 Altavoces delanteros SB-AK640 Altavoz de subgraves SB-WAK640...
- Page 40 Instrucciones de funcionamiento Sistema estéreo con reproductor de discos compactos SC-AK640 Model No. ACCESORIOS SUMINISTRADOS ACCESORIOS SUMINISTRADOS Por favor, verifi que e identifi que los accesorios suministrados. 1 x Cordón de alimentación de CA Índice INSTRUCCIONES IMPORTANTES DE 2 x Pilas del mando a distancia SEGURIDAD .........3...