Table of Contents
Advertisement
Advertisement
Table of Contents

Related Manuals for Creative NOMAD Jukebox ZEN NX 20GB


Summary of Contents for Creative NOMAD Jukebox ZEN NX 20GB
- Page 1 User’s Guide...
- Page 2 Creative NOMAD Jukebox Zen NX Information in this document is subject to change without notice and does not represent a commitment on the part of Creative Technology Ltd. No part of this manual may be reproduced or transmitted in any form or by any means, electronic or mechanical, including photocopying and recording, for any purpose without the written permission of Creative Technology Ltd.
- Page 3 Contents...
-
Page 4: Table Of Contents
Hardware ................xviii Software ................. xviii Creative MediaSource Player .......... xix Creative MediaSource Organizer ........xix Creative File Manager 2 ............ xx Adobe Acrobat Reader ............. xx Minimum System Requirements ........... xxi Document Conventions ..............xxii Web Information ................xxiii Optional Player Accessories ............ - Page 5 Selecting list and confirmation box options ..... 1-3 2 Getting Started Inserting the battery ..............2-1 Charging the Battery ..............2-3 Power Source and Level Indicators ........2-4 Installing Software ................. 2-5 Connecting your Player to your Computer ........2-6 Transferring Music ................
- Page 6 Enhancing Your Music ..............3-25 Using EAX ................3-25 Customizing EQ Settings in EAX ......... 3-27 4 Software Applications About Creative MediaSource and File Manager 2 ......4-1 Using Creative MediaSource ..........4-2 Ripping Audio CD Tracks ..........4-2 Transferring tracks ............4-3 Editing audio track information ........
- Page 7 A Technical Specifications Size ................. A-1 Weight ................A-1 Memory ................A-1 Capacity ................A-1 Battery type ..............A-1 Battery Life (playback time) ..........A-1 Interface ................A-1 Playback Formats ............A-2 Signal to Noise Ratio ............A-2 Channel Separation ............A-2 THD .................
- Page 8 C Frequently Asked Questions and Error Diagrams AutoPlay ..................C-1 Features ..................C-2 General ..................C-2 Maintenance .................. C-5 Usage .................... C-5 Error Diagrams ................C-7 D User Preferences Setting User Preferences .............. D-1 Personalize your Jukebox ............. D-1 Profiles ................... D-2 Using Sleep Timer ............
-
Page 9: Safety And Handling Instructions
Safety and Handling Instructions... -
Page 10: Caring For Your Player
Safety and Handling Instructions Caring For While your player is quite robust, observing these handling procedures will prolong its life. Your Player Do not store or Do not subject to use in areas excessive force or exceeding 45ºC impact. or 113ºF. Do not expose to Keep away from heat or incinerate. -
Page 11: Battery Usage Precautions
Battery Usage When charging or handling your player’s battery, take note of these precautions: Precautions Do not expose to Avoid contact with heat or fire. metal objects like keys or Never modify or necklaces. disassemble the battery. If there is leakage, stench, Do not pierce or Store away from... -
Page 12: Introduction
Introduction... - Page 13 Introduction Congratulations on making an excellent decision in purchasing the Creative NOMAD Jukebox Zen NX! Your new multi-format portable player is extremely lightweight, just about 8.0 The product name may ounces (226 grams). Even though it is no bigger than a normal portable vary from country to cassette player, you can store thousands of songs in the player’s music...
-
Page 14: Before You Begin
Before You Begin... -
Page 15: Hardware
❍ ❍ Quick Start leaflet ❍ Stereo headphones ❍ USB cable ❍ Protective pouch ❍ Lithium-ion rechargeable battery Software ❍ Creative MediaSource Player ❍ Creative MediaSource Organizer ❍ Creative File Manager 2 Adobe Acrobat Reader ❍ Before You Begin xviii... -
Page 16: Creative Mediasource Player
With Creative MediaSource Organizer, you can find any track easily, no MediaSource matter where it is stored on your hard disk or external storage devices. Organizer To enjoy this feature, you must have a Creative Sound Blaster Audigy 2 audio card installed in your system. Before You Begin xix... -
Page 17: Creative File Manager 2
Explorer, you can easily copy or move data files to and from your player, just like a portable storage device. Creative File Manager 2 also lets you copy audio tracks to your player's Music Library. However, you will not be able to view your player's Music Library with Creative File Manager 2. -
Page 18: Minimum System Requirements
® ® Minimum ❍ Microsoft Windows 98 Second Edition (SE), Windows 2000, Windows Millennium Edition (Me) or Windows XP System ® ® ® ® ❍ Intel Pentium II 233 MHz, AMD -K6-2 266 MHz or better processor Requirements (Pentium III 450 MHz or higher recommended for MP3 encoding) ❍... -
Page 19: Document Conventions
Document We use icons to highlight useful or urgent information for you: Conventions Tip. This tells you about shortcuts or hints relating to a feature. Note. This highlights additional or important information about a feature. Caution! This highlights proper usage of your player. Use this information to avoid situations involving risk. -
Page 20: Web Information
Visit www.NOMADworld.com regularly for information on: Information ❍ firmware updates ❍ NOMAD accessories tips and tricks ❍ ❍ FAQs ❍ troubleshooting ❍ documentation updates ❍ software updates or purchases ❍ technologies used in your player ❍ an online glossary Before You Begin xxiii... -
Page 21: Optional Player Accessories
Optional Player Accessories Car Kit ❍ The Car Kit comes with a Cassette Adapter that connects your player to a car cassette player. Removable battery ❍ You can get an additional removable Lithium-Ion battery for your battery. Visit www.NOMADworld.com to learn more about these accessories. Before You Begin xxiv... -
Page 22: Online Registration
Enjoy a host of benefits by registering your products during installation, or at www.creative.com/register. Registration Benefits include: ❍ Service and Product support from Creative. Exclusive updates on promotions and events! ❍ To register online, your player must be connected to the computer. -
Page 23: Tour Of Your Player
A Tour of Your Player... -
Page 24: Your Player At A Glance
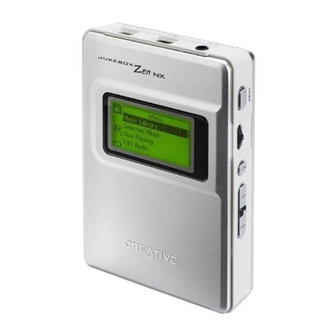
A Tour of Your Player Your Player at a Glance LCD screen USB connector connects a USB cable from your player to your computer to transfer data or audio Forward/Reverse button Power adapter Play/Pause connector button Scroller Headphones connector connects to your Menu button headphones. -
Page 25: Using The Scroller
Using the Scroller Scroll Select The Scroller is one of the most important features of your NOMAD Jukebox Zen NX. In this document, we will use a new term, “Scroll Select”, to indicate that you should use the Scroller to scroll through options and then select the option by pressing the Scroller. -
Page 26: Selecting Menu Options
Selecting menu You can use the Scroller to make selections in menus. For example, if you are looking at the Menu screen: options From the Menu screen to the Settings screen 1. Use the Scroller to scroll up and down in the menu. 2. - Page 27 Button What It Does Usage Tips ❍ press and hold until player turns OWER on or off ❍ when the player is turned on, ❍ turns the player on and off press this button. The Lock ❍ disables all buttons except for the scroller player? window appears.
- Page 28 Button What It Does Usage Tips ❍ press and hold the end of OLUME the button to increase the ❍ increases the volume volume quickly ❍ decreases the volume ❍ press and hold the end of the button to decrease the volume quickly ❍...
-
Page 29: Getting Started
Getting Started... -
Page 30: Inserting The Battery
Getting Started Inserting the 1. Push the Open switch to the right as shown in Figure 2-1. The cover pops open. battery Open switch Figure 2-1: Opening the cover. 2. Insert the battery into your player. 3. Position the hooks of cover over the openings as shown in Figure 2-2. Hook Opening Figure 2-2: Positioning hooks of cover. - Page 31 4. Press the cover gently to snap shut as shown in Figure 2-3. Figure 2-3: Securing the cover. Getting Started 2-2...
-
Page 32: Charging The Battery
Charging the The high performance lithium-ion battery supplied with your player needs to be fully charged before you use it. Your player’s built-in battery charger will Battery fully charge the battery (in approximately 4 hours) to obtain the maximum playback time. To charge your player’s battery: 1. -
Page 33: Power Source And Level Indicators
Power Source Your player displays one of the following icons, depending on the battery’s charged status or the power source (battery or electrical power). and Level Indicators Icon What the icon means Notes ❍ your player is running from electrical power only ❍... -
Page 34: Installing Software
4. Click the Install software for NOMAD Jukebox Zen NX option to select 5. Click the OK button. You can also select the language that your 6. Click the Next button to register with Creative, so that you will be player’s screens updated on new developments for your Jukebox. appear in. See "Language Settings"... -
Page 35: Connecting Your Player To Your Computer
You are now ready to connect your player to your computer. Your NOMAD Jukebox Zen NX comes with a USB 2.0 cable for fast data transfers to and your Player to from your computer. Be sure that you have installed Creative MediaSource your Computer before connecting your player. -
Page 36: Transferring Music
CDs to your computer. Music files must, however, be encoded into the supported formats (MP3, WMA or WAV file formats), then transferred to your player with Creative MediaSource Organizer. Data files can also be transferred and stored in your player. For example, you want to transfer a large movie file from one computer to another. -
Page 37: Downloading From The Internet
The first phase in making an MP3 file is extracting audio data from an audio CD. To extract audio data, you will need a CD-ROM drive that can extract digital audio data, and a program known as a Ripper. With Creative MediaSource Organizer, you can rip tracks from most audio CDs. This program uses the CD-ROM drive to read the audio tracks from the audio CD and stores it on your hard disk. - Page 38 MP3 files is 128 Kbps, although some are set higher, at 160 or 192 Kbps. Higher bitrates will result in larger MP3 file sizes, with better audio quality. Use Creative MediaSource Organizer to extract audio tracks and encode MP3s.
-
Page 39: Playing And Managing Your Music
Playing and Managing Your Music... -
Page 40: Playing Music
Tracks to the Selected Music List" on page 3-11, then play back the entire Selected Music List. To add audio tracks to NOMAD Jukebox Zen NX’s Music Library, see "Using Creative MediaSource" on page 4-2. Follow these steps to play the Selected Music List. Playing the Selected Music List 1. -
Page 41: Playing All Tracks In Your Player
3. Scroll Select Selected Music. The upper-left corner of the screen will display the Selected Music List icon. Selected Music List icon Audio Selections 4. Press the Back button again to display the Menu screen. 5. Scroll Select Now Playing, which shows the track that is being played back or the track that has been selected. -
Page 42: Play Modes
Play Modes Your player has Play Modes that allow you to change how your Selected Music List is played back. The following Play Modes are available: ❍ Repeat track ❍ Repeat all ❍ Shuffle ❍ Shuffle repeat ❍ Track once ❍... -
Page 43: Shuffling Music
To repeat the whole Selected Music List Scroll Select Repeat All. The Repeat All icon appears onscreen and the Selected Music List is repeated continuously until you stop it. Shuffling music The Shuffle Play Mode can be used once (“Shuffle”) or continuously (“Shuffle Repeat”). -
Page 44: Playing A Track Once
To Shuffle Repeat the Selected Music List continuously Scroll Select Shuffle Repeat. The Shuffle Repeat icon appears onscreen and tracks are selected at random and played back continuously until you stop playback. Playing a track When the Selected Music List is played normally, each track in the Selected Music List is played, from the first track to the last. -
Page 45: Normal Mode
Normal mode Once the Normal mode is enabled, each track in the Selected Music List is played, from the first track to the last. 1. Press the Menu button 2. Scroll Select Selected Music. The Selected Music List screen appears. 3. -
Page 46: Bookmarking A Track
Bookmarking a Bookmarking a track sets a playback point—you can jump to this point whenever you play the bookmarked track. This is useful if, for example, you track want to bookmark an audio book. 1. Press the Menu button 2. Scroll Select Now Playing. A track can only be The Now Playing screen appears. - Page 47 To remove a bookmark Scroll Select Clear Bookmark. A message box appears, telling you that the bookmark has been cleared. Playing and Managing Your Music 3-8...
-
Page 48: Organizing Your Music
All transferred tracks can be found in the "All Tracks" category, but Jukebox Zen NX’s depending on your Creative MediaSource settings, tracks can also be found Music Library, see in other categories. For example, take a fictitious track called "Toffee Apple "Using Creative... -
Page 49: Finding A Music Track In The Music Library
Finding a Music In the following example, you will be shown how to find a track by navigating through your Music Library. Track in the Music Library 1. Press the Menu button 2. Scroll Select Music Library. 3. Scroll Select an audio category. For example, if you want to find a track in a particular album, Scroll Select Albums. -
Page 50: Adding Music Tracks To The Selected Music List
Adding Music Audio selections from the Music Library can either be added sequentially after selections already in the Selected Music List ("Add to Play") or placed Tracks to the at the front of the Selected Music List for immediate playback ("Play Now"). Selected Music List 1. - Page 51 5. Scroll Select Open. The tracks within the sub-category appear. 6. Scroll Select Add to Play to add the audio selection to the back of the Selected Music List. 7. Scroll Select Play Now or press the Play button to add the selection to the front of the Selected Music List and immediately play it back.
-
Page 52: Viewing Track Information In The Music Library
Viewing Track Detailed information about tracks in the Music Library is readily available. This includes the track’s title, artist, album and genre that the track belongs Information in to, as well as the track’s length. the Music Library To view information about tracks in the Music Library 1. -
Page 53: Deleting Music Tracks From The Music Library
Deleting Music This action permanently deletes tracks, albums, artists, genres or Selected Music Lists from your NOMAD Jukebox Zen NX. Tracks from the To delete a track Music Library 1. Press the Menu button 2. Scroll Select Music Library. 3. Scroll Select an audio category. For example, if you want to find a track in a particular album, Scroll Select Albums. - Page 54 To delete an entire album, artist, genre or Selected Music List 1. Press the Menu button 2. Scroll Select Music Library. 3. Scroll Select an audio category. For example, if you want to delete a particular album, Scroll Select Albums. 4.
-
Page 55: Using The Selected Music List
Using the You can do more than play audio selections in the Selected Music List. You can: Selected ❍ View audio in the Selected Music List Music List ❍ View information about tracks in the Selected Music List ❍ Remove audio ❍... - Page 56 4. Scroll Select Expand. The tracks in the selection appear beneath the album, artist or genre. To collapse an album, artist or genre 1. Press the Menu button 2. Scroll Select Selected Music. The Selected Music List screen appears. 3. Scroll Select the expanded album, artist or genre. A list appears. 4.
-
Page 57: Viewing Track Information In The Selected Music List
Viewing track Information about tracks in the Selected Music List can be easily accessed and viewed. The information provided is identical to that described in "To information in the view information about tracks in the Music Library" on page 3-13. Selected Music List 1. -
Page 58: Removing Music Tracks From The Selected Music List
Removing music When tracks, albums, artists or genres are removed from your player’s Selected Music List, they are only removed from the Selected Music List— tracks from the audio still remains in the Music Library. To delete audio completely, tracks, Selected Music albums, artists or genres must be deleted from the Music Library as shown in List... - Page 59 To remove all audio from the Selected Music List 1. Scroll Select Remove All. A confirmation box appears, asking you if you want to remove all tracks in the Selected Music List. 2. Scroll Select the check mark All audio selections are removed from the Selected Music List. Playing and Managing Your Music 3-20...
-
Page 60: Rearranging The Selected Music List
Rearranging the If you want to listen to tracks in a particular order, you can rearrange the tracks in the Selected Music List by artist, genre or individual track. Selected Music List 1. Press the Menu button 2. Scroll Select Selected Music. The Selected Music List screen appears. - Page 61 5. Using the Scroller, move the album, artist, genre or individual track to the preferred position in the Selected Music List. 6. Press the Scroller to set the position you have selected. Playing and Managing Your Music 3-22...
-
Page 62: Saving The Selected Music List As A Playlist
Saving the If you like the contents and arrangement of your current Selected Music List, you can choose to save it as a playlist for retrieval and playback later. Selected Music List as a playlist 1. Press the Menu button 2. - Page 63 5. Scroll Select the letters on the list to form a name for your playlist. This name appears in the box at the bottom of the screen. Note: When entering letters into the box, you can switch from upper to lower case (or vice-versa) by simply Scroll Selecting the letter and holding the Scroller until the letter changes to the case you want.
-
Page 64: Enhancing Your Music
Enhancing Your Music Using EAX Your player allows you to enhance your listening experience with EAX technologies also available with Creative's Sound Blaster Live! and Audigy 2 audio cards. EAX technologies (or "Settings") available in your player include: ❍ Environment, a collection of presets that allows you to experience audio in the... - Page 65 To use EAX with your currently playing audio: 1. Turn on EAX. 2. Select an EAX setting. 3. Select a preset, rate or mode to use with the selected EAX setting. This simple process is described in the following instructions. 1.
-
Page 66: Customizing Eq Settings In Eax
Scroll Select the preset, rate or mode you want to use with your EAX setting. Customizing EQ Under the EAX Advanced EQ settings, a Custom EQ option lets you define your own EQ settings. Settings in EAX 1. Press the Menu button 2. - Page 67 6. Scroll Select each vertical control level. Use the Scroller to move the control knob up or down to vary the amount of boost or reduction in the selected frequency range. 7. Scroll Select the check mark to return to the EAX Audio Settings. Playing and Managing Your Music 3-28...
-
Page 68: Software Applications
Software Applications... -
Page 69: About Creative Mediasource And File Manager 2
Creative MediaSource, Creative File Manager 2, and other useful software, are included on your installation CD (see "Installing Software" on page 2-5). MediaSource Creative MediaSorce is the best way to organize and transfer audio to and and File from your player. This chapter includes basic instructions on using... -
Page 70: Using Creative Mediasource
Library. You can choose to rip an entire CD, or selected tracks from the audio Tracks To rip a CD 1. Insert an audio CD into your CD-ROM drive. Rather than manually 2. If you are not already in Creative MediaSource Organizer, click the entering track Player/Organizer View button. information, retrieve such audio CD 3. -
Page 71: Transferring Tracks
Transferring tracks With Creative MediaSource, you can transfer files and audio tracks to and from your player. To transfer files from one source to another 1. If you are not already in Creative MediaSource Organizer, click the Player/Organizer View button. -
Page 72: Editing Audio Track Information
To edit information about a track 1. If you are not already in Creative MediaSource Organizer, click the Player/Organizer View button. 2. In the Content window, locate the track you want to edit, and right-click 3. Select the Edit Track Properties option. -
Page 73: Creating A Playlist
To create a playlist tracks in your player cannot be transferred 1. If you are not already in Creative MediaSource Organizer, click the to your computer. Player/Organizer View button. 2. In the Sources window, select PC Music Library. -
Page 74: Adding Audio Tracks To A Playlist
5. Click the OK button. 6. Continue selecting tracks until your playlist is complete. Adding audio tracks 1. If you are not already in Creative MediaSource Organizer, click the Player/Organizer View button. to a playlist 2. In the Sources window, click the plus sign next to Playlists and select the playlist. -
Page 75: Using File Manager 2
Using File Instructions on how to use File Manager 2 are in the File Manager 2 Help file—only basic instructions are provided here. Manager 2 Creating a folder 1. In Windows Explorer, locate and click the Nomad Explorer icon . 2. -
Page 76: Deleting A File Or Folder
Deleting a file or 1. In Windows Explorer, locate and click the NOMAD Explorer icon . folder 2. On the View menu, point to Active Device and click NOMAD Jukebox. 3. If you have more than one NOMAD Jukebox connected to your computer, click the NOMAD Jukebox that you want to set as active. -
Page 77: A Technical Specifications
Technical Specifications... -
Page 78: Size
Technical Specifications 2.99" (W) x 4.43" (H) x 0.95" (D) or 75.9 mm x 112.5 mm x ❑ Size 24.1 mm 8.0 oz or 226 gms (with the battery) ❑ Weight 8 MB SDRAM buffer ❑ Memory 20/30 GB hard drive ❑... -
Page 79: Playback Formats
MP3 (at 8, 16, 22.05, 24, 32, 44.1 and 48 kHz) Playback Formats ❑ WMA (at 16, 22.05, 24, 32, 44.1 and 48 kHz) ❑ Wave (at 32, 44.1, 48 kHz) ❑ Up to 98 dB (Headphones) ❑ Signal to Noise Ratio Up to 75 dB (Headphones) ❑... -
Page 80: Data Connector
USB 2.0/USB 1.1 ❑ Data Connector Environment effects ❑ Parametric equalization ❑ Headphone spatialization ❑ Smart Volume Management ❑ Advanced EQ ❑ Time Scaling ❑ Up to 1.5 times faster or 0.5 times slower for audio book content, ❑ Playback Speed WMA, WAV and MP3 audio playback Technical Specifications A-3... -
Page 81: B Onscreen Diagram And Icon Guide
Onscreen Diagram and Icon Guide... -
Page 82: Information Diagrams
Onscreen Diagram and Icon Guide Information Diagram Action/Meaning Diagrams ❍ your computer is actively managing your player. To use your player, disconnect it from your computer. Warning: Do not disconnect your player while your computer is still actively managing it. The following icons appear onscreen when the associated... -
Page 83: Playback Icons
Playback Icons Icon Action/Meaning ❍ Play ❍ Pause ❍ Forward ❍ Reverse ❍ Skip forward ❍ Skip back Onscreen Diagram and Icon Guide B-2... -
Page 84: Selected Music List Icons
Selected Music Icon Action/Meaning List Icons ❍ Album ❍ Artist The following icons are commonly found in the Selected List screen. ❍ Genre ❍ Track ❍ Track within audio category ❍ Audio selected for playback or that is currently playing back Onscreen Diagram and Icon Guide B-3... -
Page 85: Play Mode Icons
Play Mode Icon Action/Meaning Icons ❍ Repeat Track ❍ The following icons Repeat All appear onscreen when the respective audio enhancements are active. ❍ Shuffle ❍ Shuffle Repeat ❍ Play Track Once Onscreen Diagram and Icon Guide B-4... -
Page 86: Navigational Icons
Navigational Icon Action/Meaning Icons ❍ Menu The following icons ❍ Selected Music List appear onscreen when you are in the associated firmware section. ❍ Now Playingk ❍ Music Library ❍ Playlists category ❍ All Tracks category ❍ Albums category ❍ Artists category Onscreen Diagram and Icon Guide B-5... - Page 87 Icon Action/Meaning ❍ Genre category The following icons appear on-screen when you are in the ❍ associated firmware section. ❍ Find ❍ Settings ❍ About Onscreen Diagram and Icon Guide B-6...
-
Page 88: C Frequently Asked Questions And Error Diagrams
Frequently Asked Questions and Error Diagrams... -
Page 89: Autoplay
NOMAD Jukebox Zen NX. If you have a technical problem with this product, you may wish to consult our self-help tool “Knowledgebase” for online troubleshooting and solutions. Go to www.creative.com and select your region. The Frequently Asked Questions (FAQs) have been divided into a few categories for your easy reference. -
Page 90: Features
Where can I get official information on all Jukebox products? Visit NOMADworld for updates and downloads relating to all Jukebox products, Creative’s MP3 players and accessories. Visit www.NOMADworld.com. My player seems to have frozen. Is there anything I can do? You can reset your player. - Page 91 How can I get accessories for my Jukebox? Visit www.NOMADworld.com for the latest news on accessories. FAQs and Troubleshooting C-3...
- Page 92 You may see this message when installing this driver or update. If you do, you may choose to click the Continue Anyway button. Creative has tested this driver or update on Windows XP, and it does not impair or destabilize your computer.
-
Page 93: Maintenance
Maintenance Do I need to defragment the player’s hard disk? No, you will not need to defragment, format or clean up the hard disk at all. The player’s unique file system ensures that you will not have to worry about hard disk maintenance. - Page 94 If I damage or lose my AC adapter, can I buy a similar, off-the-shelf adapter? No. The adapter may not be compatible with your player, and may even damage it. You should get a replacement adapter from Creative at www.NOMADworld.com, or your local Creative office/distributor. FAQs and Troubleshooting C-6...
-
Page 95: Error Diagrams
Error Diagrams If an error occurs, you may see any one of the following diagrams, indicating the general nature of the problem. Diagram Likely Causes Suggested Action ❍ download a newer ❍ unexpected power firmware version loss while saving ❍ reload firmware settings ❍... -
Page 96: D User Preferences
User Preferences... -
Page 97: Setting User Preferences
User Preferences Setting User Your player offers many configuration options. You can ❍ personalize your Jukebox Preferences ❍ specify profiles ❍ set the contrast level for your player’s screen ❍ select the default language ❍ reset your player ❍ lock and unlock your player’s buttons ❍... -
Page 98: Profiles
Profiles In this screen, you can: ❍ select a profile ❍ clear the Selected Music List whenever you Scroll Select the Play Now option. ❍ change the skin of the Now Playing screen ❍ specify the default start screen ❍ enable the screensaver ❍... -
Page 99: Contrast
Setting Sleep Timer Sleep Timer lets you play music tracks for a specified time period. 1. From the Settings screen, Scroll Select Edit Profile. 2. Scroll Select Sleep Timer. 3. Select a playback time. 4. Scroll Select the left arrow to exit the Profile screen. 5. -
Page 100: Input Language
Input Language This option controls the language in which you input letters or characters in input boxes, for example, when you search for a track or rename a playlist. 1. From the Settings screen, Scroll Select Input under Language. 2. From the menu, Scroll Select a language. Time and Date This option allows you to set the date and time, and set the Wake to Music feature. -
Page 101: Setting Wake-To-Music
Setting Wake-To- 1. From the Jukebox Settings screen, Scroll Select Time & Date. Music 2. Scroll Select the time settings next to the Wake to Music icon 3. Turn the Scroller up or down to increase or decrease the time, and then press the Scroller to save the setting. -
Page 102: Resetting Your Player's Settings
Resetting your If you wish to reset your player’s settings to the default settings, do the following Player’s Settings 1. Press the Menu button. 2. Scroll Select Settings. 3. Scroll Select Reset Settings. A confirmation window appears. 4. Scroll Select the check mark Resetting your If your player stops responding, reset the player. -
Page 103: Locking And Unlocking Your Player
Locking and Locking your NOMAD Jukebox Zen NX will disable all buttons on the player except for the Scroller. This feature is useful when you do not want any unlocking your buttons (for example, Stop) pressed accidentally. Player If you press a button while the player is locked, a popup window appears for you to unlock the player.