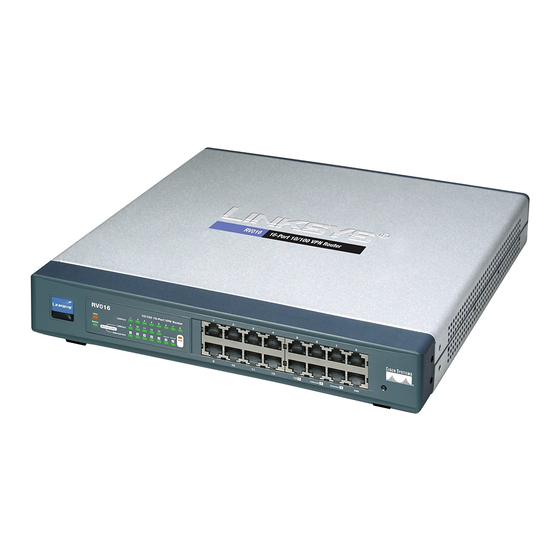
Cisco RV016 User Manual
10/100 16-port vpn router business series
Hide thumbs
Also See for RV016:
- Administration manual (199 pages) ,
- Quick start manual (13 pages) ,
- Datasheet (4 pages)
Table of Contents
Advertisement
Quick Links
Advertisement
Table of Contents

Related Manuals for Cisco RV016


Summary of Contents for Cisco RV016
- Page 1 USER GUIDE BUSINESS SERIES 10/100 16-Port VPN Router RV016 Model:...
-
Page 2: Icon Descriptions
Website addresses in this document are listed without http:// in front of the address because most current web browsers do not require it. If you use an older web browser, you may have to add http:// in front of the web address. -
Page 3: Table Of Contents
How to Access the Web-Based Utility ....... . . 7... - Page 4 Bandwidth Management ........27...
- Page 5 Install the Client Certificate ........64...
- Page 6 Configuration of the RV016 ........68...
- Page 7 Battery Recycling Statement ........
-
Page 8: Chapter 1: Introduction
Two are dedicated Internet ports that let you connect QuickVPN software. (For more information, refer a second Internet line as a backup, or you can use both to “Appendix B: Linksys QuickVPN for Windows Internet ports at the same time, allowing the Router to 2000, XP, or Vista”.) -
Page 9: Computer (Using Vpn Client Software) To Vpn Router
VPN settings. She accesses the VPN client software and connects to the VPN Router at the central office. As VPNs use the Internet, distance is not a factor. Using the VPN, the businesswoman now has a secure connection to the central office’s network, as if she... -
Page 10: Chapter 2: Product Overview
(Orange) The Diag LED lights up when press and hold in the Reset button for a the Router is not ready for use. It turns off when second using the tip of a pen. This is similar the Router is ready for use. -
Page 11: Chapter 3: Installation
There are three ways to place the Router. The first way is Suggested Mounting Hardware to place the Router horizontally on a surface. The second way is to mount the Router on a wall. The third way is to mount the Router in a standard-sized, 19-inch high rack. 5-6 mm 1.6-2 mm... -
Page 12: Rack-Mount Placement
(Tma) specified by the manufacturer. Reduced Air Flow Installation of the equipment • in a rack should be such that the amount of air flow required for safe operation of the equipment is not compromised. Mechanical Loading Mounting of the equipment in •... - Page 13 Power port, and then plug the power cord into an electrical outlet. Connect the Power The System LED on the front panel will light up as soon as the power adapter is connected properly. Power on your computers and other network devices.
-
Page 14: Chapter 4: Advanced Configuration
The Router’s web-based utility allows you to set up utility is a link to the Site Map, which has links to all of the the Router and perform advanced configuration and utility’s tabs. -
Page 15: System Information
Firmware version Displayed here is the current version of each port. If a port is disabled, it will be red; if a port is number of the firmware installed on the Router. enabled, it will be black. If a port is connected, it will be Displayed here are the type and speed of the green. -
Page 16: Network Setting Status
This shows the DMZ IP address, as seen by external users on the Internet and hyperlinks to the DMZ If you have not set up the e-mail server on the Log tab, Setting section on the Setup > Network screen. -
Page 17: Setup > Network
192.168.1.1 for the Router’s local IP address and 255.255.255.0 for the subnet mask. If you have set up the mail server but the log has not been generated due to the Log Queue Length and Log Time Multiple Subnet You can add more Class C networks Threshold settings, the message, “E-mail settings have... - Page 18 Exit to return to the Network screen. connect two broadband connections to the Router; however, you can set up as many as seven broadband If you want to delete a subnet you have created, select it connections. and click Delete selected subnet. Click Save Settings...
- Page 19 Internet connections for end-users. If you use a DSL Use the Following DNS Server Addresses If you want to line, check with your ISP to see if they use PPPoE, select specify DNS server IP addresses, select this option. PPPoE.
- Page 20 If you select the Connect on Demand option, the connection will be disconnected The Router comes with a special DMZ port, which is used after a specified period of inactivity (Max Idle Time). If you for setting up public servers. The DMZ port sits between have been disconnected due to inactivity, Connect on the local network ports and the Internet port.
-
Page 21: Setup > Password
Chapter 4 Advanced Configuration Each of the servers on the DMZ will need a unique, public Internet IP address. The ISP you use to connect your network to the Internet should be able to provide these addresses, as well as information on setting up public Internet servers. -
Page 22: Setup > Dmz Host
Setup > DMZ Host Forwarding The DMZ (Demilitarized Zone) Host feature allows one local user to be exposed to the Internet for use of a Port Range Forwarding special-purpose service such as Internet gaming or videoconferencing. Although Port Range Forwarding can... -
Page 23: Setup > Upnp
Port Triggering table. Then the Router will forward the entry. incoming packets to the LAN host. Application Name If the Service you need is not listed in the menu, click Enter the name of the application. Service Management to add the new service. The Service Trigger Port Range Enter the starting and ending port Management screen appears. -
Page 24: Upnp
Settings to save your changes, or click Cancel Changes to undo them. Click Exit to return to the UPnP screen. If you want to delete a service you have created, select it and click Delete selected service. Click Save Settings to save your changes, or click Cancel Changes to undo them. -
Page 25: One-To-One Nat
Enter the starting IP address of the After you clicked Edit, configure the MAC Clone settings internal IP address range. This is the IP address of the first for the selected WAN port. device that can be accessed from the Internet. -
Page 26: Setup > Ddns
Dynamic Domain Name System (DDNS) service allows fields. For example, if your host name were myhouse. you to assign a fixed domain name to a dynamic WAN IP dyndns.org, then myhouse would go into the first field, address, so you can host your own web, FTP or other type dyndns would go into the second field, and org would go of TCP/IP server in your LAN. -
Page 27: Setup > Advanced Routing
The RIP would go into the second field, and net would go into the protocol regularly broadcasts routing information to last field. -
Page 28: Dhcp > Setup
Select the appropriate interface. The Interface tells you whether your network is on the LAN or WAN. If the gateway router is on a LAN port, then select LAN. If you are connecting to another network through the Internet, select the appropriate WAN port option. -
Page 29: Setup
WINS is assigned if the computer (DHCP client) requests Static IP one. If you do not know the IP address of the WINS server, keep the default, 0.0.0.0. You can assign a static IP address to a specific device based on its MAC address. -
Page 30: Dhcp > Status
Intelligent Balancer (Auto Mode) and IP Group (By Users), except for WAN1. The Router reserves at least one WAN DHCP > Status port for non-IP Group users, so WAN1 will always be set to Intelligent Balancer (Auto Mode). On the Status screen, view the status information for the DHCP server and its clients. - Page 31 IP address. This tool can detect the network connection who use Intelligent Balancer mode. status of the ISP if you have set up the DNS server in the If you change the Router’s Load Balance Mode, a Setup > Network screen. If you did not set up the DNS confirmation message will appear.
- Page 32 IP address. This tool can detect the network connection would like, up to a maximum of 100. To delete a rule, select status of the ISP if you have set up the DNS server in the it and click Delete selected application.
-
Page 33: System Management > Bandwidth Management
Select this option to ping the DNS Click Add to List, and configure as many rules as you Lookup Host. Then enter the IP address. would like, up to a maximum of 100. To delete a rule, select IP Group it and click Delete selected application. -
Page 34: Bandwidth Management
Click Add to List, and configure as many rules as you Management screen appears. would like, up to a maximum of 100. To delete a rule, select it and click Delete selected application. Click Summary to see a summary of the Rate Control rules. -
Page 35: System Management > Snmp
Select Enable to use this Priority rule. Click Add to List, and configure as many rules as you would like, up to a maximum of 50. To delete a rule, select it and click Delete selected application. Click Summary to see a summary of the Priority rules. The System Management >... -
Page 36: System Management > Diagnostic
Look up the name Enter the host name, and click Go. entered. (Do not add the prefix http:// or else you will get an error Trap Community Name Create the password that will message.) The Router will then query the DNS server and be sent with each trap to the SNMP manager. -
Page 37: System Management > Factory Default
System Management > Diagnostic > Ping Ping host or IP address Enter the IP address of the device being pinged, and click Go. The test will take a few seconds to complete. Then the Router will display the results. Status The status of the ping test is displayed. -
Page 38: Restart
Import After you select the file, click Import. This process After clicking the button, a confirmation screen appears. may take up to a minute. Then restart the Router so that Click OK to continue. the changes will take effect. Export Configuration File Export To export the Router’s current configuration file,... -
Page 39: Basic Per Port Config
Summary From the drop-down menu, select how many WAN ports you want to use. The default is 2. (You can also change the For the selected port, the Summary table displays the number of WAN ports using the Setup > Network screen.) -
Page 40: Firewall > General
• Firewall The firewall is enabled by default. If you disable you deny Java applets, you run the risk of losing access it, then the SPI, DoS, and Block WAN Request features, to Internet sites created using this programming Access Rules, and Content Filters will also be disabled, and language. -
Page 41: Firewall > Access Rules
Chapter 4 Advanced Configuration To add a domain to the list, click Add to list. To remove a Access Rules domain from the list, select the entry, and click the Delete Except for the default rules, all configured access rules selected domain. -
Page 42: Add A New Access Rule
Source IP Select the Source IP address(es) for the access rule. If it can be any IP address, select Any. If it is one IP address, select Single and enter the IP address. If it is a range of IP addresses, select Range, and enter the starting and ending IP addresses in the fields provided. -
Page 43: Firewall > Content Filter
Enter the domain you want to block. Tunnel Used The number of VPN tunnels being used is To add a domain to the list, click Add to list. To remove a displayed. domain from the list, select the entry, and click the Delete... - Page 44 Proceed to the “VPN > Gateway to Gateway” section for instructions. Click Return to return If you do not enable the GroupVPN setting for any of your to the Summary screen. Client to Gateway tunnels, then this section will be blank.
-
Page 45: Vpn > Gateway To Gateway
Los Angeles Office, Chicago Branch, or New York Division. VPN > Gateway to Gateway This allows you to identify multiple tunnels and does not have to match the name used at the other end of the Use this screen to create a new tunnel between two VPN tunnel. - Page 46 Chapter 4 Advanced Configuration IP Only The default is IP Only. Only the device with a specific IP address will be able to access the tunnel. Local Security Gateway Type > Dynamic IP + Domain Name(FQDN) Authentication Domain Name Enter the domain name for authentication.
- Page 47 Advanced Configuration IP address Select this option if you know the static IP address of the remote VPN device at the other end of the tunnel, and then enter the IP address. Local Security Group Type > Subnet IP by DNS Resolved...
-
Page 48: Ipsec Setup
There are three groups of different prime key lengths. Group 1 is 768 bits, and Group 2 is 1,024 bits. Group 5 is 1,536 bits. If network speed is preferred, select Only the computer with a specific IP address will be able Group 1. - Page 49 SA, under which a packet should be not need to set the Phase 2 DH Group (the key for Phase 2 processed. Hexadecimal values is acceptable, and the will match the key in Phase 1).
-
Page 50: Vpn > Client To Gateway
If MD5 is selected, the Authentication Key is 32-bit, which IP header to verify the integrity of the entire packet by use requires 32 hexadecimal values. If you do not enter enough of portions of the original IP header in the hashing process. -
Page 51: Add A New Tunnel
Chapter 4 Advanced Configuration This allows you to identify multiple tunnels and does not have to match the name used at the other end of the tunnel. Interface Select the appropriate WAN port. Enable Check this box to enable a VPN tunnel. - Page 52 Dynamic IP + Domain Name(FQDN) Authentication Local Security Group Type > IP The Local Security Gateway will be a dynamic IP address, so you do not need to enter the IP address. When the IP address Enter the appropriate IP address. The default Remote Security Gateway requests to create a tunnel with IP is 192.168.1.0.
- Page 53 IP Only IP address of the remote VPN device via its public DNS records. The default is IP Only. Only the computer with a specific IP address will be able to access the tunnel. Select IP address E-mail address Enter the e-mail address as an ID.
-
Page 54: Ipsec Setup
Subnet Mask Enter the subnet mask. The default is 255.255.255.0. In order for any encryption to occur, the two ends of a IP Range VPN tunnel must agree on the methods of encryption, decryption, and authentication. This is done by sharing Specify a range of IP addresses within a subnet that will be a key to the encryption code. - Page 55 SA, under which a packet should be not need to set the Phase 2 DH Group (the key for Phase 2 processed. Hexadecimal values is acceptable, and the will match the key in Phase 1).
-
Page 56: Vpn > Vpn Client Access
Authentication Key This field specifies a key used to IP header to verify the integrity of the entire packet by use authenticate IP traffic. Enter a key of hexadecimal values. of portions of the original IP header in the hashing process. -
Page 57: Vpn Client Access
The certificate for the administrator contains the private key and should be stored in a safe place as a backup. If you reset the Router to its factory defaults, then you can import the certificate and restore it on the Router. -
Page 58: Vpn Pass Through
Internet Protocol Security (IPSec) is range of the Router. a suite of protocols used to implement secure exchange of packets at the IP layer. IPSec Pass Through is enabled by default to allow IPSec tunnels to pass through the Router. Users Setting... -
Page 59: System Log
Send E-mail to Enter the e-mail address that will receive your log files. If you do not want copies of the log information e-mailed to you, then leave this field blank. Log Queue Length You can designate the length of the Log >... -
Page 60: Log > System Statistics
Device Name, Status, IP Address, MAC displayed. Address, Subnet Mask, Default Gateway, DNS, Network To update a log, click Refresh. To clear a log, click Clear. To Service Detection status, number of Received Packets, number of Sent Packets, number of Total Packets, number exit the System Log screen and return to the Log >... -
Page 61: Wizard
Click Refresh to update the statistics. Click Next. Wizard Use this tab to access two Setup Wizards, the Basic Setup Wizard and the Access Rule Setup Wizard. Run the Basic Setup Wizard to change the number of WAN ports or set up the Router for your Internet connection(s). - Page 62 To proceed to the Wizard screen, click OK. To proceed to the System > Network screen, click Next to continue. Click Previous if you want to return Cancel. to the previous screen. Click Exit if you want to exit the Setup Wizard. Edit Network Settings Click Launch Now to run the Basic Setup Wizard.
- Page 63 Obtain an IP automatically Click Next to continue. Click Previous if you want to return to the previous screen. Click Exit if you want to If you want to use the ISP’s DNS server, select Use exit the Setup Wizard.
- Page 64 Complete the User Name and Password fields with the information provided by your ISP. Click Next to continue. Click Previous if you want to return to the previous screen. Click Exit if you want to exit the Setup Wizard. Connect on Demand or Keep Alive To set up additional WAN ports, repeat step 5.
-
Page 65: Access Rule Setup
Click Previous if you want to return to the previous depending on the intent of the Access Rule. screen. Click Exit if you want to exit the Setup Wizard. Click Next to continue. Click Previous if you want to return to the previous screen. Click Exit if you want to exit the Setup Wizard. - Page 66 For this service, you can select whether or not you want Select the Destination IP address(es) for this Access Rule. If it can be any IP address, select Any. If it is one the Router to keep a log tracking this type of activity.
-
Page 67: Support
Chapter 4 Advanced Configuration and select the appropriate days of the week. Click Next to continue. Click Previous if you want to return to the previous screen. Click Exit if you want to exit the Setup Wizard. Support Manual If you want the latest version of this User Guide, click On Line Manual. -
Page 68: Appendix A: Troubleshooting
Appendix A Troubleshooting Appendix A: The Router does not have a coaxial port for the cable connection. Troubleshooting The Router does not replace your modem. You still need your cable modem in order to use the Router. Connect your cable connection to the cable modem, insert the setup The firmware upgrade has failed. -
Page 69: Appendix B: Linksys Quickvpn For Windows 2000, Xp, Or Vista
VPN client software that is configured with her Address Bar office’s VPN settings. She accesses the VPN client software and connects to the VPN Router at the central office. As NOTE: If the Remote Management feature on VPNs use the Internet, distance is not a factor. Using the the Firewall >... -
Page 70: Add Vpn Client Users
Linksys QuickVPN for Windows 2000, XP, or Vista VPN tab. In the Router’s web-based utility, click the For the Change Password Allowed setting, select Yes to allow the user to change his or her password. Click the VPN Client Access tab. Otherwise, keep the default, No. Click Generate to generate a new certificate (if Active. -
Page 71: Download From The Internet
Select the version number of the Router. Proceed to the section, “Use of the Linksys QuickVPN Software”. Save the zip file to your computer, and extract the .exe file. Use of the Linksys QuickVPN Software Double-click the .exe file. -
Page 72: Version Number Of Linksys Quickvpn
Click OK to save your new password. Click Cancel to To save this profile, click Save. (If there are multiple cancel your change. For information, click Help. sites to which you will need to create a tunnel, you can create multiple profiles, but note that only one tunnel NOTE: You can change your password only if can be active at a time.) To delete this profile, click... -
Page 73: Appendix C: Gateway-To-Gateway Vpn Tunnel
This appendix explains how to configure an IPSec VPN tunnel between two VPN Routers, using an example. Two IPSec VPN tab. Click the computers are used to test the liveliness of the tunnel. Click the Gateway to Gateway tab. Before You Begin Enter a name in the Tunnel Name field. -
Page 74: Configuration Of The Rv016
Configuration of PC 1 and PC 2 Enter a name in the Tunnel Name field. Verify that PC 1 and PC 2 can ping each other (refer to Select the appropriate Interface, WAN1 or WAN2. Windows Help for more information). If they can ping Select Enable. -
Page 75: Configuration When The Remote Gateway Uses A Dynamic Ip Address
Configuration when the Remote Gateway Uses a Dynamic IP Address This example assumes the Remote Gateway is using a dynamic IP address. If the Remote Gateway uses a static IP address, refer to “Configuration when the Remote Gateway Uses a Static IP Address. ”... -
Page 76: Configuration Of Pc 1 And Pc 2
Subnet Mask fields. Configuration of PC 1 and PC 2 Verify that PC 1 and PC 2 can ping each other (refer to Windows Help for more information). If they can ping each other, then the VPN tunnel is configured correctly. -
Page 77: Configuration Of The Rv016
Gateway to Gateway tab. Click the Enter a name in the Tunnel Name field. Verify that PC 1 and PC 2 can ping each other (refer to Windows Help for more information). If they can ping WAN1 or WAN2. Select the appropriate Interface, each other, then the VPN tunnel is configured correctly. -
Page 78: Appendix D: Ipsec Nat Traversal
Network Address Translation (NAT) traversal is a technique developed so that data protected by IPSec can pass through a NAT. (See NAT 1 and NAT 2 in the diagram.) Since IPSec provides integrity for the entire IP datagram, WAN: 192.168.99.11 WAN: 192.168.99.22... -
Page 79: Configuration Of Router B
Router B’s IPSec VPN Settings For the Remote Security Gateway Type, select IP Only. Enter the WAN IP address of NAT 2 - RV016 in the IP Address field. Router A’s IPSec VPN Settings For the Remote Security Group Type, select Subnet. -
Page 80: Configuration Of Scenario 2
Remote Security Gateway IP address set to a public One-to-One NAT Rule on NAT 2 - RV016 IP address that is associated with the WAN IP address of Router A, which is behind the NAT. Hence the public IP 192.168.99.1 =>... -
Page 81: Configuration Of Router B
This configuration is the same as the configuration of Router A in scenario 1. For the Remote Security Gateway Type, select IP Only. Enter Router B’s WAN IP address in the IP Address field. Router B’s IPSec VPN Settings 10/100 16-Port VPN Router... - Page 82 Appendix D IPSec NAT Traversal Subnet. For the Remote Security Group Type, select Enter Router B’s local network settings in the IP Address and Subnet Mask fields. In the IPSec Setup section, select the appropriate encryption, authentication, and other key management settings.
-
Page 83: Appendix E: Bandwidth Management
Enter its SIP port range in the Port Range fields. For System Management tab. Click the example, you can set the Port Range to 5060 to 5070 to make sure that all active ports are covered. Bandwidth Management screen, click Service On the Management. -
Page 84: Creation Of New Bandwidth Management Rules
Select Add to list. After you have set up the rule, click Create Vonage VoIP Rule Set up a second rule for Vonage VoIP, this time for the Downstream direction. Select Vonage VoIP from the Service drop-down menu. Enter the IP address or range you need to control. To include all internal IP addresses, keep the default, 0. -
Page 85: Appendix F: Firmware Upgrade
If the web-based upgrade method fails, use the TFTP utility. Follow these instructions: Use a computer on the local network of the Router. Set the computer to a static IP address. (For example, if the Router uses 192.168.1.1, then set the computer to 192.168.1.100.) www.linksys.com/downloads. - Page 86 Appendix F Firmware Upgrade The utility zip file will automatically open. Extract .exe file to an appropriate location on your computer. .exe file. Double-click the In the Router IP field, enter the IP address of the Router. Firmware Upgrade Utility Login...
-
Page 87: Appendix G: Trend Micro Protectlink Gateway Service
Go buy To purchase a license to use this service, click Go buy. You will be redirected to a list of Linksys resellers on the Linksys website. Then follow the on-screen instructions. Register If you already have a license, click Register. You... -
Page 88: Protectlink
I want to buy Trend Micro ProtectLink Gateway. purchase a license to use this service, click this link. You will be redirected to a list of Linksys resellers on the Linksys website. Then follow the on-screen instructions. I have purchased ProtectLink Gateway and want to register it. -
Page 89: Protectlink > Web Protection
Reset Counter. Enable Approved Client list To set up a list of trusted For each URL category, select the appropriate Filtering clients, select this option. option. If you want to filter a sub-category, click + to view 10/100 16-Port VPN Router... -
Page 90: Protectlink > Email Protection
Enter the appropriate IP addresses or ranges. Separate multiple URLs with semicolons (“;”). e-mail protection, click this link. You will be redirected to For a range of IP addresses, use a hyphen (“-”). Example: the Trend Micro ProtectLink Gateway website. Then follow 10.1.1.0-10.1.1.10. - Page 91 To renew your license, click Renew. Then follow the on-screen instructions. Add Seats Each seat allows an e-mail account to use Email Protection. To add seats to your license, click Add Seats. Then follow the on-screen instructions. 10/100 16-Port VPN Router...
-
Page 92: Appendix H: Specifications
Unit Weight 3.25 lb (1.475 kg) Network Power AC 100~240V, 50-60 Hz Multi-WANs Support up to 7 WAN Ports with Certifications FCC Class B, CE Class B Load Balancing, Where Certain Operating Temp. 0 to 40ºC (32 to 104ºF) WAN Ports can be Dedicated to Specified IP Ranges and Services Storage Temp. -
Page 93: Appendix I: Warranty Information
CONDITIONS, REPRESENTATIONS AND WARRANTIES, and the web pages referred to herein may be updated by INCLUDING, BUT NOT LIMITED TO, ANY IMPLIED Linksys from time to time; the version in effect at the date WARRANTY OF NON-INFRINGEMENT, ARE DISCLAIMED. of purchase shall apply. -
Page 94: Technical Support
RMA number and dated proof of original purchase will be rejected. Do not include any other items with the product you are returning to Linksys. Defective product covered by this limited warranty will be repaired or replaced and returned to you without charge. -
Page 95: Appendix J: Software License Agreement
THE SOFTWARE, YOU ARE CONSENTING TO BE BOUND BY Linksys K.K. (“Linksys”) contains software (including THIS AGREEMENT. IF YOU DO NOT AGREE TO ALL OF THESE firmware) originating from Linksys and its suppliers TERMS, THEN YOU MAY NOT DOWNLOAD, INSTALL OR USE and may also contain software from the open source THE SOFTWARE. -
Page 96: End Of Schedule 1
Schedule 2 at http://www.linksys.com/gpl. If You would like a copy of the GPL or other open source code in this Software on a If this Linksys product contains open source software CD, Linksys will mail to You a CD with such code for $9.99 licensed under Version 2 of the “GNU General Public... - Page 97 Program (independent of having been made by use pieces of it in new free programs;...
- Page 98 But when you distribute the same If distribution of executable or object code is made sections as part of a whole which is a work based on by offering access to copy from a designated place, the Program, the distribution of the whole must be on...
-
Page 99: End Of Schedule 2
WHEN OTHERWISE STATED IN WRITING THE COPYRIGHT HOLDERS AND/OR OTHER PARTIES PROVIDE THE It is not the purpose of this section to induce you to PROGRAM “AS IS” WITHOUT WARRANTY OF ANY infringe any patents or other property right claims or KIND, EITHER EXPRESSED OR IMPLIED, INCLUDING, to contest validity of any such claims;... -
Page 100: Gnu Lesser General Public License
Free Software Foundation and other into non-free programs. authors who decide to use it. You can use it too, but we suggest you first think carefully about whether this license When a program is linked with a library, whether statically or... - Page 101 Library (independent of the use free programs enables a greater number of people to use of the Library in a tool for writing it). Whether that is a large body of free software. For example, permission to...
- Page 102 Appendix J Software License Agreement sections as part of a whole which is a work based on However, linking a “work that uses the Library” with the Library, the distribution of the whole must be on the Library creates an executable that is a derivative...
- Page 103 Give prominent notice with the combined library of application to use the modified definitions.) the fact that part of it is a work based on the Library, and explaining where to find the accompanying Use a suitable shared library mechanism for linking uncombined form of the same work.
-
Page 104: End Of Schedule 3
Appendix J Software License Agreement It is not the purpose of this section to induce you to HOLDERS AND/OR OTHER PARTIES PROVIDE THE infringe any patents or other property right claims or LIBRARY “AS IS” WITHOUT WARRANTY OF ANY KIND, to contest validity of any such claims;... -
Page 105: Openssl License
OpenSSL Toolkit. (http://www.openssl.org/)” If this package is used in a product, Eric Young should be The names “OpenSSL Toolkit” and “OpenSSL Project” given attribution as the author of the parts of the library must not be used to endorse or promote products used. -
Page 106: End Of Schedule 4
OF LIABILITY, WHETHER IN CONTRACT, STRICT LIABILITY, OR TORT (INCLUDING NEGLIGENCE OR OTHERWISE) ARISING IN ANY WAY OUT OF THE USE OF THIS SOFTWARE, EVEN IF ADVISED OF THE POSSIBILITY OF SUCH DAMAGE. The license and distribution terms for any publicly available version or derivative of this code cannot be changed. -
Page 107: Appendix K: Regulatory Information
This product has been tested and complies with the 廢電池請回收 specifications for a Class B digital device, pursuant to Part 15 of the FCC Rules. These limits are designed to provide reasonable protection against harmful interference in Industry Canada Statement a residential installation. -
Page 108: User Information For Consumer Products Covered By Eu Directive 2002/96/Ec On Waste Electric And Electronic Equipment (Weee)
Symbolet betyder, at dette produkt skal bortskaffes adskilt fra det almindelige husholdningsaffald. Det er dit ansvar at bortskaffe dette og andet elektrisk og English - Environmental Information for Customers in elektronisk udstyr via bestemte indsamlingssteder udpeget the European Union af staten eller de lokale myndigheder. - Page 109 (tiem, ko rada vietēji iedzīvotāji un uzņēmumi). Šī zīme nozīmē πρέπει να απορρίπτεται ξεχωριστά από τα συνήθη οικιακά to, ka šī ierīce ir jāizmet atkritumos tā, lai tā nenonāktu kopā ar απορρίμματα. Είστε υπεύθυνος για την απόρριψη του παρόντος parastiem mājsaimniecības atkritumiem. Jūsu pienākums ir šo και...
- Page 110 Šis simbolis rodo, kad gaminį reikia šalinti atskirai afval. Dit symbool geeft aan dat het product apart moet worden nuo bendro buitinių atliekų srauto. Jūs privalote užtikrinti, kad ingezameld. U bent zelf verantwoordelijk voor de vernietiging ši ir kita elektros ar elektroninė...
- Page 111 – na izdelku in/ali na embalaži – med não seja eliminado junto com os resíduos municipais não običajne, nerazvrščene odpadke. Ta simbol opozarja, da je treba separados.
-
Page 112: Appendix L: Contact Information
Support Site http://www.linksys.com/support FTP Site ftp.linksys.com Advice Line 800-546-5797 (LINKSYS) Support 800-326-7114 RMA (Return Merchandise http://www.linksys.com/warranty Authorization) NOTE: Details on warranty and RMA issues can be found in the Warranty section of this Guide. 8062520NC-JL 10/100 16-Port VPN Router...