Oster EXPRESSBAKE CKSTBRTW20 User Manual And Recipes
2lb. breadmaker
Hide thumbs
Also See for EXPRESSBAKE CKSTBRTW20:
- Service manual (1 page) ,
- User manual & recipe book (41 pages)
Table of Contents
Advertisement
Available languages
Available languages
Advertisement
Table of Contents

Related Manuals for Oster EXPRESSBAKE CKSTBRTW20


Summary of Contents for Oster EXPRESSBAKE CKSTBRTW20
- Page 1 2LB. EXPRESSBAKE® BREADMAKER 2LB. EXPRESSBAKE® BREADMAKER User Guide & Recipes/ Guía del Usuario & Recetas Safety CKSTBRTW20 Seguridad How to use Cómo usar Cleaning Cuidado y Limpieza FAQs Preguntas frecuentes Recipes Rectas Warranty Garantía www.oster.com...
-
Page 2: Important Safeguards
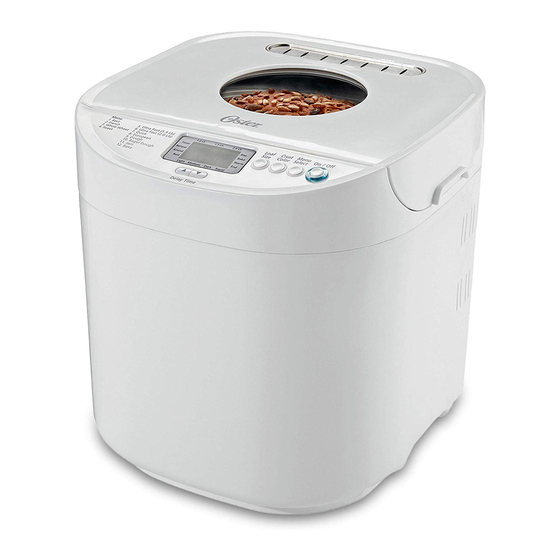
This appliance has a polarized plug, (one blade is wider than the other). As a safety feature to reduce the risk of electrical shock, this plug is intended to fi t in a polarized outlet only one way. If the plug does not fi t fully in the outlet, reverse the plug. - Page 3 LEARNING ABOUT YOUR EXPRESSBAKE® BREADMAKER Glass viewing window Breadmaker Vent Control Panel/LCD Display Top lid assembly Removable Bread Pan Measuring Scoop Kneading Blade Measuring Cup Kneading blade removal tool www.oster.com...
- Page 4 1 Place the breadmaker on a counter where the plug will reach an outlet. DO NOT yet plug the machine into the wall outlet. You will be shown later when to do this. 2 Make sure you can open the breadmaker top without hitting the top of kitchen cabinets.
-
Page 5: Before You Begin
With wet ingredients, use ONLY measuring cups with the cups/ounces marked clearly on the side. After fi lling the measuring cup, place it on a fl at surface and view it at eye level to make sure the amount of liquid is exact. Then, double check. - Page 6 Add the salt to the bread pan. 8 Before adding the yeast, use your fi nger to form a well (hole) in the fl our where you will pour the yeast. Yeast must NEVER come into contact with a liquid when you are adding ingredients.
- Page 7 Note: It is important that you DO NOT press the “Start/Stop” button while the breadmaker is making bread. If you do, the machine will turn off and you will need to start over again, from scratch. Note: It is important that you should not raise the lid for this recipe. (For other recipes you try later, you will need to raise the lid to add nuts, fruits, or other ingredients.)
- Page 8 In keep warm mode, the “0:00” will fl ash. Note: Keep warm mode will last for up to 1 hour, after 1 hour it will beep 15 times and go back to the initial status.
- Page 9 1 Insert the bread pan into the breadmaker. 2 Place all small pieces of food in a cluster inside the bread pan, then close the lid. 3 Press the Menu Select button to select the Baking function. 4 Press the ”Start/Stop” button to start the baking program.
-
Page 10: Other Ingredients
• DO NOT open the cover while making EXPRESSBAKE® Breadmaker setting breads. • If the loaf is hard to remove from the pan let it sit for about 5 minutes to cool. Gently shake the bread out of the pan and wait for 15 minutes before slicing. - Page 11 5 Measure and add exactly 3 cups of bread fl our to the bread pan. Remember to make sure not to “overpack” the fl our into the cup. To avoid over packing, a good trick is to fi ll the measuring cup to overfl owing, then tap the side of the cup with a knife or spatula to remove air pockets.
-
Page 12: Using The Delay Timer
1 Figure out how many hours and minutes there are between now and when you want fi nal, baked bread. For example, if it is 8:00 AM and you want bread ready for dinner at 6:00 PM, that is 10 hours. -
Page 13: Tips And Hints
• Yeast - Fresh yeast is probably the most important ingredient in baking bread. If the yeast is not fresh, your bread may not rise. It is better to buy new yeast than to take a chance on yeast that has been stored for a long time. -
Page 14: Measurement Equivalency Chart
Be careful not to add too much water. For Baking at High Altitudes If you live above 3000 feet, you probably already know how to adjust other recipes like cakes and muffi ns. Higher altitudes tend to: •... -
Page 15: Care And Cleaning
Cleaning the baking pan and kneading blade 1 Wipe the baking pan and kneading blade with a damp cloth and dry completely. 2 DO NOT wash the pan or parts in the dishwasher. This will damage the fi nish of the pan and the other parts. -
Page 16: Troubleshooting
Troubleshooting If you experience diffi culties when operating the breadmaker, review the troubleshooting information in this section to fi nd a solution. If you are unable to fi nd a solution, please call our Consumer Relations Department at 1(800)334–0759. If you have a power outage This unit has a memory function if the power goes out while you are using your breadmaker. - Page 17 Try using less fl our (a teaspoon at a time), or more yeast (1/4 teaspoon at a time). This could also be the result of using old fl our or the wrong type of fl our for the recipe. What do I do if the bread is not baked completely in the center? Try using more fl our (a teaspoon more at a time), or less water or liquid (a teaspoon less at a time).
-
Page 18: Traditional White Bread
2 Measure and add dry ingredients (except yeast) to the bread pan. 3 Use your fi nger to form a well (hole) in the fl our where you will pour the yeast. Yeast must NEVER come into contact with a liquid when you are adding ingredients. Measure the yeast and carefully pour it into the well. - Page 19 2 Measure and add dry ingredients (except yeast) to the bread pan. 3 Use your fi nger to form a well (hole) in the fl our where you will pour the yeast. Yeast must NEVER come into contact with a liquid when you are adding ingredients. Measure the yeast and carefully pour it into the well.
- Page 20 2 Measure and add dry ingredients (except yeast) to the bread pan. 3 Use your fi nger to form a well (hole) in the fl our where you will pour the yeast. Yeast must NEVER come into contact with a Liquid when you are adding ingredients. Measure the yeast and carefully pour it into the well.
-
Page 21: Sourdough Bread
2 Measure and add dry ingredients (except yeast) to the bread pan. 3 Use your fi nger to form a well (hole) in the fl our where you will pour the yeast. Yeast must NEVER come Into contact with a liquid when you are adding ingredients. Measure the yeast and carefully pour it into the well. - Page 22 If starter separates (liquid forms on the surface), stir until blended before using. • If the liquid that forms on the surface of starter turns pink in color at any time, discard the starter and start over again with fresh ingredients.
- Page 23 2 Measure and add dry ingredients (except yeast) to the bread pan. 3 Use your fi nger to form a well (hole) in the fl our where you will pour the yeast. Yeast must NEVER come into contact with a liquid when you are adding ingredients. Measure the yeast and carefully pour it into the well.
- Page 24 Measure and add dry ingredients (except yeast) to the bread pan. Use your fi nger to form a well (hole) in the fl our where you will pour the yeast. Yeast must NEVER come into contact with a liquid when you are adding ingredients. Measure the yeast and carefully pour it into the well.
- Page 25 2 Measure and add dry ingredients (except yeast) to the bread pan. 3 Use your fi nger to form a well (hole) in the fl our where you will pour the yeast. Yeast must NEVER come into contact with a liquid when you are adding ingredients. Measure the yeast and carefully pour it into the well.
- Page 26 2 Measure and add dry ingredients (except yeast) to the bread pan. 3 Use your fi nger to form a well (hole) in the fl our where you will pour the yeast. Yeast must NEVER come into contact with a liquid when you are adding ingredients. Measure the yeast and carefully pour it into the well.
-
Page 27: White Bread
Measure and add dry ingredients (except yeast) to the bread pan. Use your fi nger to form a well (hole) in the fl our where you will pour the yeast. Yeast must NEVER come into contact with a liquid when you are adding ingredients. Measure the yeast and carefully pour it into the well. -
Page 28: Whole Wheat
Measure and add dry ingredients (except yeast) to the bread pan. Use your fi nger to form a well (hole) in the fl our where you will pour the yeast. Yeast must NEVER come into contact with a liquid when you are adding ingredients. Measure the yeast and carefully pour it into the well. - Page 29 Measure and add dry ingredients (except yeast) to the bread pan. Use your fi nger to form a well (hole) in the fl our where you will pour the yeast. Yeast must NEVER come into contact with a liquid when you are adding ingredients. Measure the yeast and carefully pour it into the well.
- Page 30 2 Measure and add dry ingredients (except yeast) to the bread pan. 3 Use your fi nger to form a well (hole) in the fl our where you will pour the yeast. Yeast must NEVER come into contact with a liquid when you are adding ingredients. Measure the yeast and carefully pour it into the well.
- Page 31 Dough/Pasta Setting Recipes (Menus 9 and 10) Dough/Pasta Bread Machine Stages For the Dough/Pasta cycle you can expect the following things to happen as the timer counts down to zero. Dough/Pasta: To begin: The ingredients are kneaded for the fi rst time (5 minutes)
-
Page 32: Dough Instructions
Knead by hand 2 or 3 times to release the air. If the dough is easy to handle without fl our, shape on a lightly oiled, clean countertop. - Page 33 There are no preservatives in your homemade bread, so store cooled loaf in a lightly sealed plastic bag. If desired, enclose a stalk of celery in the bag to keep bread fresh longer. Do not store in the refrigerator as this causes bread to dry out faster.
- Page 34 Powdered Sugar Glaze, optional (see recipe below) Drizzle butter over dough. In a small bowl, mix sugar, cinnamon and nuts; sprinkle onto butter. Cover; let rise in warm place about 30 minutes. Bake in preheated oven (375°F) 20 to 25 minutes, until golden brown.
-
Page 35: Pizza Crust
Press “Start/Stop” button and hold it down until you hear a beep and the display clears. To remove the bread pan, grasp the handle fi rmly and lift the pan out. Pat dough into 12 x 15-inch jelly roll pan or greased 12-inch round (1–1/2 pound recipe) or 14-inch round pizza pan (2 pound recipe). - Page 36 2 tablespoons powdered low-sugar fruit pectin 1 lemon 1 With a vegetable peeler, shave off the bright layer of peel from one orange and the lemon; chop fi nely. Remove and discard remaining white peel from orange and lemon. Peel remaining oranges, and discard peels. Slice fruit into 1/2-inch pieces.
-
Page 37: Garlic Butter
Mix 1 slightly beaten egg yolk with 1 Tbsp. water or milk. Egg White Glaze Mix 1 slightly beaten egg white with 1 Tbsp. water. Note: To keep unused egg yolk fresh for several days, cover with cold water and store in refrigerator in a covered container. Garlic Butter... -
Page 38: Honey-Walnut Spread
3 to 4 tsp. milk Heat margarine in a 1-quart saucepan over medium heat until light brown; cool. Stir in powdered sugar and vanilla. Stir in milk until smooth and thin enough to drizzle. Cinnamon Glaze Mix until thin enough to drizzle: 1/2 cup powdered sugar 1/4 tsp. - Page 39 NOTES _________________________________________________________________________________________ _________________________________________________________________________________________ _________________________________________________________________________________________ _________________________________________________________________________________________ _________________________________________________________________________________________ _________________________________________________________________________________________ _________________________________________________________________________________________ _________________________________________________________________________________________ _________________________________________________________________________________________ _________________________________________________________________________________________ _________________________________________________________________________________________ _________________________________________________________________________________________ _________________________________________________________________________________________ _________________________________________________________________________________________ _________________________________________________________________________________________ _________________________________________________________________________________________ _________________________________________________________________________________________ _________________________________________________________________________________________ _________________________________________________________________________________________ _________________________________________________________________________________________ _________________________________________________________________________________________ _________________________________________________________________________________________ _________________________________________________________________________________________ _________________________________________________________________________________________ _________________________________________________________________________________________ _________________________________________________________________________________________ _________________________________________________________________________________________ _________________________________________________________________________________________ _________________________________________________________________________________________ _________________________________________________________________________________________ _________________________________________________________________________________________ _________________________________________________________________________________________ _________________________________________________________________________________________ www.oster.com...
- Page 40 Corporation (Canada) Limited doing business as Jarden Consumer Solutions (collectively “JCS”) warrants that for a period of one year from the date of purchase, this product will be free from defects in material and workmanship. JCS, at its option, will repair or replace this product or any component of the product found to be defective during the warranty period.
-
Page 41: Precauciones Importantes
8. No permita que el cable cuelgue del borde de la mesa o de la mesada o que toque superfi cies calientes. No la coloque en una superfi cie inestable ni cubierta con tela. - Page 42 APRENDA SOBRE LA PANIFICADORA EXPRESSBAKE® Visor Panifi cadora Ventilación Panel de control / Visor LCD Junta tapa superior Recipiente desmontable para el pan Cuchara medidora Cuchilla para amasar taza medidora Herramienta para desmontar la cuchilla para amasar www.oster.com...
- Page 43 INSTRUCCIONES: Preparar la panifi cadora 1 Coloque la panifi cadora en la mesada desde donde se conectará el enchufe. NO enchufe todavía el artefacto en el tomacorriente de la pared. Luego se le indicará cuándo hacerlo. 2 Asegúrese de poder abrir la parte superior de la panifi cadora sin golpear los armarios de arriba de la cocina.
- Page 44 Luego de llenar la taza para medir, colóquela en una superfi cie plana y mírela al nivel de la vista para asegurarse de que la cantidad de líquido es la exacta. Luego, vuelva a verifi carlo.
- Page 45 9 Coloque el recipiente para pan cuidadosamente a presión en la panifi cadora. 10 Cierre la tapa de la panifi cadora y enchufe el cable al tomacorriente de la pared. Ocurrirá lo siguiente. El artefacto emitirá un “pip” y se prenderán las luces del visor. La temporizador marcará...
- Page 46 Etapas de la panifi cadora (fl autas de 2 lb.) Es divertido ver cómo se hace el pan a través del visor. Para el ciclo básico, se supone que sucederá lo que se enumera a continuación a medida que el contador alcanza cero.
- Page 47 7 Presione el botón Tamaño de la fl auta para seleccionar el tamaño (1.0lb, 1.5lb o 2.0lb). Nota: El visor marcará el tamaño de la fl auta con una fl echa y señalará el correspondiente tamaño seleccionado (los programas selectos tienen posiciones fi jas).
- Page 48 La función masa es un programa similar a la función pan, salvo que no incluye horneado. Cuando el programa haya fi nalizado, emitirá 5 pips como advertencia. Cuando la máquina emita el pip e indique que el programa ha terminado, retire la masa del recipiente para pan. Función horneado: Esta función puede utilizarse para hornear pan u otra masa.
- Page 49 • NO abra la tapa mientras hace el pan con la confi guración EXPRESSBAKE®. • Si es difícil sacar la fl auta del recipiente, déjela reposar 5 minutos para que se enfríe. Retire el pan del recipiente sacudiendo suavemente y espere 15 minutos antes de cortarlo.
- Page 50 Como norma, debe usar MENOS sal para los panes con la confi guración EXPRESSBAKE®. Una menor cantidad de sal le dará una fl auta más grande. Siga la receta de la panifi cadora Oster® para obtener mejores resultados. Otros ingredientes Todos los otros ingredientes (como harina, azúcar, leche en polvo, manteca, etc.) deben estar a...
- Page 51 Nota: Es importante que NO presione el botón Comenzar / Detener mientras que la panifi cadora está haciendo el pan. Si lo hace, la máquina se apagará y deberá comenzar nuevamente de cero. Nota: NO levante la tapa cuando esté utilizando la confi guración EXPRESSBAKE®. Si la levanta, puede afectar el leudado de la masa.
-
Page 52: Trucos Y Consejos
1 Calcule las horas y minutos hasta la hora en que desea que su pan esté horneado. Por ejemplo, si son las 8 a.m. y desea pan para la cena a las 6 de la tarde, tendrá 10 horas. 2 Utilice el botón de demora para adelantar en intervalos de 10 minutos. En nuestro ejemplo, avanzará... - Page 53 - POR ÚLTIMO, la levadura Verifi que la masa Este es un secreto muy conocido por la gente que hace pan a la antigua. Cuando se amasa a mano, ajustan la consistencia de la masa agregando un poquito de agua o de harina hasta que la masa llegue al punto perfecto.
-
Page 54: Cuidado Y Limpieza
Precaución: No emplee utensilios de metal en la panifi cadora. Dañará el recipiente antiadherente y otras partes. 2 No se alarme si el color del recipiente de pan cambia con el correr del tiempo. El cambio de color se debe al vapor y humedad y no afecta el desempeño de la máquina 3 Si tiene difi cultades para retirar la cuchilla para amasar, coloque agua tibia en el recipiente para pan durante 10-15 minutos y de este modo se ablandará... -
Page 55: Preguntas Frecuentes
PREGUNTAS FRECUENTES Detección y resolución de problemas Si tiene difi cultades con el funcionamiento de la panifi cadora, revise la información de esta sección a fi n de encontrar la solución. Si no encuentra la solución, comuníquese con el Departamento de Atención al Consumidor l 1(800)334–0759. - Page 56 Pruebe con menos levadura (1/4 de cucharadita menos por vez). También podría ocurrir por olvidar agregar sal a la receta o por no colocar la cuchilla de amasar en el recipiente para pan. ¿Qué hacer si el pan no ha leudado lo sufi ciente? Existen diversas soluciones posibles.
- Page 57 Recetas con la confi guración básica (Menú 1) Etapas de la máquina para pan básico (para fl autas de 1.5 lb.) Para el ciclo básico, se supone que sucederá lo que se enumera a continuación a medida que el contador llega a 0. alcanza cero.
- Page 58 5 Presione el botón “Seleccionar menú” para elegir la confi guración Básica. 6 Presione el botón “tamaño de la fl auta” para elegir 1 lb., 1.5 lb. o 2 lb. 7 Presione el botón “Color de costra” para elegir costra suave, media, oscura o rápida.
- Page 59 Nota: Cuando agregue frutas, por ejemplo, pasas de uva, la panifi cadora emitirá unos pips durante el ciclo de amasado. Cuando la panifi cadora emita el pip durante el ciclo de amasado. Levante la tapa y agregue las pasas de uva, pocas por vez, hasta que se mezclen con la masa.
- Page 60 Cuando está en 0:60, la masa comienza a hornearse (60 minutos) Cuando está en 0:00, el pan está listo. Nota: Con el programa de pan europeo, el tamaño de la fl auta se fi ja en 1.5 lbs. y el color de la costra no se puede cambiar.
- Page 61 Cubra y deje reposar en un lugar cálido hasta que haga burbujas, de 3 a 5 horas. Guarde la preparación en el refrigerador en un recipiente de vidrio cubierto sin apretar. Si no lo utiliza al fi nal de la semana, retire una taza de la fermentación y deséchela: luego, repóngala por partes iguales de harina y agua...
- Page 62 2 Mida y agregue los ingredientes secos (salvo la levadura) en el recipiente para pan. 3 Utilice el dedo para hacer un agujero (hueco) en la harina donde colocará la levadura. La levadura NUNCA debe entrar en contacto con el líquido cuando agrega ingredientes. Mida la levadura y viértala cuidadosamente en el hueco.
- Page 63 Etapas de la máquina para pan dulce (para fl autas de 1.5 libras ) En el ciclo de pan dulce, se supone que sucederá lo que se enumera a continuación a medida que el contador desciende hasta alcanzar el cero.
- Page 64 2 Mida y agregue los ingredientes secos (salvo la levadura) en el recipiente para pan. 3 Utilice el dedo para hacer un agujero (hueco) en la harina donde colocará la levadura. La levadura NUNCA debe entrar en contacto con el líquido cuando agrega ingredientes. Mida la levadura y viértala cuidadosamente en el hueco.
- Page 65 7 Presione el botón “Comenzar / Detener”. Nota: Cuando agregue frutas, por ejemplo, pasas de uva, la panifi cadora emitirá unos pips durante el ciclo de amasado. Levante la tapa y agregue las pasas de uva, pocas por vez, hasta que se mezclen con la masa.
- Page 66 2 Mida y agregue los ingredientes secos (salvo la levadura) en el recipiente para pan. 3 Utilice el dedo para hacer un agujero (hueco) en la harina donde colocará la levadura. La levadura NUNCA debe entrar en contacto con el líquido cuando agrega ingredientes. Mida la levadura y viértala cuidadosamente en el hueco.
- Page 67 Pan integral (Menú 3) Etapas de la máquina (para fl autas de 1.5 libras ) Para el ciclo Pan integral se supone que sucederá lo que se enumera a continuación a medida que el contador alcanza cero.. ara comenzar: Los ingredientes se amasan por primera vez (5 minutos) Cuando está...
- Page 68 2 Mida y agregue los ingredientes secos (salvo la levadura) en el recipiente para pan. 3 Utilice el dedo para hacer un agujero (hueco) en la harina donde colocará la levadura. La levadura NUNCA debe entrar en contacto con el líquido cuando agrega ingredientes. Mida la levadura y viértala cuidadosamente en el hueco.
- Page 69 2 Mida y agregue los ingredientes secos (salvo la levadura) en el recipiente para pan. 3 Utilice el dedo para hacer un agujero (hueco) en la harina donde colocará la levadura. La levadura NUNCA debe entrar en contacto con el líquido cuando agrega ingredientes. Mida la levadura y viértala cuidadosamente en el hueco.
- Page 70 Recetas Confi guración de Masa/Pasta (Menús 9 y 10) Las Etapas de la Panadería de Masa/Pasta Para el ciclo de masa/pasta, se supone que sucederá lo que se enumera a continuación a medida que el contador alcanza cero. Masa/Pasta: Para comenzar: Los ingredientes se amasan por primera vez (5 minutos) Cuando está...
- Page 71 3 Presione el botón “Comenzar / Detener”. La pantalla comenzará a contar de manera regresiva el tiempo en la confi guración de la masa. Cuando la masa esté lista, se escuchará una señal y la pantalla mostrará “0:00. ” 4 Presione el botón “Comenzar / Detener” hasta que oiga un pip y se ponga en blanco la pantalla.
- Page 72 7 Precaliente el horno a 450°F. 8 Divida la masa en 12 piezas. Enrolle cada una en la forma de un lazo de 8 pulgadas. Moldéelo en la forma de un pretzel o deje como un palito. Coloque sobre una charola para hornear engrasada, barnice cada uno con el huevo cuando está...
- Page 73 Cuando la masa esté lista, se escuchará una señal y la pantalla mostrará “0:00. ” 5 Presione el botón “Comenzar / Detener” hasta que oiga un pip y se ponga en blanco la pantalla. 6 Para remover el molde de pan, agarre la manga fi rmemente y remueve el molde.
- Page 74 6 Para retirar el molde de pan, agarre la manija fi rmemente y saque el recipiente. 7 Coloque la masa en una molde para rollos de jalea que mide 12 x 15 pulgadas o un molde redondo engrasado de 12 pulgadas (la receta de 1/2 libra) o en una bandeja para pizzas de 14 pulgadas (la receta de 2 libras) 8 Precaliente el horno a 400°F.
- Page 75 4 Presione el botón “Comenzar / Detener”. La pantalla comenzará a contar en forma regresiva el tiempo en la confi guración de la jalea. Cuando la jalea esté lista, se escuchará una señal y la pantalla mostrará “0:00. ” 5 Utilizando agarraderas, saque el recipiente para pan. Vierte la jalea en contenedores; cubra y refrigere para que se cuaje.
-
Page 76: Herb-Cheese Butter
Glaseado de la clara de huevo Mezcle un huevo ligeramente batido con un 1 cda.de agua. Nota: Para mantener la yema del huevo fresca por varios días, cubra con agua fría y guarde en el refrigerador en un recipiente cubierto. -
Page 77: Glaseado De Mantequilla Dorada
3 a 4 cda. de leche Caliente la margarina en una olla de 1 litro a fuego mediano hasta que se dore ligeramente; enfríe. Mezcle el azúcar glas y la vainilla. Vierta la leche hasta que tenga una consistencia suave y delgada como para salpicar. - Page 78 NOTAS _________________________________________________________________________________________ _________________________________________________________________________________________ _________________________________________________________________________________________ _________________________________________________________________________________________ _________________________________________________________________________________________ _________________________________________________________________________________________ _________________________________________________________________________________________ _________________________________________________________________________________________ _________________________________________________________________________________________ _________________________________________________________________________________________ _________________________________________________________________________________________ _________________________________________________________________________________________ _________________________________________________________________________________________ _________________________________________________________________________________________ _________________________________________________________________________________________ _________________________________________________________________________________________ _________________________________________________________________________________________ _________________________________________________________________________________________ _________________________________________________________________________________________ _________________________________________________________________________________________ _________________________________________________________________________________________ _________________________________________________________________________________________ _________________________________________________________________________________________ _________________________________________________________________________________________ _________________________________________________________________________________________ _________________________________________________________________________________________ _________________________________________________________________________________________ _________________________________________________________________________________________ _________________________________________________________________________________________ _________________________________________________________________________________________ _________________________________________________________________________________________ _________________________________________________________________________________________ _________________________________________________________________________________________ www.oster.com...
- Page 79 JCS no será responsable de ningún tipo de daño que resulte de la compra, uso o mal uso del producto, o por la imposibilidad de usar el producto, incluidos los daños incidentales, especiales, emergentes o similares, o la pérdida de ganancias, ni de ningún incumplimiento contractual, sea de una obligación esencial o de otra...
- Page 80 Sunbeam Consumer Service EE.UU.: 1.800.334.0759 Canadá: 1.800.667.8623 www.oster.com ©2009 Sunbeam Products, Inc. operando bajo el nombre de Jarden Consumer Solutions. Todos los derechos reservados. Distribuido por Sunbeam Products, Inc. operando bajo el nombre de Jarden Consumer Solutions, Boca Raton, Florida 33431.