Table of Contents
Advertisement
Available languages
Available languages
Advertisement
Chapters
Table of Contents

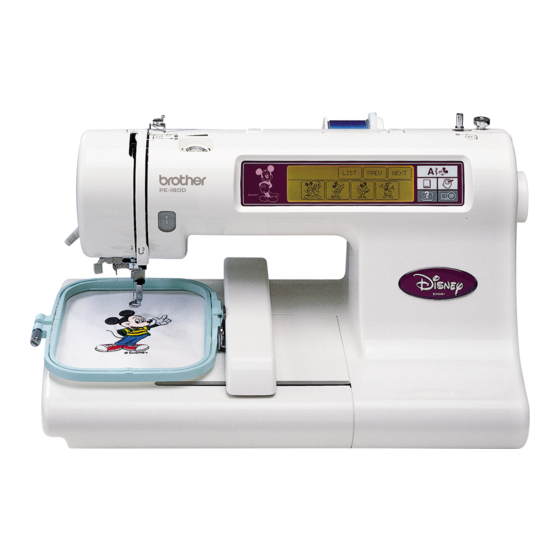
Related Manuals for Brother PE-180D


Summary of Contents for Brother PE-180D
- Page 1 Personal Embroidery System Sistema de Bordado Personal...
-
Page 2: Important Safety Instructions
3. Never operate this embroidery machine if it has a damaged cord or plug, if it is not working properly, if it has been dropped or damaged, or dropped into water. Return the embroidery machine to the nearest authorized dealer or service center for examination, repair, electrical or mechanical adjustment. - Page 3 The plug severed from the main lead must be destroyed as a plug with bare flexible cord is hazardous if engaged in a live socket outlet. In the event of replacing the plug fuse, use a fuse approved by ASTA to BS 1362, i.e.
- Page 4 PLEASE READ BEFORE USING YOUR EMBROIDERY MACHINE For safe operation 1. Be sure to keep your eye on the needle while sewing. Do not touch the balance wheel, thread take-up, needle, or other moving parts. 2. Remember to turn off the power switch and unplug the cord when: ●...
-
Page 5: Table Of Contents
IF THREAD BREAKS DURING ADJUSTING THE LCD SCREEN CONTRAST......EMBROIDERING OR WHEN PARTLY COMPLETING A PATTERN....If the LCD is hard to see when the power is turned on ........If thread breaks during embroidering ........CHANGING THE NEEDLE..... Re-embroidering from the beginning ........ -
Page 6: Machine Knowledge
MACHINE KNOWLEDGE CHAPTER 1 PRINCIPAL PARTS AND THEIR DESCRIPTION 2 15 1– Handle A– MAIN POWER SWITCH AND CONNECTORS 2– Spool cap B– SELECTION KEYS 3– Bobbin winding guide C– “START/STOP” BUTTON 4– Upper thread tension dial 5– Face plate 6–... -
Page 7: Main Power Switch And Connectors
If the plug does not fit fully in the outlet, contact a qualified electrician to install the proper outlet. Do not modify the plug in... -
Page 8: Selection Keys
1 “CHARACTERS & DESIGNS” KEY Use this key for embroidering characters and patterns. 2 “CARD” KEY Use this key to select a memory card for embroidery patterns. 3 “MEMORY” KEY Use this key for saving or retrieving pattern combinations in the machine. -
Page 9: Accessories
A cover might not be provieded in some countries. -
Page 10: Options
Embroidery set (Large) SA418 XA3733-001 Embroidery set (Small) SA416 XA3730-001 Embroidery set (Extra-small) SA415 XA3713-001 Brother poly 40 color thread set SA740 X80928-100 Brother poly #90 bobbin thread EBT-PE X80919-001 Backing material (Stabilizer material) SA517 X80914-001 Memory card No. 1 Alphabet... -
Page 11: Operation (Selection Keys)
OPERATION (SELECTION KEYS) Most of the instructions are in the machine’s memory. Messages on the LCD screen guide you through each operation. 1 “BASIC OPERATION” key 1. Press “BASIC OPERATION”. 2. Touch “NEXT”. 3. Touch “SWITCH FUNCTION”. 4. Touch “SELECTION KEY”. - Page 12 A. Selection keys Select one of the five keys that explain the functions of the machine, and press that key. When you press the key, the LCD at the left will change to display the information that you requested. 1 “CHARACTERS & DESIGNS” KEY 2 “CARD”...
- Page 13 Example: To find out how to wind a bobbin 1. Press “BASIC OPERATION”. 2. Touch “WINDING BOBBIN”. The operation procedure for winding a bobbin will be displayed. 1 “BASIC OPERATION” key Example: To find out the combination of fabric, needle and thread 1.
-
Page 14: How To Use The Language Selection Key
HOW TO USE THE LANGUAGE SELECTION KEY You can use the “LANGUAGE SELECTION” key to easily change the display lan- guage for all the keys and messages on the LCD screen to the language you need. 1. Press “BASIC OPERATION”. -
Page 15: How To Clear The Language Selection
English language. 1 “BASIC OPERATION” key CAUTION ● This function can not be used as a translation function. ● If the power supply is turned off, the current language setting will be retained... -
Page 16: Bobbin Winding And Installation
The spool cap closest to the thread spool size should be used to hold the spool securely on the spool post. The spool cap should be pushed on as far as it will go. 1 Spool cap 2 Spool... - Page 17 3. Guide the thread through the machine and the bobbin winding guide as marked with the dotted line. 4. Guide the thread through the small hole in the side of the bobbin from the inside. Holding the thread end, push the bobbin winder shaft to right.
-
Page 18: Setting The Bobbin
4. Close the bobbin cover by placing the left end in place and pressing down lightly on the right end to snap in place. There is no need to pull up the lower (bobbin) thread, it is done automatically. -
Page 19: Upper Threading
Extra spool pin Use when embroidering with metallic thread. 1. Insert the extra spool pin into the hole on the top of the machine. 2. Install the spool felt and the thread spool in that order, and then thread the upper thread. -
Page 20: Auto Needle Threading Device
If using special threads which wind quickly off the thread spool, attach a net to the spool before using. Cut the net to match the size of the spool. 1 Net 2 Thread spool 3 Spool pin 4 Spool cap Auto needle threading device 1. -
Page 21: Preparation Before Embroidering
1 Embroidery frame 2 Fabric 3 Non-woven stabilizer material Embroidering different types of fabric From normal fabrics to thick fabrics It’s a good idea to place a piece of stabilizer fabric under (not within) the frame holding the fabric being embroidered. - Page 22 After selecting your fabric, place a piece of stabilizer fabric within the frame beneath the fabric being embroidered. We also recommend using a spray-on stabilizer first, allow it to dry or iron to dry then use a non-woven stabilizer with it in the frame. Stretchable fabrics such as jerseys...
-
Page 23: Setting The Fabric In The Embroidery Frame
2. Loosen the adjusting screw of the outer frame, place the fabric on top of the outer frame with the right side of the fabric up, and then place the inner frame into the outer frame to clamp the fabric. - Page 24 1 Outer frame 2 Inner frame 3 Fabric 6. Check to be sure that the center of the design is in the correct location based on the crosshairs of the embroidery sheet. Remove the embroidery sheet using the finger hole to pull...
-
Page 25: Fitting The Embroidery Frame To The Machine
Be sure to insert both pins. If only the forward or the back pin is inserted, the pattern may not turn out correctly. 1 Frame holder... -
Page 26: Thread Tension Adjustment
1 Upper thread tension setting 2 Weak (Decrease thread tension) 3 Strong (Increase thread tension) A– To tighten the upper thread tension, adjust the dial to the right. B– To loosen the upper thread tension, adjust the dial to the left. -
Page 27: Adjusting The Lcd Screen Contrast
Reset it by turning the power switch off and then on again. If the LCD is hard to see when the power is turned on 1. While touching the LCD (anywhere is OK), turn the power off and then back on again. -
Page 28: Changing The Needle
3. Slide the needle out. 4. Insert the new needle into the needle shaft as far up as it will go with the flat side of the needle facing away from you. Secure it by firmly tightening the screw with a screwdriver. -
Page 29: Embroidering
1. Thread the upper thread following the solidline and numerical sequence marked on your machine. Be sure to attach the spool felt as shown in the illustration. 1 Spool felt (See page 16 – 17) 2. Thread the lower (bobbin) thread. (See page... - Page 30 (See page 20 – 22) 1 Carriage (embroidery arm) 2 Embroidery frame NOTE Do not push down the carriage too hard as you attach the hoop. Use caution so as not to move the carriage sideways. It is easier to move the embroidery frame under the presser foot if the presser foot lever is raised higher than its normal “up”...
-
Page 31: Start Embroidering
Start embroidering 1. After threading the needle, pass the thread from the top to the bottom through the hole of the presser foot, and gently pull the end of the thread. 2. Lower the presser foot and press the “START/STOP” button to start the machine. -
Page 32: Embroidering Advice
Needle #60 – #90 synthetic thread. Embroidery thread #50 Home sewing machine For thin and stretch fabrics which are difficult needle 75/11 to embroider, attach the fabric to non-woven stabilizer fabric before embroidering. If embroidering on a thick fabric with stabilizer... -
Page 33: How To Select Patterns
If the power is turned on without a memory card inserted, the display shown at the left will appear. If the power is turned on with a memory card inserted, the screen corresponding to the memory card will appear. (Example: No.2 The... -
Page 34: Selecting Alphabetic Characters
Selecting alphabetic characters Alphabetic characters Three different fonts are available for alphabetic characters. Touch the key that corresponds to the typeface you would like to use. Example: To select the characters to form the word “BUS” 1. Touch “ ”. -
Page 35: Uppercase & Lowercase
Screen A 1 Touch this key to have the machine sew a reinforcement stitch and stop for the changing of thread each time a new character is embroidered. (Refer to page 34.) 2 Touch this key to check the character selected. (Refer to page 34.) 3 Touch this key to return to the previous screen character choices. -
Page 36: Changing The Character Size To One Of Three Different Sizes
Changing the character size to one of three different sizes The size of the characters can be changed by touching the “L/M/S” key. Each time it is pressed L .. ) it changes as shown below. (L The size of all characters will be changed to the last character size selected. -
Page 37: Checking The Characters Input
“k” is touched. The machine will not accept your next character if it exceeds the embroidery area. To continue the word or phrase change to a smaller size character. By touching “CHECK”, the display will scroll through all the characters from the first character selected. -
Page 38: Selecting Frame Patterns
1 If you touch “NEXT”, additional frame shapes will be displayed. (There are a total of 10 different frame shapes available.) 3. Select the desired type of stitch to form the frame. 2 If you touch “NEXT”, additional stitch types will be displayed. - Page 39 Screen A 1 Touch this key if you would like to change the pattern position, pattern size and thread density, or if you would like to use the Help function. To change the pattern position: (Refer to page 43) To change the pattern size: (Refer to page 47) To change the thread density: (Refer to page 47) (It may not be possible to change the thread density for some patterns.)
-
Page 40: Selecting One-Point Patterns
2 Touch this key to return to the previous pattern screen. 3 Touch this key to move to the next pattern screen. 3. The pattern is now selected. 4 Screen A – The operation of each key shown on this screen is described on the following page. - Page 41 7 The total number of colors and the number of the color currently being sewn will be displayed. 8 Touch this key to change the display in 1 to the color name (reference). (Refer to page 39.) ( It is not...
-
Page 42: Displaying The Embroidery Time For One-Point Patterns
Displaying the embroidery time for one-point patterns 1 “BASIC OPERATION” key If you would like to know the time it takes to embroider a pattern, touch the time display key (“XXXX”). The time required will then be calculated and displayed. The time taken to change the threads is not included. -
Page 43: Selecting Patterns From A Memory Card
Selecting patterns from a memory card Be sure to turn off the power switch before inserting or removing the memory cards. 1. Turn the power switch off. 2. Insert the memory card into the card slot according to the direction of the arrow mark on the memory card. -
Page 44: Memory
MEMORY Up to 5 different pattern combinations can be saved and retrieved from memory. 1 “BASIC OPERATION” key Saving a pattern combination in memory Example: To save the “Girl” pattern in memory address 1. 1. Enter the characters to form the word or monogram. -
Page 45: Retrieving A Pattern Which Has Been Saved
4. The pattern retrieved will appear on the screen. Press “START/STOP” button to embroider the pattern. Patterns which are saved from an embroidery card can only be retrieved if the memory card containing that pattern has been inserted into the card slot of the machine. -
Page 46: Changing The Settings For The Selected Pattern
The position for embroidering the pattern can be changed by touching the “LAYOUT” key. This is useful if you want to embroider a pattern somewhere such as in the corner of the fabric or if you want to align a pattern away form the center of the embroidery area of frame. -
Page 47: Changing The Embroidery Position
If “TRIAL” is touched, the embroidery frame will move and the presser foot will trace the embroidery area to be used for the currently selected pattern and size. Do not lower the needle. Use the hole of the presser foot as a guide instead. -
Page 48: Embroidering From A Specific Starting Point
Embroidering from a specific starting point 1. Make a mark at the starting position on the fabric in the frame as shown in the illustration. The mark cannot be too close to the edge of the frame as the presser foot prevents the needle from getting very close to the frame. -
Page 49: Mirror Imazing Patterns
Mirror imazing patterns 1. Touch the “??????” key to reverse the pattern horizontally. If the “??????” key appears on the display in reverse mode, it indicates that the pattern has been reversed horizontally showing a mirror image. The “??????” key will not be displayed for... -
Page 50: Changing The Size Of Characters And Frame Patterns
Refer to page 43 for instructions on how to use other keys in this screen. Changing thread density of the stitch on characters and some frame patterns The thread density adjustment is not available for all patterns. Patterns other than the characters and some frame patterns are not adjustable. -
Page 51: Sewing A Basic Embroidery Pattern
SEWING A BASIC EMBROIDERY PATTERN Embroidering multi-color patterns When a pattern is selected it is broken down into color diagrams on the screen. The order of embroidering is shown left to right. The diagram on the left is for the first thread color. -
Page 52: Embroidering A Single Color Pattern When "Multi Color" Is Displayed
Embroidering a single color pattern when “MULTI COLOR” is displayed 1. Touch “MULTI COLOR” to change to the single color mode. If the “START/STOP” button is pressed, a single color of the pattern will be embroidered and then the machine will stop automatically. -
Page 53: Embroidering Characters That
1 Finishing position 3. Input the remaining letters “DE”, and then touch “START/CENTER” to select “START”. 4. Touch the arrow keys to move the start point of the needle to the finishing position of the last character... -
Page 54: Embroidery Applications
This mark can be used as a guide when embroidering characters or patterns to position them within the frame pattern. 2. Using the “+” mark inside the frame pattern as a guide, align the needle using the center needle layout function. Embroider the design. -
Page 55: Embroidering Appliques (Using A Frame Pattern)
1. Select the applique fabric for the project, attach a stabilizer material, place in the embroidery frame and on the machine. 2. Select the frame shape to be embroidered and the “– – –” stitch. Embroider it onto the applique fabric. Remove the fabric from the frame. -
Page 56: Embroidering Onto Small Pieces Of Fabric Or Onto Corners
Embroidering onto small pieces of fabric or onto corners Use stabilizer material to provide extra support while embroidering. After embroidering is completed, remove the stabilizer material carefully. Case A 1 Fabric 2 Secure with double faced tape or a basting... -
Page 57: If Thread Breaks During Embroidering Or When Partly Completing A Pattern
9-stitch jumps starting from the embroidering 6th single stitch) 3 Touch this key to move back to the start of the 6 Touch this key to return to the previous current color or character without embroidering screen and allow embroidery to begin. -
Page 58: If Thread Breaks During Embroidering
Replace the lower (bobbin) thread and then re-attach the embroidery frame. 2. Touch “BACK” to move back a few stitches to slightly before the position where the thread broke or the bobbin ran out of the thread. If it is not possible to move back to the position where the thread broke, touch “REVERSE SEARCH”... -
Page 59: Re-Embroidering From The Beginning
Re-embroidering from the beginning 1. Touch “HOME” to move back to the start position for a pattern. 2. Lower the presser foot lever and press the “START/STOP” button to start embroidering. 1 “START/STOP” button... -
Page 60: Maintenance
2 OFF The power cord plug must be removed from the socket outlet prior to changing the bulb. 2. Loosen the screw in the end cap at the left side of the machine. 3. Remove the end cap. 4. Replace the snap-in light bulb with a new one of the same type. -
Page 61: Cleaning
CLEANING Always keep the machine clean. 1. Turn off the power, remove the needle, and then raise the presser foot lever. 1 Use a screwdriver to loosen the screw to remove. 2. Loosen the screws on the needle plate. 3. Remove the needle plate. -
Page 62: Error Message
ERROR MESSAGE When the machine is not properly set and the “START/STOP” button is pressed, or a correction in your operation is required, machine will not start and will instruct you with an alarm and error number on the LCD. - Page 63 Alphabet card and #10, Monogram emblem card, can be saved and retrieved while the card is inserted. The card that the design was saved from must be inserted in order to retrieve the design. This message is displayed when you are trying to save patterns that cannot be combined.
- Page 64 This message is displayed during bobbin winding. This message is displayed after a “MEMORY” space is touched to save a pattern to that space. The power should not be turned off while this is on the display. This message is displayed while the machine is calculating after you touched the “?????”...
-
Page 65: Troubleshooting
Whenever embroidering becomes difficult, review the section of the instruction book which explains the operation you are performing to make sure that you are using the machine correctly. If you still have difficulty, the following check list may help you correct it. If you still experience difficulties, contact your dealer or nearest authorized service center. - Page 66 2. The embroidery frame has been 2. Attach the embroidery frame to the attached to the machine incorrectly. machine correctly. 3. Thin or stretch fabric is being used with 3. Attach stabilizer fabric. no stabilizer fabric attached. 4. Threads other than the designated 4.
-
Page 67: Mechanical Problems
● To start again, while the main power switch is off, plug the unit in. Then turn the main power switch on and select an operation. Refer to page 54, using the “HELP” function to get back... -
Page 68: Patterns
PATTERNS Character embroidering chart Sizes: [L] 30 mm (1-3/16”), [M] 15 mm (9/16”) Sizes: [L] 30 mm (1-3/16”), [M] 15 mm (9/16”) [S] 7.5 mm (1/4”) [S] 10 mm (0-3/8”) Sizes: [L] 30 mm (1-3/16”), [M] 15 mm (9/16”) [S] 9 mm (0-3/8”) Frame pattern embroidering chart <Sizes can be enlarged or reduced.>... -
Page 69: One Point Mark Embroidery Pattern
4 ... 085 5 ... 086 6 ... 079 7 ... 515 Patterns which are stored in the machine or memory cards are for home use only. These patterns are not to be used for any activity other than home use. -
Page 70: Embroidering Using Asmall Frame (Optional)
Embroidering items which won’t fit into the frame For items which won’t fit into the frame, baste or iron a piece of stabilizer fabric onto the part to be embroidered, and then place the entire piece into the frame together with the fabric to be... -
Page 71: Embroidering Using Aextra-Small Frame (Optional)
An extra-small frame which is smaller than the small frame mentioned on the previous page is also available as an option. It is used mostly for monogramming initials on pockets or cuffs. The extra-small frame can be used to embroider even smaller articles. -
Page 72: Embroidering Using Alarge Frame (Optional)
4 Center when frame is clamped in position “c”. 5 Reference line Combining patterns in the height direction 1. If the overall height is within 18.2 cm (7- 3/16”), you can embroider the respective patterns simply by changing the clamping position of the frame. -
Page 73: Linking Two Or More Embroidered Patterns (Using The 90˚ Rotation Feature)
1 Embroidery start position 3. Align the line on the fabric with a line on the embroidery sheet, and fit the fabric and embroidery sheet into the frame. Clamp the frame with the carriage at the place indicated by “a”. - Page 74 5. Use the arrow keys to move the needle to the embroidery start position, and then start embroidering. 6. Move the frame to the place indicated by “c” and clamp it again with the carriage. 7. Embroider the next pattern. If using the same pattern, go straight ahead and start embroidering.
- Page 75 Usar únicamente los accesorios recomendados por el fabricante y que vienen especificados en este manual. 3. No trabajar nunca con la máquina en caso de que tenga el cable o el enchufe en malas condiciones, si no cose correctamente, en caso de que se haya caído, haya sido dañada o se haya mojado.
- Page 76 POR FAVOR LEA ESTE MANUAL ANTES DE USAR ESA MAQUINA DE BORDAR Para funcionamiento seguro 1. Preste atención a la aguja mientras cose. No toque la polea, el tirahilos, la aguja u otras partes móviles. 2. Recuerde desconectar el interruptor principal y desenchufar el cable de alimentación cuando: ●...
- Page 77 CONECTORES ........Como cambiar la posicion TECLAS DE SELECCION...... (COMPOSICION) ......115 BOTON DE COMIENZO/PARADA..Cambio de la posición de bordado ... 116 ACCESORIOS........Verificación del área de bordado ..116 OPCIONALES ........Bordado desde un punto de comienzo FUNCIONAMIENTO específico..........
-
Page 78: Capitulo 1
A– Interruptor principal y conectores 2– Soporte de la bobina B– Teclas de selección 3– Guiahilos para enrollar la bobina C– Botón de comienzo/parada 4– Dial de tensión de hilo superior 5– Placa delantera 6– Palanca del prensatelas 7– Enhebrador de aguja 8– Prensatelas 9–... -
Page 79: Interruptor Principal Yconectores
INTERRUPTOR PRINCIPAL Y CONECTORES 1 Interruptor principal PRECAUCION – Cuando no use la máquina de bordar el 1 ON interruptor principal debe estar apagado o 2 OFF la máquina debe estar desenchufada del 2 Ranura de tarjeta de memoria tomacorriente. -
Page 80: Teclas De Seleccion
1 Tecla de caracteres y diseños Use esta tecla para bordar caracteres y patrones. 2 Tecla de tarjeta Use esta tecla para seleccionar una tarjeta de memoria para los patrones de bordado. 3 Tecla de memoria Use esta tecla para memorizar o recuperar patrones de la memoria. -
Page 81: Accesorios
Cuando coloque la cubierta de máquina en la máquina con el marco de bordado instalado, presione la tecla de caracteres y diseños o la tecla de tarjeta para volver el brazo de bordar a su posición de almacenamiento. Un método alternativo para volver el brazo de bordar a su posición de... -
Page 82: Opcionales
SA418 XA3733-001 Juego de bordado (pequeño) SA416 XA3730-001 Juego de bordado (Extra pequeño) SA415 XA3713-001 Juego de hilo de color poli #40 de Brother SA740 X80928-100 Hilo de bobina poli #90 de Brother EBT-PE X80919-001 Entretela (material estabilizador) SA517 X80914-001 Tarjeta de memoria No. -
Page 83: Funcionamiento (Teclas De Seleccion)
FUNCIONAMIENTO (TECLAS DE SELECCION) La mayoría de las instrucciones se encuentran en la memoria de la máquina. Los mensajes en la pantalla LCD lo guiarán en cada procedimiento. 1 Tecla de funcionamiento básico 1. Presione la tecla de funcionamiento básico. - Page 84 Uso de la teclas de selección A. Teclas de selección Seleccione una de las seis teclas que explican las funciones de la máquina y presione esa tecla. Cuando presione la tecla, la pantalla a la izquierda cambiará para exhibir la información que haya solicitado.
- Page 85 Se exhibirá el procedimiento para enrollar la bobina. 1 Tecla de funcionamiento básico Ejemplo: Para consultar que combinación de tejido, aguja e hilo usar. 1. Presione la tecla para modificar y consejos. 2. Presione “TEJIDO E HILO Y AGUJA”. 2 Tecla para modificar y consejos...
-
Page 86: Como Usar La Tecla De Seleccion De Lenguaje
COMO USAR LA TECLA DE SELECCION DE LENGUAJE Puede usar la tecla “SELECCION DE LENGUAJE” para cambiar fácilmente el lenguaje de los mensajes y las teclas en la pantalla al lenguaje que usted desee. 1. Presione la tecla de funcionamiento básico. -
Page 87: Como Borrar La Selección De Lenguaje
Inglés. 1 Tecla de funcionamiento básico PRECAUCION ● Esta función no se debe usar como una función de traducción. ● Si ocurre un corte de corriente, el ajuste lenguaje no se borrará y permanecerá en... -
Page 88: Enrollado E Instalacion De La Bobina
1 Encendido 2 Apagado 2. Arme el soporte de la bobina. El extremo del hilo debe salir por la parte delantera e inferior de la bobina. La tapa de al bobina debe usarse para mantener bien segura en su lugar la bobina. - Page 89 3. Pase el hilo por la máquina y por los guiahilos para enrollar la bobina tal como los indica la línea punteada. 4. Pase el hilo desde abajo por el orificio pequeño a un costado de la bobina. Sosteniendo el extremo del hilo, empuje el eje del bobinador hacia la derecha.
-
Page 90: Colocación De La Bobina
(Use una bobina plástica tal como se indica en la página 78.) 3. Pase el hilo por el gancho y por el canal hacia atrás, tirando del hilo hacia usted de forma de cortar el sobrante. 4. Cierre la cubierta de la bobina colocando el extremo izquierdo en su lugar y presionando ligeramente hacia abajo del lado derecho para que quede en su lugar. -
Page 91: Enhebrado Del Hilo Superior
1. Inserte el pasador de bobina extra en el orficio en la parte de arriba de la máquina. 2. Instale el fieltro de bobina y la bobina en ese orden, y luego enhebre el hilo superior. No enhebre el hilo en la ménsula (A). -
Page 92: Dispositivo De Enhebrado Automático De La Aguja
4. Empuje la palanca del enhebrador de aguja hacia atrás. Verifique que el gancho haya pasado por el ojo de la aguja y pase el hilo por debajo de las guías metálicas y del gancho. -
Page 93: Preparativo Antes De Bordado
Existen diferentes tipos estabilizadores no tejidos. El objetivo del estabilizador es evitar que el tejido se estire o mueva. Los mejores resultados en tejidos elásticos, de punto y livianos se obtienen planchando un poco el estabilizador no tejido. - Page 94 También le recomendamos usar primero apresto, dejarlo secar o secarlo con la plancha y luego usar un estabilizador no tejido en el bastidor. Tejidos elásticos como jerseys Adhiera un pedazo de estabilizador un planchar un poco más grande que el marco donde va a bordar el tejido, y luego estírelo sobre el marco.
-
Page 95: Colocación Del Tejido En El Marco De Bordado
Colocación del tejido en el marco de bordado 1. Marque el tejido con tiza o un lápiz especial para indicar el centro de lugar a bordar. 2. Afloje el tornillo de ajuste del marco exterior, coloque el tejido sobre el marco exterior con el derecho del tejido hacia arriba y luego coloque el marco interior dentro del marco exterior para prensar el tejido. - Page 96 5. Introduzca el tejido y el marco interior dentro del marco exterior asegurándose que la marca en el tejido no se salga de posición. Instalación correcta Instálelos correctamente de forma que los bordes del marco exterior e interior queden parejos.
-
Page 97: Instalación Del Marco De Bordado En La Máquina
Instalación del marco de bordado en la máquina 1. Levante el prensatelas a la posición más alta. Luego pase el marco de bordado por debajo del prensatelas con las Salientes para instalación del lado derecho y con el derecho del tejido hacia arriba. -
Page 98: Ajuste De Tension Del Hilo
Ajústela de forma que el ancho de puntada del hilo inferior del lado del revés del tejido sea un tercio del ancho total. Es importante lograr la tensión correcta pues demasiada tensión o poca tensión hará que el bordado quede mal o que el tejido se arrolle. 1 Derecho del tejido 2 Revés del tejido... -
Page 99: Ajuste De Brillo De La Pantalla Lcd
Reponga la pantalla apagando y encendiendo nuevamente el interruptor principal. Si la pantalla LCD no se ve bien cuando la máquina está encendida 1. A la misma vez que toca la pantalla LCD (en cualquier lugar está bien), apague y vuelva a encender la máquina nuevamente. -
Page 100: Cambio De La Aguja
Coloque la aguja firmemente. 1 Tecla de funcionamiento básico 1. Apague el interruptor principal y baje la palanca del prensatelas. Gire la polea para levantar la aguja a la posición más alta. 2. Afloje el tornillo de la aguja con un destornillador. -
Page 101: Capitulo 2
Asegúrese de colocar el fieltro de bobina tal como se indica en la figura. 1 Fieltro de bobina (Consulte la página 88 a 89). 2. Enhebre el hilo inferior (Consulte la página 87). - Page 102 3. Coloque el tejido en el marco de bordado y luego instale el marco en la máquina. (Consulte la página 92 – 94) 1 Carro (Brazo de bordar) 2 Marco de bordado NOTA No empuje el carro demasiado hacia abajo al instalar el bastidor.
-
Page 103: Comienzo Del Bordado
Comienzo de bordado 1. Después de enhebrar la aguja, pase el hilo por el orificio desde arriba hacia abajo y tire suavemente del extremo del hilo. 2. Baje el prensatelas y presione el botón de comienzo/parada para comenzar a coser. Después de coser 5 a 6 puntadas, pare la máquina y levante de nuevo el prensatelas. -
Page 104: Consejos Para El Bordado
75/11 bordar, use un estabilizador no tejido debajo del tejido a bordar. Si borda un tejido grueso con estabilizador (consulte la página 90), se recomienda que use una aguja de máquina de coser para el hogar fuerte 90/14. -
Page 105: Como Seleccionar Patrones
COMO SELECCIONAR PATRONES Selección de patrones de bordado incorporados Seleccione el tipo de patrones de bordado incorporados que desea bordar. Si enciende el interruptor principal sin haber colocado una tarjeta de memoria, la exhibición que se indica a la izquierda aparecerá... -
Page 106: Selección De Caracteres Alfabéticos
Selección de caracteres alfabéticos Caracteres alfabéticos Se dispone de tres tipos de letras diferentes para los caracteres alfabéticos. Presione la tecla que corresponde al tipo de letra que desea usar. Ejemplo: Para seleccionar los caracteres para la palabra “BUS”. 1. Presione “... -
Page 107: Mayúsculas Y Minúsculas
Pantalla A 1 Presione esta tecla para que su máquina cosa una puntada de refuerzo y pare para cambiar el hilo cada vez que borde un nuevo carácter. (Consulte la página 106.) 2 Presione esta tecla para verificar el carácter seleccionado. (Consulte la página 106.) 3 Presione esta tecla para volver a los caracteres elegidos en la pantalla anterior. -
Page 108: Cambio Del Tamaño De Los Caracteres
1 Grande (G) 2 Mediano (M) 3 Pequeño (P) Corrección de caracteres Puede borrar un carácter a la vez presionando “BORR”. Ejemplo: Si por equivocación a introducido “Giel” en vez de “Girl”. 1. Presione dos veces “BORR”. 2. Introduzca el carácter correcto. -
Page 109: Verificación De Los Caracteres Ingresados
Presionando “COMP”, todos los caracteres desde el primero se desplazarán a lo largo de la pantalla. Si todos los caracteres seleccionados pueden aparecer, entonces no se desplazarán por la pantalla. -
Page 110: Selección De Marcos Bordados
“CARACTERES Y DISEÑOS” y luego “ ”. 2. Seleccione la forma que desea para el marco. 1 Si presiona “SIGUI”, se exhibirán otras formas. (Existen un total de 10 formas de marcos disponibles.) 3. - Page 111 Pantalla A 1 Presione esta tecla si desea cambiar la posición del patrón, el tamaño del patrón y la densidad del hilo, o si desea usar la función de ayuda. Para cambiar la posición del patrón: (Consulte la página 115) Para cambiar el tamaño del patrón: (Consulte la página 119)
-
Page 112: Selección De Patrones De Una Puntada
1 Presione “LISTA” para exhibir en la pantalla todos los patrones disponibles. Puede seleccionar el patrón deseado presionándolo. 2 Presione “PREV” para volver a la pantalla de patrones anterior. 3 Presione “SIGUI” para cambiar a la pantalla de patrones siguiente. - Page 113 2 Presione esta tecla para exhibir el tiempo total necesario para bordar el patrón y el tiempo restante hasta terminar el patrón. El tiempo que se demora en cambiar los hilos no se incluye en estos tiempos. (El tiempo se calcula después de presionar la tecla, y luego es exhibido.) (Consulte la página 111.) 3 Presione esta tecla para cambiar entre el modo multicolor y monocolor.
-
Page 114: Exhibición Del Tiempo De Bordado Para Patrones De Una Puntada
4 Tiempo total necesario 4. El tiempo restante cambiará al finalizar de bordar cada color. Exhibición de los nombres de colores para patrones de una puntada 1 Tecla de funcionamiento básico Si presiona “COLOR DE HILO”, los nombres de los colores (referencia) de los hilos a usar diferentes se exhibirán en orden. -
Page 115: Selección De Patrones De Una Tarjeta De Memoria
Asegúrese de desconectar el interruptor principal antes de insertar o retirar una tarjeta de memoria. 1. Desconecte el interruptor principal. 2. Inserte la tarjeta de memoria en la ranura de acuerdo a la dirección indicada con la flecha en la tarjeta de memoria. 1 Flecha en la tarjeta de memoria 3. -
Page 116: Memoria
MEMORIA Se pueden almacenar y recuperar de la memoria hasta 5 combinaciones diferentes de patrones. 1 Tecla de funcionamiento básico Almacenando una combinación de patrón en la memoria Ejemplo: Para almacenar el patrón “Girl” en la memoria 1. 1. Introduzca los caractéres para formar la palabra o el monograma. -
Page 117: Recuperando Un Patrón De La Memoria
1. Presione “MEMORIA”. 1 Tecla de memoria 2. Presione “SIGUI”. 3. Presione “REVISION 2”. 4. El dibujo recuperado aparecerá en la pantalla. Presione el botón de comienzo/parada para bordar el dibujo. Los patrones almacenados en una tarjeta de bordado sólo pueden ser recuperados si la tarjeta de memoria conteniendo ese patrón ha... -
Page 118: Cambio De Los Ajustes Para El Patron Seleccionado
Como cambiar la posicion (COMPOSICION) Puede cambiar la posición del bordado presionando “COMPOSI”. Esto resulta muy útil si desea bordar un dibujo sobre una esquina del tejido o desea colocar el dibujo fuera del centro del área de bordado del bastidor. -
Page 119: Cambio De La Posición De Bordado
Verificación del área de bordado Si presiona “PRUEBA”, el marco de bordado se moverá y el prensatelas se moverá por el área en que se va a bordar el patrón seleccionado. No baje la aguja. En cambio use el orificio en el prensatelas... -
Page 120: Bordado Desde Un Punto De Comienzo Específico
3. Borde el patrón Cambio de la dirección del patrón Cada vez que presione “90˚” el patrón girará hacia la derecha en pasos de 90˚ tal como se muestra en la figura a la izquierda. -
Page 121: Patrones En Forma De Espejo
1. Presionar la tecla “??????” para invertir el dibujo horizontalmente y muestra una imagen en espejo. Si la tecla “??????” aparece en la pantalla en modo invertido, indica que el dibujo ha sido invertido horizontalmente mostrando una imagen en espejo. -
Page 122: Cambio Del Tamaño De Los Caracteres Y Marcos Bordados
Consulte la página 115 por instrucciones sobre como usar otras teclas de este figura. Cambio de la densidad de la puntada en caracteres y algunos marcos bordados La función de ajuste de densidad de puntada no se puede usar con todos los patrones de bordado. -
Page 123: Bordado De Un Patron De Bordado Basico
Cuando se selecciona un patrón se separa en la pantalla en colores o diagramas. El orden de bordado se indica de izquierda a derecha. El diagrama de la izquierda es el del hilo del primer color. 1. Enhebre el primer color. (Consulte las páginas 88 a 89) -
Page 124: Bordado De Un Patrón De Un Sólo Color Con La Indicación "Multi Color" En La Pantalla
Bordado de un patrón de un sólo color con la indicación “MULTI COLOR” en la pantalla 1. Presione “MULTI COLOR” para cambiar al modo de un sólo color. Si presiona el botón de comienzo/parada, se bordará un patrón de un sólo color y luego la máquina parará... -
Page 125: Bordado De Más Letras De Las Que Entran En El Área De Bordado
Bordado de más letras de las que entran en el área de bordad Esta función es útil cuando tiene muchas letras y no los puede bordar a todos dentro del bastidor de bordado. Ejemplo: ABCDE en tamaño grande 1. Ingrese “ABC”, luego presione “AJUSTAR” y luego “COMPOSI”. -
Page 126: Bordado De Aplicaciones
Haciendo emblemas o decoraciones 1. Después de bordar un marco y combinar el diseño, cosa un marco extra del lado de afuera usando la puntada “– – –” un poco más grande que la del marco original. 2. Corte el tejido alrededor del marco, siguiendo la línea del marco exterior. -
Page 127: Apliques Bordado (Usando Un Marco De Bordado)
“– – –” como en el paso 2. 4. Aplique una capa fina de adhesivo en la parte de atrás del aplique creado en el paso 2, y luego colóquelo sobre el tejido de base de forma que quede dentro del marco que acaba de bordar. -
Page 128: Bordando Sobre Piezas Pequeñas De Tejido O Sobre Esquinas
Bordando sobre piezas pequeñas de tejido o sobre esquinas Use material estabilizador para tener más apoyo al bordar. Luego de bordar, retire cuidadosamente el material estabilizador. Caso A 1 Tejido 2 Asegurado con cinta de doble fase o hilvanado 3 Estabilizador... -
Page 129: Si El Hilo Se Rompe Durante El Bordado O Cuando Haya Terminado Un Patron Casi Terminado
SI EL HILO SE ROMPE DURANTE EL BORDADO O CUANDO HAYA TERMINADO UN PATRON CASI TERMINADO Antes de bordar Mientras borda Cuando comience a bordar, “AJUSTAR” cambiará a “AYUDA”. Presione “AYUDA” luego aparecerá la siguiente pantalla. 1 Presione aquí para moverse hacia atrás a la 5 Presione aquí... -
Page 130: Si El Hilo Se Rompe Durante El Bordado
1. Si el hilo superior se rompe. Vuelva a enhebrar el hilo superior. Si el hilo inferior se rompe o se acaba el hilo de la bobina. Corte el hilo superior del lado de arriba del bastidor y luego retire el bastidor. -
Page 131: Volviendo A Bordar Desde El Principio
Volviendo a bordar desde el principio 1. Presione aquí para moverse hacia atrás a la posición de comienzo de un patrón. 2. Baje la palanca del prensatelas y presione el botón de comienzo/parada para comenzar a bordar. 1 Botón de comienzo / parada... -
Page 132: Mantenimiento
2 Encendido Para cambiar la bombilla, debe desenchufar el cable de alimentación del tomacorriente 2. Quite los tornillos del lado de atrás de la cabeza de la máquina. 3. Desmonte el extremo de la cabeza. 4. Cambie la bombilla por una nueva. -
Page 133: Limpieza
2. Afloje los tornillos de la placa de aguja. 3. Desmonte la placa de aguja. 4. Retire la lanzadera. 5. Quite la pelusa y los hilos acumulados en el gancho y lanzadera interior con un cepilla o con el accesorio de una aspiradora pequeña. -
Page 134: Mensajes De Error
MENSAJES DE ERROR Cuando la máquina no está adecuadamente preparada y presiona el botón de comienzo/parada, o es necesario hacer alguna corrección, la máquina no comenzará a coser y sonará una alarma y aparecerá un mensaje en la pantalla indicándole el error. - Page 135 Este mensaje aparecerá cuando haya querido mover el marco de bordado con la aguja en la posición baja. Use la polea para mover la aguja a la posición superior. Luego continúe. Este mensaje aparecerá cuando el tamaño combinado de los patrones sea más grande que el área de bordado.
- Page 136 Este mensaje aparecerá si la máquina calcula después de presionar la tecla “ ”. Presione “CANCELAR” si desea interrumpir el proceso del cálculo. Alarma ● En caso de funcionamiento correcto: Se escuchará un bip. En caso que haya un problema: Se escucharán dos o cuatro bips.
-
Page 137: Localizacion De Averias
Si el problema persiste el siguiente listado de problemas le puede ayudar a corregirlos. Si aún persiste el problema, consulte al centro de servicio técnico autorizado más próximo o al distribuidor. - Page 138 9. El hilo no se corta durante el corte 1. Se ha acumulado hilo alrededor de la 1. Quite la placa de aguja y limpie el hilo de hilo automático. cuchilla de corte de hilo. acumulado.
- Page 139 2. Cámbiela por la aguja correcta. Precaución ● Esta máquina tiene un sensor de ruptura de hilo. Si el hilo no está enhebrado, la máquina no funcionará aunque presione el botón de encendido/apagado. Además, puede escuchar un sonido fuerte diferente del sonido normal debido al funcionamiento del mecanismo de la barra de agujas durante los cambios de composición, a pruebas y otros movimientos del marco...
- Page 140 PATRONES Cuadro de caractéres para bordado Tamaños: [G] 30 mm, [M] 15 mm Tamaños: [G] 30 mm, [M] 15 mm [P] 7.5 mm [P] 10 mm Tamaños: [G] 30 mm, [M] 15 mm [P] 9 mm Cuadro de marco de bordado (El tamaño se puede agrandar o reducir.)
-
Page 141: Patrones
Patrones de una puntada <Tiempo de bordado: 2 a 18 min. (No se incluye el tiempo necesario para cambiar los colores.)> Orden de 1 ... 001 1 ... 704 1 ... 205 1 ... 339 1 ... 339 1 ... 205 1 ... -
Page 142: Bordado Usando Un Marco Pequeño (Opcional)
2. Si no cambia la posición del diseño en la pantalla “COMPOSICION”, verifique que el área a bordar para el diseño seleccionado se encuentre entre 70 mm de altura y ancho presionando “COMPOSICION”. -
Page 143: Bordado Usando Un Bastidor Extra Pequeño (Opcional)
BORDADO USANDO UN BASTIDOR EXTRA PEQUEÑO (OPCIONAL) Se dispone de un bastidor extra pequeño opcional que es más pequeño que el bastidor pequeño mencionado en la página anterior. Se usa principalmente para hacer monogramas de iniciales en los bolsillos o los puños. -
Page 144: Bordado Usando Un Marco Grande (Opcional)
2. Una vez que ha bordado el diseño, mueva el marco de la posición “a” a la posición “b” o la posición “c”. 3. Borde el diseño la parte de abajo del diseño. -
Page 145: Unión De Dos O Más Diseños De Bordado
Unión de dos o más diseños de bordado (uso de la función de giro de 90˚) Ejemplo: Diseños en la tarjeta de flores (no. 2) 1. Verifique el largo de los diseños que desea bordar continuamente presionando “COMPOSI”. Si el largo es menos de 18,2 cm, puede continuar con el bordado sólo... - Page 146 5. Use las teclas de flecha para mover la aguja a la posición de comienzo de bordado, y luego comience a bordar. 6. Mueva el marco a la posición indicada con una “c” y enganche otra vez el marco en el carro.
- Page 147 ENGLISH/SPANISH 882-211 191213-111 Printed in Taiwan...