Table of Contents
Advertisement
Quick Links
OWNER'S MANUAL
DDQ-9H1SC
BEFORE USING TELEVISION RECEIVER,
READ AND OBSERVE ALL OF THIS OWNER'S MANUAL.
Part No. 11906570B
IMPORTANT SAFEGUARDS
HOW TO GET THE MOST ENJOYMENT FROM YOUR NEW COLOR TV SET
Your new Color TV incorporates a host of features designed to give you excellent performance.
In addition, this model utilizes a highly sophisticated Control Microprocessor that can give
you unprecedented convenience and control in the areas of Picture Adjustment, Channel
Tuning, On-Screen Information.
We therefore strongly urge that you read all of these instructions before using your TV for
the first time.
It is especially important that you read and follow the instructions under the heading:
"CHANNEL MEMORY" on page 16.
SAFETY INSTRUCTION
ANTENNA
Unless your TV is connected to a Cable TV system or to a centralized antenna system, a good
outdoor color TV antenna is recommended for the best performance. However, if you are
located in a strong signal area that is free from interference and ghost conditions (multipath),
an indoor antenna may be insufficient. The two pole antenna packed with this set is for your
convenience only. It is not capable of providing you with the sharp detail and rich color that this
television was designed to display.
LOCATION
Select an area where sunlight or bright indoor illumination will not fall directly on the picture
screen.
Also, be sure that the location selected allows a free flow of air to and from the perforated back
cover of the set.
NOTES
Never remove the back cover of the set. This can expose you to very high voltage and other
hazards.
If the set does not operate properly, unplug it and call your dealer or service shop.
VIEWING
This color receiver may be viewed from any desired distance. Most viewers prefer a distance
of three to six feet or more depending on-screen size for maximum eye comfort.
Caution
To prevent electric shock do not use this (polarized) plug with an extension cord, receptacle or
other outlet unless the blades can be inserted to prevent blade exposure.
2
Advertisement
Table of Contents

Related Manuals for Daewoo DDQ-9H1SC


Summary of Contents for Daewoo DDQ-9H1SC
-
Page 1: Important Safeguards
OWNER'S MANUAL DDQ-9H1SC BEFORE USING TELEVISION RECEIVER, READ AND OBSERVE ALL OF THIS OWNER’S MANUAL. Part No. 11906570B IMPORTANT SAFEGUARDS HOW TO GET THE MOST ENJOYMENT FROM YOUR NEW COLOR TV SET Your new Color TV incorporates a host of features designed to give you excellent performance. -
Page 2: Table Of Contents
Caution Any changes or modifications in construction of this device which are not expressly approved by the party responsible for compliance could avoid the user’s authority to operate the equipment. GRAPHICAL SYMBOLS EXPLANATION This lightning flash with arrowhead symbol, within an equilateral triangle is intended to alert the user to the CAUTION presence of uninsulated "dangerous voltage"... -
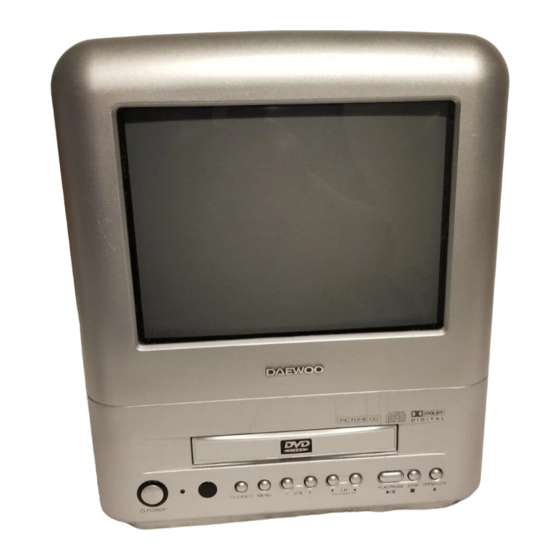
Page 3: Location Of Controls
LOCATION OF CONTROLS CONNECTING EXTERNAL EQUIPMENT AUDIO/VIDEO IN JACK If your receiver has AUDIO/VIDEO IN JACK, connect this JACK to VCR and TV receiver. Select AV by pressing the AV mode selection key on the remote control. Push PLAY key of your VCR. The advantage of this connection is a superior quality of picture and sound during play back. -
Page 4: Antenna Connection
CONNECTING EXTERNAL EQUIPMENT EARPHONES The earphones must have an impedance of between 8 and 32 ohms and have a 3.5mm stereo jack plug. 1. Plug the earphone jack into the earphone socket on the right hand side of the TV. 2. -
Page 5: Video/Audio Connections
CABLE TV(CATV) CONNECTION A 75 ohm coaxial cable connector is built into the set for easy hookup. When connecting the 75 ohm coaxial cable to the set, screw the 75 ohm cable to the COAXIAL CABLE CONNECTOR. Some cable TV companies offer "premium pay channels". Since the signals of these premium pay channels are scrambled, a cable TV converter/descrambler is generally provided to the subscriber by the cable TV company. -
Page 6: Remote Control Use
REMOTE CONTROL USE Correct Point at the Remote Control Sensor of the TV set. The maximum operable distance is approximately 6m from the Remote Control Sensor, and not more than 30 to either side of center. The operation of the Remote Control is most effective when there is nothing between it and the Remote Control Sensor. -
Page 7: On Screen Language Selection
CABLE TV CHANNEL CONVERSION CHART In addition to the normal TV reception from an antenna for VHF (Channels 2-13) and UHF (Channel 14-69), your TV set is equipped to receive non-scrambled cable TV channels. SubMid band (A-8, A-5-A-1), Mid band (A-I) Super band (J-W) Hyper band (W 1 - W 28) and Ultra band (W 29 - W 84) can be received by using the channel selections as shown in the following chart. -
Page 8: Channel Memory
BASIS OF "MENU" OPERATION METHOD You can execute every operation by pressing CH buttons and VOL +/- or alternately. If you learn one method, You can easily operate another function by viewing picture. 1. Pressing these buttons alternately makes every operation easy. 2. - Page 9 CHANNEL MEMORY(SET UP) AUTO PROGRAM This function allows the channels to be memorized automatically to match the TV broadcasts and cable channels in your area. 1. Press TV MENU button and move the cursor to "SET UP" option and press VOL + or button, then the "SET UP"...
-
Page 10: Picture Adjustment 1
CHANNEL MEMORY(SET UP) FINE TUNE If the reception is clear, you do not have to fine-tune the channel, as this is done automatically during auto program and manual memory. If however the signal is weak or distorted, you may have to fine-tune the channel manually. 1. -
Page 11: Sound Adjustment
PICTURE ADJUSTMENT 2 You can sequentially select and adjust one of five picture levels. Contrast, Brightness, Color, Sharpness or Tint e.g. : Contrast Adjustment. MENU PICTURE Press the TV MENU button. Move the SOUND TIME cursor to PICTURE by pressing the CH SETUP buttons and press the VOL + or FUNCTION... - Page 12 SOUND ADJUSTMENT EQUALIZER You can adjust five frequency ranges to your preference. MENU PICTURE Press the TV MENU button. Move the SOUND cursor to SOUND by pressing the CH TIME buttons and press the VOL + or SETUP FUNCTION button. LANGUAGE ENGLISH : MOVE...
- Page 13 SOUND ADJUSTMENT SURROUND SOUND SOUND MENU MENU Press the TV MENU button. Move the PICTURE cursor to SOUND by pressing the CH SOUND buttons and press the VOL + or TIME SETUP button. FUNCTION LANGUAGE ENGLISH : MOVE : SELECT : EXIT SOUND SOUND...
-
Page 14: Time Setting
SOUND ADJUSTMENT USING MTS BUTTON : Your TV set incorporates an MTS (Multichannel Television Sound) decoder to receive stereo broadcasts and any accompanying SAP (Second Audio Program) such as another language sound track). 1. Press the MTS button Depending on the audio signal type of the currently receiving broadcast, on-screen selection appears as follows: Receiving signal On-screen selections... - Page 15 TIME SETTING SLEEP TIMER You can select a time period from 15 through 90 minutes so that the television automatically switches to power-off mode. MENU PICTURE Press TV MENU button the cursor to SOUND TIME by pressing the CH TIME button and press the VOL + or SETUP button.
-
Page 16: Function
TIME SETTING TIME CLOCK AM12:00 Move the cursor to "ON TIME" by CH SLEEP buttons and press the VOL +/- or TIMER buttons to set the time. ON TIME AM07:30 OFF TIME AM12:00 ON CHANNEL : ADJ. : MOVE : PREV. TIME CLOCK AM12:00... -
Page 17: Other Useful Function
FUNCTION BLUE BACK When no picture signal is inputed, or the signal is weak, the screen reverts to a blue back color. FUNCTION FUNCTION BLUE BACK BLUE BACK HALFTONE HALFTONE : MOVE : MOVE : ADJ. : PREV. On this feature disable to continue watching very weak signals. HALFTONE You can select Halftone mode in the on-screen. -
Page 18: Dvd Function & Operation
DVD FUNCTION & OPERATION INTRODUCTION Manufactured under license from Dolby Laboratories. "Dolby" and the double-D symbol are trademarks of Dolby Laboratories. -
Page 19: Disc Requirement/Copyright Information
Disc Requirements/Copyright Information Remote Control Unit (DVD) 1. OPEN/CLOSE BUTTON Use this button to open/close the disc tray. Pressing this button will while on TV/Video mode will automatically change it to DVD mode. 2. PLAY/PAUSE BUTTON Use this button to play or pause the disc. Pressing this button during play, cause the disc pause if in pause mode it function as the play. -
Page 20: Basic Playback
Remote Control Unit (DVD) 12. ANGLE BUTTON If a disc includes multi angle information, the user can watch a screen in multi angles. The function is limited to a DVD disc supporting multi angle information. 13. ZOOM BUTTON Use this button to enlarge DVD or DVD screen image up to 4 times. You may also move the image using CH buttons. -
Page 21: Searching For A Specific Screen/Song During Playback
Searching for a specific screen/song during playback Searching for a specific screen/song during playback... -
Page 22: Changing The Audio/Subtitle Language
Setting a custom view Changing the audio/subtitle language... -
Page 23: Selecting A Menu And 3D
Changing the size and angle of the screen Selecting a menu and 3D... -
Page 24: Setting The Language
Using the Setup Menu Setting the Language... -
Page 25: Setting The Video
Setting the Language Setting the VIDEO... -
Page 26: Setting The Audio
Setting the SPEAKERS Setting the Audio... -
Page 27: Custom Setting
CUSTOM settings Setting rating level and password... - Page 28 Operation with an MP3 disc Operation with an MP3 disc C:001 / T:008...
-
Page 29: Use Of Jpeg Disc
Use of JPEG DISC Use of JPEG DISC... -
Page 30: Trouble Shooting Guide
TROUBLE SHOOTING GUIDE Before requesting service, please refer to the following chart for the symptom and possible solution. For more information, see the corresponding page in this manual. SYMPTOM POSSIBLE SOLUTIONS Make sure the power cord is plugged in. TV does not Try another AC outlet. -
Page 31: Specification
SPECIFICATION Power Source AC 120V~, 60Hz, 60W DC 12-24V, 54W TV Broadcasting NTSC Receiving Channels VHF 2-13CH, UHF 14-69CH CATV 1, 14 - 125CH (T/T 181CH) Channel indicator On Screen Display Sound Output 1.5W+1.5W (Stereo) Speakers 3W(8ohm) x 2 (Stereo) Dimension (W H D) 273mm (W) x 318mm (H) x 318mm (D) Weight... - Page 32 MEMO...
- Page 33 MEMO...