Table of Contents
Advertisement
Quick Links
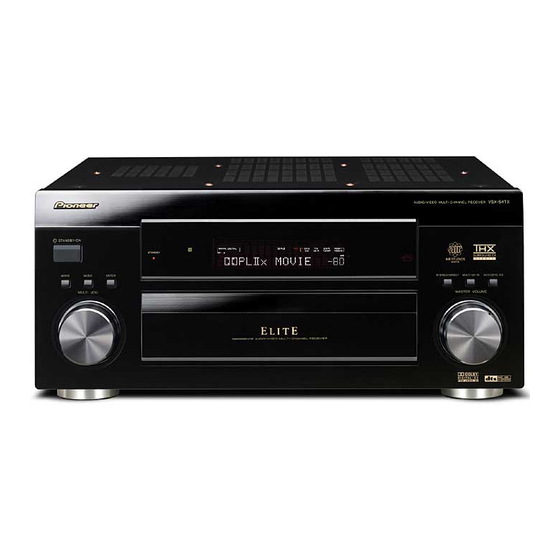
AUDIO/VIDEO MULTI-CHANNEL
RECEIVER
VSX-54TX
Register your product at
www.pioneerelectronics.com
• Protect your new investment
The details of your purchase will be on file for reference in the event of an
insurance claim such as loss or theft.
• Receive free tips, updates and service bulletins on
your new product
• Improve product development
Your input helps us continue to design products that meet your needs.
• Receive a free Pioneer newsletter
Registered customers can opt in to receive a monthly newsletter.
Operating Instructions
Advertisement
Table of Contents

Related Manuals for Pioneer Elite VSX-54TX


Summary of Contents for Pioneer Elite VSX-54TX
-
Page 1: Operating Instructions
Register your product at www.pioneerelectronics.com • Protect your new investment The details of your purchase will be on file for reference in the event of an insurance claim such as loss or theft. • Receive free tips, updates and service bulletins on your new product •... - Page 2 D8-10-2_En NOTE: This equipment has been tested and found to comply with the limits for a Class B digital device, pursuant to Part 15 of the FCC Rules. These limits are designed to provide reasonable protection against harmful interference in a residential installation.
-
Page 3: Important Safety Instructions
WATER AND MOISTURE — Do not use this cords should be routed so that they are not likely • If the product has been exposed to rain or water. product near water — for example, near a to be walked on or pinched by items placed •... -
Page 4: Table Of Contents
Selecting the input signal type ....41 player ........14 Using the surround back channel . - Page 5 Watching video and audio sources independently . . 63 DTS ........90 Dimming the display .
-
Page 6: Before You Start
• Remote control unit area, allowing you to customize your system calibration with the help of a graphical output that can be displayed on-screen, or using a computer. • Dolby Digital and DTS decoding, including Dolby Digital EX, DTS 96/24 and DTS-ES •... -
Page 7: Ventilation
Loading the batteries (at least 8 in. (20 cm) at the top). If not enough space is Load the batteries into the remote control as shown provided between the unit and walls or other equipment, below using alkaline batteries (AA IEC LR6) batteries. -
Page 8: Operating Range Of The Remote Control
• Make sure that there are no obstacles between the remote and the remote sensor on the unit. • The remote has a range of about 23 feet (7 meters). 23 feet (7m) • Remote operation may become unreliable if strong sunlight or fluorescent light is shining on the unit’s... -
Page 9: 02 5 Minute Guide
DVD-Video has become the basic source material for home theater due to its size, quality, and ease of use. Depending on the DVD, you can have up to seven different audio tracks coming from one disc, all of them being sent to different speakers in your system. - Page 10 Although this is ideal, other configurations with fewer speakers—no subwoofer or no center speaker, or even no surround speakers—will work. At the very least, front left and right speakers only are necessary. Note that your main surround speakers should always be connected as a pair, but you can connect just one surround back speaker if you like (it must be connected to the left surround back terminal).
- Page 11 (+) red, and negative (–) black terminal. For proper sound you should take care to match these up Make sure you’ve set the video input on your TV to this with the terminals on the speakers themselves. receiver. Check the manual that came with the TV if you don’t know how to do this.
-
Page 12: Automatically Setting Up For Surround Sound
Important Important • Make sure the microphone and speakers are not • If you have a tripod, use it to place the microphone so moved during the Auto Surround Setup. that it’s about ear level at your normal listening position. Otherwise, place the microphone at ear •... - Page 13 (and number for surround back). When you’re finished, go to the next step. 1.Surround Setup If you see an ERR message in the right side column, there [ SurrBack System ] Auto Setting may be a problem with the speaker connection. If...
-
Page 14: Other Problems When Using The Auto Surround Setup
Before continuing, you may want to check the digital • Turn down the volume of your TV so that all the sound audio output settings on your DVD player and digital is coming from the speakers connected to this satellite receiver. -
Page 15: Connecting Your Equipment
This receiver provides you with almost limitless possibilities for connecting your audio/video system, but it doesn’t have to be difficult. Depending on your needs, you could be up and running in no time after a few simple connections. This section has been designed so that you can read through this short introduction, then jump to the specific connections that you need to make. -
Page 16: About The Video Converter
(100 mA max.). See Switching components on monitor connections. and off using the 12 volt trigger on page 60 for connection details. 15 RS-232C connector This port is provided for connecting a personal computer for graphical output when using Advanced MCACC. -
Page 17: About Cable Types
Component video cables Use component video cables to get the best possible color reproduction of your video source. The color signal of the TV is divided into the luminance (Y) signal and the and P color (P ) signals and then output. In this way, Digital audio cables interference between the signals is avoided. -
Page 18: Connecting Your Tv
Connect the analog audio outputs from your TV to the TV/SAT inputs on this receiver. receiver. To be able to play the sound from the TV’s built- in tuner, connect the analog audio outputs from your TV • Use a stereo RCA phono cable for the connection. -
Page 19: Connecting A Dvd Player
• If your DVD player only has an optical digital output, • Use a standard RCA video cable or an S-video cable you can connect it to one of the optical inputs on this for the connection. receiver using an optical cable. When you set up the •... -
Page 20: Connecting The Multichannel Analog Outputs
DVD player For DVD Audio and SACD playback, your DVD player may • If there is only a single surround back output, be sure have 5.1, 6.1 or 7.1 channel analog outputs (depending to connect it to the SURROUND BACK L jack on this on whether your player supports surround back receiver. -
Page 21: Connecting A Satellite/Cable Receiver Or Other Set-Top Box
• If your set-top box only has a coaxial digital output, tuners are all examples of so-called ‘set-top boxes’. you can connect it to one of the coaxial inputs on this receiver using a coaxial digital audio cable. When Connect a set of audio/video outputs on the set- you set up the receiver you’ll need to tell the receiver... -
Page 22: Connecting A Vcr Or Dvd Recorder
The example illustration below shows a recorder • See About the video converter on page 16 if you plan connected to the optical DIGITAL 2 (CD-R/TAPE1) input. to use a different type of video cable than you used to When you set up the receiver you’ll need to tell the... -
Page 23: Connecting Other Video Sources
Connecting other video sources You can basically use any of the audio/video inputs on • See About the video converter on page 16 if you plan this receiver for any kind of video source. The example to use a different type of video cable than you used to illustration below shows a component connected to the connect your TV. -
Page 24: Using The Component Video Jacks
Assign the component video inputs to the input compatible with progressive-scan video. source you’ve connected. This must be done so that they can be used in Important conjunction with the audio/video input(s) to which you have connected the component above (see Assigning the •... -
Page 25: Connecting Digital Audio Sources
• If your digital compoent only has an optical digital Note output, you can connect it to one of the optical inputs • In order to record some digital sources, you must on this receiver using an optical cable. When you set make analog connections as explained in Connecting up the receiver you’ll need to tell the receiver which... -
Page 26: Connecting Analog Audio Sources
Connect the analog audio outputs of the source • If you use a turntable with this LINE IN jack only component to a set of spare audio inputs on this connect one with a built-in phono equalizer. -
Page 27: Connecting A Component To The Front Panel Inputs
(VIDEO), an S-video jack (S-VIDEO), stereo analog audio inputs (AUDIO L/R) and an optical digital audio input • Pull down the front cover where indicated to access (DIGITAL). You can use these connections for any kind of the front panel inputs. -
Page 28: Installing Your Speaker System
(it must be connected to the left Although this is ideal, other configurations with fewer surround back terminal). You can use speakers with a speakers—no subwoofer or no center speaker, or even... -
Page 29: Connecting The Speakers
Placing the speakers • Make sure that all the bare speaker wire is twisted Where you put your speakers in the room has a big effect together and inserted fully into the speaker terminal. on the quality of the sound. The following guidelines If any of the bare speaker wire touches the back panel should help you to get the best sound from your system. -
Page 30: Connecting Antennas
Don’t drape loosely or leave coiled up. • Clip the loop into the stand (fig. B). • It’s possible to fix the AM antenna to a wall (fig. C). Before fixing, make sure that the reception is satisfactory. -
Page 31: Connecting External Antennas
Never make a knot in the cord or tie it with other cables. The power cords should be routed so that they are not likely to be stepped on. -
Page 32: Controls And Displays
Front panel 11 12 MULTI JOG dial STANDBY indicator Depending on the operation, you can use this to select an Lights when the receiver is in standby. input source or listening mode, as well as for tuner and Remote sensor system settings. - Page 33 RETURN to exit the current menu screen. player, video camera (etc.), that has an optical digital connection. 14 STREAM DIRECT (page 37) • S-VIDEO – Connect a video camera (etc.), that has an Press to switch on/off Direct playback. S-video out. 15 HI-BIT/HI-SAMPLING (page 43) •...
-
Page 34: Display
AUTO lights when the receiver is set to select the input Dolby, DTS and sources. signal automatically. LS, S and RS will light at the same time to indicate 6.1 channel sources. Digital format indicators • PRO LOGIC II – Lights during Dolby Pro Logic II and •... -
Page 35: Remote Control
(such as a DVD player or TV), or as the TUNER EDIT button when using the tuner. AUDIO Use to switch the audio tracks of a DVD when a DVD player is selected as the input source. Command buttons for other components Use these buttons to control the component you selected with the MULTI CONTROL buttons. - Page 36 HI-BIT (page 43) 15 TOP MENU/GUIDE Use this to switch the audio scaler on or off. Use to display the disc ‘top menu’ when a DVD player is TV CONTROL buttons selected as the input source. Also use to find stations or These are dedicated buttons used to control your TV once menus on a digital TV tuner.
-
Page 37: Listening To Your System
Note • If the SB CH MODE is switched to OFF, or the Note surround back speakers are set to NO (this happens automatically if the Surround back speaker setting on •... -
Page 38: The Movie Listening Modes
With two channel sources, select from: • 2 Pro Logic IIx MOVIE – Up to 7.1 channel sound, especially suited to movie sources • 2 PRO LOGIC – 4.1 channel surround sound with... -
Page 39: Dolby Pro Logic Iix Music Settings
Press EFFECT/CH SEL again to adjust other settings. Note • If the SB CH MODE is switched to OFF, 2 Pro Logic Press RECEIVER. IIx (above) becomes 2 Pro Logic II (5.1 channel sound), however the above setting will still be... -
Page 40: Listening In Stereo
If you’ve connected to the multichannel inputs on the are downmixed to stereo. rear panel (see Connecting the multichannel analog outputs on page 20), you will be able to select them as your input source. • While listening to a source, press STEREO/DIRECT for stereo playback. -
Page 41: Listening With Acoustic Calibration Eq
Most of the audio inputs have both analog and digital • If you want to play DTS-encoded sources, you need to jacks. You can select the type of signal to be used in each have digital connections. If ANALOG is selected, case. -
Page 42: Using The Surround Back Channel
6.1 encoded sources (for example, Dolby • SB CH ON – 6.1 or 7.1 encoding is always used (for Digital EX or DTS-ES), or you can choose to always use example, on 5.1 encoded material) 6.1 or 7.1 decoding with other sources (for example, 5.1... -
Page 43: Listening With Virtual Surround Back Speakers
+VSB shows in the display. encoded sources like Dolby Digital EX or DTS-ES (VIRTL SB AUTO), or you can simply switch it off (VIRTL SB OFF). Using the audio scaler for Hi-bit and For stereo sources, you’ll have to select one of the NEO:6... -
Page 44: Using Midnight And Loudness Listening
The Loudness feature boosts the bass and treble in audio sources, useful for listening at low volumes. Press RECEIVER. This step is only necessary if you want to use Loudness. Press MIDNIGHT or LOUDNESS to switch the Switching the tone control on or off effect on or off. -
Page 45: Reducing Noise During Playback
Listening to your system Listening to dual mono soundtracks • If you switch on the tone control when DIRECT is selected, the receiver automatically switches to • Default setting: DUAL ch1 STEREO. You can specify how dual mono encoded Dolby Digital soundtracks should be played. -
Page 46: Using The Tuner
Each press switches the band between FM and AM. For example, to tune to 106.00 (FM), press 1, 0, 6, 0, 0. • You can also use the front panel MULTI JOG dial to select the tuner. -
Page 47: Memorizing Station Presets
On the front panel, press SELECT first to switch to the frequency select mode for (STATION) TUNING +/–. • You can also use the front panel MULTI JOG dial or the number buttons on the remote control to select the station preset. - Page 48 (cursor left/right) buttons or the front panel MULTI JOG dial to change the character and ENTER to confirm (or to add a space if no character is input). The name can be up to four characters (the possible characters are listed below).
-
Page 49: The Surround Setup Menu
• You can also use the front panel display to make settings. You can also use the MULTI JOG dial and • If you’re using a subwoofer, switch it on and turn up ENTER on the front panel instead of the (cursor the volume to the middle position. -
Page 50: Surround Back Speaker Setting
(see Normal surround setting below). (Automatically setting up for surround sound on page 12), • Expert – Use this menu to fine tune your surround you can use these settings to adjust speaker parameters setup (see The Expert setup menu on page 75). -
Page 51: Channel Level
SMALL to send bass frequencies to the other • If you have a subwoofer and like lots of bass, it may speakers or subwoofer. If you didn’t connect a center seem logical to select LARGE for your front speakers speaker, choose NO (the center channel is sent to and PLUS for the subwoofer. -
Page 52: Speaker Distance
• If you are using a Sound Pressure Level (SPL) meter, take the readings from your main listening position Speaker Distance and adjust the level of each speaker to 75 dB SPL (C- Left 1 0 . 0 f t Center 1 0 . -
Page 53: Controlling Other Equipment
Programming signals from other remote controls on page 54. • You can't assign the RECEIVER or TUNER buttons. See Preset code brands on page 92 for a list of brands Point the remote at the component you want to available for each component. -
Page 54: Programming Signals From Other Remote Controls
The buttons avail- remote controls able are shown below: If the preset code for your component is not available, or the available preset codes do not operate correctly, you can program signals from the remote control of another component. -
Page 55: Controls For Tvs
• The TV CONTROL buttons on the remote control are dedicated to control the TV assigned to the TV CONT button. Thus if you only have one TV to hook up to this system assign it to the TV CONT MULTI CONTROL button. If you have two TVs, assign the main TV to the TV CONT button. -
Page 56: Controls For Other Components
This remote control can control these components after entering the proper codes or teaching the receiver the commands (see Using the remote control with other components on page 53 for more on this). Use the MULTI CONTROL buttons to select the component. - Page 57 Basic playback options. Double cassette 2nd deck • Depending on the maker and individual model, there are some buttons that may not be able operate some equipment or may operate it in a different way. • The default preset setting for all functions is a corresponding Pioneer component. Note that where two buttons...
-
Page 58: Direct Function
This could let you, for example, use the remote control to set up and listen to a CD on the receiver and Similar to multi operations, System Off allows you to use then use the remote control to rewind a tape in your VCR one button to stop and switch off a series of components while you continue to listen to your CD player. -
Page 59: Using Multi Operations
You can repeat this process for up to five commands. Press the RECEIVER button. The LED lights continuously. You don't need to program the receiver to switch on or off. This is done automatically. Press the MULTI CONTROL button for the With Pioneer components, you don't need to: component you want to set SYSTEM OFF. -
Page 60: Using System Off
System Setup Pioneer component. menu (see 12 Volt Trigger on page 74 to do this). Note that Use a cable with a mono mini-plug on each end for the this will only work with components that have a standby connection. - Page 61 Continue the chain in the same way for as many components as you have. Note • If you want to control all your components using this receiver's remote control, refer to Using the remote control with other components on page 53 and Programming signals from other remote controls on page 54.
-
Page 62: Using Other Functions
Keep in mind you can't make a digital recording from an picture. By adding a bit of delay, you can adjust the sound analog source or vice-versa, so make sure the to match the presentation of the video. -
Page 63: Watching Video And Audio Sources Independently
Using other functions Watching video and audio sources independently Press RECEIVER. You can listen to a sound source and select a different Press DIMMER repeatedly to change the video source on your TV. brightness of the front panel display. •... -
Page 64: Resetting Remote Control
Use this feature to reset the system to its factory default settings. Note • You can cancel or exit any of the following steps by pressing REMOTE SETUP. Clearing multi operations You can clear a multi operation (see Programming a multi-operation on page 58) you have programmed. -
Page 65: Other Connections
Press repeatedly to choose a speaker system option: • You can use speakers with a nominal impedance • SP A – Sound is output from speaker system A and between 6–16 (please see Switching the speaker the same signal is output from the pre-out terminals. -
Page 66: Bi-Amping Your Front Speakers
SELECTABLE Caution Since both front and surround back speaker terminals • Make sure you use a parallel (not series, which are output the same audio, it doesn’t matter which set (front fairly uncommon) connection when bi-wiring your or surround back) is powering which part (Hi or Low) of speakers. -
Page 67: Multi-Room Listening
You must select MR&S in Surround back speaker setting This receiver can power two independent systems in on page 50 to use this setup. Note that the sound in the separate rooms after you have made the proper multi- sub room will be temporarily interrupted when room connections. -
Page 68: Using The Multi-Room Controls
When you’re finished, press CONTROL again to return to the main room controls. You can also press the MULTI ROOM & SOURCE ON/ OFF button on the front panel to switch off all output to the sub room. Note • Multi-room can’t be used when you’re setting up the... -
Page 69: Connecting An Ir Receiver
Surround • If you want to link a Pioneer component to the IR back speaker setting on page 50. receiver, see Operating other Pioneer components with this unit's sensor on page 60 to connect to the CONTROL jacks instead of the IR OUT jack. -
Page 70: Connecting A Pc For Advanced Mcacc Output
Second Edition, or Windows NT 4.0 (Service pack 6). When you’re finished, select ‘Exit’ on the on- • CPU must be at least Pentium 3 / 300MHz or AMD K6 screen display. / 300MHz (or equivalent) with at least 128MB of You’ll be taken to the Advanced EQ Setup. -
Page 71: Advanced Setup
(see Multi-Room and IR receiver setup on page 74). • 12V Trigger – Specify which components are switched on or off using the 12 volt trigger (see 12 Volt Trigger on page 74). Make the adjustments necessary for each setting, pressing ENTER to confirm after each setting. -
Page 72: The Input Assign Menu
S-video or composite video input instead of the component video signal. You only need to do this if you didn’t hook up your digital equipment according to the default settings for the Select ‘Component -In Select’... -
Page 73: Function Rename
ENTER to move remote, you can press and hold to change forward a position. If you want to change a character you characters quickly. input, you can press RETURN to go back one position. -
Page 74: Multi-Room And Ir Receiver Setup
VARIABLE [ Exit ] IR Receiver [ Setting 1 ] [ Exit ] • OFF – 12 volt trigger is not activated for the selected CAUTION: If the "FIXED" component. position is chosen, the volume will be loud. • ON – 12 volt trigger is activated for the selected With the FIXED setting, the source is sent from this component. -
Page 75: The Expert Setup Menu
(see Dynamic Range Control on page 83). Make the adjustments necessary for each • You can also use the front panel display to make setting, pressing ENTER to confirm after each settings. You can also use the MULTI JOG dial and setting. -
Page 76: Crossover Network
This will be the reference speaker level, so you may want • For more on selecting the speaker sizes, see Normal to keep the level around 0dB so that you’ll have plenty of surround setting on page 50. room to adjust the other speaker levels. -
Page 77: Acoustic Calibration Eq
Check. Select Next after you have channel. finished checking each screen. • If you want to go back and adjust a channel, simply • If you want to copy these settings and adjust them (cursor up/down) to select it. - Page 78 FRONT ALIGN settings from the auto setup above (or from Automatically setting up for surround sound on page 12) to one of the custom settings. Instead of just a flat EQ curve, this will give you a reference point from...
-
Page 79: Professional Acoustic Calibration
(or from Automatically setting up for surround sound on Auto Surround Setup on page 12. page 12) to one of the custom settings. Instead of just a flat EQ curve, this will give you a reference point from which to start. -
Page 80: Using Professional Acoustic Calibration
If your room isn’t affected by the factors above, it is often not necessary to make a 20–40ms setting. Later time settings may provide a more detailed sound experience Level with your speaker system. - Page 81 (buttons) to check the reverb in select frequency ranges. Since this measurement characteristics for each channel. Select ‘Exit’ when is also made in Auto Pro (above), there is no need to you’re done. do this again if you were satisfied with the results.
-
Page 82: Bass Peak Level
P e a k L e v e l T o Please Wait a c o m f o r t a b l e V o l u m e ( – 8 0 = n o s o u n d ) Set the bass peak level gradually, then press ENTER at the point just before the tone starts to distort. -
Page 83: Dynamic Range Control
Advanced setup • If the YES or PLUS setting on the subwoofer is selected (in Speaker Setting on page 50), the test tone will only play back from the subwoofer. If not, the test • For general dynamic range control, you can use the... -
Page 84: Additional Information
Additional information Troubleshooting Incorrect operations are often mistaken for trouble and malfunctions. If you think that there is something wrong with this component, check the points below. Sometimes the trouble may lie in another component. Investigate the other components and electrical appliances being used. If the trouble cannot be rectified even after exercising the checks listed below, ask your nearest Pioneer authorized independent service company to carry out repair work. -
Page 85: No Sound
No sound from subwoofer. • The bass attenuator is set too low (for • See Bass Peak Level on page 82 to adjust the setting. example, the -80 setting). • The subwoofer isn’t connected properly, or • Connect or switch on the subwoofer (see Installing your it is switched off. -
Page 86: Other Audio Problems
• The digital output level has been turned • Set the digital volume level of the player to full, or to the down on a CD player or other component neutral position. equipped with digital output level adjustment capability. -
Page 87: Video
• The DVD/video player settings are incorrect. • Set correctly. Refer to the instruction manual supplied with the DVD/video player. • The video input selected on the TV monitor •... -
Page 88: Settings
Remedy The Auto Surround Setup • The ambient noise level in the room is too • Keep the noise level in the room as low as possible continually shows an error. high, or obstacles are blocking the setup when using the Auto Surround Setup (see Other problems microphone. -
Page 89: Remote Control
• The component you have hooked up is not a • This feature only works with Pioneer products. Pioneer product. • For information about using the remote control in the sub room, please contact your local Pioneer dealer or the Pioneer Customer Support division. Note •... -
Page 90: Surround Sound Formats
Dolby Digital is a multichannel digital audio coding DTS Digital Surround system widely used in cinemas, and in the home for DVD and digital broadcast soundtracks. It can deliver up to six DTS Digital Surround is a 5.1-channel audio coding discrete audio channels, comprising five full range system from Digital Theater Systems Inc. -
Page 91: About Thx
Laserdisc, VHS tape, DVD, etc., analog domain. and is not changed for playback in a small home theatre environment. THX engineers developed patented THX Surround EX technologies to accurately translate the sound from the... -
Page 92: Preset Code Brands
Manufacturer Code MITSUBISHI 5098, 5099 3070, 3071, 3072 6024, 6025, 6026 PIONEER 1001, 1002, 1003 MIVAR 5100 KENDO 3073 PANASONIC 6027, 6028, 6029 DENON 1004 5101, 5102 KENWOOD 3074, 3075, 3076 PHILIPS 6030, 6031 1005 NOKIA OCEANIC 5103 LOEWE 3077, 3078... -
Page 93: Specifications
Microphone ........1... - Page 94 Level Example Electronic Industries Associationís Consumer Electronics Group want you to get the most out of your equipment by playing it at a safe level. One that Quiet library, soft whispers lets the sound come through loud and clear without...
- Page 95 Published by Pioneer Corporation. Copyright © 2004 Pioneer Corporation. All rights reserved. <04E00001> Printed in <ARB7309-A>...