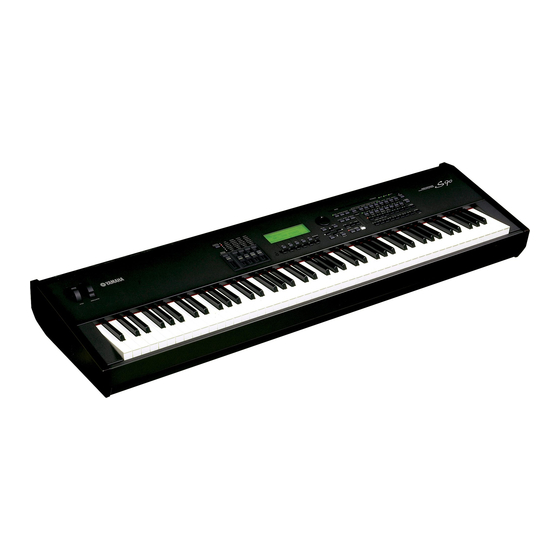
Yamaha S-90 Owner's Manual
For s90 music synthesizer
Hide thumbs
Also See for S-90:
- Owner's manual (139 pages) ,
- Data list (56 pages) ,
- Quick start manual (7 pages)
Table of Contents
Advertisement
Quick Links
•
Copying of the commercially available music sequence data and/or digital audio files is strictly
prohibited except for your personal use.
•
The software and this owner's manual are exclusive copyrights of Yamaha Corporation.
•
Copying of the software or reproduction of this manual in whole or in part by any means is expressly
forbidden without the written consent of the manufacturer.
•
Yamaha makes no representations or warranties with regard to the use of the software and
documentation and cannot be held responsible for the results of the use of this manual and the software.
•
The screen displays as illustrated in this Owner's Manual are for instructional purposes, and may appear
somewhat different from the screens which appear on your computer.
•
Click on the red-colored text to jump to the related item in this manual.
®
•
The OMS
and
Systems, Inc.
•
The company names and product names in this Owner's Manual are the trademarks or registered
trademarks of their respective companies.
This owner's manual assumes that you are already familiar with basic Windows/Macintosh operations.
If you are not, please refer to the owner's manual which came with your Windows/Mac OS software
before using Voice Editor.
For information about hardware requirements, the interconnection of devices and the installation of the
Voice Editor software, refer to the separate "Installation Manual" as well as the Owner's Manual for the
respective MIDI device.
The screen illustrations in this manual are mainly taken from Windows. Differences that exist in the
Macintosh version are duly shown and explained.
Contents
What is the Voice Editor?...........................
Starting the Voice Editor ...........................
Menu Bar ....................................................
Library Window ..........................................
Library Window Toolbar ........................................
Edit Window..............................................
An Example of Voice Editor in Use ..........
OMS Settings (Macintosh) .......................
Troubleshooting........................................
in this Owner's Manual are the trademarks or registered trademarks of Opcode
© 2002 Yamaha Corporation. All rights reserved.
1
2
3
4
7
9
15
29
31
33
Advertisement
Table of Contents

Related Manuals for Yamaha S-90


Summary of Contents for Yamaha S-90
- Page 1 • Yamaha makes no representations or warranties with regard to the use of the software and documentation and cannot be held responsible for the results of the use of this manual and the software.
-
Page 2: What Is The Voice Editor
What is the Voice Editor? With the Voice Editor, you can edit your synthesizer’s voices and effects via your computer. Thanks to the easy-to-understand graphical interface, you can edit virtually all of the voice parameters of S90 right from your computer — using the mouse to adjust the virtual knobs, sliders, and buttons and entering values from the computer keyboard. -
Page 3: Starting The Voice Editor
Level 3 – OPT Views provides support for edit views and MIDI processors/panels that require direct access to client program storage structures. Typically this will allow sophisticated MIDI edit views to be supported. [YAMAHA OPT Tools] [Voice Editor for S90]... -
Page 4: Menu Bar
Macintosh If you are using Voice Editor on a Macintosh computer, open “Chooser” from the Apple menu and turn off “AppleTalk.” Open the “YAMAHA Tools” folder and double-click “VoiceEditorforS90” icon in the “Voice Editor for S90” folder. Menu Bar The Menu Bar contains various editing and setup functions/commands. Click the desired menu name to open the appropriate pull-down menu, and choose the function/command you wish to apply. - Page 5 Save Library As... (Save As...) Lets you save the Library file under a new or different name. Close (Macintosh only) Close the window. This is the same as the “Close” box in the Title bar. Exit (Quit) Exits from the Voice Editor. This menu is only available when the Voice Editor is used as a plug-in of the host application.
- Page 6 Setup (Windows) / MIDI (Macintosh) Windows Macintosh Setup... (Editor Setup...) This is the same as the “Editor Setup” button in the toolbar (page 11). Transmit Bulk... (Transmit...) This is the same as the “Transmit Bulk” button in the toolbar (page 12).
-
Page 7: Library Window
Library Window When you start Voice Editor, you will first see the Library window, which consists of tabs, each representing a Memory in the tone generation block. Each tab lists all the names, numbers and categories of voices in the selected Memory. Double-clicking on a voice name in the Library window opens the Edit window for a voice, letting you edit the voice. - Page 8 Split Bar (Windows only) If you place the mouse pointer over the line (Split Bar) that divides the Track Parameter Section from the Block Section, the pointer will change shape into the split tool. With this tool, you can drag the Split Bar back and forth and change the widths of the two sections. You can change the size of any of the windows by placing the mouse pointer on the top, bottom, left, or right border lines of the window, then dragging the line until the window is as big or small as you like.
-
Page 9: Library Window Toolbar
Library Window Toolbar 1 “Open” button Click this to open the “Open” dialog and select a Library file to open. “Open” Dialog Select the desired Library file (extension: .W4E) and click [Open]. The contents of the selected file is indicated on the Library Window. If you are using a Macintosh, the typical Macintosh “Open”... - Page 10 2 “Save” button Click this to save the existing Library file with your new settings. If you are working on a new file, this button will open the “Save As” dialog, where you can name and save your settings as a new Library file (*.W4E).
- Page 11 3 “Editor Setup” button Click this to open the “Editor Setup” dialog and specify the MIDI Out port settings. “Editor Setup” Dialog This is where you set up the Voice Editor to allow the transmission/reception of voice data to/ from your synthesizer. Click the [OK] button to apply the settings and quit the dialog. Click the [Cancel] button to quit without applying the settings.
- Page 12 4 “Transmit” button Click this to open the “Transmit” dialog to transmit all settings to your synthesizer. “Transmit” Dialog Voice data can be transmitted in bulk to your synthesizer. Click the [Start] button to begin transmitting the data. The progress bar shows how much of the data has been transmitted. Finally, click the [Close] button to quit the dialog.
- Page 13 5 “Receive” button Click this to open the “Receive” dialog to receive all settings from your synthesizer. “Receive” Dialog Voice data can be received in bulk from your synthesizer. Select the bulk voice data you wish to receive, then click the [Start] button. The progress bar shows how much of the data has been received.
- Page 14 6 “Edit Window” button Click this to open the Edit Window (Common) for the selected voice in the list. For further details, see page 7 “Monitor” button If you click this, bulk voice data will be sent for monitoring on your synthesizer each time you select a voice.
-
Page 15: Edit Window
To select a block of voices, click the number of the first voice, hold down the [Shift] key, then click the last voice. A normal voice cannot be imported to a Drum voice or a Plug-in voice. Similarly, a Drum voice cannot be imported to a Normal voice or a Plug-in voice. - Page 16 1 Toolbar This contains buttons for executing various basic functions in the program. The following four buttons are available: • Editor Setup button ...See • Library Window button ...Click this to bring the Library Window back into view. • Store button...Click this to open the “Store” dialog, where you can name your •...
- Page 17 4 PITCH BEND settings Use the “LOWER” knob to set the lowest point in the pitch bend wheel’s range and the “UPPER” knob to set the highest point. 5 PORTAMENTO block Use the switch to enable/disable portamento and the “TIME” knob to specify the portamento time.
- Page 18 2 DEPTH settings... Sets the degree to which the selected controller will affect 3 DESTINATION settings... Click on the text box and choose the parameter you wish to 4 ELEMENT switches ... Click these to enable/disable the Elements which will be COMMON LFO Panel (Normal Voice only) 5 LFO WAVE setting...
- Page 19 2 SLOPE ...Determines the slope or ramp characteristics of the LFO wave. • OFF ...No slope; the LFO instantly jumps to the level of each step. • UP ...The LFO ramps up to the next step, when that step is higher in •...
- Page 20 $ ASSIGNABLE 1/2 settings Use the knobs to set the value of the parameter assigned to each of the assignable 1/2 controllers. % MEQ GAIN CONTROL settings Use the knobs to set the gain for each frequency band of the four-band EQ. ELEMENT Unit 1 EL (Element) 1 to 4 buttons Click these to open the corresponding “ELEMENT”...
- Page 21 2 ON/OFF switches Click these to switch each Element on or off. 3 Element Level knobs Use these to set the level of each Element. 4 EF (Effect) 1 / EF (Effect) 2 / THRU switches Click these to assign each Element to Insertion Effect 1 or Insertion Effect 2, or to by pass the Insertion Effect units.
- Page 22 5 LFO PITCH knob Use this to set the pitch modulation depth of the LFO. You can also enter a value directly in the text box to the left of the knob. 6 LFO FILTER knob Use this to set the filter modulation depth of the LFO. You can also enter a value directly in the text box to the left of the knob.
- Page 23 FILTER Settings Click on the text box and choose the filter type. The graph shows pre-defined settings initially, but you can edit these. Using the LPF type as an example, drag the left handle vertically to set the Filter Gain. Drag the right handle horizontally to set the Filter Cutoff frequency. Parameter values are shown when dragging the handles.
- Page 24 “DRUM KEY” Dialog & º ¡ ™ 1 Key ...Indicates the note name to be edited. 2 Keyboard ...Click on the keyboard to specify note assigned to the Element or Voice you are editing. The text box to the left shows the note name. 3 TYPE ...Determines the bank of the sound source: Preset wave or Voice.
- Page 25 & FILTER ...Drag one of the handles horizontally to adjust the Element’s “HPF Cutoff Frequency.” Drag the other handle vertically to adjust its “LPF Resonance,” and horizontally to adjust its “LPF Cutoff Frequency.” To set these values directly, select the “OSCILLATOR” tab of the DRUM KEY DETAIL Dialog. * AMPLITUDE EG ...Drag the first handle (furthest to the left) horizontally to adjust the Element’s “Attack Time.”...
- Page 26 Insertion Effect 1 Unit 1 CONNECT selector Click on the text box and choose the order in which signals are passed from one insertion effect unit to the other. 2 Indicator lamps These show which of the Elements are assigned to the respective Insertion Effect unit. The Indicator lamps are not available for Drum Voices.
- Page 27 3 Reverb Pan controls Use these knobs to set the stereo positioning of the Reverb Effect. 4 Reverb Return controls Use these knobs to set the amount of Reverb Effect that is used in the output signal. 5 [DETAIL] button Click this to open the Reverb dialog and set the detailed parameters.
-
Page 28: The Toolbar
The Toolbar 1 “Editor Setup” button Click this to open the “Editor Setup” dialog. See 2 “Library Window” button Click this to bring the Library Window back into view. See 3 “Store” button Click this to open the “Store” dialog. See below for details. “Store”... -
Page 29: An Example Of Voice Editor In Use
In the Voice Name list, click the voice in which your edited voice will be stored. After storing to a Library file, the data for the original voice will be overwritten when you save the Library file. It is recommended that you back up important data. Click the [Store] button to store your edited voice in the location specified in step #4. - Page 30 Various blocks are arranged in the Edit window. First, let’s set the parameters for Elements 1 to 4 on the Element block which make up the voice. Open the dialogs for Elements 1 to 4, select the waveforms, and adjust the tonal characteristics of the voice using the filters and equalizers.
-
Page 31: Oms Settings (Macintosh)
Connect a USB cable to the appropriate ports on the S90 and Macintosh, then set the “MIDI IN/OUT” setting (UTILITY [F5] Double-click the “OMS Setup” icon in the “OMS Application” folder. Choose “Open” from the File menu and select “S90-USB” from within the “OMS setup for YAMAHA” folder. [SF4]) of the S90 to “USB.”... - Page 32 Choose “Make Current” from the File menu. The setup for your S90 is now saved as the current studio setup. Choose “Quit” from the File menu to close OMS Setup. Voice Editor is not compatible with versions of OMS earlier than 2.0. OMS Port Setup Having set up OMS, you now need to start up Voice Editor and set the OMS ports.
-
Page 33: Troubleshooting
Troubleshooting If you encounter problems such as no sound output or abnormal behavior, verify the connections before checking the following. <Windows / Macintosh> Sound does not change when using knobs or sliders. • Are the MIDI Out port and Device Number set correctly in the Editor Setup? Bulk data is not transmitted. - Page 34 The modem/printer port is not recognized. • Check the connection and settings of the MIDI interface. • On some Macintosh models such as the Performa series, the modem port cannot be used and only the printer port is available. • The modem/printer port will not be recognized if AppleTalk is ON. Note that with some Macintosh models, AppleTalk is automatically enabled when starting up.