Yaesu FT-857D Operating Manual
Hf/vhf/uhf ultra compact transceiver
Hide thumbs
Also See for FT-857D:
- Brochure & specs (2 pages) ,
- Cheat sheet (2 pages) ,
- Programming manual (1 page)
Table of Contents
Advertisement
Quick Links
O
M
PERATING
ANUAL
VERTEX STANDARD CO., LTD.
4-8-8 Nakameguro, Meguro-Ku, Tokyo 153-8644, Japan
VERTEX STANDARD
US Headquarters
10900 Walker Street, Cypress, CA 90630, U.S.A.
International Division
8350 N.W. 52nd Terrace, Suite 201, Miami, FL 33166, U.S.A.
YAESU EUROPE B.V.
P.O. Box 75525, 1118 ZN Schiphol, The Netherlands
YAESU UK LTD.
Unit 12, Sun Valley Business Park, Winnall Close
Winchester, Hampshire, SO23 0LB, U.K.
VERTEX STANDARD HK LTD.
Unit 5, 20/F., Seaview Centre, 139-141 Hoi Bun Road,
Kwun Tong, Kowloon, Hong Kong
Advertisement
Table of Contents

Related Manuals for Yaesu FT-857D


Summary of Contents for Yaesu FT-857D
- Page 1 10900 Walker Street, Cypress, CA 90630, U.S.A. International Division 8350 N.W. 52nd Terrace, Suite 201, Miami, FL 33166, U.S.A. YAESU EUROPE B.V. P.O. Box 75525, 1118 ZN Schiphol, The Netherlands YAESU UK LTD. Unit 12, Sun Valley Business Park, Winnall Close Winchester, Hampshire, SO23 0LB, U.K.
-
Page 2: Table Of Contents
Introduction ... 1 Specifications ... 2 Accessories & Options ... 4 Installation ... 5 Preliminary Inspection ... 5 Installation Tips ... 5 Safety Information ... 6 Installing the Microphone and Front Panel ... 7 Power connections ... 8 Grounding ... 10 Mobile Station Grounding ... -
Page 3: Introduction
NTRODUCTION HOME CLAR FUNC The FT-857 is a rugged, innovative multiband, multimode mobile/portable transceiver for the amateur radio MF/HF/VHF/UHF bands. Providing coverage of the 160-10 meter bands plus the 6 m, 2 m, and 70 cm bands, the FT-857 includes operation on the SSB, CW, AM, FM, and Digital modes, yielding the most comprehensive performance package available for mobile and field operation. -
Page 4: Specifications
PECIFICATIONS General Frequency Range: Emission Modes: Synthesizer Steps (Min.): Antenna Impedance: Operating Temp. Range: Frequency Stability: Supply Voltage: Current Consumption: Case Size (W x H x D): Weight (Approx.): Transmitter RF Power Output: (@13.8 V DC) Modulation Types: FM Maximum Deviation: Spurious Radiation: Carrier Suppression: Opp. - Page 5 Receiver Circuit Type: Intermediate Frequencies: Sensitivity: Squelch Sensitivity: Image Rejection: IF Rejection: Selectivity (–6/–60 dB): AF Output: AF Output Impedance: Specifications are subject to change without notice, and are guaranteed within the amateur bands only. FT-857 Operating Manual PECIFICATIONS Double-Conversion Superheterodyne (SSB/CW/AM/FM) Superheterodyne (WFM) 1st: 68.33 MHz (SSB/CW/AM/FM);...
-
Page 6: Accessories & Options
CCESSORIES Hand Microphone MH-31 Mobile Mounting Bracket MMB-82 ... 1 DC Power Cord ... 1 Operating Manual ... 1 Warranty Card ... 1 FP-1030A External AC Power Supply (25A) DSP-2 Digital Signal Processing Unit YF-122S Collins SSB Filter (2.3 kHz/4.7 kHz: –6 dB/–66 dB) YF-122C Collins CW Filter (500 Hz/2 kHz: –6 dB/–60 dB) YF-122CN... -
Page 7: Installation
NSTALLATION This chapter describes the installation procedure for integrating the FT-857 into a typical amateur radio station. It is presumed that you possess technical knowledge and conceptual understanding consistent with your status as a licensed radio amateur. Please take some extra time to make certain that the important safety and technical requirements detailed in this chapter are followed closely. -
Page 8: Safety Information
NSTALLATION The FT-857 is an electrical apparatus, as well as a generator of RF (Radio Frequency) energy, and you should exercise all safety precautions as are appropriate for this type of device. These safety tips apply to any device installed in a well-designed amateur radio station. -
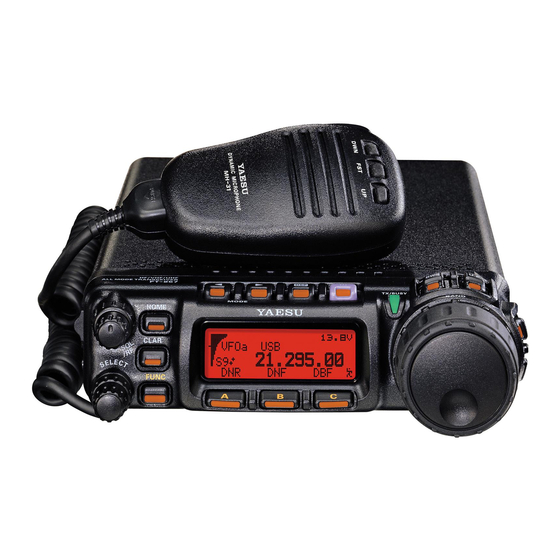
Page 9: Installing The Microphone And Front Panel
NSTALLING THE 1. Insert the microphone’s plug into the recessed jack on the transceiver, as shown in the illustration. 2. You may position the microphone cable so as to cause it to exit from the side or the bottom of the transceiver. Just route the cable into the appropriate channel provided, as shown in the illustration. -
Page 10: Power Connections
NSTALLATION The DC power connector for the FT-857 must only be connected to a DC source providing 13.8 Volts DC (±15%), and capable of at least 22 Amperes of current. Always observe proper polarity when making DC connections: The Red DC power lead connects to the Positive (+) DC terminal; and the Black DC power lead connects to the Negative (–) DC terminal. - Page 11 Tips for Successful Mobile Installations: r Before connecting the DC cable to the battery, measure the voltage across the battery terminals with the engine running fast enough to show a charge. If the voltage is above 15 Volts, the vehicle’s voltage regulator should be adjusted to reduce the charging volt- age to 14 Volts or lower.
-
Page 12: Grounding
NSTALLATION The provision of an effective ground system is important in any successful communications station. A good ground system can contribute to station efficiency in a number of ways: r It can minimize the possibility of electrical shock to the operator. r It can minimize RF currents flowing on the shield of the coaxial cable and the chassis of the transceiver which may cause interference to nearby home entertainment devices or laboratory test equipment. -
Page 13: Base Station Earth Grounding
NSTALLATION ROUNDING Base Station Earth Grounding Typically, the ground connection consists of one or more copper-clad steel rods, driven into the ground. If multiple ground rods are used, they should be configured in a “V” configura- tion, and bonded together at the apex of the “V” which is nearest the station location. Use a heavy, braided cable (such as the discarded shield from type RG-213 coaxial cable) and strong cable clamps to secure the braided cables to the ground rods. -
Page 14: Antenna Considerations
MHz, display very high “Q” due to the fact that they must be physically shortened, then resonated using a loading coil. Additional system bandwidth may be realized using the Yaesu FC-30 Automatic Antenna Tuner, which will present a 50 W impedance to your transceiver on the 1.8 ~ 50 MHz bands so long as the SWR on the coaxial line connected to the FC-30... -
Page 15: Base Station Antenna Installations
NTENNA rest of the vehicle’s body, using a heavy braid bonded securely at both ends, to ensure that as much counterpoise as possible is secured. In portable operation, be sure to lay out radials (or otherwise construct a n image plane for the vertical monopole); it is not adequate simply to connect a vertical radiating element to the rear panel Antenna jack of this transceiver, with- out providing a suitable counterpoise. -
Page 16: Rf Field Exposure
NSTALLATION NTENNA ONSIDERATIONS Do not allow disconnected cables to touch the case of your FT-857 transceiver or accesso- ries, as lightning can easily jump from the cable to the circuitry of your transceiver via the case, causing irreparable damage. If a lightning storm is in progress in your immediate area, do not attempt to disconnect the cables, as you could be killed instantly if lightning should strike your antenna structure or a nearby power line. -
Page 17: Electromagnetic Compatibility
NSTALLATION LECTROMAGNETIC OMPATIBILITY If this transceiver is used with, or in the vicinity of, a computer or computer-driven accesso- ries, you may need to experiment with grounding and/or Radio Frequency Interference (RFI) suppression devices (such as ferrite cores) to minimize interference to your communications caused by energy from the computer. -
Page 18: Linear Amplifier Interfacing
NSTALLATION INEAR The FT-857 provides the switching and drive-control lines required for easy interfacing to most all commonly-available amplifiers sold today. These include: r The Antenna Jacks (“HF/50MHz” and “144/430MHz”); r A T/R control line (open circuit on RX, closure to ground on TX); and r A negative-going ALC jack (control voltage range: 0V to –4V DC). -
Page 19: Cw Key/Keyer Connections
INEAR The “TX GND” T/R control line is a transistor “open collector” circuit, capable of handling positive amplifier relay coil voltages of up to +50V DC and current of up to 400 mA. If you plan on using multiple linear amplifiers for different bands, you must provide external band- switching of the “TX GND”... -
Page 20: Receiver Accessories (Tape Recorder Etc.)
NSTALLATION ECEIVER CCESSORIES Connection of a tape recorder or other such receiver accessory is easily accomplished by using the DATA jack’s Data Out (1200 bps) terminal (Pin 5) and Ground (Pin 2). The audio output is fixed at 100 mV, with an impedance of 600 W. DJUSTING THE The two front feet of the transceiver allow the transceiver to be tilted upward for better viewing. - Page 21 NSTALLATION FT-857 Operating Manual...
-
Page 22: Front Panel Control & Switches
RONT ANEL HOME CLAR FUNC AF Knob The (inner) VOL knob adjusts the receiver audio volume level presented to the internal or external speaker. Clockwise rotation increases the volume level. SQL/RF Knob In the USA version, this (outer) SQL/RF knob adjusts the gain of the receiver’s RF and IF stages. -
Page 23: Func Key
& S RONT ANEL ONTROL WITCHES FUNC Key Press this key momentarily to enable the changing of the function of the Multi Function keys ([ A ] , [ B ] , and [ C ]) by rotating the SELECT knob. Press and hold in this key for one second to activate the “Menu”... -
Page 24: Main Dial
RONT ANEL HOME CLAR FUNC BAND ( DWN ) /BAND ( UP ) Key Pressing either of these keys momentarily will cause the frequency to be moved up or down by one frequency band. The selections available are: ... 1.8 MHz ó 3.5 MHz ó 5.0 MHz ó 7.0 MHz ó 10 MHz ó 14 MHz ó 15 MHz ó... - Page 25 RONT ANEL MIC Jack Connect the supplied MH-31 SP-PH Switch If you use earphones with this transceiver, move this switch to the “PH” position before inserting the earphone plug into the SP/PH Jack, to prevent injury your ears. METER Jack This 3.5-mm 2-pin jack is used for connection to an analog meter (not produced by Vertex Standard).
-
Page 26: Multi Function Key Detail
RONT ANEL ULTI The [ A ] , [ B ] , and [ C ] keys select many of the most important operating features of the transceiver. When you press the [ FUNC ] key, then rotate the SELECT knob, the current function of that key will appear above each of the [ A ] , [ B ] , and [ C ] keys (along the bottom of the LCD). - Page 27 RONT ANEL ULTI Multi Function Row “c” ( MFc ) [ STO, RCL, PROC ] Ó Ó Ó [ A ] [ B ] [ C ] Multi Function Row “d” ( MFd ) [ RPT, REV, VOX ] Ó Ó...
- Page 28 RONT ANEL ULTI Multi Function Row “e” ( MFe ) [ TON, – – –, TDCH ] ([ ENC, DEC, TDCH ]) Ó Ó Ó [ A ] [ B ] [ C ] Ó Ó Ó [ A ] [ B ] [ C ] Multi Function Row “f”...
- Page 29 RONT ANEL ULTI Multi Function Row “h” ( MFh ) [ SCOP, WID, STEP ] Ó Ó Ó [ A ] [ B ] [ C ] Multi Function Row “i” ( MFi ) [ MTR, – – –, DISP ] Ó...
- Page 30 RONT ANEL ULTI Multi Function Row “j” ( MFj ) [ SPOT, BK, KYR ] Ó Ó Ó [ A ] [ B ] [ C ] Multi Function Row “k” ( MFk ) [ TUNE, DOWN, UP ] Ó Ó...
- Page 31 RONT ANEL ULTI Multi Function Row “m” ( MFm ) [ IPO, ATT, NAR ] Ó Ó Ó [ A ] [ B ] [ C ] Multi Function Row “n” ( MFn ) [ CFIL,– – –,– – – ] Ó...
- Page 32 RONT ANEL ULTI Multi Function Row “p” ( MFp ) [ DNR, DNF, DBF ] Ó Ó Ó [ A ] [ B ] [ C ] Multi Function Row “q” ( MFq ) [ MONI, QSPL, ATC ] ( Programmable Keys ) Ó...
- Page 33 & S RONT ANEL ONTROL WITCHES FT-857 Operating Manual...
-
Page 34: Rear Panel Connectors
ANEL INPUT Jack This is the DC power supply connection for the transceiver. Use the supplied DC cable to connect this jack to the car battery or DC power supply, which must be capable of supplying at least 22 Amps @ 13.8 VDC. -
Page 35: Key Jack
DATA Jack This 6-pin, mini-DIN jack accepts AFSK input from a Ter- minal Node Controller (TNC); it also provides fixed-level Receiver Audio Output, Push-To-Talk (PTT), Squelch Sta- tus, and ground lines. ACC Jack This 3.5-mm 3-pin jack accepts external ALC (Automatic Level Control) voltage from a linear amplifier on the tip connection, and accepts a “Transmit Request”... -
Page 36: Operation
PERATION Hi! I’m R.F. Radio, and I’m here to guide you through the fine points of the setup and use of your new FT-857. I know you’re anxious to get on the air, but I encour- age you to read the “Operation” section of this manual as thoroughly as possible, so you’ll get the most out of this fantastic new rig. -
Page 37: Adjusting The Audio Volume Level
DJUSTING THE Rotate the AF knob to set a comfortable listening level. When operating in the “DIG” or “PKT” modes, you may set the AF knob to any comfortable setting, or even all the way off, because the output from the DATA jack is a fixed-level audio signal. -
Page 38: Adjusting The Rf Gain And Squelch
PERATION DJUSTING THE The SQL/RF Gain control is configured differently, depending on the country to which the FT-857 has been exported. In the U.S. version, the default function of this control is “RF Gain.” The configuration of the SQL/RF Gain control is set via Menu Mode No-080 [ SQL/RF GAIN ] ;... -
Page 39: Changing The Dial Speed
change the operating frequency in 1 MHz steps, allowing very quick frequency excursions. This can be particularly helpful on the VHF and UHF bands. In step 2 above, it was mentioned that tuning in the “AM/FM/PKT” modes is accomplished using the SELECT knob. By default, the DIAL is disabled in these modes; if you wish to enable the DIAL in these modes, use Menu Mode No-004 [ AM&FM DIAL ] ;... -
Page 40: Receiver Accessories
ECEIVER OCKING The front panel LOCK button allows you to disable the DIAL and/or the front panel con- trols. In the transceiver’s default configuration, pressing the [ LOCK ] button disables just the DIAL, while the other keys and switches are unaffected. -
Page 41: Clarifier
LARIFIER The Clarifier (RIT) allows you to set an offset of up to ±9.99 kHz of the receive frequency relative to your transmit frequency. To achieve a wider offset than this, you may use the “Split” operating mode, described later. 1. -
Page 42: If Shift
ECEIVER The receiver’s IF SHIFT feature is an effective interference-reduction tool, which allows you to shift the passband response higher or lower without changing the pitch of the incom- ing signal. 1. Press and hold in the [ CLAR ] button for one sec- ond to activate the IF SHIFT feature. -
Page 43: Agc
AGC ( A The receiver recovery time constant of the AGC system may be modified to match your operating needs. 1. Press the [ FUNC ] key momentarily, then rotate the SELECT knob, as needed, until Multi Function Row “l” [ NB, AGC, AUTO ] appears on the display. 2. -
Page 44: Ipo
ECEIVER IPO ( I NTERCEPT The IPO feature bypasses the receiver RF preamplifier, thereby eliminating the preamp’s gain. This feature is not available on the 144 MHz and 430 MHz bands. 1. Press the [ FUNC ] key momentarily, then rotate the SELECT knob, as needed, until Multi Function Row “m”... -
Page 45: Dsp Bandpass Filter (Dbp)
DSP B ANDPASS In the SSB mode, the receiver’s selectivity may be enhanced via the DSP Bandpass Filter. 1. Press the [ DSP ] key momentarily. This instantly activates Multi Function Row “p” [ DNR, DNF, DBF ] . 2. Press the [ C ]( DBF ) key to activate the DSP Bandpass Filter. The “u” icon will appear at the left side of the “DBF”... -
Page 46: Dsp Cw Peaking Filter (Dbf)
ECEIVER DSP CW P EAKING In the CW mode, pressing the [ C ]( DBF ) key in Multi Function Row “p” [ DNR, DNF, DBF ] activates a narrow-bandwidth peaking filter, which may be ideal for use under very crowded conditions. -
Page 47: Dsp Notch Filter (Dnf)
DSP N OTCH The DSP system’s Notch Filter may be helpful in removing one or more offending carrier or heterodyne signals from the audio passband. 1. Press the [ DSP ] key momentarily. This instantly activates Multi Function Row “p” [ DNR, DNF, DBF ] . -
Page 48: Automatic Power-Off Feature
ECEIVER UTOMATIC The APO feature helps conserve battery life by automatically turning the transceiver off after a user-defined period of time within which there has been no dial or key activity. The available selections for the time before power-off are 1 ~ 6 hours, as well as “APO Off.” The default condition for the APO is OFF, and here is the procedure for activating it: 1. - Page 49 ECEIVER CCESSORIES FT-857 Operating Manual...
-
Page 50: Transmitter Operation
RANSMITTER SSB/AM T Basic Setup/Operation 1. Press the [ MODE ( t ) ] or [ MODE ( u ) ] key so as to select either SSB (LSB/USB) or the AM mode. In the SSB mode, if you are operating on the 7 MHz or lower bands, select the LSB mode. -
Page 51: Vox Operation
SSB/AM T VOX Operation The VOX system provides automatic transmit/receive switching based on voice input to the microphone. With the VOX system enabled, you do not need to press the PTT switch in order to transmit. 1. Press the [ FUNC ] key momentarily, then rotate the SELECT knob, as needed, until Multi Function Row “d”... -
Page 52: Af Speech Processor Operation
RANSMITTER SSB/AM T AF Speech Processor Operation The AF Speech Processor increases your average power output while operating on SSB and AM modes. 1. Press the [ FUNC ] key, then rotate the SELECT knob, as necessary, to recall Multi Function Row “c”... -
Page 53: Dsp Microphone Equalizer
SSB/AM T DSP Microphone Equalizer In the SSB, AM, and FM transmission modes, you may use the DSP system to change the frequency response of the audio stage, if you have installed the optional DSP-2 Digital Signal Processing Unit. This will allow you to roll off excessive high- and/or low-frequency components of your voice’s audio characteristics. -
Page 54: Cw Transmission
RANSMITTER Operation using Straight Key/External Keying Device When using a straight key, an external electronic keyer, or a computer-generated keying device, please follow the instructions in this section. 1. Insert your key’s plug into the rear-panel KEY jack. 2. Press the [ MODE ( t ) ] or [ MODE ( u ) ] key, as needed, to select one of the CW modes (CW/CWR). - Page 55 This adjustment also controls the BFO offset (actual pitch of your transmitted signal relative to your current receive frequency). To adjust the CW sidetone pitch: Ÿ Press and hold in the [ FUNC ] key for one second to enter the Menu mode. Ÿ...
-
Page 56: Using The Built-In Electronic Keyer
RANSMITTER Using the Built-in Electronic Keyer The built-in Electronic Keyer provides a convenient method of generating CW. The Elec- tronic Keyer includes weight and speed adjustments. 1. Connect your keyer paddle’s cable to the KEY jack on the rear panel of the transceiver. 2. - Page 57 KEY REV ] . The default setting for this feature is “NORMAL,” whereby the “Tip” con- nection on the Key Plug is “Dot” and the “Ring” connection is “Dash.” To change the paddle polarity: Ÿ Press and hold in the [ FUNC ] key for one second to enter the Menu mode. Ÿ...
-
Page 58: Fm Transmission
RANSMITTER Basic Setup/Operation 1. Press the [ MODE ( t ) ] or [ MODE ( u ) ] key so as to select the FM mode. 2. Press the microphone’s PTT switch, and speak into the microphone in a normal voice. Release the PTT switch to return to the receive mode. -
Page 59: Repeater Operation
Repeater Operation 1. Press the [ FUNC ] key momentarily, then rotate the SELECT knob, as needed, until Multi Function Row “d” [ RPT, REV, VOX ] appears on the display. 2. Press the [ A ]( RPT ) key to activate repeater operation. One press of the [ A ]( RPT ) key will have set the transceiver for “Minus Shift”... -
Page 60: Tone Search Scanning
RANSMITTER Mode No-083 [ TONE FREQ ] . (2) Rotate the DIAL knob to select the desired CTCSS frequency. (3) When done, press and hold in the [ FUNC ] key for one second to save the new setting and exit to normal operation. -
Page 61: Dcs Operation
DCS Operation Another form of tone access control is Digital Code Squelch, or DCS. It is a newer, more advanced tone system that is less susceptible to false triggering than CTCSS. A DCS En- coder/Decoder is built into your transceiver, and operation is very similar to that described above for CTCSS. -
Page 62: Split Tone Operation
RANSMITTER Split Tone Operation The FT-857 can be configured in a “Split Tone” configuration via the Menu mode. This allows you to encode a CTCSS Tone but decode a DCS code, encode and decode different CTCSS Tones, encode (only) a DCS code, etc. 1. -
Page 63: Arts Tm Operation
ARTS™ Operation The ARTS™ system uses DCS signaling to inform you when you and another ARTS™ equipped station are within communications range. This can be especially valuable during search-and-rescue operations, as a base station can quickly use ARTS™ to alert a field unit that it is out of range;... -
Page 64: Cw Identifier Setup
RANSMITTER CW Identifier Setup The ARTS™ feature includes a CW identifier, as discussed previously. Every ten minutes ™ operation, the radio can be instructed to send “DE (your callsign) K” if this during ARTS feature is enabled. The callsign field may contain up to 10 characters. Here’s how to program the CW Identifier: 1. -
Page 65: Digital Mode Operation (Ssb-Based Afsk)
IGITAL The FT-857 provides extensive capability for digital mode operation on the HF, VHF, and UHF bands. The use of AFSK (Audio Frequency-Shifted Keying) configurations allows a wide variety of different communication modes to be utilized. The Menu provides for spe- cific digital mode selections, which include custom BFO offsets to optimize the receive and transmit passbands for the mode selected. -
Page 66: Psk31 Operation
RANSMITTER IGITAL monitor ALC voltage. If not, press the [ FUNC ] key momentarily, then rotate the SE- LECT knob to select to select Multi Function Row “i” [ MTR, – – –, DISP ] , then press the [ A ]( MTR ) or [ B ] key so as to select metering of ALC (“ALC” icon will appear at the upper of the [ B ] ] key). -
Page 67: Packet (1200/9600 Bps Fm) Operation
IGITAL 2. Press the [ MODE ( t ) ] or [ MODE ( u ) ] key, as needed, to select the DIG operating mode (the “DIG” icon will appear on the display). 3. Now use Menu mode to configure the transceiver’s passband response. Once in the Menu mode, rotate the SELECT knob to select Menu Mode No-039 [ DIG SHIFT ] , and rotate the DIAL knob to set the desired BFO offset. -
Page 68: Weatherfax Monitoring
RANSMITTER ( 1200/9600 ACKET ating on 1200 bps, try now to connect to another station or node; you may well find that the drive level needs no further adjustment. If, however, you are having trouble connecting due to insufficient or excessive drive from the TNC to the FT-857, use Menu Mode No-071 [ PKT 1200 ] (for 1200 bps Packet) or No-072 [ PKT 9600 ] (for 9600 bps Packet) to set the drive. -
Page 69: Time-Out Timer
Most often used on FM, the transmitter’s Time-Out Timer (TOT) feature disables the trans- mitter after a user-defined period of transmission. This feature may be useful in preventing a “stuck microphone” (accidental closure of the PTT switch) from causing interference to other users, and it will also force you to keep your transmissions short, thereby conserving battery power. -
Page 70: Atas-100/-120 Operation
RANSMITTER CTIVE UNING NTENNA The optional ATAS-100/-120 Active-Tuning Antenna System provides operation on a number of HF bands (7/14/21/28 MHz) plus 50 MHz, 144 MHz, and 430 MHz. The FT-857 pro- vides microprocessor control of the tuning mechanism in the ATAS-100/-120 for conve- nient automatic tuning. -
Page 71: Manual Tuning
CTIVE UNING NTENNA 6. When you wish to conclude ATAS-100/-120 operation, press the [ A ]( TUNE ) key; the “u” icon disappear surrounding the “ATAS” indication. If the ATAS-100/120 retracts to its minimum length, it will not automatically shut off instantly;... -
Page 72: Atas-100/-120 Operating Tips
RANSMITTER PERATION ( ATAS-100/-120 ) O CTIVE UNING NTENNA YSTEM PERATION ATAS-100/-120 Operating Tips The information below will help you derive the best performance possible from the ATAS- 100/-120 Active-Tuning Antenna System. Grounding It is critically important that you establish a good mechanical and RF ground connection for your ATAS-100/-120 (as with all vertical antennas). -
Page 73: Automatic Antenna Tuner Operation
FC-30 A UTOMATIC The optional FC-30 Automatic Antenna Tuner provides automatic tuning of a coaxial line so as to present a nominal 50 W impedance to the FT-857’s HF/50 MHz antenna port. Before operation can begin, you must instruct the FT-857’s microprocessor that the FC-30 is being used. -
Page 74: Antenna Tuner Memory System
RANSMITTER PERATION FC-30 A UTOMATIC NTENNA UNER PERATION Antenna Tuner Memory System The FC-30, working in concert with the FT-857, can store impedance matching data in its micro-computer memory, so as to provide instant adjustment as you transmit in different areas of a particular band. -
Page 75: Memory Operation
QMB ( Q UICK The “Quick Memory” Bank provides one-touch access to frequencies you want to store and recall in a hurry. You may store a “QMB” channel into a “regular” memory later, if you like; use of the “regular” memories will be described later. QMB Channel Storage 1. -
Page 76: Memory Operation On "Regular" Memory Channel
EMORY PERATION EMORY PERATION ON Most Memory operation will be conducted in the “regular” memory registers. There are 200 memory channels available for storage and recall of important frequencies. Normal Memory Storage 1. Tune in the desired frequency, and set the operating mode and bandwidth. If this is an FM channel, set up any required CTCSS/DCS and repeater shift configurations. -
Page 77: Split-Frequency Memory Storage
EMORY PERATION ON Split-Frequency Memory Storage You can also store “Split” frequencies, such as when operating on a repeater system not utiliz- ing a “standard” offset. This procedure may also be used for DX work on 7 MHz SSB, etc. 1. -
Page 78: Memory Channel Recall
EMORY PERATION EMORY PERATION ON Memory Channel Recall 1. If you currently are in the VFO tuning mode, press the [ M/V ] key once to enter the “Memory” mode (a memory channel number “M-nnn” will appear on the display in the space previously occupied by “VFOa”... -
Page 79: Masking ("Hiding") A Memory
EMORY PERATION ON Masking (“Hiding”) a Memory Frequency data stored on a memory channel can be deleted, if desired, from any memory channel except channel “1.” The deletion process is not a “hard” erasure, so if you erase a channel by mistake using this procedure, the memory channel contents can be recovered. 1. -
Page 80: Memory Operation On "Home" Channel Memories
EMORY PERATION EMORY PERATION ON Four Special one-touch “Home” channels are available, for special frequencies you use often. Either “simplex” or “split” frequency/mode data may be stored in the “Home” chan- nel locations. Special “Home” channels are available for HF (any frequency between 1.8 and 29.7 MHz), 50 MHz, 144 MHz, and 430 MHz. -
Page 81: Labeling Memories After Programming Channel Data
ABELING EMORIES AFTER You may wish to append an alpha-numeric “Tag” (label) to a memory or memories, to aid in recollection of the channel’s intended use (such as a club name, etc.), some time after you have performed the initial memory programming. This is easily accomplished using the Menu mode. -
Page 82: Spectrum Scope Monitor
PECTRUM The Spectrum Scope Monitor allows viewing of operating activity on frequencies above and below your current operating frequency in the VFO mode, or viewing of memory chan- nel activity on the current memory group when in the Memory mode. When the Spectrum Scope Monitor is activated, the display indicates the relative signal strength on channels immediately adjacent to the current operating frequency. -
Page 83: Smart Search Tm
MART The Smart Search™ feature automatically stores frequencies where activity is encountered on the current band. When Smart Search™ is engaged, the transceiver quickly searches above your current frequency, storing active frequencies as it goes (without stopping on them even momentarily). These frequencies are stored in a special Smart Search™ memory bank, consisting of 50 memories. -
Page 84: Scanning Operation
CANNING This transceiver contains a wide variety of scanning capabilities. Whether you are in the VFO mode or one of the memory modes, scanning operation is fundamentally identical in all configurations, but with the following differences: r In the VFO mode, scanning causes the transceiver to sweep up or down the band, paus- ing or halting on any signal encountered;... -
Page 85: Scan-Resume Choices
Scan-Resume Choices Scanning operation requires that you have the FT-857’s audio squelched. The transceiver then “assumes” that the opening of the squelch corresponds to the discovery of a signal you may wish to listen to. Once the scan has been halted, one of three things may happen: TIME (default action): In this mode, the transceiver pauses on the signal and stays locked on its frequency for five seconds. - Page 86 CANNING 5. Initiate memory scanning; you will observe that the channels you marked to be skipped are not included in the scanning loop. 6. Press the PTT switch to stop the scan; you may now use the SELECT knob to step through the channels manually - one at a time - and you will observe that the “Skipped”...
-
Page 87: Priority Channel" Scanning
“P RIORITY The FT-857’s scanning features include a two-channel scanning capability which allows you to operate on a VFO or Memory channel, while periodically checking Memory Channel “M-001” for activity. If a station is received on Memory Channel “M-001” which is strong enough to open the Squelch, the scanner will pause on that station in accordance with the Scan-Resume mode set via Menu Mode No-077 [ SCAN MODE ] . -
Page 88: Programmable Memory Scan (Pms) Operation
CANNING ROGRAMMABLE To limit scanning (and manual tuning) within a particular frequency range, you can use the Programmable Memory Scanning (PMS) feature, which utilizes five special-purpose memory pairs (“M-P1L/M-P1U” through “M-P5L/M-P5U”). The PMS feature is especially useful in helping you to observe any operating sub-band limits which apply to your Amateur license class. -
Page 89: Dual Watch Operation
Dual Watch is similar, in some respects, to scanning. In Dual Watch, however, the trans- ceiver monitors (squelched) on the VFO-A frequency while periodically checking VFO-B for activity (or vice-versa). A typical example might be for you to set VFO-A to 50.110 MHz, watching for DX stations who might call CQ on that frequency, while periodically checking 28.885 MHz for stations reporting band openings on 6 meters. -
Page 90: Miscellaneous Settings
ISCELLANEOUS PERATION ON 5167.5 97.401(d) of the regulations governing amateur radio in the United States permit emergency amateur communications on the spot frequency of 5167.5 kHz by stations in (or within 92.6 km of) the state of Alaska. This frequency is only to be used when the immediate safety of human life and/or property are threatened, and is never to be used for routine communica- tions. -
Page 91: Cw Training Feature
CW T The FT-857 provides a CW Training feature, which sends random Morse Code five-charac- ter groups via the sidetone (heard in the speaker), so you can improve your CW proficiency whether or not the bands are open. 1. Press and hold in the [ FUNC ] key for one second to enter the Menu mode. 2. -
Page 92: Beacon Feature
ISCELLANEOUS The FT-857’s unique “Beacon” feature allows you to set up the transceiver to send a repeti- tive message. For example, on a DX-pedition, the FT-857 beacon might be activated on a 50 MHz frequency, to alert DXers as to possible band openings. Beacon Text Storage 1. -
Page 93: Beacon Text Sending (On The Air)
Beacon Transmission (On the Air) 1. Press and hold in the [ FUNC ] key for one second to enter the Menu mode. 2. Rotate the SELECT knob to select Menu Mode No-012 [ BEACON TIME ] . 3. Rotate the DIAL to select the interval time (between repeats of the message) (1 ~ 255 seconds). -
Page 94: Display Customization
ISCELLANEOUS Display Lamp Mode The FT-857 illumination lamp has four options for activation of the illumination. To set up the Lamp mode: 1. Press and hold in the [ FUNC ] key for one second to activate the Menu mode. 2. -
Page 95: Display Color
Display Color The LCD color may be changed using the Menu Mode for different operating status condi- tions. For example, the display may be configured to show a different color according to ARTS status, by Band, by Memory Group, by VFO/Memory/HOME/QMB status, or may be set to indicate different colors according to meter indication (i.e. -
Page 96: Menu Operation
ON/OFF ENABLE/DISABLE DISABLE 0 ~ 100 ø1 2.5/5/9/10/12.5/25kHz OFF/1h ~ 6h OFF/RANGE/ALL RANGE ON/OFF – YAESU – – OFF/ 1 sec ~ 255sec 440/880/1760 Hz 880Hz 0 ~ 100 –300 ~ +300 Hz 0 Hz –300 ~ +300 Hz 0 Hz –300 ~ +300 Hz... - Page 97 Menu Item Function 020 CAT/LIN/TUN Selects the device which is connected to the CAT/ LINEAR jack on the rear panel. 021 CLAR DIAL SEL Defines the “control” knob to be used for setting of the clarifier offset frequency. 022 CW AUTO MODE Selects whether the KEY jack shall be “Enabled”...
- Page 98 PERATION Menu Item Function 059 MIC SEL The choice of the equipment which connects to the MIC jack. 060 MTR ARX SEL Select the analog meter display configuration while the transceiver is receiving. 061 MTR ATX SEL Selects the analog meter display configuration while the transceiver is transmitting.
- Page 99 PERATION MENU MODE No-001 [ EXT MENU ] Function: Enables/Disables the extended Menu Mode. Available Values: ON/OFF Default: OFF MENU MODE No•002 [ 144 MHz ARS ] Function: Activates/deactivates the Automatic Repeater Shift feature when operating on the 144 MHz band. Available Values: ON/OFF Default: ON (depending on transceiver version) MENU MODE No•003 [ 430 MHz ARS ]...
- Page 100 3. Repeat the previous step as many times as necessary to complete your callsign. 4. Press the SELECT knob to save your completed callsign and exit. Default: YAESU MENU MODE No•011 [ BEACON TEXT 1 ] Function: Stores the message for the Beacon. Up to 40 characters may be stored. The stor- age procedure is as follows: 1.
-
Page 101: Cat
PERATION MENU MODE No•012 [ BEACON TIME ] Function: Selects the interval time (between message and message). Available Values: OFF/1 sec ~ 255 sec Default: OFF MENU MODE No•013 [ BEEP TONE ] Function: Selects the beep frequency. Available Values: 440/880/1760 Hz Default: 880 Hz MENU MODE No-014 [ BEEP VOL ] Function: Selects the beep volume level. - Page 102 PERATION MENU MODE No•021 [ CLAR DIAL SEL ] Function: Defines the SELECT knob to be used for setting of the clarifier offset frequency. Available Values: SEL, MAIN (Selector/Main Dial Knobs) Default: SEL MENU MODE No-022 [ CW AUTO MODE ] Function: Selects whether the KEY jack shall be “Enabled”...
- Page 103 PERATION MENU MODE No•026 [ CW PADDLE ] Function: Enables/disables CW keying by the microphone’s [ UP ] / [ DWN ] keys. Available Values: ELEKEY/MICKEY Default: ELEKEY When this Menu Item is set to “MICKEY,” press the microphone’s [ UP ] key to send a “dot,”...
- Page 104 PERATION MENU MODE No•032 [ CW WEIGHT ] Function: Sets the Dot:Dash ratio for the built-in electronic keyer. Available Values: 1:2.5 ~ 1:4.5 Default: 1:3.0 MENU MODE No-033 [ DCS CODE ] Function: Setting of the DCS code. Available Values: 104 Standard DCS codes Default: 023 You can set the DSC codes for Encode and De- code separately.
- Page 105 PERATION MENU MODE No•038 [ DIG MODE ] Function: Selects the mode and sideband (if applicable) in the DIG (Digital) mode. Available Values: RTTY-L/RTTY-U/PSK31-L/PSK31-U/USER-L/USER-U Default: RTTY-L RTTY-L: AFSK RTTY operation on the LSB mode RTTY-U: AFSK RTTY operation on the USB mode PSK31-L: PSK-31 operation on the LSB mode PSK31-U:PSK-31 operation on the USB mode USER-L: User-programmed custom operation based on LSB mode...
- Page 106 PERATION MENU MODE No-043 [ DISP INTENSITY ] Function: Setting of the display brightness level. Available Values: 1 (Dim) ~ 3 (Bright) Default: 3 MENU MODE No•044 [ DISP MODE ] Function: Sets up the LCD Lamp mode. Available Values: OFF/AUTO1/AUTO2/ON Default: AUTO2 OFF: Disables the LCD illumination.
- Page 107 MENU MODE No-048 [ DSP MIC EQ ] Function: Sets the DSP microphone equalization pattern. Available Values: OFF/LPF/HPF/BOTH Default: OFF OFF: This function is disabled. LPF: Lower frequencies are emphasized. HPF: Higher frequencies are emphasized. BOTH: Mid-range frequencies are emphasized. MENU MODE No-049 [ DSP NR LEVEL ] Function: Setting of the degree of DSP Noise Reduction.
- Page 108 PERATION MENU MODE No•054 [ LOCK MODE ] Function: Selects the operation of the front panel’s [ LOCK ] key. Available Values: DIAL/FREQ/PANEL/ALL Default: DIAL DIAL: Locks the DIAL knob only. FREQ: Locks the front panel keys and knobs related to frequency control (such as [ BAND ( DWN ) ] and [ BAND ( UP ) ] key, [ A ]( A/B ) key., etc.) PANEL: Locks all front panel keys and knobs (except POWER and [ LOCK ] keys) Locks all front panel keys and knobs (except POWER and [ LOCK ] keys) and...
- Page 109 MENU MODE No•057 [ MEM/VFO DIAL MODE ] Function: Selects the function which is engaged when you press the SELECT knob thereby activating its “secondary” function). Available Values: CW SIDETONE, CW SPEED, MHz/MEM GRP, MIC GAIN, NB LEVEL, RF POWER/STEP Default: MHz/MEM GRP MENU MODE No•058 [ MIC SCAN ] Function: Enables/disables scanning access via the microphone’s [ UP ] / [ DWN ] keys.
- Page 110 PERATION MENU MODE No•061 [ MTR ATX SEL ] Function: Selects the analog meter display configuration while the transceiver is transmit- ting. Available Values: PWR, ALC, MOD, SWR, VLT, N/A, OFF Default: PWR PWR: Indicates the relative transmit power. ALC: Indicates the relative Automatic Level Control voltage. MOD: Indicates the deviation level.
- Page 111 MENU MODE No•068 [ PG ACC ] Function: Programming the optional MH-59 Available Values: All Multi Functions, all Menu Items (except Menu #065 through 070), MONI, Q.SPL, TCALL, ATC and USER. Default: MONI MENU MODE No•069 [ PG P1 ] Function: Programming the optional MH-59 Available Values: All Multi Functions, all Menu Items (except Menu #065 through 070), MONI, Q.SPL, TCALL, ATC and USER.
- Page 112 PERATION MENU MODE No-076 [ RPT SHIFT ] Function: Sets the magnitude of the repeater shift. Available Values: 0.00 ~ 99.99 (MHz) Default: Depends on operating band and transceiver version. MENU MODE No•077 [ SCAN MODE ] Function: Selects the desired Scan-Resume mode. Available Values: TIME/BUSY/STOP Default: TIME This Menu Item allows you to select your favorite method of scan-restart after the scanner...
- Page 113 PERATION MENU MODE No-083 [ TONE FREQ ] Function: Setting of the CTCSS Tone Fre- quency. Available Values: 50 Standard CTCSS tones Default: 88.5 Hz MENU MODE No-084 [ TOT TIME ] Function: Selects the Time-Out Timer time. Available Values: OFF/1 ~ 20 (min) Default: OFF MENU MODE No•085 [ TUNER/ATAS ] Function: Selects the device (FC-30 or ATAS-100/-120) to be controlled via the front...
- Page 114 PERATION MENU MODE No•089 [ XVTR A FREQ ] Function: Allows an arbitrary frequency to be set on the display, to allow direct frequency readout during transverter operation; can also be used to account for frequency conversion inaccuracies when a known reference frequency is known. Available Values: 0,000,00 ~ 9999,999,00 (kHz) Default: Current VFO frequency.
- Page 115 CAT O PERATION The FT-857’s System allows the transceiver to be controlled by a personal computer. This allows multiple control operations to be fully automated as a single mouse click, or it allows a third-party software package (such as contest logging software) to communicate with the FT-857 without (redundant) operator intervention.
- Page 116 CAT O PERATION CAT Data Protocol All commands sent from the computer to the transceiver consist of five-byte blocks, with up to 200 ms between each byte. The last byte in each block is the instruction opcode, while the first four bytes of each block are arguments (either parameters for that instruction, or dummy values required to pad the block out to five bytes).
- Page 117 Command Title ø LOCK ON/OFF ø PTT ON/OFF Set Frequency Operating Mode ø CLAR ON/OFF CLAR Frequency ø VFO-A/B ø SPLIT ON/OFF Repeater Offset Frequency Repeater Offset CTCSS/DCS Mode CTCSS Tone DCS Code ø Read RX Status ø Read TX Status ø...
- Page 118 CAT O PERATION Note 1: CTCSS Tone Example: Set the CTCSS Tone Frequncy to 88.5 Hz (TX) and 100.0 Hz (RX) â â â â 00 = 88.5 Hz (TX), 100.0 Hz (RX) Note 2: DCS Code Example: Set the DCS Code to 023 (TX) and 371 (RX) â...
-
Page 119: Power-On Microprocessor Reset Procedures
OWER Some or all transceiver settings can be reset to their factory-default states using one of the following power-on routines: r [ V/M ] + POWER on: Resets all memories and following menu settings to their factory- default values: Menu #06 (AM STEP), 33 (DCS CODE), 52 (FM STEP), 56 (MEM TAG), 76 (RPT SHIFT), 82 (SSB STEP), and 83 (TONE FREQ). -
Page 120: Cloning
LONING You can transfer all data stored in one transceiver to another set by utilizing the handy “Cloning” feature. This requires a user-constructed cloning cable which connects the CAT/ LINEAR jacks on the two transceivers, as shown below. To clone from one transceiver to another, use the following procedure: 1. -
Page 121: Installation Optional Accessories
NSTALLATION OF PTIONAL IGITAL The DSP-2 is a highly-effective filtering technology which can dramatically improve re- ception and transmission. 1. Turn the transceiver’s power off by pressing and holding in the POWER switch for one second, then disconnect the DC cable from the INPUT jack on the rear panel of the transceiver. -
Page 122: Optional Filters:yf-122S, Yf-122C, And Yf-122Cn
NSTALLATION OF PTIONAL ILTERS 1. Turn the transceiver’s power off by pressing and holding in the PWR switch for one second, then disconnect the DC cable from the INPUT jack on the rear panel of the transceiver. 2. Referring to Figure 1, remove the seven screws affixing the top cover of the transceiver then disconnect the speaker’s connector from the MAIN Unit. -
Page 123: Optional High Stability Reference Oscillator Tcxo-9
NSTALLATION OF PTIONAL TABILITY The TCXO-9 provides high stability over a wide range of ambient temperatures, so as to enhance digital-mode operating. 1. Turn the transceiver’s power off by pressing and holding in the POWER switch for one second, then disconnect the DC cable from the INPUT jack on the rear panel of the transceiver. -
Page 124: Appendix
PPENDIX ETUP OF EMORIES FOR Although the FT-857 is not capable of “full duplex” operation (simultaneous transmission and reception), its flexible memory system is ideal for configuring a set of memories for LEO satellite work. The example below is designed around the popular satellite UO-14, but the same principles apply to operation using AO-27, and other such satellites. - Page 125 PPENDIX ( LEO ) FM S ETUP OF EMORIES FOR ARTH RBIT ATELLITE PERATION Press the [ FUNC ] key momentarily, then rotate the SELECT knob one click counter-clock- wise to re-select Multi Function Row “a” [ A/B, A=B, SPL ] . Press the [ A ]( A/B ) key to select VFOb (145.970 MHz).
- Page 126 PPENDIX ETUP OF EMORIES FOR TAG ] to label each satellite memory (for example, “UO-14a” ~ “UO-14e” for the above five channels). A complete set of frequencies may be stored for each LEO satellite you wish to utilize, and once configured, the FT-857 provides a flexible and easy-to-use earth station capability for these popular satellites.
-
Page 127: A8J Remote Microphone
MH-59 The optional MH-59 Remote Microphone provides control of the major functions of the FT-857 from the microphone’s keypad. The MH-59 adjust the operating frequency and receiver audio volume level. Before connecting the MH-59 MH-59 is being used, using the Menu Mode: 1. - Page 128 PPENDIX MH-59 [ 4 ( HOME )] key Pressing this key recalls a favorite “Home” fre- quency memory. This key generates the DTMF “4” tone during trans- mission, and frequency entry digit “4” during Di- rect Keypad Frequency Entry. [ 5 ( tMODE )] ] key Pressing this key changes the operating mode: USB ð...
- Page 129 MH-59 [ Ú ] key This key generates the DTMF “F (Ú)” tone during transmission. [ 0 ( CNTL )] key This key generates the DTMF “0” tone during transmission, and frequency entry digit “0” during Direct Keypad Frequency Entry. [ ENT ( # )] key Press this key to enter the Direct Keypad Frequency Entry mode.
- Page 130 PPENDIX MH-59 [ P1 ] key (Quick Split) Press this key to change the Sub VFO frequency (Main VFO frequency + 5 kHz) and automatically engage the ”Split” feature. You may program the configuration of this key, to enable use of a different function, via Menu Mode No-069 [ PG P1 ] .
- Page 131 1. Changes or modifications to this device not expressly approved by VERTEX STANDARD could void the user’s authorization to operate this device. 2. This device complies with part 15 of the FCC Rules. Operation is subject to the following two conditions; (1) this device may not cause harmful interference, and (2) this device must accept any interference including interference that may cause undesired operation.
- Page 132 Copyright 2002 Printed in Japan VERTEX STANDARD CO., LTD. All rights reserved. No portion of this manual may be reproduced without the permission of VERTEX STANDARD CO., LTD. 0212u-AK...