Xerox WorkCentre 6505N User Manual
Color laser multifunction printer
Hide thumbs
Also See for WorkCentre 6505N:
- Brochure (4 pages) ,
- Evaluator manual (28 pages) ,
- Specifications (4 pages)
Table of Contents
Advertisement
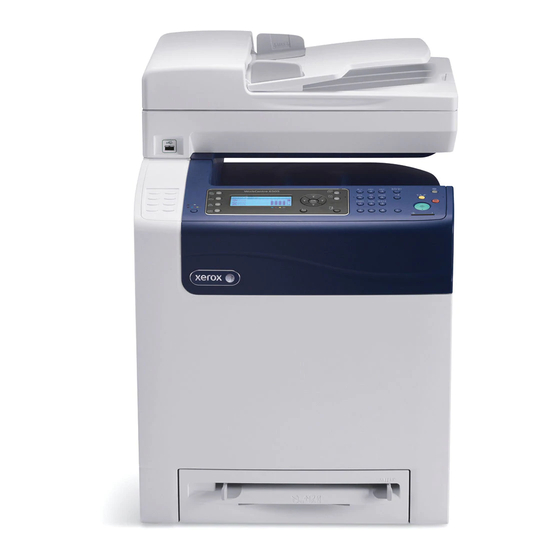
Xerox WorkCentre 6505
Multifunction Printer
Xerox
WorkCentre
®
User Guide
Guide d'utilisation
Italiano
Guida per l'utente
Deutsch
Benutzerhandbuch
Español
Guía del usuario
Português
Guia do usuário
Nederlands
Gebruikershandleiding
Svenska
Användarhandbok
Dansk
Betjeningsvejledning
Čeština
Uživatelská příručka
Polski
Przewodnik użytkownika
6505
®
Magyar
Felhasználói útmutató
Русский
Руководство пользователя
Türkçe
Kullanım Kılavuzu
Ελληνικά
Εγχειρίδιο χρήστη
Advertisement
Table of Contents
Troubleshooting

Related Manuals for Xerox WorkCentre 6505N


Summary of Contents for Xerox WorkCentre 6505N
-
Page 1: User Guide
Xerox WorkCentre 6505 Multifunction Printer Xerox WorkCentre ® User Guide Guide d'utilisation Svenska Italiano Guida per l’utente Dansk Deutsch Benutzerhandbuch Español Čeština Guía del usuario Polski Português Guia do usuário Nederlands Gebruikershandleiding 6505 ® Användarhandbok Magyar Felhasználói útmutató Русский Руководство пользователя... - Page 2 © 2011 Xerox Corporation. All Rights Reserved. Unpublished rights reserved under the copyright laws of the United States. Contents of this publication may not be reproduced in any form without permission of Xerox Corporation. Copyright protection claimed includes all forms of matters of copyrightable materials and information now allowed by statutory or judicial law or hereinafter granted, including without limitation, material generated from the software programs which are displayed on the screen such as styles, templates, icons, screen displays, looks, and so on.
-
Page 3: Table Of Contents
Selecting a Location for the Printer ............29 WorkCentre 6505 Color Laser Multifunction Printer... - Page 4 Loading Paper in the 250-Sheet Feeder (Tray 2) ........65 WorkCentre 6505 Color Laser Multifunction Printer...
- Page 5 Scanning to a USB Flash Drive............114 WorkCentre 6505 Color Laser Multifunction Printer...
- Page 6 Navigating the Control Panel Menus........... . . 146 WorkCentre 6505 Color Laser Multifunction Printer...
- Page 7 Color Balance ................203 WorkCentre 6505 Color Laser Multifunction Printer...
- Page 8 European Union ..............229 WorkCentre 6505 Color Laser Multifunction Printer...
-
Page 9: Safety
15 Your printer and the recommended supplies have been designed and tested to meet strict safety requirements. Attention to the following information ensures the continued safe operation of your printer. WorkCentre 6505 Color Laser Multifunction Printer User Guide... -
Page 10: Electrical Safety
Use of controls, adjustments, or performance of procedures other than the procedures specified in this manual can result in hazardous radiation exposure. Power Cord • Use the power cord supplied with your printer. WorkCentre 6505 Color Laser Multifunction Printer User Guide... - Page 11 The power cord is attached to the printer as a plug-in device on the back of the printer. If it is necessary to disconnect all electrical power from the printer, disconnect the power cord from the electrical outlet. WorkCentre 6505 Color Laser Multifunction Printer Safety...
-
Page 12: Operational Safety
• Do not place the printer in locations susceptible to vibrations. • For optimum performance, use the printer at elevations below 3,100 m (10,170 ft.). WorkCentre 6505 Color Laser Multifunction Printer User Guide on page 29. Relative Humidity on page 213. -
Page 13: Printer Supplies
Agreements, and Total Satisfaction Guarantee, do not cover damage, malfunction, or degradation of performance caused by use of non-Xerox degradation of performance caused by the use of Xerox The Total Satisfaction Guarantee is available in the United States and Canada. Coverage can vary outside these areas. -
Page 14: Maintenance Safety
• Do not use aerosol cleaners. Clean with a dry, lint-free cloth only. • Do not burn any consumables or routine maintenance items. For information on Xerox recycling programs, go to www.xerox.com/gwa. See also: Cleaning the Printer... -
Page 15: Printer Symbols
Do not place or drop any object on the transfer belt. It can cause print-quality problems or permanently damage the belt. It can take 40 minutes for the fuser to cool down. WorkCentre 6505 Color Laser Multifunction Printer Safety User Guide... - Page 16 Safety WorkCentre 6505 Color Laser Multifunction Printer User Guide...
- Page 17 Configurations and Options • Energy Saver Mode on page 23 • Information Pages on page 24 • CentreWare Internet Services • More Information on page 26 on page 21 on page 25 WorkCentre 6505 Color Laser Multifunction Printer User Guide...
-
Page 18: Features
Front View Tray 1 (250 sheet paper tray) Manual feed slot Front cover Front cover release button Control panel WorkCentre 6505 Color Laser Multifunction Printer User Guide wc6505_003 USB memory port Automatic document feeder (ADF) tray Output tray Power switch... -
Page 19: Rear View
Memory slot door Internal View Button for opening the front cover Transfer unit Imaging unit Network connector Line out (to telephone) Line in (from wall jack) Fuser ADF document glass Toner cartridges WorkCentre 6505 Color Laser Multifunction Printer Features User Guide... -
Page 20: Control Panel
Energy Saver mode. 11. Clear All button: Clears all text, numbers or instructions. 12. Stop button: Cancels the current print job. WorkCentre 6505 Color Laser Multifunction Printer User Guide 13. Start button: Press to start a copy, scan, or fax job. -
Page 21: Configurations And Options
22 Configurations The WorkCentre 6505 printer is available in two configurations: • WorkCentre 6505N: Includes all standard features. • WorkCentre 6505DN: Includes all standard features plus a duplex unit. Note: When these items are not standard on your printer, you can order additional memory and trays. -
Page 22: Optional Features
Form Overlay: Enables writing PCL5 forms. • Font Download: Enables the downloading of fonts to the RAM Disk. Optional Features • Duplex unit for automatic 2-sided printing (optional for WorkCentre 6505N) • 250-sheet feeder (Tray 2) • Wireless network adapter •... -
Page 23: Energy Saver Mode
The printer is calibrating after having been in Energy Saver mode or after a jam is cleared. • You pressed another button within the last minute. on page 23 on page 23 on page 23 on page 20. WorkCentre 6505 Color Laser Multifunction Printer Features User Guide... -
Page 24: Information Pages
By default, the Startup Page prints automatically each time the printer is turned on. You can turn off this feature in the System Setup Menu under the Admin Menu settings. For details, see System Setup on page 157. WorkCentre 6505 Color Laser Multifunction Printer User Guide... -
Page 25: Centreware Internet Services
At your computer, open a Web browser, type the IP address of the printer into the address field, then press Enter or Return. Note: If you do not know the IP address of your printer, see on page 35. Finding the IP Address of Your Printer WorkCentre 6505 Color Laser Multifunction Printer Features User Guide... -
Page 26: More Information
Installation Guide Quick Use Guide Video Tutorials Recommended Media List Online Support Assistant Technical Support Information Pages Supplies WorkCentre 6505 Color Laser Multifunction Printer User Guide Source Packaged with the printer. Packaged with the printer. www.xerox.com/office/WC6505docs Europe: www.xerox.com/europaper North America: www.xerox.com/paper... -
Page 27: Installation And Setup
49 See also: Online Support Assistant at Installation Guide packaged with your printer. on page 28 on page 29 on page 32 on page 37 on page 44 on page 46 www.xerox.com/office/WC6505support WorkCentre 6505 Color Laser Multifunction Printer User Guide... -
Page 28: Installation And Setup Overview
38. Enable optional features and configure software. Note: If the Software and Documentation disc is not available, you can download the latest drivers from www.xerox.com/office/WC6505drivers. WorkCentre 6505 Color Laser Multifunction Printer User Guide Choosing a Connection Method Connecting the Printer... -
Page 29: Selecting A Location For The Printer
100 mm (3.9 in.) on the left side of the printer • 250 mm (9.8 in.) on the right side of the printer Connecting the Printer on page 30. WorkCentre 6505 Color Laser Multifunction Printer Installation and Setup User Guide... -
Page 30: Connecting The Printer
10. Set or automatically discover the network IP address of the printer. For details, see IP Address of the Printer on page 32. WorkCentre 6505 Color Laser Multifunction Printer User Guide on page 30 on page 31 on page 31 About TCP/IP and IP Addresses on page 32. -
Page 31: Connecting Using A Usb Cable
Connect the other end of the RJ11 cable to an operating telephone line. Enable and configure the Fax functions. For details, see page 139. Installation and Setup Installing the Software Changing the Default Fax Job Settings WorkCentre 6505 Color Laser Multifunction Printer on page 38. User Guide... -
Page 32: Configuring Network Settings
33. Note: You can view the IP address of your printer from the Startup Page, the Configuration Page, or the printer control panel. For details, see WorkCentre 6505 Color Laser Multifunction Printer User Guide on page 32 on page 32... -
Page 33: Assigning The Ip Address Manually
Press the Up Arrow or Down Arrow button to select IPv4, then press OK. At Get IP Address, press OK. Press the Up Arrow or Down Arrow button to select Panel, then press OK to enable this option. Installation and Setup WorkCentre 6505 Color Laser Multifunction Printer User Guide... -
Page 34: Changing The Ip Address Using Centreware Internet Services
IP address, in the Get IP Address field, select a method from the drop-down list. After changing the address information, scroll to the bottom of the page and click Save Changes. WorkCentre 6505 Color Laser Multifunction Printer User Guide Installing the Software www.xerox.com/office/WC6505support... -
Page 35: Finding The Ip Address Of Your Printer
Use the alphanumeric keypad to enter the name of your company, then press OK. Identify the telephone number of the sending machine: Press the Up Arrow or Down Arrow button to select Fax Number, then press OK. Installation and Setup WorkCentre 6505 Color Laser Multifunction Printer User Guide... -
Page 36: Enabling The Printer For Scanning
If you are connected using the USB cable, you cannot scan to an email address or a network location (a shared folder on your computer). For more information see Scanning Setup Overview WorkCentre 6505 Color Laser Multifunction Printer User Guide Setting the Date and Time on page 25. -
Page 37: Setting The Date And Time
12. Press the Return button repeatedly to return to the Ready screen. Note: You can also set the date and time using CentreWare Internet Services. Installation and Setup Enabling the Printer for Faxing WorkCentre 6505 Color Laser Multifunction Printer User Guide... -
Page 38: Installing The Software
Linux: Your printer supports connection to Linux platforms through the network interface. Available Print Drivers To access special printing options, use a Xerox description languages and operating systems. The following print drivers are available. To download the latest drivers, go to www.xerox.com/office/WC6505drivers. -
Page 39: Installing The Print Drivers For A Windows Network Printer
In the lower left section of the screen, click the Software Installation button. At the top of the License Agreement, select your language, then click I Agree to accept the agreement. ® The Xerox Printer Installation screen appears. In the Discovered Printers list, select your WorkCentre 6505 printer, then click Next. Note: When installing drivers for a network printer, if you do not see your printer in the list, click the IP Address or DNS Name button. -
Page 40: Installing Print And Scan Drivers For Windows Usb
To configure the computer software for using the WorkCentre 6505 scanner feature: On your computer, select Start > All Programs > Xerox > WorkCentre 6505 > Scan Setting Tools. In the IP Address box of the IP Address Setting window, enter the IP address of the printer. -
Page 41: Installing The Drivers And Utilities For Macintosh Os X Version 10.5 And Later
Insert the Software and Documentation disc into the appropriate drive on your computer. If the Software and Documentation disc is not available, download the latest drivers from Note: www.xerox.com/office/6505MFPdrivers. On your desktop, double-click the WorkCentre 6505 icon. Double-click WorkCentre 6505 Installer. -
Page 42: Installing The Scan Driver
Insert the Software and Documentation disc into the appropriate drive on your computer. Note: If the Software and Documentation disc is not available, download the latest drivers from www.xerox.com/office/6505MFPdrivers. On your desktop, double-click the WorkCentre 6505 scan icon. Click WorkCentre 6505 Scan Installer. -
Page 43: Installing Other Drivers
The following drivers are also available to download for Windows at www.xerox.com/office/WC6505drivers: • Xerox Global Print Driver (PCL version): Print to any PCL printer on your network, even printers made by other manufacturers. It configures itself for your individual printer upon installation. •... -
Page 44: Installing Utilities For Windows
Click Next to accept the destination location. At the prompt, click Finish. On your computer, select Start > All Programs > Xerox > WorkCentre 6505 > Address Book Editor. Click Connect via Network to manage the address book over the network, then click OK. - Page 45 At the next screen, click Next to accept the default installation destination. Click Next. Click Finish. The PrintingScout icon appears in your Windows Taskbar. See also: Checking Printer Status with PrintingScout Installation and Setup on page 172 WorkCentre 6505 Color Laser Multifunction Printer User Guide...
-
Page 46: Enabling Optional Features
• For Windows Server 2003 and later, click Start > Settings > Printers. • For Windows 7, click Start > Devices and Printers. WorkCentre 6505 Color Laser Multifunction Printer User Guide on page 46 on page 47 on page 48... -
Page 47: Enabling Optional Features For The Windows Pcl Driver
For Windows 7, click Start > Devices and Printers. In the list of printers, right-click the WorkCentre 6505 PCL printer and select Properties. Installation and Setup on page 46 on page 46 WorkCentre 6505 Color Laser Multifunction Printer User Guide... -
Page 48: Enabling Optional Features For Macintosh Os X 10.5 And Later
To enable RAM Disk, select the Available option. Note: A minimum of 512 MB is required. • To enable automatic 2-sided printing, at the Duplex Unit field, select the Available option. Click Set Printer Options to save the settings. WorkCentre 6505 Color Laser Multifunction Printer User Guide... -
Page 49: Setting Up Scanning
Select the Everyone group, and verify that all permissions are enabled. on page 49 on page 51 on page 52 on page 53 on page 25. WorkCentre 6505 Color Laser Multifunction Printer Installation and Setup Installing the Software User Guide... -
Page 50: Adding Folder As Address Book Entry
Book Entry Using CentreWare Internet Services Adding the Folder as an Address Book Entry Using the Address Book Editor On your computer select Start > All Programs > Xerox > WorkCentre 6505 > Address Book Editor. The Address Book Editor opens. -
Page 51: Setting Up Scanning To An Ftp Server
Under Network Scan (Comp./Serv.), click Comp./Server Address Book. Finding the IP Address of Your Printer on page 49. Finding the IP Address of Your Printer WorkCentre 6505 Color Laser Multifunction Printer Installation and Setup on page 35. Setting Up Scanning to a on page 35. -
Page 52: Setting Up Scanning To An Email Address
You can now scan to an email address. For more information, see Address on page 52. WorkCentre 6505 Color Laser Multifunction Printer User Guide Setting Up Scanning to an FTP Server Finding the IP Address of Your Printer Setting Up Scanning to an Email on page 35. -
Page 53: Setting Up Scanning With Usb
For more information see Installing the Software Start Express Scan Manager: • Windows: Click Start > Programs > Xerox > WorkCentre 6505 > Express Scan Manager. • Macintosh: Navigate to Applications > Xerox > WorkCentre 6505, and double-click Express Scan Manager. - Page 54 Installation and Setup WorkCentre 6505 Color Laser Multifunction Printer User Guide...
-
Page 55: Printing
Printing on Both Sides of the Paper • Printing Using Secure Print • Printing Using Proof Print on page 97 on page 56 on page 68 on page 77 on page 91 on page 95 WorkCentre 6505 Color Laser Multifunction Printer User Guide... -
Page 56: Supported Paper And Media
Your printer is designed to use various paper and other media types. Follow the guidelines in this section to ensure the best print quality and to avoid jams. ® For best results, use Xerox printing media specified for your printer. They are guaranteed to produce excellent results with your printer. -
Page 57: Paper That Can Damage Your Printer
Do not open sealed packages of paper until you are ready to load them into the printer. Leave paper in the original packaging. For most commercial cut-size grades, the ream wrapper contains an inner lining that protects the paper from moisture loss or gain. WorkCentre 6505 Color Laser Multifunction Printer Printing User Guide... -
Page 58: Supported Paper
The printed image can fade due to moisture, such as water, rain or vapor. For details, contact your reseller. Tray 1 Paper Size Paper Type and Weight Loading Capacity WorkCentre 6505 Color Laser Multifunction Printer User Guide • Letter (8.5 x 11 in.) • US Folio (8.5 x 13 in.) •... - Page 59 A4 (210 x 297 mm) • A5 (148 x 210 mm) • JIS B5 (182 x 257 mm) • Custom size range: Width: 76.2–215.9 mm (3–8.5 in.) Height: 127–355.6 mm (5–14 in.) WorkCentre 6505 Color Laser Multifunction Printer Printing User Guide...
- Page 60 Manual Feed Slot Paper Type and Weight Loading Capacity Duplex Unit (2-Sided Printing) Paper Size Paper Type and Weight Loading Capacity WorkCentre 6505 Color Laser Multifunction Printer User Guide • Plain (65–120 g/m , 17–32 lb. Bond) • Letterhead (plain) •...
-
Page 61: Loading Paper
For more paper usage guidelines, see on page 63 on page 65 Supported Paper Supported Paper and Media on page 56. WorkCentre 6505 Color Laser Multifunction Printer Printing on page 58. , 17–40 lb. Bond, 40–80 lb. (16–28 lb. User Guide... - Page 62 Slide the paper width guides to the edge of the tray. Extend the width guides fully as shown in the following illustration. Before loading the paper flex the sheets back and forth, and then fan them. Straighten the edges of the stack on a level surface. WorkCentre 6505 Color Laser Multifunction Printer User Guide wc6505_008 wc6505_009...
-
Page 63: Loading Paper In The Manual Feed Slot
If the paper looks skewed after the printer pulls it in, gently remove the paper and reseat it. Then press the OK button or wait for the automatic calibration to start. wc6505_010 on page 68 WorkCentre 6505 Color Laser Multifunction Printer Printing Supported Paper User Guide... - Page 64 Note: You can insert paper during the ready mode or sleep mode of the printer. The printer automatically detects the paper and holds it while it waits for a print job. WorkCentre 6505 Color Laser Multifunction Printer User Guide wc6505_011...
-
Page 65: Loading Paper In The 250-Sheet Feeder (Tray 2)
Do not remove the tray during printing because it can cause a paper jam. To load paper in the 250-sheet feeder: Gently pull the paper tray out of the printer. Supported Paper on page 58. wc6505_049 WorkCentre 6505 Color Laser Multifunction Printer Printing User Guide... - Page 66 Place the paper into the tray with the print side face up. Note: Do not exceed the maximum fill line in the tray. Overfilling the tray can cause paper jams. WorkCentre 6505 Color Laser Multifunction Printer User Guide wc6505_009 wc6505_010...
- Page 67 Insert the tray back into the printer until it stops. CAUTION: Be careful not to use excessive force on the tray. Doing so could damage the printer. See also: Setting Paper Types and Sizes wc6505_017 wc6505_050 on page 68 WorkCentre 6505 Color Laser Multifunction Printer Printing User Guide...
-
Page 68: Setting Paper Types And Sizes
Press the Up Arrow or Down Arrow button to select Tray Settings, then press the OK button. Press the Up Arrow or Down Arrow button to select the tray you are setting, then press OK. WorkCentre 6505 Color Laser Multifunction Printer User Guide... - Page 69 Press the Up Arrow or Down Arrow button to select Paper Size, then press OK. Select the paper size, then press OK. Press the Return button to return to the Ready screen. WorkCentre 6505 Color Laser Multifunction Printer Printing User Guide...
-
Page 70: Selecting Printing Options
Set defaults for the other print driver if applicable. Note: For more information about Windows print driver options, click the Help button in the Printing Preferences dialog box to view the online help. WorkCentre 6505 Color Laser Multifunction Printer User Guide on page 70 on page 71... -
Page 71: Selecting Printing Defaults In Windows For A Shared Network Printer
For instructions, click the Help button in the print driver dialog box to view the online help. on page 72 on page 73 on page 73. WorkCentre 6505 Color Laser Multifunction Printer Printing on page 72, and Printing User Guide... - Page 72 • Defaults button: Returns all of the Layout tab settings to their defaults. • Help button: Opens the online help of the print driver for the Layout tab. WorkCentre 6505 Color Laser Multifunction Printer User Guide Enabling on page 46.
- Page 73 Printer Status button: Opens the internal settings page of the printer in CentreWare Internet Services in your computer Web browser for network printers only. • Defaults button: Returns the Paper/Output tab settings to their defaults. on page 47. WorkCentre 6505 Color Laser Multifunction Printer Printing Enabling User Guide...
- Page 74 Advanced Provides access to advanced printer options such as skipping blank pages, printing in draft mode, banner mode, and size mismatch settings. It provides access to certain graphic settings and font settings. WorkCentre 6505 Color Laser Multifunction Printer User Guide...
-
Page 75: Selecting Printing Options For An Individual Job In Macintosh
Manual Feed Slot, Tray 1, Tray 2 (if installed). First page from: Specifies the tray from which to print the first page. Remaining from: Specifies the tray from which to print the remaining pages. WorkCentre 6505 Color Laser Multifunction Printer Printing on page 75. User Guide... - Page 76 Summary Summarizes the driver selections. WorkCentre 6505 Color Laser Multifunction Printer User Guide Print Cover Page: None, Before document, After document. When an option other than None is selected, a cover page prints.
-
Page 77: Printing On Specialty Media
CAUTION: Never use envelopes with windows or metal clasps because they can damage the printer. Damage caused by using unsupported envelopes is not covered under the Xerox Warranty, Service Agreement, or Total Satisfaction Guarantee. The Total Satisfaction Guarantee is available in the United States and Canada. Coverage can vary outside these areas. Please contact your local representative for details. - Page 78 If you are printing using the PostScript driver, go to Driver on page 79. • If you are printing using the PCL driver, go to page 79. WorkCentre 6505 Color Laser Multifunction Printer User Guide Loading Paper in Tray 1 on page 61. wc6505-051 Printing Envelopes using the PostScript...
- Page 79 After loading the envelopes in the appropriate tray, in the application you are printing from, open the Print dialog box. on page 63. wc6505_013 Printing Envelopes using the PostScript Printing Envelopes using the PCL Driver WorkCentre 6505 Color Laser Multifunction Printer Printing User Guide...
-
Page 80: Printing Labels
• Printing Labels from Tray 1 • Printing Labels from the Manual Feed Slot To order paper or other specialty media, contact your local reseller or go to the Xerox at www.xerox.com/office/WC6505supplies. Guidelines for Printing Labels Note: Labels can be printed from Tray 1 and from the manual feed slot. - Page 81 Ensure that the sheet is entered straight, not crooked. If necessary, reposition the paper guides to fit the sheet. wc6505_015 wc6505_016 WorkCentre 6505 Color Laser Multifunction Printer Printing Loading Paper in Loading Paper...
-
Page 82: Printing On Glossy Cardstock
Printing on Glossy Cardstock from Tray 1 Gently pull out the paper tray and slide open the paper guides. For details, see Tray 1 on page 61. WorkCentre 6505 Color Laser Multifunction Printer User Guide on page 82 on page 82... - Page 83 From the Paper Tray list, select Tray 1. Select any other desired settings, such as page orientation, then click OK. In the Print dialog box, click OK or Print to start printing. wc6505_018 WorkCentre 6505 Color Laser Multifunction Printer Printing User Guide...
- Page 84 From the Paper Type list, select Lightweight Glossy Cardstock or Heavyweight Glossy Cardstock. From the Paper Tray list, select Manual Feed Slot. Click OK. In the Print dialog box, click OK or Print to start printing. WorkCentre 6505 Color Laser Multifunction Printer User Guide Loading Paper in the wc6505_011 wc6505_052...
-
Page 85: Printing On Cardstock
In the Print dialog box, click OK or Print to start printing. on page 85 on page 85 on page 86 WorkCentre 6505 Color Laser Multifunction Printer Printing , 37–60 lb. cover. , 60–80 lb. cover. Test all thick Loading Paper in... - Page 86 From the Paper Type list, select Lightweight Cardstock or Heavyweight Cardstock. From the Paper Tray list, select Manual Feed Slot. Click OK. In the Print dialog box, click OK or Print to start printing. WorkCentre 6505 Color Laser Multifunction Printer User Guide Loading Paper in the wc6505_012...
-
Page 87: Printing Custom Sizes
87 on page 89 on page 88 on page 88 on page 58. Creating a Custom Paper Size Through the on page 88. WorkCentre 6505 Color Laser Multifunction Printer Printing on page 87 on page 88 User Guide... - Page 88 From the Format For drop-down list, select the WorkCentre 6505. From the Paper Size drop-down list, select Manage Custom Sizes. In the Custom Paper Sizes window, click the plus (+) button to add the new custom size. WorkCentre 6505 Color Laser Multifunction Printer User Guide...
-
Page 89: Printing On Custom Size Paper
From the Paper Type list, select the paper type. From the Paper Tray list, select the tray to print from. on page 89 on page 89 Loading Paper Loading Paper WorkCentre 6505 Color Laser Multifunction Printer Printing on page 61. on page 61. User Guide... - Page 90 Printing Select any other desired options, then click OK. In the Print dialog box, click OK or Print to start printing. WorkCentre 6505 Color Laser Multifunction Printer User Guide...
-
Page 91: Printing On Both Sides Of The Paper
Flip on Short Edge on page 91 on page 92 on page 93. However, you can use the manual on page 58. Flip on Long Edge WorkCentre 6505 Color Laser Multifunction Printer Printing on page 93. Landscape Flip on Short Edge User Guide... -
Page 92: Automatic 2-Sided Printing
CAUTION: Use only paper specified for use with this printer. Damage caused by unsupported paper is not covered under the Xerox Guarantee. The Total Satisfaction Guarantee is available in the United States and Canada. Coverage can vary outside these areas. Please contact your local representative for details. - Page 93 If the paper looks skewed after the printer pulls it in, gently remove the paper and insert it again. on page 21. Enabling Optional Features Supported Paper WorkCentre 6505 Color Laser Multifunction Printer Printing on page 46. on page 58. User Guide...
- Page 94 From the Paper Type list, select the paper type. From the Paper Tray list, select Manual Feed Slot. Click OK. In the Print dialog box, specify the page you want to print. Click Print or OK to start printing. WorkCentre 6505 Color Laser Multifunction Printer User Guide...
-
Page 95: Printing Using Secure Print
To display a timestamp on the control panel, select Use Existing Name if you are using the PostScript driver, or Auto Retrieve for the PCL driver. Click OK. on page 95 on page 21. Enabling Optional Features WorkCentre 6505 Color Laser Multifunction Printer Printing on page 46. User Guide... -
Page 96: Printing A Secure Print Job
Any print jobs stored in the RAM are erased when the printer is switched off or loses power. See also: Storing a Print Job in Memory WorkCentre 6505 Color Laser Multifunction Printer User Guide Printing a Secure Print Job on page 95... -
Page 97: Printing Using Proof Print
One set of the job prints. Review this set. If the set is satisfactory, you can print the remaining sets from the control panel. For details, see on page 97 on page 21. Enabling Optional Features Printing a Proof Print Job WorkCentre 6505 Color Laser Multifunction Printer Printing on page 46. on page 98. User Guide... -
Page 98: Printing A Proof Print Job
Press OK. Note: Any print jobs stored in the RAM are erased when the printer is turned off or loses power. See also: Setting Up a Proof Print Job WorkCentre 6505 Color Laser Multifunction Printer User Guide on page 97... -
Page 99: Copying
Copying This chapter includes: • Basic Copying on page 100 • Adjusting Copying Options • Changing the Default Settings on page 102 on page 107 WorkCentre 6505 Color Laser Multifunction Printer User Guide... -
Page 100: Basic Copying
The Automatic Document Feeder (ADF) accommodates the following original sizes: • Width: 148 –216 mm (4.1 in. – 8.5 in.) • Length: 210 –355.6 mm (8.3 in. – 14 in.) WorkCentre 6505 Color Laser Multifunction Printer User Guide on page 102. wc6505_019 Document Feeder Insert originals face up with the top of the page entering the feeder first. -
Page 101: Document Glass
Paper with paper clips or staples attached • Paper with wrinkles, curls, folds, tears, or notches • Coated or carbonless paper or items other than paper such as cloth or metal • Envelopes (17–32 lb. Bond). wc6505_007 WorkCentre 6505 Color Laser Multifunction Printer Copying User Guide... -
Page 102: Adjusting Copying Options
Note: The Color Mode returns to the default setting after the copy job is complete. To modify the default setting, see Selecting the Default Copy Settings WorkCentre 6505 Color Laser Multifunction Printer User Guide Basic Copying on page 100. on page 105... -
Page 103: Selecting The Paper Supply
Text for black and white or colored text. • Mixed for both text and photographs, such as magazines or newspapers. Photo for photographs. • Note: The default setting is Mixed. Press OK to confirm the setting. WorkCentre 6505 Color Laser Multifunction Printer Copying User Guide... -
Page 104: Image Adjustments
Press the Up Arrow or Down Arrow button to select Sharpness, then press the OK button. Select a sharpness setting: • Sharper • Normal • Softer Note: The default setting is Normal. Press OK to confirm the setting. WorkCentre 6505 Color Laser Multifunction Printer User Guide on page 104 on page 104 on page 105... -
Page 105: Image Layout Adjustments
Auto copies two original pages, reduces the images, and prints them onto one side of a page. ID Card Copy copies two original size images onto one side of a page. The images are not • reduced. on page 105 WorkCentre 6505 Color Laser Multifunction Printer Copying User Guide... -
Page 106: Output Adjustments
Press the Up Arrow or Down Arrow button to select Collated, then press the OK button. Select an option: • Off turns collation off. • On turns collation on. Auto turns collation on. • Note: The default setting is Auto. Press OK to confirm the setting. WorkCentre 6505 Color Laser Multifunction Printer User Guide... -
Page 107: Changing The Default Settings
Press the Up Arrow or Down Arrow button to select Auto Exposure Level, then press the OK button. Select an auto exposure setting: on page 107 on page 109 on page 107 on page 108 on page 108 on page 108 WorkCentre 6505 Color Laser Multifunction Printer Copying User Guide... -
Page 108: Changing The Color Balance
Changing the Manual Feed Slot Paper Type To change the manual feed slot paper size: Press the Up Arrow or Down Arrow button to select M.F. Paper Type, then press the OK button. WorkCentre 6505 Color Laser Multifunction Printer User Guide... -
Page 109: Limiting Access To Copy Operations
Changing General Copy Default Settings You can change the default settings for the following general copy options: • 2-Sided • Paper Supply • Document Size • Document Type • Reduce/Enlarge • Lighten/Darken • Sharpness WorkCentre 6505 Color Laser Multifunction Printer Copying User Guide... - Page 110 Color Saturation • Auto Exposure On/Off • Special Copy Mode • Margin Top/Bottom • Margin Left/Right • Margin Center • Collated Note: For individual settings, see WorkCentre 6505 Color Laser Multifunction Printer User Guide Adjusting Copying Options on page 102.
- Page 111 Adjusting Scanning Options See also: Installation and Setup Overview on page 112 on page 114 on page 115 on page 116 on page 118 on page 120 on page 28 WorkCentre 6505 Color Laser Multifunction Printer on page 113 User Guide...
-
Page 112: Scanning
Note: For details, see Automatic Document Feeder Guidelines WorkCentre 6505 Color Laser Multifunction Printer User Guide wc6505_019 Document Feeder Insert originals face up with the top of the page entering the feeder first. Adjust the paper guides so they fit against the originals. -
Page 113: Scanning To A Folder On A Computer With A Usb Connection
Adjusting Scan Settings Press the Start button to begin the scan. ® A Xerox WorkCentre 6505 (USB) scanner dialog box opens on your computer, where you select which application to launch to manage the scanned file. Select WorkCentre 6505 Express Scan Manager, then click OK. -
Page 114: Scanning To A Usb Flash Drive
Yes prompts you to place the next page on the document glass. Select Continue or Cancel the Action. Press OK. The printer scans your images to the folder you specified. WorkCentre 6505 Color Laser Multifunction Printer User Guide on page 120. -
Page 115: Scanning To A Shared Folder On A Network Computer
Yes prompts you to place the next page on the document glass. Select Continue or Cancel the Action. Press OK. The printer scans the documents to the shared folder on your computer. on page 115 Connecting the Printer on page 30. Adjusting Scanning Options WorkCentre 6505 Color Laser Multifunction Printer Scanning User Guide... -
Page 116: Scanning To An Email Address
Yes prompts you to place the next page on the document glass. Select Continue or Cancel the Action. Press OK. The printer scans your documents, and sends them as email attachments of the default file type. See also: Adjusting Scanning Options WorkCentre 6505 Color Laser Multifunction Printer User Guide on page 120... -
Page 117: Scanning To An Ftp Server
Press the Up Arrow or Down Arrow button to select the FTP address, then press OK. Press the Start button to begin the scan. The printer scans the document and places the image on the FTP server. See also: Adjusting Scanning Options on page 120 WorkCentre 6505 Color Laser Multifunction Printer Scanning User Guide... -
Page 118: Scanning Images Into An Application
In the application, select the menu item to acquire the image. For example, if you are using Microsoft Word 2003, to place an image in a document: Select Insert. WorkCentre 6505 Color Laser Multifunction Printer User Guide on page 118... -
Page 119: Scanning An Image Into A Macintosh Os X Application
For more information, click the Help button to view the online help. Press the Scan button to begin the scan. The printer scans the document and places the image in your application. WorkCentre 6505 Color Laser Multifunction Printer Scanning User Guide... -
Page 120: Adjusting Scanning Options
If the original image contains color, you can scan the image in color or in black and white. Selecting black and white significantly reduces the file size of the scanned images. WorkCentre 6505 Color Laser Multifunction Printer User Guide on page 123... -
Page 121: Setting The Scan Resolution
Specifying the Scanned Image File Format To specify the file format of the scanned image: Press the Up Arrow or Down Arrow button to select File Format, then press the OK button. Select a file type: WorkCentre 6505 Color Laser Multifunction Printer Scanning User Guide... -
Page 122: Automatically Suppressing Background Variations
Press OK. Adjusting Image Contrast Press the Up Arrow or Down Arrow button to select Contrast, then press the OK button. Select an option: • Higher Normal • • Lower Press OK. WorkCentre 6505 Color Laser Multifunction Printer User Guide... -
Page 123: Changing The Default Scan Settings
Press the Up Arrow or Down Arrow button to select a setting: on page 123 on page 124 on page 124 on page 124 on page 125 on page 125 on page 125 WorkCentre 6505 Color Laser Multifunction Printer Scanning User Guide... - Page 124 Setting the TIFF File Format Press the Up Arrow or Down Arrow button to select TIFF File Format, then press the OK button. Select a setting: TIFF V6 • • TTN2 Press OK. WorkCentre 6505 Color Laser Multifunction Printer User Guide...
-
Page 125: Limiting Access To Scan Operations
If prompted, enter the four-digit password, then press OK. Select Secure Settings, then press OK. Select Service Lock, then press OK. Select an option: • Scan to Computer Adjusting Scan Settings on page 120. WorkCentre 6505 Color Laser Multifunction Printer Scanning User Guide... - Page 126 • • Locked turns on the service lock, disabling the scan function. • Password Locked requires a password to use the scan function. Enter a new password, then press OK. Press OK. WorkCentre 6505 Color Laser Multifunction Printer User Guide...
- Page 127 Changing the Default Fax Job Settings • Managing Fax Functions on page 140 See also: Installation and Setup Overview on page 128 on page 132 on page 137 on page 139 on page 28 WorkCentre 6505 Color Laser Multifunction Printer User Guide...
-
Page 128: Faxing
Note: For details, see Automatic Document Feeder Guidelines WorkCentre 6505 Color Laser Multifunction Printer User Guide wc6505_019 Document Feeder Insert originals face up with the top of the page entering the feeder first. -
Page 129: Basic Faxing
If monitor reports are set to print, the report shows the fax transmission status. For details, Printing Monitor Reports on page 129 on page 130 on page 133. on page 136. on page 136. on page 137. on page 140. WorkCentre 6505 Color Laser Multifunction Printer Faxing Faxing to an User Guide... -
Page 130: Sending A Fax From Your Computer
11. To delay sending the fax, select the Delayed Send check box, then adjust the delay time. 12. Click Start Sending to send the fax. Note: To stop a fax from sending, click the Stop button. WorkCentre 6505 Color Laser Multifunction Printer User Guide on page 132 on page 140... -
Page 131: Sending A Fax Using Macintosh Applications
Faxing Sending a Fax Using Macintosh Applications To send a fax from a Macintosh OS X version 10.5 and later computer, download the latest driver from www.xerox.com/office/WC6505drivers. WorkCentre 6505 Color Laser Multifunction Printer User Guide... -
Page 132: Using The Fax Address Book
Three-digit speed dial entries are assigned automatically in CentreWare Internet Services. To add an individual entry using the Address Book Editor: Access the Address Book Editor: Windows: On the Start menu, select Programs > Xerox > WorkCentre 6505 > Address Book • Editor. -
Page 133: Faxing To A Group
• Macintosh: Open the Applications folder, select Xerox/WorkCentre 6505/Address Book Editor, then click OK. In the left pane, right-click the Fax icon, then select New > New Entry. The Speed Dial dialog box appears. The Address Book Editor automatically assigns the speed dial number to the first empty entry. - Page 134 To create a fax group using the Address Book Editor: Access the Address Book Editor: • Windows: On the Start menu, select Programs > Xerox > WorkCentre 6505 > Address Book Editor. • Macintosh: Open the Applications folder, and then select Xerox/WorkCentre 6505/Address Book Editor, and then click OK.
- Page 135 To edit an existing fax group using the Address Book Editor: Access the Address Book Editor: • Windows: On the Start menu, select Programs > Xerox > WorkCentre 6505 > Address Book Editor. • Macintosh: Open the Applications folder, and then select Xerox/WorkCentre 6505/Address Book Editor, then click OK.
- Page 136 Use the alphanumeric keypad to enter the search text, then press OK. Press the Up Arrow or Down Arrow button to scroll through the server address book results. Press OK to select the entry. Press OK. WorkCentre 6505 Color Laser Multifunction Printer User Guide...
-
Page 137: Selecting Fax Options For Single Jobs
On the control panel, press the Fax button. Press the Up Arrow or Down Arrow button to select On Hook, then press the OK button. on page 137 on page 137 on page 138 WorkCentre 6505 Color Laser Multifunction Printer Faxing User Guide... -
Page 138: Sending A Delayed Fax
To turn on Polling: On the control panel, press the Fax button. Press the Up Arrow or Down Arrow button to select Polling, then press the OK button. Select On, then press OK. WorkCentre 6505 Color Laser Multifunction Printer User Guide... -
Page 139: Changing The Default Fax Job Settings
If prompted, enter the password, then press OK. Select Fax Settings, then press OK. Edit the fax settings as desired. Press OK. For information on the Fax Settings menu items, see Fax Settings on page 153. WorkCentre 6505 Color Laser Multifunction Printer Faxing User Guide... -
Page 140: Managing Fax Functions
Print at Error prints a monitor report when an error occurs with the fax transmission. Print Disabled does not print a monitor report. • The default setting is Print Always. Press OK. WorkCentre 6505 Color Laser Multifunction Printer User Guide on page 141 on page 141 on page 142... -
Page 141: Enabling Or Disabling Secure Faxes
Select Service Lock, then press OK. Select Fax, then press OK. Select an option: • Unlocked turns off the service lock. Locked turns on the service lock, disabling the fax function. • WorkCentre 6505 Color Laser Multifunction Printer Faxing User Guide... -
Page 142: Limiting Who Can Send Faxes To The Printer
On only receives faxes from phone numbers in the printer address book. Press OK. Limiting Access to Fax Operations The Fax Lock options limit access to fax operations. To set the password: On the control panel, press the System button. WorkCentre 6505 Color Laser Multifunction Printer User Guide... -
Page 143: Printing Fax Reports
If necessary, press the Redial/Pause button to insert a pause, represented by a hyphen. Press the Redial/Pause button multiple times to add additional pauses. Note: Press the Start button to send the fax. WorkCentre 6505 Color Laser Multifunction Printer Faxing User Guide... - Page 144 Faxing WorkCentre 6505 Color Laser Multifunction Printer User Guide...
-
Page 145: Control Panel Menus
Control Panel Menus This chapter includes: • Navigating the Control Panel Menus • System Menus on page 147 on page 146 WorkCentre 6505 Color Laser Multifunction Printer User Guide... -
Page 146: Navigating The Control Panel Menus
Return Power Saver Stop Clear All Redial/Pause Speed Dial WorkCentre 6505 Color Laser Multifunction Printer User Guide Description Allows you to change job settings for copy jobs. Allows you to change job settings for scan jobs. Prints from USB memory. -
Page 147: System Menus
Allows you to select the language that appears on the control panel. Admin Menu on page 149. on page 161 on page 163 on page 162 on page 163 WorkCentre 6505 Color Laser Multifunction Printer Control Panel Menus Information Pages Billing Meters User Guide... -
Page 148: Information Pages
The Billing Meters menu shows the number of processed print jobs. The meter is divided according to the color modes. You cannot print the billing meters and you cannot reset them; they track the total number of pages printed for the life of the printer. WorkCentre 6505 Color Laser Multifunction Printer User Guide Auto Log Print... -
Page 149: Admin Menu
Use this menu to create, edit, and delete speed dial and group dial numbers. Item Description Speed Dial Create, edit, and delete speed dial address book entries. Group Dial Create, edit, and delete speed dial group entries. on page 176. WorkCentre 6505 Color Laser Multifunction Printer Control Panel Menus User Guide... -
Page 150: Pcl Settings
Add-CR: The Carriage Return command is added. • CR-XX: The Line Feed and Carriage Return commands are both added. Default Color Specifies the default color mode: Black or Color. The default setting is Black. WorkCentre 6505 Color Laser Multifunction Printer User Guide... -
Page 151: Pdf Settings
Use this menu to specify PostScript settings. Item Description PS Error Report Turns the PostScript error report off or on. PS Job Time-Out Turns the PostScript job time-out off or on. WorkCentre 6505 Color Laser Multifunction Printer Control Panel Menus User Guide... -
Page 152: Network Setup
• Email Alerts: The default setting is Enable. • CentreWare IS: The default setting is Enable. • Bonjour (mDNS): The default setting is Enable. • Telnet • Update Addr Book • LLTD WorkCentre 6505 Color Laser Multifunction Printer User Guide... -
Page 153: Fax Settings
Specify values from 0 through 255 seconds. Auto Ans. When ANS/FAX Mode is enabled, specifies how long the printer waits before answering an Ans/FAX incoming call. Specify values from 0 through 255 seconds. WorkCentre 6505 Color Laser Multifunction Printer Control Panel Menus User Guide... - Page 154 Specifies your telephone number, which is printed at the top of each page sent from your printer. Fax Cover When set to On, automatically prints a fax cover page. When set to Off, does not print a fax Page cover page. WorkCentre 6505 Color Laser Multifunction Printer User Guide...
- Page 155 Specifies a distinctive ring pattern for use with DRPD service. Your telephone company Pattern specifies the DRPD Patterns. The patterns provided with your multifunction printer are shown here, with Pattern 1 at the top and Pattern 5 at the bottom: 2-Sided Print Turns 2-sided printing on or off.
-
Page 156: Usb Setup
Use this menu to configure the USB port. Item Description Port Status Enables or disables the USB port. Adobe Protocol Specifies the Adobe protocol: • • TBCP • Binary • Auto • Standard WorkCentre 6505 Color Laser Multifunction Printer User Guide... -
Page 157: System Setup
Specifies the date and time, and the format of the settings: • Set Date & Time. • Date Format: Select yy/mm/dd, mm/dd/yy, or dd/mm/yy. • Time Format: Select 12H or 24H format. Energy Saver Mode on page 23. WorkCentre 6505 Color Laser Multifunction Printer Control Panel Menus User Guide... - Page 158 Text data is printed on A4 or Letter size paper. • Off: Does not print the received data. The default setting is Off. • On: Prints the received data as text data. WorkCentre 6505 Color Laser Multifunction Printer User Guide on page 24.
-
Page 159: Maintenance
Initializes the print counts. Reset Fuser Resets the count for fuser life to 0. Imaging Unit Refresh Helps improve imaging unit performance by performing a density and color curve calibration. Color Registration WorkCentre 6505 Color Laser Multifunction Printer Control Panel Menus User Guide... -
Page 160: Secure Settings
Panel Lock must be enabled before setting the service locks. Secure Receive Turns Secure Receive Set on or off. Login Error When enabled, specifies the number of login attempts to make, from 1 through 10 times. WorkCentre 6505 Color Laser Multifunction Printer User Guide on page 142. Changing... -
Page 161: Default Settings
Adjusts the Auto Exposure level. Color Balance Adjusts the color levels of your copies. 2-Sided Specifies 2-sided copying options: • 1->1-Sided • Long Edge Binding • Short Edge Binding Changing the Default Settings WorkCentre 6505 Color Laser Multifunction Printer Control Panel Menus User Guide... -
Page 162: Scan Defaults
Turns on and off the copy margins for the middle of the page. Use to create a gutter in the middle of the page when you print using the N-up or booklet features. TIFF File Format Sets the TIFF file format: TIFF V6 or TTN2. WorkCentre 6505 Color Laser Multifunction Printer User Guide Adjusting Scanning Options... -
Page 163: Tray Settings
Specifies a password to enter to print a PDF file. Use the alphanumeric keypad to enter a password up to 32 characters. Tray Settings Use this menu to configure settings for paper trays installed in the printer. Changing the Default Fax Job Settings WorkCentre 6505 Color Laser Multifunction Printer Control Panel Menus User Guide... - Page 164 Specifies whether to display the message that prompts you to set the paper size and type every time you load paper in the tray. The default setting is Off. WorkCentre 6505 Color Laser Multifunction Printer User Guide on page 58, and...
-
Page 165: Maintenance
Cleaning the Printer on page 166 • Ordering Supplies on page 169 • Managing the Printer on page 171 • Checking Page Counts on page 176 • Moving the Printer on page 178 WorkCentre 6505 Color Laser Multifunction Printer User Guide... -
Page 166: Cleaning The Printer
Do not touch the electrical contacts, gears, or laser devices. Doing so could damage the printer and cause the print quality to deteriorate. • Make sure any parts removed during cleaning are reinstalled before you plug in the printer. WorkCentre 6505 Color Laser Multifunction Printer User Guide on page 167... -
Page 167: Cleaning The Document Glass
Do not spray the detergent directly on the printer. The liquid detergent could enter the printer through a gap and cause problems. Never use cleaning agents other than water or neutral detergent. wc6505_031 WorkCentre 6505 Color Laser Multifunction Printer Maintenance User Guide... -
Page 168: Cleaning The Interior
If a sheet of paper is wrapped around the heat roller, do not try to remove it immediately to avoid injuries or burns. Switch off the printer immediately and wait 40 minutes for the fuser to cool. WorkCentre 6505 Color Laser Multifunction Printer User Guide Clearing Paper Jams Fuser 2. -
Page 169: Ordering Supplies
Although the transfer belt unit is not considered a routine maintenance item, if it becomes damaged, you can order another one. You can also order a duplex unit. To order routine maintenance items, contact your local Xerox ® your local Xerox customer service representative, or go to the Xerox www.xerox.com/office/WC6505supplies. -
Page 170: Recycling Supplies
Maintenance avoid interruptions to your printing. The control panel displays an error message when the supply must be replaced. To order supplies, contact your local reseller or go to the Xerox www.xerox.com/office/WC6505supplies. CAUTION: Use of non-Xerox Agreements, and Total Satisfaction Guarantee do not cover damage, malfunction, or degradation... -
Page 171: Managing The Printer
To view the status of print jobs from the main menu in CentreWare Internet Services, click the Jobs button or tab. on page 171 on page 172 on page 173 on page 171 on page 171 CentreWare Internet Services WorkCentre 6505 Color Laser Multifunction Printer Maintenance on page 25. User Guide... -
Page 172: Checking Printer Status With Printingscout
In the Windows taskbar, double-click the PrintingScout icon. • • From the Start menu, select Programs > Xerox PrintingScout. The status of the printer is displayed in the General Status window that opens. For information on using PrintingScout, see the PrintingScout help. To see Help in the Windows taskbar, right-click the PrintingScout icon and select Help. -
Page 173: Checking Printer Status Using Email
11. In the Email Filter (Filters Email received by the device) section, enter the email addresses of the users who are permitted to send email to the printer. If no address is specified here, the printer can receive email from all users. on page 174 WorkCentre 6505 Color Laser Multifunction Printer Maintenance User Guide... - Page 174 Examples of Commands • To check the printer status when the read-only password is ronly, for read only, use: #Password ronly #Status WorkCentre 6505 Color Laser Multifunction Printer User Guide Parameter Description Password Use this command at the top of the email when a password for read only or full access is set.
- Page 175 • To set the recipient email address to service@xerox.com when the full access password is admin, use: #Password admin #SetMsgAddr service@xerox.com • To set the recipient email address to service@xerox.com, and confirm the setting result on the network settings list when the full access password is admin, use: #Password admin #SetMsgAddr service@xerox.com...
-
Page 176: Checking Page Counts
At Information Pages, press the OK button. Press the Up Arrow or Down Arrow button to select Print Meter, then press OK. Press OK. The Print Volume Report prints. WorkCentre 6505 Color Laser Multifunction Printer User Guide on page 176... - Page 177 Maintenance See also: Information Pages on page 24 Managing the Printer with CentreWare Internet Services on page 171 WorkCentre 6505 Color Laser Multifunction Printer User Guide...
-
Page 178: Moving The Printer
For details on how to uninstall the options, refer to the instruction sheet that is bundled with each option. WARNING: To avoid injury, use two people to lift the printer off the lower feeder unit. WorkCentre 6505 Color Laser Multifunction Printer User Guide... - Page 179 Reconnect the printer to the cables and power cord. Plug in and turn on the printer. Adjust the color registration before using the printer. For details, see page 199. 30 kg 66.1 lb. wc6505_002 Color Registration WorkCentre 6505 Color Laser Multifunction Printer Maintenance User Guide...
- Page 180 Maintenance WorkCentre 6505 Color Laser Multifunction Printer User Guide...
-
Page 181: Troubleshooting
191 • Cleaning the Imaging Unit and Laser Lens • Color Registration on page 199 • Color Balance on page 203 • Paper Jams on page 204 on page 196 WorkCentre 6505 Color Laser Multifunction Printer User Guide... -
Page 182: Troubleshooting Overview
You can find solutions for print-quality problems, paper jams, software installation, and more. To access the Online Support Assistant, go to www.xerox.com/office/WC6505support. Information Pages Two information pages in the printer, the Demo Page and the Error History report, can help with troubleshooting certain problems. -
Page 183: More Information
Contacts Printer registration Material Safety Data Sheets identify materials and provide information on safely handling and storing hazardous materials. Information about recycling supplies. Link www.xerox.com/office/WC6505support www.xerox.com/office/WC6505supplies www.xerox.com/office/businessresourcecenter www.xerox.com/office/worldcontacts www.xerox.com/office/register www.xerox.com/environment_europe (European Union) www.xerox.com/msds (U.S. and Canada) www.xerox.com/gwa... -
Page 184: Control Panel Messages
Insert Fuser 010-317 Replace Imaging Unit Insert Imaging Unit Insert Xxx Cartridge Replace Xxx Cartridge Invalid Xxx ® Non-Xerox Toner Low Density Xxx Cartridge WorkCentre 6505 Color Laser Multifunction Printer User Guide Condition/Reason/Solution Time to replace the fuser. Replace the old fuser with a new one and then restart the printer. -
Page 185: Error Messages
There is a paper misfeed at the duplex unit. Press the button to open the front cover, then remove the jammed paper. For details, see Clearing Jams at the Duplex Unit WorkCentre 6505 Color Laser Multifunction Printer Troubleshooting on page 169. Clearing Jams at the 250- Clearing Jams at the Manual Feed Slot on page 208. - Page 186 Press OK Button Error 016-718 Collate Full Press OK Button Error 116-721 WorkCentre 6505 Color Laser Multifunction Printer User Guide Condition/Reason/Solution Paper is jammed inside the printer. Open the front cover and remove the paper. There is a paper misfeed at the registration roller that helps align the paper in the printer path.
- Page 187 Press the OK button to clear the message, cancel the current print job, and conduct the next print job, if any. Error 016-720 Press the Cancel button to cancel the print job. WorkCentre 6505 Color Laser Multifunction Printer Troubleshooting User Guide...
-
Page 188: Problems With The Printer
Probable causes of trouble are that the printer, computer, server, or other hardware is not correctly set for the network environment you are using. Symptom No power. Cannot print. WorkCentre 6505 Color Laser Multifunction Printer User Guide Troubleshooting Overview Reason/Solution Is the power to the printer turned off? Press the power button to the On position to turn on the power. - Page 189 An error has occurred that you cannot correct by yourself. Record the displayed error message or error code, turn off the power, and disconnect the power plug from the outlet. Refer to the Xerox website at www.xerox.com/office/WC6505support. Light of the Ready indicator is There are jobs remaining in the printer.
- Page 190 The paper tray is not inserted properly. Push the paper tray completely into the printer. There is a foreign object inside the printer. Turn off the printer and remove the foreign object. Refer to the Xerox Support website at www.xerox.com/office/WC6505support. Loading Paper Paper Storage on page 56.
-
Page 191: Print-Quality Problems
You can also print a demo page to more precisely determine the print-quality problem. For details, see If the print quality does not improve after carrying out the appropriate action, contact Xerox Customer Support or your reseller. - Page 192 Vertical black or color streaks or multiple colored streaks or lines. • Streaks in only one color. Recurring smudges. WorkCentre 6505 Color Laser Multifunction Printer User Guide Cause Solution The paper is outside the Replace the paper with a recommended...
- Page 193 ® toner cartridges. specifications and replace if necessary. For details, see page 169. Replace the transfer belt unit. For assistance, see the Xerox website at: www.xerox.com/office/WC6505support Replace the paper. Also, see Storage Guidelines Replace the paper with a recommended size and type, then confirm that your print driver settings are correct.
- Page 194 Turn on the printer and leave it on for at causes partial blanks or creased least one hour to get rid of the paper. condensation. If the problems still occur, for assistance see the Xerox website: www.xerox.com/office/WC6505support The laser is being blocked. Remove the imaging unit and clean all debris from the laser lens with a lint-free cloth.
- Page 195 Cause Colors are blurry or there is Color-to-color alignment is not white area around objects. correct. Solution Perform an automatic color registration adjustment. For details, see Registration on page 199. WorkCentre 6505 Color Laser Multifunction Printer Troubleshooting Color User Guide...
-
Page 196: Cleaning The Imaging Unit And Laser Lens
Fold down the transfer belt unit, being careful not to touch its shiny surface. Using a flashlight, inspect the gaps in the imaging unit and remove any paper debris from the area. WorkCentre 6505 Color Laser Multifunction Printer User Guide wc6505_039... - Page 197 Using a clean, dry, lint-free cloth or swab, clean all debris from the laser lens. Check for and remove any debris around the imaging unit gears located on the left side of the unit. Internal View wc6505_040 WorkCentre 6505 Color Laser Multifunction Printer Troubleshooting on page 19. wc6505_041 wc6505_042...
- Page 198 Turn the four twist-locks to the right to lock the unit. 11. Fold the transfer belt unit back into place and close the printer front cover. WorkCentre 6505 Color Laser Multifunction Printer User Guide wc6505_043...
-
Page 199: Color Registration
Printing the Color Registration Correction Chart • Determining the Color Registration Values • Entering Color Registration Values on page 199 on page 199 on page 199 on page 200. on page 200. on page 201. WorkCentre 6505 Color Laser Multifunction Printer Troubleshooting User Guide... - Page 200 Identify the column of white that is the straightest. Refer to the enlarged illustration on the chart that shows how to determine the closest number. For each color, do one of the following: WorkCentre 6505 Color Laser Multifunction Printer User Guide on page 200 to determine if any...
- Page 201 Press the Up Arrow or Down Arrow button to select Color Regi Char, then press OK. Press the Up Arrow or Down Arrow button to select Yes, then press OK. Note: For details, see Printing the Color Registration Correction Chart Entering Color on page 200. WorkCentre 6505 Color Laser Multifunction Printer Troubleshooting User Guide...
- Page 202 11. If 0 is not displayed next to the straight lines, examine the chart and determine additional correction values. 12. When satisfied that the horizontal adjustment is complete, press the Return button to return to the Ready screen. WorkCentre 6505 Color Laser Multifunction Printer User Guide...
-
Page 203: Color Balance
Press the Up Arrow or Down Arrow button to select Drum Refresh, then press OK. At the Are you sure? prompt, press OK. The process runs automatically. Wait about three minutes for the process to complete and the printer to return to Ready. WorkCentre 6505 Color Laser Multifunction Printer Troubleshooting User Guide... -
Page 204: Paper Jams
Technical Support for additional assistance. Turn off the printer to remove jammed paper that is difficult or impossible to see. WARNING: The fuser and the surrounding area are hot and can cause burns. WorkCentre 6505 Color Laser Multifunction Printer User Guide Supported Paper and... -
Page 205: Clearing Paper Jams
CAUTION: If it is difficult to open the front cover, do not force it. Turn off the printer using the power switch on the right side of the printer. For additional assistance, refer to the Xerox website at www.xerox.com/office/WC6505support. Clearing Jams at Tray 1 Pull the paper tray open. - Page 206 Press the front cover button to open the cover. Carefully remove any jammed paper in the printer. Make sure that there are no torn pieces of paper inside the printer. WorkCentre 6505 Color Laser Multifunction Printer User Guide wc6505_023 wc6505_025...
- Page 207 Do not expose the imaging unit to any light source for more than 5 minutes. Prolonged exposure to light can damage the unit. Do not touch the shiny black transfer belt unit. For additional assistance, refer to the Xerox www.xerox.com/office/WC6505support Press the front cover button on the side of the printer and open the printer cover.
- Page 208 Press the front cover button and open the printer cover. WARNING: Some components inside the printer, such as the fuser and surrounding area, are hot and can cause burns. CAUTION: Prolonged exposure to light can damage the imaging unit. WorkCentre 6505 Color Laser Multifunction Printer User Guide wc6505_046...
- Page 209 Close the duplex unit, then close the printer cover. Note: To remove the entire duplex unit, after opening the front cover of the printer, press the front cover-release button again to release the duplex unit. wc6505_047 wc6505_048 WorkCentre 6505 Color Laser Multifunction Printer Troubleshooting User Guide...
- Page 210 Troubleshooting WorkCentre 6505 Color Laser Multifunction Printer User Guide...
-
Page 211: Printer Specifications
Printer Specifications This chapter includes: • Physical Specifications on page 212 • Environmental Specifications • Electrical Specifications on page 214 • Performance Specifications on page 213 on page 215 WorkCentre 6505 Color Laser Multifunction Printer User Guide... -
Page 212: Physical Specifications
Physical Specifications Weights and Dimensions Part Printer 250-Sheet Feeder (optional) Duplex Unit (optional) WorkCentre 6505 Color Laser Multifunction Printer User Guide Specifications Width: 430 mm (16.9 in.) Depth: 544 mm (21.4 in.) Height: 584 mm (23 in.) Weight: 30 Kg (66.13 lb.) Width: 419 mm (16.5 in.) -
Page 213: Environmental Specifications
Under extreme environment conditions, such as 10°C and 85%RH, defects can occur due to condensation approximately 30 minutes after the printer is turned on. 15–85% RH at 28°C (82°F) Elevation For optimum performance, use the printer at elevations below 3,100 m (10,170 ft.). WorkCentre 6505 Color Laser Multifunction Printer Printer Specifications User Guide... -
Page 214: Electrical Specifications
This printer does not consume electric power when the power switch is turned off even if the printer is connected to an AC outlet. • qualified multifunction printer NERGY • Default time settings: 30 minutes and 5 minutes WorkCentre 6505 Color Laser Multifunction Printer User Guide... -
Page 215: Performance Specifications
Color: 16 ppm (A4)/17 ppm (Letter) Black and White: 16 ppm (A4)/17 ppm (Letter) Standard: 600 x 600 dpi x 1-bit Enhanced: 600 x 600 dpi x 4-bit (PostScript driver)/5-bit (PCL driver) WorkCentre 6505 Color Laser Multifunction Printer Printer Specifications User Guide... - Page 216 Printer Specifications WorkCentre 6505 Color Laser Multifunction Printer User Guide...
-
Page 217: Regulatory Information
• Electromagnetic Interference • Other Regulations on page 220 • Copy Regulations on page 221 • Fax Regulations on page 224 • Material Safety Data Sheets on page 218 on page 227 WorkCentre 6505 Color Laser Multifunction Printer User Guide... -
Page 218: Electromagnetic Interference
• Consult the dealer or an experienced radio/television technician for help. Any changes or modifications not expressly approved by Xerox operate the equipment. To ensure compliance with Part 15 of the FCC rules, use shielded interface cables. Canada Regulations This Class B digital apparatus complies with Canadian ICES-003. -
Page 219: European Union
This product, if used properly in accordance with the instructions, is not dangerous for the consumer or to the environment. To ensure compliance with European Union regulations, use shielded interface cables. A signed copy of the Declaration of Conformity for this product can be obtained from Xerox Regulatory Information ®... -
Page 220: Other Regulations
Regulatory Information Other Regulations Turkey (RoHS Regulation) In compliance with Article 7 (d), we hereby certify: "It is in compliance with the EEE Regulation." "EEE yönetmeli ine uygundur." ð WorkCentre 6505 Color Laser Multifunction Printer User Guide... -
Page 221: Copy Regulations
Stamps and other representatives of value, of whatever denomination, which have been or may be issued under any Act of Congress. • Adjusted Compensation Certificates for Veterans of the World Wars. Obligations or Securities of any Foreign Government, Bank, or Corporation. Regulatory Information WorkCentre 6505 Color Laser Multifunction Printer User Guide... -
Page 222: Canada
Canada or a department, board, Commission or agency established by the Government of Canada or of a province or of a government of a state other than Canada. WorkCentre 6505 Color Laser Multifunction Printer User Guide... -
Page 223: Other Countries
Postage stamps and other negotiable instruments This list is not inclusive and no liability is assumed for either its completeness or accuracy. In case of doubt, contact your legal counsel. Regulatory Information WorkCentre 6505 Color Laser Multifunction Printer User Guide... -
Page 224: Fax Regulations
To order the correct service from the local telephone company, you could also have to quote the codes in the following list: • Facility Interface Code (FIC) = 02LS2 WorkCentre 6505 Color Laser Multifunction Printer User Guide... -
Page 225: Canada
Ask your local telephone company for the modular jack type installed on your line. Connecting this machine to an unauthorized jack can damage telephone company equipment. You, not Xerox®, assume all responsibility and/or liability for any damage caused by the connection of this machine to an unauthorized jack. -
Page 226: European Union
DTMF signaling. DTMF signaling provides reliable and faster call setup. Modification of this product, connection to external control software or to external control apparatus not authorized by Xerox South African Statement This modem must be used in conjunction with an approved surge protection device. -
Page 227: Material Safety Data Sheets
Material Safety Data Sheets For Material Safety Data information regarding your WorkCentre 6505 printer, go to: • North America: www.xerox.com/msds • European Union: www.xerox.com/environment_europe For Customer Support Center phone numbers, go to www.xerox.com/office/worldcontacts. Regulatory Information WorkCentre 6505 Color Laser Multifunction Printer User Guide... - Page 228 Regulatory Information WorkCentre 6505 Color Laser Multifunction Printer User Guide...
-
Page 229: Recycling And Disposal
Special handling may apply. For details, see www.dtsc.ca.gov/hazardouswaste/perchlorate. North America ® Xerox operates an equipment take back and reuse/recycle program. Contact your Xerox representative (1-800-ASK-XEROX) to determine whether this Xerox For more information about Xerox recycling and disposal information, contact your local authorities. Other Countries Please contact your local waste authorities and request disposal guidance. - Page 230 In accordance with European legislation, end-of-life electrical and electronic equipment subject to disposal must be managed within agreed procedures. Prior to disposal, please contact your local reseller or Xerox information. WorkCentre 6505 Color Laser Multifunction Printer User Guide ®...
-
Page 231: Note For The Battery Symbol
This wheeled bin symbol may be used in combination with a chemical symbol. This establishes compliance with the requirements set out by the Directive. Removal Batteries should only be replaced by a MANUFACTURER-approved service facility. Recycling and Disposal WorkCentre 6505 Color Laser Multifunction Printer User Guide... - Page 232 Recycling and Disposal WorkCentre 6505 Color Laser Multifunction Printer User Guide...