Table of Contents
Advertisement
Advertisement
Table of Contents

Related Manuals for Whirlpool Gold GGE388LX


Summary of Contents for Whirlpool Gold GGE388LX
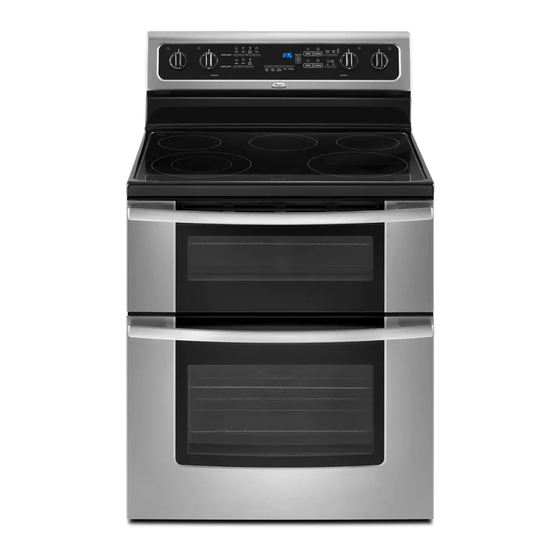
- Page 1 ® ELECTRIC DOUBLE OVEN RANGE Use & Care Guide For questions about features, operation/performance, parts, accessories or service, call: 1-800-253-1301. or visit our website at... www.whirlpool.com Table of Contents ...2 Models GGE388LX, GGE390LX W10291450A...
-
Page 2: Table Of Contents
RANGE SAFETY ...3 The Anti-Tip Bracket ...3 COOKTOP USE ...5 Cooktop Controls...5 Dual Size Element ...5 Warm Zone...6 Ceramic Glass ...6 Home Canning ...7 Cookware ...7 ELECTRONIC OVEN CONTROLS...8 Display...8 Cancel ...8 Oven Lights ...8 Kitchen Timer ...8 Settings ...8 Oven Temperature Control ...10... -
Page 3: Range Safety
The range will not tip during normal use. However, the range can tip if you apply too much force or weight to the open door without having the anti-tip bracket fastened down properly. -
Page 4: Important Safety Instructions
UNDER ANTI-TIP BRACKET. CAUTION: ■ Do not store items of interest to children in cabinets above a range or on the backguard of a range – children climbing on the range to reach items could be seriously injured. ■ Proper Installation – Be sure the range is properly installed and grounded by a qualified technician. -
Page 5: Cooktop Use
This manual covers different models. The range you have purchased may have some or all of the items listed. The locations and appearances of the items shown here may not match those of your model. A. Surface cooking area locator B. -
Page 6: Warm Zone
A. Dual element control - left side B. Single element control - right side To Use Single Element: 1. Push in and turn the control knob counterclockwise from the OFF position to the Single zone anywhere between HI and 2. Push in and turn knob to OFF when finished. To Use Dual Element: 1. -
Page 7: Home Canning
■ Use flat-bottomed cookware for best heat conduction and energy efficiency. Cookware with rounded, warped, ribbed or dented bottoms could cause uneven heating and poor cooking results. ■ Determine flatness by placing the straight edge of a ruler across the bottom of the cookware. While you rotate the ruler, no space or light should be visible between it and the cookware. -
Page 8: Electronic Oven Controls
ELECTRONIC OVEN CONTROLS This manual covers different models. The range you have purchased may have some or all of the items listed. The locations and appearances of the items shown here may not match those of your model. A. Upper oven settings B. - Page 9 Fahrenheit and Celsius The temperature is factory preset to Fahrenheit, but can be changed to Celsius. 1. Press SETTINGS once. “TEMP UNIT” appears in the upper text area while “Fahrenheit press (^) for Celsius” will scroll twice from right to left in the lower text area.
-
Page 10: Oven Temperature Control
12-Hour Auto Off The oven control is set to automatically shut off the oven 12 hours after the oven turns on. This will not interfere with any timed or delayed cook function. To Cancel 12-Hour Auto Off: 1. Press SETTINGS nine times until “12 Hr AUTO_OFF” appears in the upper text area and “ON. -
Page 11: Oven Use
Odors and smoke are normal when the oven is used the first few times, or when it is heavily soiled. IMPORTANT: The health of some birds is extremely sensitive to the fumes given off. Exposure to the fumes may result in death to certain birds. -
Page 12: Bakeware
BAKEWARE To cook food evenly, hot air must be able to circulate. Allow 2" (5.0 cm) of space around bakeware and oven walls. Use the following chart as a guide. NUMBER POSITION ON RACK OF PAN(S) Center of rack. Side by side or slightly staggered. 3 or 4 Opposite corners on each rack. -
Page 13: Broiling
To Bake or Roast: 1. Press the BAKE keypad for desired oven. “BAKE” will scroll in the upper or lower text area (depending on oven selection), and 350°F (175°C) will be displayed. After 3 seconds, “Set temp or” will scroll in the selected oven text area, followed by “Push START.”... -
Page 14: Toasting - Upper Oven Only
BROILING CHART It is not necessary to preheat oven(s) when broiling. Times are guidelines only and may need to be adjusted for individual tastes. Turn meat halfway through cooking time. Recommended rack positions are numbered from the bottom (1) to the top (5). For diagram, see the “Positioning Racks and Bakeware”... -
Page 15: Hold Warm Feature
■ When roasting poultry and meat, use a broiler pan and grid. It is not necessary to wait for the oven to preheat, unless recommended in the recipe. To order a broiling pan, see “Assistance or Service” section. A. Broiler grid B. -
Page 16: Automatic Shutoff/Sabbath Mode
2. Press the Temp/Time “up” or “down” arrow pads to adjust the temperature by 5°F (3°C) increments until the desired temperature is displayed. The temperature can be set from 145°F (63°C) to 190°F (85°C). NOTE: The temperature may be changed at any time by pressing the Temp/Time “up”... -
Page 17: Start Time
Before setting, a stop time must be entered. For more information on using Delay Clean, see “To Delay Clean” in the “Range Care” section. To Set a Delay Start: 1. Press START TIME. “PRESS (^) FOR UPPER OVEN” will scroll from top to bottom in the upper text area, and “PRESS ( ) FOR LOWER OVEN”... -
Page 18: Range Care
Only 1 oven can be cleaned at a time. The Warm Zone element will not function during self clean. Both oven doors lock when either oven is being cleaned. RANGE CARE Self-Cleaning Cycle (on some models) How the Cycle Works... -
Page 19: To Delay Start Self-Clean
The SteamClean feature is designed for light oven cavity bottom cleaning on models that have hidden bake in both ovens. Allow the range to cool to room temperature before using the SteamClean feature. If your oven cavity is above 100°F (38°C), OVEN COOLING will appear in the display and the SteamClean feature will not activate until it cools down. -
Page 20: General Cleaning
Soap, water and a soft cloth or sponge are suggested first unless otherwise noted. EXTERIOR PORCELAIN ENAMEL SURFACES Food spills containing acids, such as vinegar and tomato, should be cleaned as soon as the entire range is cool. These spills may affect the finish. Cleaning Method: ■... -
Page 21: Oven Light
Do not wipe down glass surfaces until the oven has completely cooled. For normal range use, it is not suggested to remove the oven door. However, if removal is necessary, make sure the oven is off and cool. Then, follow these instructions. The oven door is heavy. -
Page 22: Troubleshooting
Is the control knob set to the proper heat level? See “Cooktop Controls” section. ■ Is the range level? Level the range. See the Installation Instructions. Oven will not operate ■ Is the electronic oven control set correctly? See “Electronic Oven Controls” section. -
Page 23: Assistance Or Service
Accessories U.S.A. To order accessories, call the Whirlpool Customer eXperience Center toll free at 1-866-664-2449 and follow the menu prompts. Or visit our website at www.whirlpool.com and click on “Parts & Accessories.” replacement parts will fit Broiler Pan and Grid Order Part Number 4396923 ®... -
Page 24: Warranty
Whirlpool Corporation or Whirlpool Canada LP (hereafter “Whirlpool”) will pay for Factory Specified Parts and repair labor to correct defects in materials or workmanship. Service must be provided by a Whirlpool designated service company. This limited warranty is valid only in the United States or Canada and applies only when the major appliance is used in the country in which it was purchased.