Table of Contents
Advertisement
Quick Links
Advertisement
Table of Contents

Related Manuals for Vivitar Vivicam 3200


Summary of Contents for Vivitar Vivicam 3200
- Page 1 ViviCam 3200 Digital Still Camera User Manual...
- Page 2 Copyright © 1999 Vivitar Corporation Vivitar Corporation 1280 Rancho Conejo Blvd. Newbury Park, CA 91320 USA www.vivitar.com www.vivitar.co.jp www.vivitar.co.uk Image Expert and Camio are trademarks of Sierra Imaging, Inc. Microsoft and Windows are registered trademarks of Microsoft Corporation. CompactFlash is a registered trademark of the CompactFlash Association.
-
Page 3: Table Of Contents
Contents Contents CONTENTS ...I GETTING STARTED ... 1 Camera Package Contents... 1 Camera Parts ... 2 Safety and Handling Information... 4 TAKING A PICTURE... 5 Powering the Camera On/Off... 5 Taking a Picture... 6 Using Quick Review ... 7 Using Focus Lock ... 8 Using the Memory Card ... - Page 4 V3200 Camera User’s Guide VIEWING AND DOWNLOADING YOUR PICTURES USING A PC ... 27 Connecting your Camera to a PC... 27 Downloading Pictures using a Compact Flash Card Reader ... 27 Using Image Expert to View and Download Pictures ... 27 TROUBLESHOOTING...
-
Page 5: Getting Started
Getting Started Congratulations on your purchase of a new ViviCam 3200 (V3200) Digital Camera! The V3200 is an easy-to-use high-quality digital camera that features: Two resolution settings and three quality settings that enable you to take 24-bit color pictures up to a... -
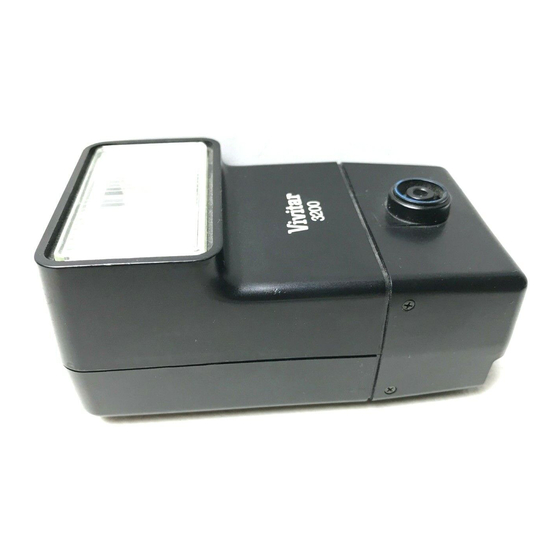
Page 6: Camera Parts
V3200 Camera User’s Guide Camera Parts Front View Back View... - Page 7 Getting Started Top View Bottom View Memory storage compartment...
-
Page 8: Safety And Handling Information
V3200 Camera User’s Guide Safety and Handling Information For your safety and the protection of your camera, observe the following tips while handling your camera. Camera information Do not take apart or attempt to service the camera yourself. Do not expose the camera to moisture, excessive heat, or excessive cold. Let the camera warm up when moving from a cold to a warm temperature. -
Page 9: Taking A Picture
Taking a Picture Using the Capture mode on your camera, you can: Take a picture Preview the picture on the LCD display before taking it Instantly review and (if you don't like what you see) delete the picture just taken To select this mode, slide the Mode switch to the position labeled “Capture”. -
Page 10: Taking A Picture
V3200 Camera User’s Guide Taking a Picture To take a picture with your camera: Make sure you have a Compact Flash memory card inserted in the memory card slot. Set the Mode switch to Capture. Turn the camera on. Frame your subject in the optical viewfinder. Hold the camera still and press the Shutter button down fully. -
Page 11: Using Quick Review
Using Quick Review When the Quick Review preference is set to On, the camera LCD displays the picture for a short period of time after you have taken it. This feature allows you to instantly review a picture. It also gives you a chance to immediately delete, or discard the image you have just taken. -
Page 12: Using Focus Lock
V3200 Camera User’s Guide Using Focus Lock When taking a picture, your camera automatically focuses on the object in the center of the viewfinder. If you want the camera to focus on a subject that is not in the center of the picture, you can use the camera’s focus lock feature to set the focus. -
Page 13: Using The Memory Card
Using a Memory Card Your camera stores pictures on a removable Compact Flash memory storage card. A 4 MB Compact Flash card is included with the camera kit. You may purchase additional cards in varying sizes. The camera does not contain internal storage memory; therefore, the camera will not operate i f a memory card is not inserted. -
Page 14: Using The Self-Timer
V3200 Camera User’s Guide Using the Self-Timer Use the self-timer to delay taking a picture for 10 seconds after pressing the shutter button. To take a picture using the self-timer: Turn the camera on. Set the Mode switch to Capture. Press the Self-timer button. -
Page 15: Resolution And Quality Levels
Checking Resolution and Quality Levels The resolution setting determines the size of the picture in pixels. Your camera has two resolution settings: Megapixel (1152 x 864 pixels) and VGA (640 x 480 pixels). The quality setting controls how much your pictures will be compressed on the memory card. -
Page 16: Flash Setting
V3200 Camera User’s Guide Flash Settings Your camera has four different flash modes: Flash Off, Red-Eye, On/Fill, and Automatic. The current flash setting is displayed on the camera Status LCD. Symbol Flash Setting Flash Off: No flash used. Red-Eye: Automatic flash used, preceded by a pre-flash. -
Page 17: Macro Function
Macro Function Use the Macro setting to take pictures of subjects that are close to the camera, such as flowers. When the Macro setting is on, the Macro symbol is displayed on the camera Status LCD. Symbol Setting Use when... The distance between your camera and the subject is between 10 inches Macro (25 cm) and 2 feet (60 cm). -
Page 18: Battery Status
V3200 Camera User’s Guide Battery Status Your camera kit includes 4 AA batteries. When these batteries are drained, you may replace them with any standard AA alkaline, lithium, or rechargeable NiCd or NiMH batteries. The battery-shaped symbol on the Status LCD shows the approximate charge state of the batteries in the camera. -
Page 19: Reviewing Pictures
Reviewing Pictures The Review mode of your camera allows you to: Display pictures on the camera’s LCD screen and review, lock, or delete them. Display pictures on a TV monitor connected to your camera. View a slide show of the pictures stored on the camera’s memory card. To select this mode, slide the Mode switch to the position labeled “Review”. -
Page 20: Displaying Information About Your Pictures
V3200 Camera User’s Guide To display a slide show of your pictures on the LCD screen: Press the Select button to display the Review menu. Press the 6 button until the Slide Show menu option is highlighted. Press the Select button to start the slide show. -
Page 21: Viewing Pictures On Your Television
Viewing Pictures on Your Television You can use a television to view the pictures stored in your camera. To properly display pictures on your TV screen, your camera must be set to the correct video signal standard and must be connected to your TV. To change the camera's video mode: By default, the camera is set to use the NTSC video signal standard to display images on your TV. -
Page 22: Taking A Picture Using Your Television
V3200 Camera User’s Guide Taking a Picture Using Your Television By connecting your camera to a television set, you can use your TV screen as a viewfinder to frame and take pictures. To take a picture using your TV as a viewfinder: Turn the TV on. -
Page 23: Deleting Pictures
Deleting Pictures You can delete any picture from your camera's memory card while the camera is in Review mode unless the picture is locked. To delete the currently displayed image: Press the Delete button at the bottom of the LCD screen. The LCD will display the Delete menu. - Page 24 V3200 Camera User’s Guide To delete all the unlocked images on the memory card: Press the Delete button at the bottom of the LCD screen. The LCD will display the Delete menu. Press the 6 button until the Delete All menu option is highlighted.
-
Page 25: Locking And Unlocking Pictures
Locking and Unlocking Pictures You may want to lock pictures to avoid accidentally deleting them. If a picture is locked, a locked status icon displays in the upper left corner of the LCD screen when you view information about the image (see Displaying Information about Your Pictures on page 16). -
Page 26: Setting Camera Preferences
V3200 Camera User’s Guide Setting Camera Preferences The Preference mode of your camera allows you to activate or change the following settings: Image resolution Image quality Camera sounds Image quick review Camera date and time To select the Preference mode, slide the Mode switch to the position labeled “PREF”. Setting the Resolution Set the Mode switch to PREF. -
Page 27: Setting The Camera Sounds
Setting the Camera Sounds By default, the camera is set to beep whenever you take a picture, connect the camera to a computer, or encounter an error condition. To turn the beep sound off: Set the Mode switch to PREF. Turn the camera on. -
Page 28: Setting The Camera Date And Time
V3200 Camera User’s Guide Setting the Camera Date and Time You are automatically prompted to set the date and time when you first use the camera or whenever you replace the batteries. You can change these settings at any time through the Date & Time Preference menu tab. -
Page 29: Changing The Exposure
Changing the Exposure Your camera automatically adjusts the exposure of each picture to accommodate the current lighting conditions. You may want to manually adjust the exposure setting when using your camera in unusual lighting conditions; for example, when taking a picture of a person standing in front of a bright light source. The camera’s Exposure preference setting lets you adjust the exposure from –2.0 to +2.0 in 0.5 increments. -
Page 30: Setting The Video Mode
V3200 Camera User’s Guide Setting the Video Mode The video setting lets you adjust your camera to the same video signal standard used by your TV. Your camera must be set correctly if you want to review or take pictures using your TV screen. You are automatically prompted to set the correct video mode the first time you use the camera. -
Page 31: Viewing And Downloading Your Pictures Using A Pc
This allows you to by-pass the serial data download process altogether. The CF reader is much faster and circumvents serial communications conflicts. CF readers are available from your local computer store or digital camera accessory supplier. Likewise, a PCMCIA CF adapter that allows mobile computers (laptops and notebooks) to read CF memory cards directly into a PCMCIA slot on your notebook computer. -
Page 32: Troubleshooting
V3200 Camera User’s Guide Troubleshooting Camera Problems Problem Possible causes My camera has no power. The camera is not turned on. The batteries are low. The batteries are installed incorrectly. The AC adapter isn't plugged in. My camera won't take a Is the Ready light red and blinking? If so, the flash may be picture. -
Page 33: Image Problems
Image Problems Problem Possible causes Your subject or the camera may My images look blurry. have moved. Your camera may not be set to the correct distance setting. You may need to use the flash for My image looks too dark. this image. -
Page 34: Appendix
V3200 Camera User’s Guide Appendix Regulatory information FCC Compliance This device complies with Part 15 of the FCC Rules. Operation is subject to the following two conditions: This device may not cause harmful interference, and This device must accept any interference received, including interference that may cause undesired operation. -
Page 35: Warranty
This camera is under warranty for a period of one year from the date of purchase, by the original purchaser. In case of defects in materials or workmanship, Vivitar Corporation will repair or replace the camera free of charge within the warranty period. This warranty applies to the camera only. This warranty does not include batteries, or other accessories that have not been manufactured by Vivitar Corporation. -
Page 36: Camera Specifications
V3200 Camera User’s Guide Camera Specifications Output Resolution Megapixel resolution mode: 1152 x 864 Standard resolution mode: 640 x 480 CCD Sensor 1/3”, 1174 x 884, interlaced Color 24-bit color Output File Format Standard JPEG, with embedded thumbnail (JFIF) Compression JPEG with 3 file sizes: Best, High, Medium Processing Time Approximately 5 seconds...