Table of Contents
Advertisement
Advertisement
Table of Contents

Related Manuals for Universal Remote PowerPak RF-20


Summary of Contents for Universal Remote PowerPak RF-20
- Page 2 The information in this manual is copyright protected. No part of this manual may be copied or reproduced in any form without prior written consent from Universal Remote Control, Inc. UNIVERSAL REMOTE CONTROL, INC. SHALL NOT BE LIABLE FOR OPERATIONAL, TECHNICAL OR EDITORIAL ERRORS / OMISSIONS MADE IN THIS MANUAL.
-
Page 3: Battery Installation
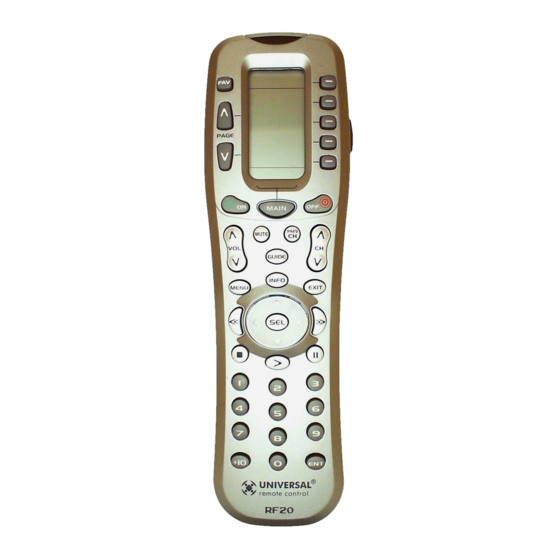
TITLE FAVORITE CHANNEL PAGE BUTTONS changes the page of buttons displayed PAGE NUMBERS MAIN BUTTON takes you to the main menu FUNCTION BUTTONS LIGHT BUTTON Getting Started-Overview SCREEN-LABELED DISPLA Y BUTTONS This is what MASTERCONTROL™ RF20 is all about! The RF20 is designed to operate up to 10 different Audio/Video Components and is pre-programmed to operate virtually all brands of TV, VCR, DVD and CD Players, Cable Set Top Boxes, Satellite Receivers, TiVo and other... - Page 4 Activating Component Commands – Simple, Easy, Intuitive Once you’ve programmed MAIN menu and select the RF20 for your Components, next Component you want all you have to do to operate to operate. a specific Component is first, press the MAIN but- If you don’t see the ton.
- Page 5 Basic Setup - Overview There are two ways to program the RF20: • The Pre-Programmed Code Method • The Learning Method The Pre-Programmed Code Method allows you to set up all the buttons at once, so it’s the fastest and easiest of the two methods.
- Page 6 STEP 4: The screen will then display the Press the P-PRO display button five Components from Page 1 of to select the Pre-Programmed the MAIN menu. Method. To display Page 2 of the MAIN menu that lists an additional five Components, simply press the PAGE ( ) ( ) buttons.
- Page 7 NOTE: If the Component fails to turn off after you have entered all the code numbers listed for your brand, you can scan through all the other code numbers that are pre-loaded into the RF20 for that Component (in this case TV) by using the UP or DOWN display buttons on the screen.
- Page 8 STEP 9: Once you have found the right code, save the code number by pressing the SAVE display button that appears on the LCD screen. The LCD screen will blink “SAVED” two times, signaling that the code number has been successfully saved. SAVE BUTTON STEP 10:...
-
Page 9: Learning Method
RF20 is the last remote you’ll ever need! Just follow these simple steps: STEP 1: Line-up the RF20 with the other remote control, head-to-head, one or two inches apart. STEP 2: On the RF20, press and hold the MAIN and ENT (Enter) - Page 10 PAGE and MAIN buttons. STEP 6: Press and hold the button on the other remote control that you want to ‘teach’ to the RF20 until the LCD display on the RF20 changes to either “GOOD” or “FAILD”.
-
Page 11: Advanced Features
CHILD LOCK FEATURE This ‘child-lock’ feature prevents the unauthorized use of the remote control by children. It blocks all operations of the remote control. To Activate: Press the +10 and ENT (Enter) buttons simultaneously for 3 seconds. - Page 12 STEP 5: Press the button you wish to edit. The first character space of your button label will start to blink. UP CURSOR Button deletes all text LEFT CURSOR Moves blinking character left DOWN CURSOR deletes the currently blinking character RIGHT CURSOR Moves blinking character right...
-
Page 13: Favorite Channel Setup
Favorite Channel Setup This is one of RF20’s most desirable features. Once it’s set up, you can select up to 40 favorite channels with the press of a button - without the need to remember or type in a channel number. Let the channel surfing begin! To access Favorite Channel listings, simply press the FAV button to display Page 1 of Favorite Channel listings. - Page 14 STEP 7: Press the LIGHT button after you enter the channel number. A new screen appears displaying SAVE, UNDO or EXIT. STEP 8: To save the channel you entered, press the SAVE display button. The UNDO display button lets you erase the last entry. The EXIT display button erases all entries for this button.
- Page 15 STEP 7: Press the second component display button that you want the Macro to turn on (in this example, VCR) and “VCR” will display at the top of the screen. (“STEP 4” will display at the bottom of the screen.) STEP 8: Then, press the ON button to confirm the command.
- Page 16 Advanced Macro Options: SETTING UP A POWER OFF MACRO: Simply follow the same steps as outlined above, except press the OFF button in place of the ON button. SETTING A COMPONENT BUTTON AS MACRO: If you wish to set one of the Component buttons as a macro, in STEP 3, press the Page Up button twice.
- Page 17 The bottom of the display flashes “PUNCH TO”. Press the button for the Component that doesn’t have volume control commands yet (i.e.,DVD). This is the Component you are going to PUNCH TO for the volume and mute commands. NOTE: If you want to PUNCH TO the MAIN Component, press the POWER OFF button at this time.
- Page 18 Hiding and Adding Pages Each of your RF20 Components actually contains eight pages. However, only five pages are visible in the factory default setting. Three page are hidden in each Component. If you wish to use the hidden pages, you can ADD it. If you don’t want to use some of the existing pages, you can HIDE them.
- Page 19 Recalling Pre-Programmed Setup Code Numbers In case you didn’t write down the Pre-Programmed Code Numbers that you used to set up your RF20, you can easily recall them using this simple process: STEP 1: Press and hold the MAIN and ENT (Enter) buttons at the same time for approximately 3 seconds, until the word “SETUP”...
- Page 20 Erasing Commands - Overview You can erase an individual button with a learned com- mand, a macro or a favorite channel. You can erase an ENTIRE Component’s learned command or macro buttons. You can also erase ALL your learned commands on all Components or all your macros or favorite channels every- where.
-
Page 21: Factory Default Settings
Re-setting RF20 to Original Factory Default Settings If you want to start with a clean slate, you can re-set the RF20 its original factory default settings by performing the following steps. NOTE: This process will essentially erase EVERYTHING you have programmed into the RF20. STEP 1: STEP 2: Press and hold both the... -
Page 22: Sold Separately
The Optional PowerBlaster (for ‘barrier-free’ RF control) [Sold separately] Of all the fabulous RF20 features, this is probably the most exciting. When used in combination with the optional PowerBlaster , the RF20 becomes an amazing remote control powerhouse that sends multi-directional RF (Radio Frequency) signals that pass through walls, doors and floors - both indoors and outdoors. - Page 23 Pre-Programmed Code Notes Record the three digit codes for your system here AUDIO CABLE LIGHT TAPE PHONO VCR2 XM RADIO IPOD X-BOX Pre-Programmed Code Tables The RF20’s Pre-Programmed code library is divided into categories (TV, VCR, AUX, etc.). Each category actually includes many types of Components.
- Page 24 BRAND ADMIRAL 072 081 161 160 ADVENT AKAI 197 146 248 A MARK 112 143 AMPRO 167 073 157 183 AMSTRAD ANAM 043 054 056 080 112 131 197 004 112 058 APEX DIGITAL 006 310 AUDIOVOX 076 273 BARCO BLAUPUNKT BROKSONIC CAIRN...
- Page 25 BRAND SUPRE MACY SYLVANIA 197 003 059 060 063 064 164 044 160 127 SYNTAX OLEVIA TANDY TATUNG 056 062 TECHNICS 034 080 TECHWOOD TEKNIKA 002 003 004 024 028 043 072 101 143 TELEFUNKEN 037 046 086 087 TELERENT TERA TOSHIBA 015 138 030 007 040 062 101 325...
- Page 26 BRAND REGAL 049 050 REGENCY RODGERS SAMSUNG SCIENTIFIC ATLANTA 043 011 003 041 042 045 046 SEREN SERVICE ELECTRIC SHAW SIGECOM SONY 096 108 SPRUCER 047 078 STARCOM 002 004 008 009 STARGATE 008 030 097 104 SUSQUEHANNA 043 074 TIME WARNER 043 074 TOCOM...
- Page 27 BRAND VINC YAMAHA 042 089 166 195 197 ZENITH 057 074 091 DVD-TV/DVD Combos AIWA FUNAI SAMSUNG SYLVANIA SYMPHONIC TOSHIBA DVD-TV/DVD/VCR Combos MAGNAVOX PANASONIC SYLVANIA TOSHIBA DVD-DVD/VCR Combos GO VIDEO 137 218 PANASONIC PHILIPS 105 (VCR Functions for VCR 067) POLAROID SAMSUNG 137 159...
- Page 28 BRAND AIWA 034 161 AKAI 016 146 043 046 124 125 142 AMPRO ANAM AUDIO DYNAMICS 012 023 039 043 BROOKSONIC 035 037 129 CANON 028 031 CAPEHART CRAIG 003 040 135 CURTIS MATHES 031 041 DAEWOO 111 116 117 119 005 007 010 065 108 110 112 DAYTRON 012 023 039 043 DYNATECH...
- Page 29 BRAND ADCOM 082 092 225 161 269 355 356 366 AIWA 170 018 104 202 203 213 211 188 AKAI 138 189 125 126 127 128 258 281 282 038 AMEND ANGSTROM ANTHEM 335 336 337 338 339 ARCAM 141 418 419 ATLANTIC TECHNOLOGY AUDIO ACCESS AUDIO ALCHEMY...
- Page 30 BRAND TOSHIBA 060 087 198 278 WARDS YAMAHA 026 253 169 067 173 205 264 232 089 264 274 285 332 373 432 433 ZENITH 143 210 AUDIO-XM Radios & Tuners BOSE 170 532 DELPHI 415 515 FANFARE KENWOOD POLKAUDIO SONY CODE NUMBERS CABLEVISION / VOOM...
- Page 31 BRAND ADCOM 062 042 AIWA 059 065 088 089 105 122 170 187 AKAI 085 195 202 231 232 AMEND ARCAM AUDIO ACCESS 119 147 AUDIO EASE AUDIO TECHNICA 037 057 CALIFORNIA AUDIO 103 008 CAPETRONIC CARRERA 057 080 CARVER 185 041 044 050 086 107 130 134 135 138 139 203 204 167 CASIO 111 182...
- Page 32 BRAND DISH ECHOSTAR HUGHES 108 117 HUMAX PHILIPS 108 090 117 REPLAY NETWORKS SONY 104 105 TIVO 090 117 TOSHIBA CODE NUMBERS AIWA APPLE/iPod ARCHER AURORA MULTIMEDIA AUTON BOSE CELADON CRESTRON DELL DRAPER SCREEN DREAMVISION DWIN EVERQUEST EXTRON FAROUDJA FUJI GATEWAY HAUPPAUGE HUNTERDOUGLAS...
- Page 33 BRAND MARANTZ 014 027 056 065 087 MCINTOSH MITSUBISHI 242 243 029 048 NAKAMICHI 244 245 025 ONKYO 002 012 016 017 018 019 115 OPTIMUS 026 054 055 PANASONIC 007 010 032 088 195 PHILIPS 027 087 PIONEER 003 039 047 050 066 098 222 QUASAR 007 088 SANSUI...
-
Page 34: Frequently Asked Questions
RF20 would still remember your settings. Who can I call for more answers? The Universal Remote Control Technical Support and Customer Service staff are ready to answer any questions you might have. - Page 35 RF20 simply MORE powerful 500 Mamaroneck Avenue Harrison, NY 10528 Phone: 1-914-835-4484 FAX: 1-914-835-4532 www.universalremote.com OCE-0046B_rev01...