Table of Contents
Advertisement
Quick Links
Download this manual
See also:
Owner's Manual
Before Reading This Manual
This Instruction Manual describes how to install the software provided and a brief explanation of how to use the
Software Application.
To ensure that you use this Software Application correctly, read this Instruction Manual carefully before you
start using the Software Application.
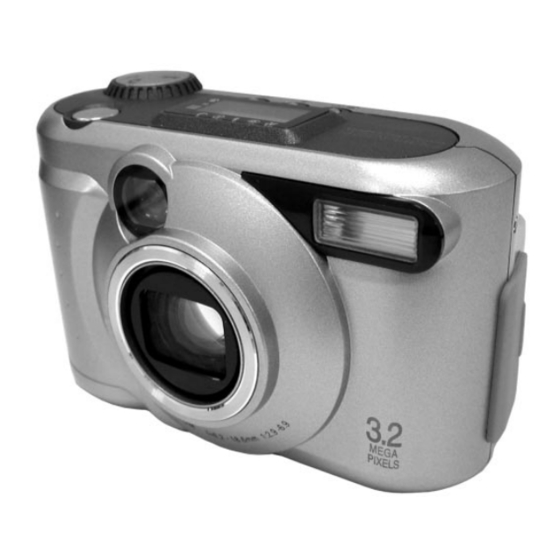
This document has been written assuming that you basically understand how to use the Toshiba PDR-3320
Digital Still Camera and your personal computer that the Software Application is running on.
For basic details on the PDR-3320 and your personal computer, refer to the Toshiba PDR-3320 Digital Still
Camera's Instruction Manual or the Instruction Manual for your personal computer.
Trademark Information
Microsoft
®
and Windows
and other countries.
Windows is an abbreviated term referring to the Microsoft Windows Operating System.
Macintosh is a trademark of Apple Computer, Inc.
ACDSee
TM
is a registered trademark of ACD Systems Ltd.
Direct X
®
is a registered trademark of the Microsoft Corporation.
SmartMedia
TM
is a trademark of Toshiba Corporation .
Other companies or product names are trademarks or registered trademarks of the respective companies.
Conventions Used in This Manual
IMPORTANT
Indicates items or details that you should observe to prevent loss of data, malfunction and impaired
performance. Also indicates information relating to specifications and functions.
Memo
Indicates extra useful information.
®
are registered trademarks of the Microsoft Corporation of the U.S. registered in the USA
1
Advertisement
Table of Contents

Related Manuals for Toshiba PDR-3320


Summary of Contents for Toshiba PDR-3320
-
Page 1: Before Reading This Manual
Digital Still Camera and your personal computer that the Software Application is running on. For basic details on the PDR-3320 and your personal computer, refer to the Toshiba PDR-3320 Digital Still Camera’s Instruction Manual or the Instruction Manual for your personal computer. - Page 2 Before Reading This Manual (continued) Abbreviations Used in This Manual Windows 98 This refers to the Microsoft Windows 2000 This refers to the Microsoft Windows ME This refers to the Microsoft Windows XP This refers to the Microsoft Images This refers to still images. About Bundled Software in CD-ROM After USB connection between the camera and the computer is established, the system will automatically launch ACDSee software.
- Page 3 Before Reading This Manual (continued) Make sure that you have all of the items below before you start using your software application. CD-ROM (1 disk) Software Manual (this manual) USB cable...
-
Page 4: Table Of Contents
Contents Getting Ready Before Reading This Manual ... 1 Contents ... 4 Features of This Software Application ... 5 About Files ... 6 About the Software ... 8 Pre-installation Checks ... 9 When Using Windows Installation Procedure (for Windows) ... 10 Installing ACDSee ... -
Page 5: Features Of This Software Application
If you install the software and drivers on your personal computer, you can perform the following: Importing Images You can import images taken on the Toshiba PDR-3320 Digital Still Camera into your personal computer. To import images, you need to use the USB cable (packaged with this camera), or PC card adapter. -
Page 6: About Files
About Files File Structure of SmartMedia Memory Card The images taken on the Toshiba PDR-3320 Digital Still Camera are stored on the SmartMedia Memory Card as shown below. - Page 7 About Files (continued) About Still Picture Data On the PDR-3320, still image data is saved in Exif format. This format is JPEG data that includes a thumbnail image and the photographic settings. Still image data is saved as follows as shown on page 6:...
-
Page 8: About The Software
About the Software You can install the following software from the CD-ROM: ACDSee This software allows you to edit and print imported still images. USB driver(for Windows 98 only) This USB driver provided on the CD-ROM is exclusively for Windows 98. Installing the USB driver for use in Windows 2000, Windows ME, Windows XP and Macintosh is not necessary. -
Page 9: Pre-Installation Checks
Pre-installation Checks To install the software supplied on the CD-ROM, your personal computer must conform to the system requirements in the table below. Check the following items before you install the software. Minimum system requirements When using Mac OS 9.0 or 9.1, you need to install CarbonLib 1.3 or later. You can download the program from the web site of Apple Computer, Inc. -
Page 10: Installation Procedure(For Windows)
Installation Procedure(for Windows) Installing ACDSee Before installing the ACDSee, install the USB driver(only required on Windows 98). Insert the CD-ROM supplied with this software package into the CD-ROM drive. The screen for selecting the display language appears. Click Click Follow the on-screen instructions to complete the installation. -
Page 11: Insalling The Usb Driver (For Windows 98 Only)
Installation Procedure(for Windows) (continued) Installing the USB Driver (for Windows 98 Only) Install this driver when the USB cable(provided) is used. (The USB driver provided on the CD-ROM is exclusively for Windows 98. Installing the USB driver for use in Windows 2000/ME/XP is not necessary.) Insert the CD-ROM supplied with this software package into the CD-ROM drive. -
Page 12: Using The Usb Cable (Windows 98/2000/Me/Xp)
USB cable(provided). When you connect the PDR-3320 to your personal computer by the USB cable, the connection can only be made with both the PDR-3320 and your personal computer turned ON. The USB connection will be automatically recognized by the computer. - Page 13 Using the USB Cable (Windows 98/2000/ME/XP)(continued) IMPORTANT When connecting the USB cable, pay attention to insert the connector in a proper direction. If CamDetect function is active ( icon will appear on Windows task bar), ACDSee software will be automatically launched. If CamDetect icon is not active, you can open the Camera Detector program: a.Click the [Start] menu.
- Page 14 Using the USB Cable (Windows 98/2000/ME/XP)(continued) Once ACDSee starts up, it will automatically open the existing XXXTOSHI subfolder stored in DCIM folder. The Removable disk automatically appears once the camera’s power is ON after USB connection is successfully accomplished between the camera and the computer.
-
Page 15: Copying Images To Camera
Select images that you wish to copy to the camera. Go to [Plug-ins| Copy to Camera]. Copy Images to Camera will appear. Choose Camera source, select PDR-3320 camera [TOSHIBA PDR on G:] Select the options on Resize Images: Best fit to standard camera resolutions... - Page 16 Copying Images to Camera(continued) Click OK. After copying images process completed, one XXXACDSE folder will be automatically created on the Folder tree pane. XXXACDSE folder is created next to the last existing XXXTOSHI folder on the Folder tree pane. Memo [Do not resize] option on [Copy to Camera] function, the copied images may not properly display on the camera.
-
Page 17: Installation Procedure (For Windows)
Installation Procedure(for Macintosh) Installing ACDSee Insert the CD-ROM supplied with this software package into the CD-ROM drive. The screen for selecting the display language appears. Click Click Follow the on-screen instructions to complete the installation. Memo During the ACDSee installation process, LaunchACDSee will automatically be installed along with it. -
Page 18: Using The Usb Cable (Macintosh)
Using the USB Cable (Macintosh) To transfer images stored on the PDR-3320 to your computer, you need to connect PDR-3320 to your computer first by using the USB cable (provided). For Mac OS 9.0 or later users, the computer will recognize the camera and load its own USB driver while the USB cable is connected so that installing the USB driver is not necessary. -
Page 19: General Operations
General Operations General Operations ACDSee is a program composed of three main windows, which work to manage, view and manipulate your images. The Browse Window It presents an Explorer-like interface that lets you locate and manage images stored in your file system. By default, this window comes up when you start ACDSee. - Page 20 General Operations(continued) The Photo Enhancer It lets you touch up your photographs, or alter them dramatically, with a wide range of easy-to-use tools. Clicking the Enhance button or selecting the [Tools | Edit…] command, will begin a photo enhancement session. You can have as many Photo Enhancer windows open simultaneously as you like.
-
Page 21: Starting The Photo Enhancer
Starting the Photo Enhancer Starting the Photo Enhancer Select an image and click the Photo Enhancer shortcut button window. You can also use the [Tools | Edit…] command. Enhancement Functions The Photo Enhancer lets you express your creativity by altering the appearance of your photos. Its easy-to-use enhancement features let you touch up your photos in minute detail, or radically change their look and feel. - Page 22 Starting the Photo Enhancer(continued) Red-eye Reduction: Removes the unwanted red-eye effect from images. Sepia: Gives a photo a dated or old-fashioned look. Sepia is a term that describes dated photos that consist of shades of reddish brown. Colorize: Alters an image to reflect an adjustable monochrome format. Negative: Creates a negative representation of an image.
-
Page 23: How To Access The Service And Support
How to Access the Service and Support You can use the supplied CD-ROM to access the Toshiba website for frequently asked question, firmware upgrades on application models, service and support, and more. Insert the CD-ROM supplied with this software package into the CD-ROM drive. -
Page 24: Global Contacts
Global Contacts The latest information, including service and support, is available on our homepage. Please access it and have a look. In the supplied CD-ROM, a file containing information regarding service and support is recorded; we recommend that you save this file to your computer in case you lose the instruction manual. - Page 25 Toshiba Digital Community,like special adapter mounts for Tele-photo, Wide-angle, and other filters and lenses designed specifically for your digital camera. There are frequent discounts and promotions on printing services, carrying cases, service plans, and digital camera accessories. To find out more, visit the Toshiba Digital Community at www.toshiba.com/taisisd...