
Related Manuals for Samsung RF4289HARS


Summary of Contents for Samsung RF4289HARS
-
Page 1: User Manual
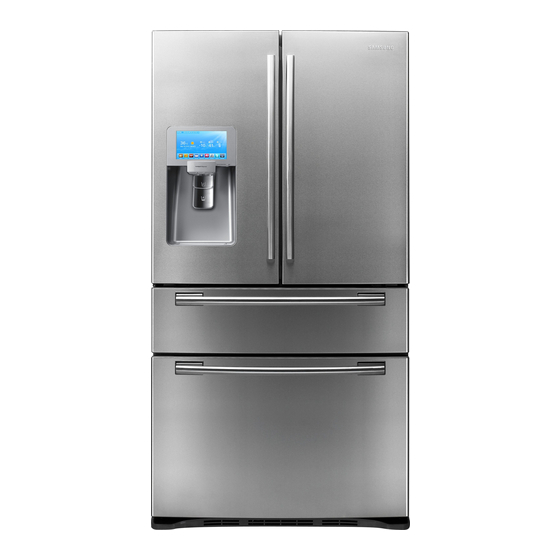
RF4289HA Refrigerator user manual English Imagine the possibilities Thank you for purchasing a Samsung product. To receive a more complete service, please register your product at www.samsung.com/register Free Standing Appliance... -
Page 2: Safety Information
Safety Information SAFETY INFORMATION Before using your new Samsung French Door Refrigerator, please read this manual thoroughly to ensure that you know how to operate the features and functions that your new appliance offers safely and efficiently. This appliance is not intended for use by persons... - Page 3 • When moving the refrigerator, be careful not to roll over or damage the power cord. This constitutes a fire hazard. • Make sure that the power plug is not squashed or damaged by the back of the refrigerator. • Keep the packing materials out of reach of children.
- Page 4 Lamp Cover and LED Lamp by yourself. Please contact your service agents. • If any dust or water is in refrigerator, pull out the power plug and contact your Samsung Electronics service center. Otherwise there is a risk of fire. cAuTION SIGNS FOR uSING cAuTION • Do not re-freeze frozen foods that have...
-
Page 5: Table Of Contents
SEVERE WARNING SIGNS FOR DISPOSAL WARNING • Risk of child entrapment. Before you throw away your old refrigerator or freezer: Take off the doors. Leave the shelves in place so that children can not easily climb inside. • Please dispose of the packaging material from this product in an environmentally friendly manner. -
Page 6: Setting Up Your French Door Refrigerator
Setting up your French Door Refrigerator GETTING READY TO INSTALL THE REFRIGERATOR Congratulations on your purchase of the Samsung French Door Refrigerator. We hope you enjoy the state-of-art features and efficiencies that this new appliance offers. Selecting the best location for the refrigerator • A location with easy access to the water supply. - Page 7 AccESSORIES AND REquIRED TOOLS The following accessories are included with your refigerator: compression Hex wrench Fastener fitting Required Tools (Not provided) You need the following tools to complete the installation of your refirgerator: Flat-blade screwdriver Philips screwdriver (+) Pliers Allen wrench (3/16”) (5mm) REMOVING THE REFRIGERATOR DOORS Some installations require door removal to transport...
-
Page 8: Disassemble The Flex Door
3. Remove the 3 hex head bolts ( 7 ) attached to the upper left and right door hinges with a socket wrench (10mm). Remove the ground screw ( 8 ) attached to the upper left and right door hinges with a philips screwdriver (+). -
Page 9: Assemble The Flex Door
ASSEMBLE THE FLEx DOOR To reattach the flex doors, assemble parts in reverse order. DISASSEMBLE THE FREEzER DRAWER 1. Take out the upper drawer by lifting it up. 2. Remove the tilting pocket ( 1 ) by pulling both support guards ( 2 ) aside. And take out both support guards by pulling them aside. -
Page 10: Adjusting The Freezer Drawer
If the right side is lower, perform the same procedure, but with the right control lever. It is difficult to remove the cover leg front from the refrigerator, so we do not recommend making small adjustments wIth the control lever. Instead, refer to the next page for the best way to make minor adjustments to the doors. -
Page 11: Installing The Water Line
3. Find the best level to align the door slope. • After adjustment, tighten the controller screw ( 3 ) and then philips screws. Example) The slope is about 0.08inch (2mm) as shown below. - Rotate the height adjuster to -2.0 to reduce the door slope. Slope Reference plane... - Page 12 Refrigerator Plastic tubing (A) (Supplied) Ferrule (Not supplied) copper tubing Plastic tubing (B) (Not supplied) (Not supplied) Household water supply line 1. Slip the compression nut ( A ) through the supplied plastic tubing ( A ). 2. Tighten the compression nut ( A ) onto the 1/4” compression fitting.
-
Page 13: Operating Your French Door Refrigerator
2. For the periodic updates of Weather or News, it may cause network traffics when the Display is not being used. 3. When there are softwares newly updated by Samsung, they will be automatically updated and it will be informed to the User. - Page 14 Indicator Icons (At the left-top of the Screen) 1. Network Signal Strength : 5 Level (off - 1 - 2 - 3 - 4) 2. Volume Level : 5 Level (off - 1 - 2 - 3 - 4) 3. Filter Status : 3 Level (blue - pink - red) 4.
-
Page 15: Setting The Freezer/Fridge Temperature
SETTING THE FREEzER/FRIDGE TEMPERATuRE The temperature control allows you to set the freezer and the fridge temperatures. Use the following instructions to change and set these temperatures. 1. Touch the Freezer/Fridge temperature on the Home screen. • When ice cream is stored at a temperature above 4°F (-16°C) in the freezer, it may melt. •... - Page 16 • The freezer or fridge temperature may change depending on the door opening/closing frequencies, the food quantity, the ambient temperature, etc. • Temperatures vary at each food storage section in the freezer and refrigerator compartments. • When the room temperature increases, there can be an “Abnormally High Temperature”...
- Page 17 SETTING THE DISPENSER You can select the ice type. 1. Touch the dispenser status on the Home screen. 2. Touch the desired dispenser type; then touch the CLOSE button. • Touch the Ice Off, if you don't want to make more ice. • When the Ice Off is set, the Ice Off indicator icon ( • We recommend you stop ice making if the following occur: - There is enough ice in the ice bucket.
-
Page 18: Door Open Alarm
DOOR OPEN ALARM When the fridge / fridge door remains open over 2 minutes, a warning window pops up with alarm sounds. After the first alarming, it repeats every minute. And, it stops when closing both doors. If the Door Alarm OFF is selected on the Settings function, alarming does not occur. - Page 19 3. Select the messaging tools as needed by touching the buttons upper the message screen. Enter the message contents with the selected tools. • : Select to input a memo in pen mode.(your finger or a smooth-tip pen such as a style pen.) •...
- Page 20 • The memo being displayed on the Home screen can be put away by touching the Detach button or can be temporarily hidden by touching the Hide Memo button. How to show the memo(s). 1. Touch the Memo button on the Home screen. 2.
- Page 21 3. Check the saved memo. • In the Detail View screen, you can delete it or attach/detach it on the Home screen. 3. Choose the desired memos to show. • When pressing the Select All button, all the memos on the current page will be selected and the Select All button will shift to the Unselect All button.
- Page 22 How to delete the memo(s). 1. Touch the Memo button on the Home screen. 2. Choose the desired memo to delete. 3. Touch the Delete button. 22_ operating 2. To delete multiple memos, press the Multi Select button. 3. Choose the desired memos to delete.
- Page 23 4. Touch the Yes button. PHOTOS Photos can be uploaded from a Memory card/DLNA device/Picasa Web Album into the My Album of this refrigerator. How to copy Photos from Memory card to My Album 1. Pull out the cover over the card slot and move it to the side. 2.
- Page 24 • The Memory slot is only for SD/SDHC/MMC/HS MMC type memory cards. • It reads only JPEG(JPG) images. • The Panel has a capacity of about 300 photos. • When saving photos from a memory card to the panel, the photo size is automatically changed to 800 x 480 pixels, regardless of the original size.
- Page 25 3. Choose the desired photo to save in the My Album. • When pressing the Select All button, the Multi Selection screen shows. • When there are multiple pages with many photos, there will be page numbers on the bottom of the screen.
- Page 26 • When the photo is selected, it will display its detail information. • Larger photo sizes will take longer to upload. 5. The " Save To My Album" appears on the screen while uploading photo from the Memory Card. • Larger photo sizes will take longer to upload.
- Page 27 How to store DLNA device photos to My Album • This function is only available when the wireless network (Wi-Fi) is connected. 1. Touch the Photos button on the Home screen. 2. Touch the All Share on the photos list. At this time, the DLNA device to connect needs connecting to the same wireless AP as to the refrigerator.
- Page 28 • At the lower tree folders, you can move to its upper tree folder by selecting the '..' icon. 5. Choose the desired photo to save in the My Album. 6. Touch the Save To My Album button. 7. The "Save To My Album" appears on the screen while uploading photo from the DLNA device.
- Page 29 • Larger photo sizes will take longer to upload. • The wireless network is used to transmit photos in the DLNA device. So, the transmission may not work properly depending on the network conditions. • When the photo is selected, it will display its detail information. How to save photos in the Picasa Web Album to My Album.
- Page 30 4. Touch the Save To My Album button. 5. The "Save To My Album" appears on the screen while uploading photo from the Picasa Web Album. • When the photo is selected, it will display its detail information. • Larger photo sizes will take longer to upload. • According to the status of the wireless network, you may not expect smooth transmission.
- Page 31 2. Touch the Picasa Web Album on the photos list. 3. Touch the Sign In button. • When you have an account with Google Picasa (http:// picasaweb.google.com), you can see the uploaded photos in the Picasa by logging in with the account. 4.
- Page 32 7. Choose the desired photo to save in the My Album. 8. Touch the Save To My Album button. 9. The "Save To My Album" appears on the screen while uploading photo from the Picasa Web Album. • When the photo is selected, it will display its detail information. • Larger photo sizes will take longer to upload.
- Page 33 How to set the slide show. 1. Touch the Photos button on the Home screen. 2. Touch the My Album on the photos list. 3. Touch the Multi Select button. 4. Choose the photos for slide show and touch the View Selected button.
- Page 34 6. The slide show will start with selected photos and touch the screen to change the view option. • With the selected photos, the slide show runs one time. And, when the slide show finishes, the view options will appear on the screen. • By selecting the • When selecting the 7.
- Page 35 10. Use the - and + buttons to change the slide show transition speed: then touch the OK button. 11. To change the slide show order of the photos, select the button. 12. Choose the desired slide show order of the photos: then touch the OK button.
- Page 36 How to rotate the photo(s). 1. Touch the My Album on the photos list. 2. Choose the desired photo to rotate. 3. Choose the -90° Rotate or 90° Rotate button. • The rotated photos will be automatically stored (replacing the original photos). 36_ operating 2.
- Page 37 Save to memory card. 1. Touch the My Album on the photos list. 2. Choose the desired photo. 3. Touch the Save To Memory Card button. 4. The "Save To Memory Card" appears on the screen while saving photos. • A memory card needs to be inserted to save the photos in My Album to the memory card. 2.
- Page 38 2. Choose the desired photo. 3. Touch the Delete button. 4. Touch the Yes button. • There are 10 photos that have been pre-loaded by Samsung. These Photos explain product features and cannot be deleted. 38_ operating 2. To delete multiple photos, press the Multi Select button.
- Page 39 EPIcuRIOuS With the Epicurious service, it is easy to find various recipes by ingredients or events. • This function is only available when the refrigerator is connected to the wireless network (Wi-Fi). How to use the Featured Recipes 1. Touch the Epicurious button on the Home screen. • There will be a 4-second commercial ad when entering the Epicurious.
- Page 40 5. By selecting the Favorite button or the Shopping List button, you can make your favorite list or shopping list. 6. When the Preparation tab is selected on the top of the page, its step-by-step recipe will show on the main page.
- Page 41 How to use the Recipe Search by Ingredient. 1. Touch the Recipe Search by Ingredient on the epicurious list. 2. Choose the Food and Drink button: then choose the Food/Drink type on the left of screen. And choose the ingredient being displayed with icons. • When selecting an ingredient being displayed with icons, the expected number of foods will show on the bottom of the page.
- Page 42 How to use the My Favorites. 1. Touch the My Favorites on the epicurious list. • Recipe Favorites can be stored up to 100 of them. 2. Choose the desired food. • When selecting the A-Z button, it will show the saved recipes in the alphabetical order. • With the Delete button, you can delete saved recipes.
- Page 43 3. Touch the View Combined Shopping List button. 4. The display screen will show the entire ingredient list of selected foods. cALENDAR You can see the calendar from Google Calendar. • This function is only available when the refrigerator is connected to the wireless network (Wi-Fi). • To use the Calendar, you need a Google account.
- Page 44 2. Choose the Email and Password input box: then enter the Google account ID and password by using the screen keyboard. 3. Touch the Sign in button. • When checking on the 'Stay signed in' box, the account will be stored for future log-in. • When you do not have a Google account, you can get one at http://calendar.google.com.
- Page 45 How to manage Shared calendar 1. Choose the Other Calendar. 2. Choose the Show and Hide button. • It is possible to set showing or hiding the schedules of a calender in subscription on the Other Calendar List screen. • Even if the Show / Hide setting is changed, there is no change in the subscription list and the Show / Hide setting on the Google Calender Web.
- Page 46 2. Touch the region search bar on the left top of the screen. 3. Touch the + button on the right upper corner of screen. 4. Enter the location name or zipcode(US Only) by using the screen keyboard : then thouch the OK button. 5.
- Page 47 7. Touch the " " button on the right top of the screen. 8. The display screen will show the location weather. How to see the today weather. 1. Touch the WeatherBug button on the Home screen. • There will be a 4-second commercial ad when entering the WeatherBug.
- Page 48 How to add Regions for Weather Service 1. Touch the region search bar on the left top of the screen. 2. The current region information will show on the screen. 3. Touch the + button on the right upper corner of screen. 4.
- Page 49 5. Choose the desired location name. 6. Choose the desired station name. How to Select Regions for Weather Service 1. Touch the desired location name on the location list. 2. Choose the back( ) button on the right upper corner. The display screen will show the changed location weather.
- Page 50 How to delete Regions for Weather Service 1. Touch the edit button on the right upper corner of screen. 2. Choose the desired check box on the left of the location name: then touch the Delete button. How to see the weather forecast. 1.
- Page 51 AP NEWS The internet news service provider will provide the weather information. • This function is only available when the refrigerator is connected to the wireless network (Wi-Fi). How to see the internet new. 1. Touch the Ap News button on the Home screen. 2.
- Page 52 • With the 5. When there is a photo to see its exploded view, select the target photo. • With the PANDORA • This function is only available when the refrigerator is connected to the wireless network (Wi-Fi). • Through the Pandora service, it is possible to enjoy your favorite songs free of charge. • The song selection is based on the analysis data being collected by the Music Genome Project of the Pandora and my own selection can affect the next song selection by its feedback.
- Page 53 3. Choose the Email and Password input box: then enter the Pandora account ID and password by using the screen keyboard. • When you do not have a Pandora account, you can get one at http://www.pandora.com. • In the Email section, enter the Pandora account ID such as UserID@gmail.com. 4.
- Page 54 6. When the Bookmark button( a song, it is to be added to the Song Bookmark List and its list can be viewed at the Pandora site. • By bookmarking my favorite songs, it is possible to check the song list and to purchase various albums on the [Your Profile] page at www.pandora.com.
- Page 55 TWITTER • This function is only available when the refrigerator is connected to the wireless network (Wi-Fi). • You can't write a twit while working on this function. How to show the twitter. 1. Touch the Twitter button on the Home screen. 2.
- Page 56 5. Touch the twit on the twit list, you can see the detail information. • When selecting the List View on the Detail View screen, the screen changes to the Twit List. 6. Touch the button, it will show the detail information of the follower/followee.
-
Page 57: Energy Saver
ENERGY SAVER It turns on and off the Energy Saver function. When the Energy Saver is on, the power consumption decreases. 1. Select the Energy Saver ON or OFF buttons on the settings list. • The Energy Saver function is pre-set to ON in the factory. -
Page 58: Water Filter
• We recommend you stop ice making if the following occur: - There is enough ice in the ice bucket. - You want to save water and energy. - Water is not being supplied to the refrigerator. • If the ice maker function is ON, and the water line is not connected, there will be a water valve noise from back of the unit. - Page 59 • For a replacement water filter, you can visit your local home improvement center or contact the Samsung Parts distributor. Be sure the replacement water filter has the SAMSUNG logo on the box and on the water filter. Link : http://www.samsungparts.com DISPLAY You can set the brightness of the LCD and running time of the Screensaver.
- Page 60 VOLuME You can control the volume of the alert sounds. 1. Touch the button in the right bottom corner of the settings list. 2. Touch the Volume on the settings list. 3. Select the volume sound level button to adjust the alert sound level.
- Page 61 DATE SETTING You can set the current date. 1. Touch the button in the right bottom corner of the settings list. 2. Touch the Date on the settings list. 3. Use the buttons to revise the month. 4. Select the desired day: then touch the Save button. • If the current date is incorrect, you may not use the twitter.
- Page 62 1. Touch the button in the right bottom corner of the settings list. 2. Touch the Wi-Fi Networks on the settings list. 3. Choose the wireless AP you want to connect. • : Locked with Security Code • : Signal Strength • You can check the MAC address of the Fridge on the bottom of the Screen.
- Page 63 5. When the IP Address button is selected after succeeding in the AP connection, it is possible to check the currently set IP address and the Gateway. 6. When selecting the User Config button, the IP Address, Subnet Mask, Gateway and DNS buttons will be activated to be able to be selected for data input.
-
Page 64: Dispenser Light
DISPENSER LIGHT It is to set the operation of the dispenser lamp light. 1. Touch the button two times in the right bottom corner of the settings list. 2. Touch the Dispenser Light on the settings list. 3. Select the desired dispenser light status: then touch the Save button. -
Page 65: Touch Screen Correction
TOucH ScREEN cORREcTION The stylus touch point can be calibrated to best meet the user’s needs. To adjust the stylus touch point on the touch screen: 1. Touch the button two times in the right bottom corner of the settings list. 2. -
Page 66: Smart Grid
• The software update is offered as through the wireless network. When the updated software is offered through the wireless network, the Upgarde button is activated on the right bottom corner of the screen. And, when selecting the Upgrade button, it starts updating right away (it takes about 10 seconds). - Page 67 4. If you touch each level text or Help button, you can see information about Smart Grid Function. Higher Level means higher peak time than lower levels. • If Modem is not connected, The message can be found. How to override the Smart Grid control 1.
- Page 68 4. You can select the Override time from 1hour to 24hour After set time, Override function will be turned off and Smart Grid control will be started. When you select "Permanently", "Override" function will operate continuously until the "Override" function is turned off. 5.
-
Page 69: How To Use The Dispenser
HOW TO uSE THE DISPENSER Touch the dispenser status on the Home screen to select the type of dispenser you want. Place your cup under the ice outlet and push gently against the dispenser lever. Make sure the glass is in line with the dispenser to prevent the ice from bouncing out. -
Page 70: Changing The Water Filter
For a replacement water filter, you can visit your local home Improvement center or contact the Samsung Parts distributor. Be sure the replacement water filter has the SAMSUNG logo on the box and on the water filter. Link : http://www.samsungparts.com Removing any residual matter inside the water supply line after installing the water filter. -
Page 71: Using The Two Lever Dispenser
Reverse Osmosis Water Supply IMPORTANT : The pressure of the water supply coming out of a reverse osmosis system going to the water inlet valve of the refrigerator needs to be between 35 and 120 psi (241 and 827 kPa). If a reverse osmosis water filtration system is connected to your cold water supply, the water pressure to the reverse osmosis system needs to be a... -
Page 72: Parts And Features
Never put your finger or any other objects in the dispenser opening. It may cause injury. Do not try to disassemble the ice maker. Do not wash or spray the ice bucket with water while it is in the refrigerator. Remove it to clean it. Water clouding phenomenon All water provided to the refrigerator flows through the core filter which is an alkaline water... -
Page 73: Using Flex Zone
When closing the door, make sure the Vertical Hinged Section is in the correct position to avoid scratching the other door. If the Vertical Hinged Section is reversed, put it back to the right position and close the door. Moisture may appear at times on the Vertical Hinged Section. - Page 74 REMOVING THE REFRIGERATOR AccESSORIES 1. Door Bins & Dairy Compartment · Door bins (1) To remove - Simply lift the bin up and pull straight out. To relocate - Slide it in above the desires location and push down until it stops. ·...
-
Page 75: Using The Doors
1. Refer to page 7 for disassembly instructions. 2. Open the cover housing with a flat-blade screwdriver. uSING THE DOORS Ensure that the doors close all the way and are securely sealed. When the refrigerator door is only partially open, it will automatically close. -
Page 76: Food Storage Tips
FOOD STORAGE TIPS Foods Refrigerator DAIRY PRODUCTS Butter 2-3 Weeks Milk 1-2 Weeks Cream Cheese, cheese food, and cheese 2-4 Weeks spread Hard Cheese (un- 3-4 Months opened) Hard Cheese (opened) 2 Months Cottage Cheese 10-15 Days Cream 7-10 Days Sour Cream 2 Weeks Cream Dips (opened) - Page 77 Foods Refrigerator FISH AND SHELLFISH Fish Fatty Fish (mackerel, 1-2 Days trout, salmon) Lean Fish (cod, flounder, 1-2 Days etc) Frozen or Breaded Shellfish Shrimp (uncooked) 1-2 Days Crab 3-5 Days Cooked Fish or Shellfish 2-3 Days MEAT Fresh, Uncooked Chops 2-4 Days Ground...
-
Page 78: Cleaning The Refrigerator
THE REFRIGERATOR Caring for your Samsung French Door Refrigerator prolongs the life of your appliance and helps keep the refrigerator free of odor and germs. cleaning the Interior Clean the inside walls and accessories with a mild detergent and then wipe dry with a soft cloth. -
Page 79: Troubleshooting
Troubleshooting PROBLEM SOLUTION The refrigerator does • Check that the power plug is properly connected. • Is the temperature control on the display panel set to the correct temperature? Try setting it to not work at all or it does a lower temperature. - Page 80 PROBLEM SOLUTION Photos not showing • When the “A SD/MMC card is connected” messages do not show on the screen, check if the with the memory card • Check if there are photos or images stored in the memory card. connected • Check if the images in the memory card are JPEG (JPG) types.
-
Page 81: Warranty
Samsung authorized service center. Samsung will repair or replace any part found to be defective, at our option and at no charge as stipulatedX herein, with new or reconditioned parts during the limited warranty period specified above. All replaced parts and products become the property of Samsung and must be returned to Samsung. - Page 82 OR GUARANTY GIVEN BY ANY PERSON, FIRM OR CORPORATION WITH RESPECT TO THIS PRODUCT SHALL BE BINDING ON SAMSUNG. SAMSUNG SHALL NOT BE LIABLE FOR LOSS OF REVENUE OR PROFITS, FAILURE TO REALIZE SAVINGS OR OTHER BENEFITS, OR ANY OTHER SPECIAL, INCIDENTAL...
- Page 83 memo...
- Page 84 memo...
- Page 85 memo...
- Page 86 CANADA (800-726-7864) In an effort to promote recycling this user manual is printed on recycled paper. OR VISIT US ONLINE AT Samsung Electronics America, Inc. 85 Challenger www.samsung.com Samsung Electronics Canada Inc. Customer Service, www.samsung.com/ca 55 Standish Court Mississauga, Ontario L5R 4B2...