Siemens Gigaset A580 User Manual
Siemens gigaset a580: user guide
Hide thumbs
Also See for Gigaset A580:
- User manual (197 pages) ,
- User giude (64 pages) ,
- Installation manual (19 pages)
Table of Contents
Advertisement
Advertisement
Table of Contents

Related Manuals for Siemens Gigaset A580


Summary of Contents for Siemens Gigaset A580
- Page 1 A580 IP...
-
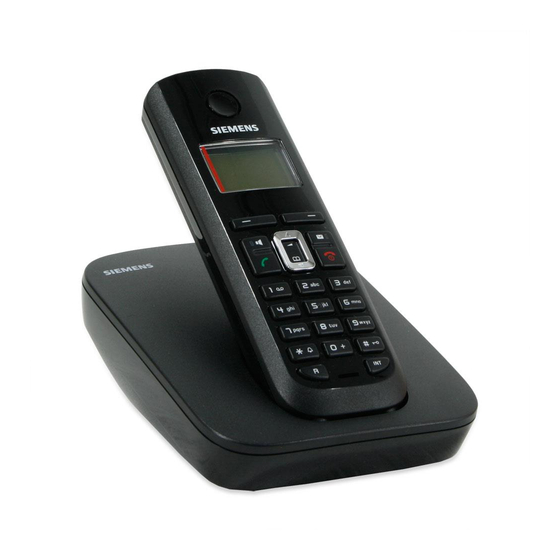
Page 2: The Handset At A Glance
The handset at a glance Ð INT 1 10.10.08 07:15 Þ Menu Handset keys 1 Display in idle status (example) £ 2 Charge status of the batteries Page £ 3 Display keys ( Page £ 4 Message key ( Page Access to Calls and Message lists;... -
Page 3: Overview Of Display Icons
Overview of display icons Overview of display icons = e V U Charge status of the batteries (empty to fully charged) = (flashes) Batteries almost empty e V U (flashes) Charging Ò Ñ i Ð Reception strength icon Reception signal strength between the base station and the handset (low to high) | (flashes) No reception signal between the base station and the handset Shortly after activating Eco , the ¼... -
Page 4: Table Of Contents
Safety precautions ........7 Gigaset A580 IP – more than just making calls ....8 VoIP –... - Page 5 Contents VoIP telephony via Gigaset.net ......46 Opening the Gigaset.net directory ....... . 47 Searching for subscribers in the Gigaset.net directory .
- Page 6 Configuring the IP ..........103 Configuring telephone connections ......106 Optimizing voice quality for VoIP connections .
- Page 7 End-user limited warranty ........159 Gigaset A580 IP – free software ......163 Accessories .
-
Page 8: Safety Precautions
Safety precautions Warning Be sure to read this user guide and the safety precautions before using your telephone. Explain their content and the potential hazards associated with using the telephone to your children. Use only the power adapter supplied, as indicated on the underside of the base station or charging cradle. -
Page 9: Gigaset A580 Ip - More Than Just Making Calls
£ Page 87). Reduce the transmission power by activating £ Page 69). Your Gigaset A580 IP has a protected operating system that offers increased security against viruses from the Internet. Have fun using your new phone! 120). £ Page 38). -
Page 10: Voip - Making Calls Via The Internet
You can find a list of recommended routers on the Internet at: www.gigaset.com/customercare From here, go to the FAQ page and select "Gigaset A580 IP". Search for "Router", for example. Access the services of a VoIP provider. You can open up to six accounts with different VoIP providers. -
Page 11: First Steps
First steps First steps Checking the package contents one Gigaset A580 IP base station §§1§§ one power adapter for connecting the base station to the electrical power supply §§2§§ one phone cord for connecting the base station to the fixed line network §§3§§... -
Page 12: Setting Up The Handset For Use
Internet at www.gigaset.com Select "Gigaset A580 IP" in the product field to open the relevant product page where you will find a link to the user guide. For information on finding the current firmware version of your base station,... - Page 13 First steps ¤ Insert the batteries with the polarity in the correct direction. The polarity is indi- cated in/on the battery compartment. ¤ To open the battery cover, for instance to replace the batteries, remove the belt clip (if attached). Insert a coin into the cavity on the casing, then pull the battery cover in an upward direction.
-
Page 14: Connecting The Charging Cradle
Connecting the charging cradle The charging cradle is designed to be operated in enclosed, dry areas at tem- peratures ranging from +41°F to +113°F. To disconnect the plug from the charging cradle, press the release button connect the plug 2. Please note Only place the handset in the charging cradle for which it is intended. - Page 15 Please note The address of a time server on the Internet is stored on your telephone. The date and time are taken from this time server, provided that the base station is connected to the Internet and synchronization with the time server is acti- £...
- Page 16 Settings Ç Date/Time Ç ¤ Enter Date: 10.10.2008] Ç To correct an entry, press up or down on the Control key to toggle between fields. ¤ Press the Control key down repeatedly ... … until the menu item Settings appears. ¤...
- Page 17 First steps Ç Enter time: [07:15] pm am/pm Saved Registering the handset to the base station Your handset is registered to the base station by default. For information on registering additional handsets with the base station and make free internal calls, ¤...
-
Page 18: Installing The Base Station
For information on mounting the base station on the wall, Warning Never expose the telephone to any of the following: heat sources, direct sunlight or other electrical appliances. Protect your Gigaset from moisture, dust, corrosive liquids and fumes. -
Page 19: Connecting The Base Station
First steps Connecting the base station To make calls with your phone via the fixed line network and via VoIP, you must connect the base station to the fixed line network and the Internet, £ Figure Figure 1 Connecting the phone to the fixed line network and the Internet Follow the steps in the order given below ( Connect the phone cord and power lead to the base station. - Page 20 1. Connect the phone cord and power lead to the base station Insert the phone cord into the lower connection socket at the rear of the §§1§§ base station. Insert the power lead of the power adapter into the upper connection socket §§2§§...
- Page 21 Use only the power adapter and phone cord supplied. Pin connections on telephone cords can vary (pin connections You can now use your phone to make calls via the fixed line network and can be reached on your fixed line number.
-
Page 22: Making Settings For Voip Telephony
Making settings for VoIP telephony Before you can use the Internet (VoIP) to phone any other numbers on the Internet, the fixed line network or the cellular phone network, you need the services of a VoIP provider who supports the VoIP SIP standard. Prerequisite: You have registered with such a VoIP provider (e.g. - Page 23 First steps Start VoIP connection wizard? New firmware available New/improved firmware is available for your phone on the Internet. First per- form an automatic update of the firmware ( been completed (after approx. 3 minutes) the handset's idle display appears again and the Message key f flashes.
- Page 24 Downloading VoIP provider data Select VoIP provider? The connection wizard establishes a connection with the Gigaset configuration server on the Internet. Various profiles with general access data for different VoIP providers can be downloaded here. After a brief period you will see the following display: Select country Germany...
- Page 25 First steps Select provider Provider 1 Ç Provider x Ç The general access data for your VoIP provider is downloaded. Please note If the data for your VoIP provider is not available for downloading, press the display key twice. You can then carry out the following steps with the connec- tion wizard.
- Page 26 Please note When entering case sensitive access data: To switch between upper and lower case and digits, press the (several times if necessary). You can see briefly in the display whether upper case, lower case or digits is selected. Characters entered incorrectly can be deleted using the left Display key below .
-
Page 27: Completing The Voip Settings
First steps Completing the VoIP settings After the entries have been completed, the handset reverts to idle status. Ð Þ ¤ Test whether your VoIP data is complete and has been stored in the phone correctly. Calling via VoIP: Enter a number using the handset keypad and press and hold the Talk key c. - Page 28 Icons on the idle display The following is displayed: the internal number, e.g. the quality of the reception signal between base station and handset (signal strength): – poor to good: Ò Ñ i Ð – no reception: | flashes battery charge status: –...
- Page 29 First steps SIP registration failed Your personal data for registering with the VoIP provider may have been entered incompletely or incorrectly. ¤ Check your entries for Username, Password. Particularly check your use of upper and lower case. To do this, open the following menu on your handset: ¢...
-
Page 30: What Would You Like To Do Next
Setting the ringer melody and volume Setting the handset volume Entering local area code/extra codes Eco mode Operating the telephone on a PABX Registering existing handsets to a base station Transferring directory entries from existing Gigaset handsets to the new handset(s) -
Page 31: Operating The Handset
Operating the handset Operating the handset Using the Control key In the following description, the side of the Control key you need to press for each operation is indicated accordingly, e.g. t for "press up on the Control key". The Control key has a number of different functions: With the handset in idle status (without a screensaver) Press briefly to open the handset directory. -
Page 32: Using The Keys On The Keypad
Insert characters to the left of the cursor Overwrite the (flashing) character when entering the time and date, etc. Using the menus Your telephone's functions are accessed using a menu that has a number of lev- els. Main menu (first menu level) ¤... -
Page 33: Activating/Deactivating The Handset
Operating the handset Reverting to idle status You can revert to idle status from anywhere in the menu as follows: ¤ Press and hold the End Call key a. ¤ Do not press any key: after 2 minutes the display will automatically revert to idle status. -
Page 34: Using This Guide
Using this guide The operating steps are shown in abbreviated form. Example: ¢ Settings §Menu§ This illustration represents: Þ Settings Ç Handset Ç Auto Answer Ç ¢ ¢ Handset Auto Answer Menu ¤ Press the Display key below to open the main menu. ¤... -
Page 35: Menu Trees
Menu trees Menu trees Phone menu Open the main menu on your phone by clicking on the right Display key handset is in idle status. There are two ways to select a function: Using number combinations ("shortcut") ¤ Enter the number combination that is in front of the function in the menu tree. M 3 2 for "Set handset language". - Page 36 Settings £ 7-1 Date/Time Page 14 7-2 Audio Settings 7-2-1 Call Volume 7-2-2 Ringer Volume 7-2-3 Ringer Melody 7-2-4 Advisory Tones 7-2-5 Battery Low 7-3 Handset 7-3-1 Display 7-3-2 Language 7-3-3 Auto Answer 7-3-4 Register Handset 7-3-5 Reset Handset 7-2-1-1 Earpiece Volume 7-2-1-2 Handsfree Volume £...
- Page 37 Menu trees 7-4 Base 7-4-1 Calls List Type 7-4-2 Music on hold 7-4-3 System PIN 7-4-4 Base Reset 7-4-5 Additional Features 7-4-6 Local Network 7-4-7 Telephony 7-4-8 Firmware Update 7-4-1-1 Missed Calls 7-4-1-2 All Calls £ Page 86 £ Page 84 £...
-
Page 38: Web Configurator Menu
Web configurator menu £ Home Page 99 Settings IP Configuration Telephony Messaging Services Handsets Miscellaneous Status Device £ Page 103 Connections Audio Number Assignment Call Forwarding Dialing Plans Network Mailbox Advanced Settings Messenger E-Mail £ Page 133 £ Page 133 Page 134 £... -
Page 39: Making Calls With Voip And The Fixed Line Network
Making calls with VoIP and the fixed line network Making an external call External calls are calls made via the public telephone network (fixed line network) or via the Internet (VoIP). You decide which connection type you want to use for a specific call when you dial the number. You have the following... - Page 40 If you have assigned a number of VoIP numbers to your phone, you can define which VoIP number (VoIP account) is used for external calls from each specific handset (handset send number, Please note If you are using a GAP compatible handset other than the Gigaset handsets A58H, S67H, S68H, SL37H, S45 and C45, every call will be made via the standard connection, even if you press and hold the Talk key.
- Page 41 Making calls with VoIP and the fixed line network Enter the number of the party you wish to call. Add the suffix of the connection (your phone number) from which the call is to be made and charged to. Press the Talk key. The connection is always made via the line with the assigned suffix, regardless of whether you press the Talk key c briefly or press and hold.
-
Page 42: Ending A Call
Emergency numbers Dialing plans for emergency numbers (e.g. the local emergency service number) are preset for certain countries. Emergency calls are then always made via the fixed line network. You cannot delete or deactivate these dialing plans. However, you can change the connection through which each emergency number should be called (e.g. -
Page 43: Caller Id
Making calls with VoIP and the fixed line network Please note You can reject VoIP calls by pressing the End Call key an appropriate message (provider-dependent). Caller ID When you receive a call from the Internet, the caller's number or the name they have specified is displayed on the screen. - Page 44 The following is displayed in place of the number: With a call to one of your VoIP phone numbers, the display is provider- dependent (examples): Private anonymous For IP1 Menu For a call to your fixed line network number: – If no number is transmitted: Å...
-
Page 45: Using Speaker Mode
Making calls with VoIP and the fixed line network VoIP: Displaying the called party's phone number (COLP) Prerequisites: Your VoIP provider supports COLP (Connected Line Identification Presenta- tion). You may have to ask your provider to activate COLP (contact your VoIP provider for more information). -
Page 46: Muting The Handset
Muting the handset You can deactivate the microphone in your handset during an external call. The other party will hear music on hold, if activated ( Press the Display key to mute the handset. Ç Press the Display or the End Call key, to reactivate the microphone. Deactivating your handset's microphone You can deactivate your handset's microphone during an external call (includ- ing during a conference or when toggling). -
Page 47: Voip Telephony Via Gigaset.net
As soon as you start a search in the Gigaset.net directory or Make a call via Gigaset.net (dial a number with #9 at the end) or Activate the connection via the Web configurator ( * Gigaset Communications GmbH is a licensee of the Siemens trademark. £ Page £... -
Page 48: Opening The Gigaset.net Directory
Opening the Gigaset.net directory Your handset is in idle status. Press and hold. ¤ Open the directory with the s button. ¤ Select Gigaset.net to the Gigaset.net directory is established. Please note Gigaset.net tered with the base station, if the handset can send and receive directory entries. -
Page 49: Searching For Subscribers In The Gigaset.net Directory
VoIP telephony via Gigaset.net When the wizard has been started the following display will appear (example): Your nickname: 1happyuser Û ¤ Using the keypad, enter the name that you would like to be listed under in the Gigaset.net directory. The name may contain a maximum of 25 charac- ters. - Page 50 If it has not been possible to find a matching entry, a corresponding message is displayed. You have the following options: ¤ Press the Display key §New§ ¤ Press the Display key §Change§ entered name is copied and can be edited. If there are too many matching entries in the Gigaset.net directory, the mes- sage is displayed instead of a Hit list.
-
Page 51: Using Other Functions
VoIP telephony via Gigaset.net Using other functions Prerequisite: The Hit list is displayed. q (select entry) The following functions can be selected with q: Copy to Directory Copy the entry to the handset directory. The number and name (abbreviated if necessary, maximum 16 characters) are copied to the directory. ¤... -
Page 52: Calling A Gigaset.net Subscriber
Entering/editing a name Press the Display key. §Edit§ Edit name or enter new name (maximum 25 characters) and press You can delete the name with If there is no existing entry with this name in the Gigaset.net directory, the name is saved. A message to this effect is displayed. The handset switches to idle status. -
Page 53: Network Services
Network services Network services Network services are functions made available by your fixed line network or VoIP provider. Blocking your Caller ID – Anonymous calling Phone number identification can be blocked. Your phone number will not be displayed when making outgoing calls. You are calling anonymously. Prerequisites: For anonymous calls via your fixed line network connection you need to have requested the relevant service (feature) from your fixed line network... -
Page 54: Further Network Services For Voip
§Menu§ The display shows a list of configured and activated VoIP phone numbers and the Gigaset.net number of your telephone. Numbers for which call forwarding is activated are marked with ‰. Select the phone number for which you want to activate or change... - Page 55 Network services If necessary, enter the number to which the call is to be forwarded. You can specify a fixed line network, VoIP or mobile number for for- warding calls from a VoIP number. You must specify another Gigaset.net number for call forwarding from your Gigaset.net number.
-
Page 56: Functions During A Call
Functions during a call Prerequisite: Your phone will permit two parallel VoIP connections (see £ Page 116). 1 VoIP call only, Consultation calls During an external call: ¢ External Call §Menu§ Select and press Enter the number (if necessary the suffix) or copy it from the direc- tory. - Page 57 Network services Call forwarding (provider-dependent): You can connect the two external participants. Prerequisites: – You are toggling calls and you phoned the currently active participant yourself. – You have activated call forwarding via the Web configurator £ Page 127) Depending on the setting in the Web configurator ( ¤...
-
Page 58: Using Lists
Using lists The options are: Last Number Redial list Calls list Network mailbox using the Last Number Redial list The Last Number Redial list contains the ten numbers last dialed with the handset (maximum 32 numbers). If one of the numbers is in the directory, the corresponding name is displayed. -
Page 59: Opening Lists With The Message Key
Using lists Opening lists with the Message key You can use the Message key f to open the following list selection: Calls list Network mailbox, A separate list is displayed for each network mailbox. Prerequisite: Its number is saved in the base station, it is switched on £... - Page 60 Please note Only calls to the receive numbers assigned to your handset are stored in the £ Calls list ( Page 120). If no receive numbers are assigned, all calls will be stored in the Calls list for all handsets. Missed calls are not stored in the Calls list if they were taken on another phone registered with the same VoIP access data.
- Page 61 Using lists List entry Example of a list entry: New Call 01/02 1234567890 10.10.08 12:14 Ç Menu Status of entry Call: new missed call. Call: entry already read. recv.: call answered (in list type Call Entry number 01/02 means e.g. first new entry of a total of two new entries. Number or name of the caller (the number is always stored in the list with the area code) Call date and time (if set,...
- Page 62 Displaying CID information If you have CID, you can display the name and town/city that is registered with your network provider for this number. You have selected a list entry. ¢ Show Name §Menu§ If the name and town/city are not shown, it means that the caller has not requested Caller ID or that Caller ID has been withheld.
-
Page 63: Using The Directory
Using the directory Using the directory You can save up to 150 entries in your directory (number dependent on the number of individual entries). You can create a personalized directory for your own individual handset. However, you can send the list or individual entries to other handsets £... -
Page 64: Order Of Directory Entries
Storing a number in the directory ¢ ¢ New Entry §Menu§ Enter the number and press Enter the name and press Please note For information on entering IP addresses, To dial a number using a certain line connection each time, you can add the relevant line suffix to the number in question You can use the Web configurator to save the directory to a file on your PC, where it can be edited and then sent back to the handset (... -
Page 65: Managing Directory Entries
Using the directory Managing directory entries ¢ s (Select entry). Editing entries ¢ Edit Entry §Menu§ Edit the number if required, and press Edit the name if required, and press Using other functions Press the Display key. §Menu§ The following functions can be selected with q: Use Number Save or modify a saved number and then dial with c or save as a new entry;... -
Page 66: Copying A Number From The Directory
Transferring the directory to another handset Prerequisites: The sending and receiving handsets must both be registered to the same base station. The other handset and the base station can send and receive directory entries. ¢ ¢ s (Select entry) §Menu§ Select the internal number of the receiving handset and press Successful transmission is confirmed by the message transfer several individual entries one after the other by responding... -
Page 67: Using The Network Mailbox
Using the network mailbox Using the network mailbox Some fixed network providers and VoIP providers offer answer machines on the network – these are known as network mailboxes. Each network mailbox accepts incoming calls made via the corresponding line (fixed line network or corresponding VoIP phone number). To record all calls, you should therefore set up network mailboxes for both the fixed line network and for each of your VoIP connections. -
Page 68: Listening To Messages On The Network Mailbox
¢ Voice Mail §Menu§ Select and press Select network mailbox and press The selection includes the network mailboxes that belong to a VoIP/fixed line network connection and whose phone number is assigned to the handset as a receive number. connection (IP1 If a number is already saved to the base station for the selected network mail- box, fast access is activated. - Page 69 Using the network mailbox When you press the Message key f, the following is displayed (example): Net AM : IP1 Ç 1 Network mailbox name. are the standard names of the corresponding connections. The default names are always displayed regardless of which connection name you specified when configur- ing via the Web configurator.
-
Page 70: Eco Dect: Conserving Energy
ECO DECT: Conserving energy The base station of your phone is an ECO DECT base station, this means that: The base station and the charging cradle consume less power because they are equipped with a power-saving electrical power adaptor. The reduction of the handset's transmission power is dependent on the handset's proximity to the base station. -
Page 71: Setting The Alarm Clock
Setting the alarm clock Setting the alarm clock Prerequisite: The date and time have already been set ( Activating/deactivating the alarm clock ¢ Alarm Clock §Menu§ Select and press Activation After you activate the alarm clock, the menu for setting the wake-up time opens automatically. -
Page 72: Using Multiples Handsets
VoIP number in the configuration as send numbers. For information on changing the assignments, Registering another Gigaset A58H handset on the Gigaset A580 IP Before you can use your handset, you must register it to the base station. -
Page 73: De-Registering Handsets
The handset with the internal number 6 is being used: the handset you wish to register cannot be registered. Registering other handsets on the Gigaset A580 IP You can register other Gigaset handsets and handsets for other devices with GAP functionality as follows. -
Page 74: Locating A Handset ("Paging")
Locating a handset ("paging") You can locate your handset using the base station. ¤ Briefly press the Registration/Paging key on the base station ( All handsets will ring simultaneously ("paging"), even if ringer melodies are switched off. The current (local) IP address for the base station appears in the handset displays. -
Page 75: Changing The Name Of A Handset
Using multiples handsets After all the changes are completed: Press the Display key to save the input. §OK§ Press and hold (idle status). You will hear the error tone if an internal number has been assigned twice. ¤ Repeat the procedure with a free number. Changing the name of a handset The names "INT... - Page 76 Ending a call Press the End Call key. Please note You can reject an internal call by pressing the End Call key sets will continue to signal an internal "group call". If the called handset is not answered, the busy tone sounds after approx. 3 minutes.
- Page 77 Using multiples handsets Enter the internal number of the handset. The external participant hears music on hold if activated ( When an internal participant answers you can speak to them. You have the following options: Ending a consultation call ¢ Back §Menu§...
-
Page 78: Handset Settings
Changing the date and time Please note The address of a time server on the Internet is stored on your telephone. The date and time are taken from this time server provided that the base sta- tion is connected to the Internet and synchronization with the time server is £... -
Page 79: Activating/Deactivating The Screensaver
Handset settings Parts of the menu are not displayed in the language selected ..and three or more handsets are registered on your base station. A language that is not one of the standard languages for the base station (= English (North America), Français (Amér. -
Page 80: Quickly Accessing Functions
The text information is initially displayed once. Then the digital clock is displayed by itself. The text information is displayed again when: – New information is received – You remove the handset from the charging cradle or place it in the charging cradle –... -
Page 81: Activating/Deactivating Auto Answer
Handset settings Fixed Line call Opens the predialing option for making a call via the fixed line network. IP call §IP§ Opens the predialing option for making a call via VoIP. Activating/deactivating auto answer If you activate this function, when you receive a call you can simply lift the handset out of the charging cradle without having to press the Talk key c. -
Page 82: Setting Ringers
Setting ringers Volume: You can choose between five volumes (1–5; e.g. volume 3 = ˆ) and the "crescendo" ring (6; volume increases with each ring = ‡). Ringer melodies: You can select various ringers from a list of pre-loaded ringer melodies. The first three melodies are "classical"... -
Page 83: Activating/Deactivating Advisory Tones
Handset settings Activating/deactivating the ringer You can deactivate the ringer on your handset before you answer a call or when the handset is in idle status; the ringer can be deactivated permanently or just for the current call. The ringer cannot be re-activated while an external call is in progress. -
Page 84: Setting The Battery Low Tone
Setting the battery low tone The battery warning tone advises that the batteries need to be charged. You can activate it, deactivate it or decide whether or not it should sound during a call. Briefly press up on the Control key. Select and press Battery Low During Call... -
Page 85: Setting The Base Station Via The Handset
Setting the base station via the handset Setting the base station via the handset The base station settings are performed using a registered Gigaset A58H handset. Some settings can also be carried out via the base station Web configurator. The ú icon identifies functions that you can perform via the Web configurator. -
Page 86: Restoring The Base Station To The Factory Settings
Restoring the base station to the factory settings Resetting the base station via the menu Each individual setting is reset, in particular: VoIP settings such as VoIP provider and account data and DTMF settings £ Page Settings for the local network ( Default connection ( The names of the handsets ( is deactivated (... -
Page 87: Activating/Deactivating Music On Hold
Setting the base station via the handset Activating/deactivating music on hold ¢ Settings §Menu§ Music on hold Select and press (‰ = on). Setting default connection You can make settings according to whether you want to make calls via VoIP or the fixed line network as standard. -
Page 88: Entering Local And Extra Area Codes
Entering local and extra area codes Use the following guidelines to make local calls (calls to the local fixed line net- work): Depending on the exchange, area codes are not dialed for local calls via your fixed line network. However, all calls are stored in the Calls list with access codes. - Page 89 ( Please note If the telephone is not connected to the Internet at the time when the check for new firmware is to be carried out (e.g. because the router is deactivated), the check is carried out as soon as the phone is reconnected to the Internet.
-
Page 90: Making Voip Settings On The Handset
Making VoIP settings on the handset To use VoIP, you must set a few parameters for your phone. You can make the following settings using your handset. Download the general access data for your VoIP provider from the Gigaset configuration server and store it on your phone. Enter your personal access data for your first VoIP account (first VoIP phone number). - Page 91 Making VoIP settings on the handset If only one provider is available, the countries and providers lists are not dis- played. Only the name of this provider will then appear in the display. To start the download, confirm with ú If your VoIP provider is not included in the list, you need to enter or adjust the general VoIP settings manually via your phone's Web configurator, £...
-
Page 92: Setting The Phone's Ip Address In Lan
Setting the phone's IP address in LAN The base station requires an IP address in order to be "recognized" by the LAN (the router). The IP address can be assigned to the base station automatically (by the router) or manually. If performed dynamically, the router's DHCP server automatically assigns the base station an IP address. - Page 93 Making VoIP settings on the handset Viewing/changing the subnet mask You can only change the subnet mask if you have deactivated dynamic assign- ment. 255.255.255.0 is the default. ¢ Settings §Menu§ Enter the system PIN and press Subnet Mask Select and press The current subnet mask is displayed.
-
Page 94: Activating/Deactivating The Display Of Voip Status Messages
Activating/deactivating the display of VoIP status messages If the function is activated, a VoIP status code for your service provider is displayed. Activate the function if, for example, you have problems with VoIP connections. You will receive a provider-specific status code, which supports the service when the problem is analyzed. -
Page 95: Operating The Base Station On The Pabx
Operating the base station on the PABX Operating the base station on the PABX The following settings are only necessary when your PABX requires them; see the PABX user guide. The settings only affect fixed line network connections. Changing the dialing mode You can set the dialing mode. -
Page 96: Setting Pauses
If an access code is set, the following applies: The access code is added automatically when dialing from the Calls list and when dialing emergency numbers. When dialing manually and dialing numbers from the directory, you must add the access code yourself. Setting pauses Changing pause after line activity You can set the length of the pause inserted between pressing the Talk key c... -
Page 97: Setting The Phone With The Pc
Use Internet services: display text information on the handset (info services). Synchronize the telephone's date/time with a time server on the Internet. Copy contacts from the Outlook address book on your PC into the handset directories or back up your handsets' directories on your PC. - Page 98 192.168.2.2 in the address field. ¤ Launch the Web browser on your PC. ¤ Enter http:// and the telephone's current IP address (for example: http:// 192.168.2.2) into the address field of the Web browser. ¤ Press the Return key. A connection is established to the phone's Web configurator.
-
Page 99: Logging In, Setting The Web Configurator Language
Setting the phone with the PC Logging in, setting the Web configurator language Once you have successfully established the connection, the displayed in the Web browser. You can select the language you want the menus and Web configurator dia- logues to be displayed in. The language that is currently selected is displayed in the top field of the Web page. -
Page 100: Using The Web Pages
Using the Web pages The Web pages contain the UI elements displayed in Figure 2. Navigation area Working area Figure 2 Example of the structure of a Web page Menu bar In the menu bar, the Web configurator menus are displayed in the form of tab pages. -
Page 101: Navigation Area
Setting the phone with the PC Please note An overview of the Web configurator menu Navigation area In the navigation area, the functions of the menu selected in the menu bar £ Page 99) are listed. If you select a function, the associated page opens in the working area with information and/or fields for your inputs. -
Page 102: Buttons
Applying changes As soon as you have made your change on a page, activate the new setting on the phone by selecting Set. If your input in a field does not comply with the rules for this field, an appropri- ate error message is displayed. -
Page 103: Setting The Phone With The Web Configurator
– Configure settings to improve voice quality for the VoIP connections £ Page 115). – Define the default connection for your telephone (fixed line network or £ VoIP) ( Page – Assign VoIP phone numbers to the individual handsets ( –... -
Page 104: Configuring The Ip
Configuring the IP Assigning the IP address Select the necessary settings for operating your phone in your local network and to connect it to the Internet. For more detailed explanations of the individ- ual components/terms, see the glossary ( ¤ Open the following Web page: ¤... -
Page 105: Allowing Access From Other Networks
Setting the phone with the PC Preferred DNS server Enter the IP address for the preferred DNS server. DNS (Domain Name System) allows you to assign public IP addresses to symbolic names. The DNS server is required to convert the DNS name into the IP address when a connection is being established to a server. - Page 106 Entering an HTTP proxy server (only when connected to an internal company network) Direct connections between network participants and the Internet are often not permitted within internal company or organization networks (intranet). In such cases, all HTTP calls from the network are "transferred" by a proxy server. The proxy server is a computer or program within the network.
-
Page 107: Configuring Telephone Connections
Setting the phone with the PC Configuring telephone connections You can configure up to eight numbers on your phone: your fixed line network number, your Gigaset.net number and six VoIP numbers. You need to set up a VoIP account with a VoIP provider for each VoIP phone number. -
Page 108: Configuring The Voip Connection
Line suffix that you have to add to the phone number of an outgoing call to Suffix allow the account assigned to the suffix to be used as the sending account. Example If you dial 123456765#1, the connection will be made and billed through the first VoIP account, regardless of the VoIP number you have assigned to your handset as the send number and whether you briefly press/press and hold the Talk key. - Page 109 32 characters). ¤ Select the The telephone establishes a connection to the Internet and downloads all data required for the VoIP connection, i.e. the general provider information and your personal provider data (account data) are saved to your base sta- tion.
- Page 110 Profile files for the most important VoIP providers are available to download from the Internet via the Gigaset configuration server. The address for the server is stored in your phone ( To load the data onto your telephone, proceed as follows: ¤ Select Select VoIP Provider information on the download procedure.
- Page 111 Setting the phone with the PC field shows the name of the selected provider or Provider A link to the provider's homepage is displayed where available. To complete configuration of your VoIP connection, enter your account data in the Personal Provider Data Please note After the first download of the VoIP provider settings, your phone will check daily whether a newer version of the file for your VoIP provider is available via...
- Page 112 Area: General Provider Data If you have downloaded the general settings for the VoIP provider from the Gigaset configuration server ( preset with the data from the download. Generally, you do not need to config- ure any settings in this area. Specify the last part of your SIP address (URI) here (maximum 74 characters).
- Page 113 Setting the phone with the PC If your phone is connected to a router with NAT (Network Address Translation) and/or a firewall, you must select some settings in this area so that your phone can be reached from the Internet (i.e. can be addressed). Through NAT, the IP addresses of subscribers in the LAN are concealed behind the public IP address of the router.
-
Page 114: Saving Settings On The Phone
NAT refresh time Specify the intervals at which you want the phone to update its entry in the NAT routing table. Specify an interval in seconds that is a little shorter than the NAT session timeout. You should not need to change the preconfigured value for the Outbound proxy mode Specify when the outbound proxy should be used. - Page 115 Setting the phone with the PC Please note If you do not make any entries for a longer period, the connection to the Web configurator is automatically terminated. Unsaved entries are lost. If neces- sary, save intermittently. You can subsequently continue the entry and make changes if necessary.
-
Page 116: Optimizing Voice Quality For Voip Connections
Please note If you do not use your Gigaset.net connection for six weeks, it is automatically deactivated. You cannot be reached for calls from Gigaset.net. The connection is reactivated: As soon as you start a search in the Gigaset.net directory ( Make a call via Gigaset.net, i.e. - Page 117 Average voice quality. The necessary bandwidth is less than or equal to 8 kbit/ s per voice connection. Both parties involved in the telephone connection (caller/sender and recipient side) must use the same voice codec. The voice codec is negotiated between the sender and the recipient when establishing a connection.
- Page 118 Area: Settings for Connections In this area you can make specific settings for each of your VoIP phone num- bers. You can make the following settings for each VoIP phone number configured on your phone: Volume for VoIP Calls Depending on the VoIP provider, it is possible that the received voice/earpiece volume is too low or too high, so that adjusting the volume via the handset is not adequate.
-
Page 119: Voice Quality And Infrastructure
Please note that voice delays can occur depending on the codec used and the network capacity utilization. Voice quality and infrastructure With your Gigaset A580 IP, you have the opportunity to make calls with good voice quality via VoIP. However, your phone's performance with VoIP – and therefore the voice quality –... -
Page 120: Setting The Telephone's Default Connection
Please see the specialist documentation for further information. Setting the telephone's default connection The default telephone connection defines which line type (VoIP or fixed line network) will be used to dial numbers when you briefly press the c Talk key. -
Page 121: Assigning Send And Receive Numbers To Handsets
Setting the phone with the PC Area Default Connection ¤ To activate the fixed line network connection as an alternate connection, click the option next to tivate the function. ¤ Select to activate your settings. Assigning send and receive numbers to handsets You can assign up to eight phone numbers on your phone: your fixed line net- work number, your Gigaset.net number and six VoIP numbers. -
Page 122: Activating Call Forwarding For Voip Connections
¤ Select the phone numbers for each handset (fixed line network, VoIP) that are to be assigned to the handset as receive numbers. To do this, click the option following the phone number in the handset can be assigned several phone numbers or no phone number = assigned). -
Page 123: Entering Your Own Area Code, Activating/Deactivating An Automatic
Setting the phone with the PC Entering your own area code, activating/deactivating an automatic area code for VoIP On the base station, save the complete code (with international code) for the area in which you are using the phone. For VoIP calls you must generally always dial the area code – even for local calls. You can save the need to dial the area code for local calls by setting your phone to prefix this code for all VoIP calls made in the same local area ( code for local calls through VoIP... -
Page 124: Defining Dialing Plans
Defining dialing plans – cost control You can define dialing plans to reduce costs: You can define the connection (one of your VoIP accounts, the fixed line network) through which calls to specific numbers should be made and paid for. If you enter just a few digits (e.g. - Page 125 Setting the phone with the PC Connection Type The list shows all the VoIP connections that you have configured as well as your fixed line network connection. It also displays the name assigned to each con- nection. ¤ From the list, select the connection via which the number or numbers that start with the specified sequence of digits should be dialed.
-
Page 126: Activating/Deactivating Network Mailbox, Entering Numbers
Deleting dialing plans ¤ Select Delete The dialing plan is deleted from the list immediately. The space in the list is released. Please note Predefined dialing plans set as defaults (for emergency numbers) cannot be deactivated and cannot be deleted. Emergency numbers Dialing plans for emergency numbers (e.g. -
Page 127: Setting Dtmf Signaling For Voip
Setting the phone with the PC Entering numbers ¤ Enter the network mailbox number in the desired connection. With some VoIP providers your mailbox number will be downloaded together with the general VoIP provider data ( base station and displayed under ¤... -
Page 128: Defining Flash Key Functions For Voip (Hook Flash)
Defining Flash key functions for VoIP (hook flash) Your VoIP provider may support special performance features. To make use of these features, your phone needs to send a specific signal (data packet) to the SIP server. You can assign this "signal" to your phone's Flash key. If you press the Flash key during a VoIP call the signal will be sent to the server. -
Page 129: Defining Local Communication Ports For Voip
VoiP connection. Voice data is received via one port and control data via the other. You can set port numbers or port number areas for SIP and RTP ports, or set your telephone so that it can use any number of free ports from a predefined range of port numbers. ¤... - Page 130 Area Listen ports for VoIP connections Use random ports Click if you want the phone to use the ports specified in the fields port. Click if you do not want the phone to use fixed ports for port, but rather to use any free ports from predefined ranges of port numbers. The use of random ports makes sense if you want several phones to be oper- ated on the same router with NAT.
-
Page 131: Messaging
Setting the phone with the PC Messaging Your Gigaset A580 IP base station has messaging functions that can be used via a messaging capable handset, e.g. a Gigaset S67H, S68H, SL37H or C47H hand- set, which you can register to your base station. - Page 132 ¤ In the Messenger Account Jabber server or another provider's message server (Other). The access data for Gigaset.net played in Jabber Authentication password you can also register with the Gigaset.net Jabber server through your PC. ¤ Enter the user ID (maximum 50 characters) and password (maximum 20 characters) that you used to register with the message server in the ber ID Authentication password...
- Page 133 Setting the phone with the PC Please note Do not select the option "Create new account". Your Gigaset.net Jabber account has already been created in Gigaset.net. The option "SSL connection" must be deactivated in the Jabber client. ¤ Now you can enter Gigaset.net subscribers as contacts (buddies). For the Jabber ID of each subscriber, enter the subscriber's Gigaset.net number with "@jabber.gigaset.net"...
-
Page 134: Configuring Info Services/Activating Idle Display
Configuring info services/activating idle display You can configure your registered Gigaset A58H handsets to display custom- ized text information (e.g. weather reports, RSS feeds) in the idle display. To do this you must set the same applies to a registered Gigaset C38H handset. Configuring info services Please note The weather report is preset. -
Page 135: Transferring Handset Directories To/From The Pc
Setting the phone with the PC Please note For information on changing internal names and numbers, ¤ Open the following Web page: The names and internal numbers of all registered handsets are displayed in the Registered Handsets ¤ Select the handset whose number/name you want to change. ¤... - Page 136 Please note You can find information on the vCard format (vcf) on the Internet, e.g. at: www.en.wikipedia.org/wiki/VCard or www.de.wikipedia.org/wiki/VCard (You can set the display language at the bottom left-hand side in the navi- gation area of the Web page.) To transfer a handset directory (vcf file) saved on the PC that contains numerous entries to a Microsoft Outlook™...
-
Page 137: Activating Voip Status Message Display
§§6§§ Date (YYYY-MM-DD) and time of the reminder call (HH:MM) separated by a §§7§§ "T" (example: 2008-01-12T11:00). Identification as VIP (X-SIEMENS-VIP:1) §§8§§ Other information that a vCard may contain is not entered into the handset directory. Example for an entry in vCard format: BEGIN:VCARD VERSION:2.1... -
Page 138: Starting A Firmware Update
Area VoIP Status ¤ Select after play. If you select No, no VoIP status messages are displayed. ¤ Select to save the changes. Please note This user guide contains a table with possible status codes and their defini- £ tions, Page Starting a firmware update If necessary, you can load updates of the base station firmware onto your... -
Page 139: Activating/Deactivating The Automatic Version Check
Please note If the telephone is not connected to the Internet at the time when the check for new firmware is to be carried out (e.g. because the router is deactivated), the check is carried out as soon as the phone is reconnected to the Internet. -
Page 140: Copying The Date/Time From Time Server
Copying the date/time from time server The date and time are shown in the idle display of registered handsets. They are important, for example, for stating the correct time in the Calls list and for the "alarm clock" function. There are two methods for updating the time and date on your base station: manually with one of the registered handsets ( synchronization with a time server on the Internet. -
Page 141: Querying The Phone Status
Setting the phone with the PC Date and time settings are transferred to every handset after synchronization. Please note The default time server "europe.pool.ntp.org" will remain stored in the base station even if you overwrite it. If you delete your time server from the Time Server field and synchronization is still activated, the base station will continue to synchronize with the default time server. -
Page 142: Getting Help With Your Phone
Getting help with your phone Questions and answers If you have any questions about the use of your phone, you can contact us 24/7 at www.gigaset.com/customercare. The table below contains a list of common problems and possible solutions. Please note To ensure the quickest and most efficient response from Customer Service, please have the following information available: Version of firmware, EEPROM and your phone's MAC address... - Page 143 Getting help with your phone Handset does not ring. 1. The ringer melody is deactivated. ¥ Activate the ringer melody ( 2. Call forwarding set to ¥ Deactivate call forwarding (VoIP You cannot hear a ringer melody/dialing tone from the fixed line network. The phone cord supplied has not been used or has been replaced by a new cord with the wrong pin connections.
- Page 144 You cannot make calls via VoIP. ¥ First wait a few minutes. This is often a short-term event that corrects itself after a short time. If the message continues to be displayed, proceed as follows: ¥ Check whether your phone's Ethernet cable is correctly connected to the router. ¥...
- Page 145 Getting help with your phone No firmware update or VoIP profile download is carried out. 1. If Not possible, try later. update is already being carried out. ¥ Repeat the process at a later time. 2. If is displayed, the firmware or profile file may be invalid. File corrupt ¥...
-
Page 146: Using Voip Status Codes
Using VoIP status codes If you have problems with your VoIP connections, activate the £ tion ( Page support you during the problem analysis. Provide the code to the Service department during the problem analysis. In the following tables you will find the meaning of the most important status codes and messages. - Page 147 Getting help with your phone Status Meaning code 0x410 The requested service is not available from the VoIP provider. 0x413 Message is too long. 0x414 URI is too long. 0x415 Query format is not supported. 0x416 URI is faulty. 0x420 Incorrect ending 0x421 Incorrect ending...
- Page 148 Status Meaning code 0x503 The query can currently not be processed by the receiving device or the proxy because the server is either overloaded or is being serviced. If it is possible for the query to be repeated in the foreseeable future, the server informs the caller or the phone of this.
-
Page 149: Checking Service Information
Getting help with your phone Checking service information You may need the service information of your phone (base station and hand- set) for Customer Service. Base station service information Prerequisite: You are conducting an external call. The connection has been established for at least 8 seconds. -
Page 150: Protecting Our Environment
Protecting our environment Our environmental mission statement We, Gigaset Communications GmbH, bear social responsibility and are actively committed to a better world. Our ideas, technologies and actions serve people, society and the environment. The aim of our global activity is to secure sustain- able life resources for humanity. -
Page 151: Appendix
Appendix Appendix Care Wipe the base station, charging cradle and the handset with a damp cloth (do not use solvent) or an antistatic cloth. Never use a dry cloth as this can cause static. Contact with liquid If the handset should come into contact with liquid: ¤... - Page 152 Handset operating times/charging times The operating time of your Gigaset depends on the capacity and age of the bat- teries and the way they are used. (All times are maximum possible times). Standby time (hours) Talktime (hours) Operating time for 1.5 hrs of calls per day (hours) 80 Charging time, base station (hours) Charging time, charging cradle (hours) At the time of going to print, batteries up to 800 mAh were available and had...
-
Page 153: Writing And Editing Text
Codecs Quality of Service Protocols Dialing mode Pin connections on the telephone jack If you buy a replacement phone cord from a retailer, make sure that the phone jack has the correct pin assignment. Writing and editing text The following rules apply when writing text: Use t s to move the cursor to the right or left. - Page 154 Writing text/names Press the relevant key several times to enter letters/characters. Standard characters ä ë ï ö ü 1)Space 2)Line break When you press and hold a key, the characters of that key appear in the display and are highlighted one after the other. When you release the key, the high- lighted character is inserted into the input field.
-
Page 155: Industry Canada Certification
Users should ensure for their own protection that the electrical ground connections of the power utility, telephone lines and internal metallic water pipe system, if present, are connected together. This precaution may be particularly important in rural areas NOTE: Users should not attempt to make such connections themselves, but should con- tact the appropriate electric inspection authority, or electrician, as appropriate. -
Page 156: Fcc / Acta Information
The REN is used to determine the number of devices that may be connected to a tele- phone line. Excessive RENs on a telephone line may result in the devices not ringing in response to an incoming call. In most but not all areas, the sum of RENs should not exceed five (5.0). - Page 157 This phone system is compatible with inductively coupled hearing aids. Power Outage: In the event of a power outage, your cordless telephone will not operate. The cordless telephone requires electricity for operation. You should have a telephone that does not require electricity available for use during power outages.
-
Page 158: Safety Precautions
Therefore we suggest a surge arrestor. 14. Do not use the telephone to report a gas leak in the vicinity of the leak. 15. Emergency/911 numbers may not be dialed if the keypad is locked. - Page 159 Safety precautions BATTERY SAFETY PRECAUTIONS To reduce the risk of fire, injury or electric shock, and to properly dispose of batteries, please read and understand the following instructions. CONTAINS NICKEL METAL HYDRIDE BATTERY. BATTERY MUST BE RECYCLED OR DISPOSED OF PROPERLY. DO NOT DISPOSE OF IN MUNICIPAL WASTE. 1.
-
Page 160: Service (Customer Care)
– Cost of installation, removal or reinstallation. – Damage due to any telephone, electronic, hardware or software program, network, Internet or computer malfunctions, failures, or difficulties of any kind, including with- out limitation, server failure or incomplete, incorrect, garbled or delayed computer transmissions. - Page 161 Service (Customer Care) – Modification of the Product's components, or operation of the Product in an unsuita- ble environment or in a manner for which it is not intended, including but not limited to failures or defects caused by misuse, abuse, accidents, physical damage, abnormal operation, improper handling or storage, neglect, alterations, unauthorized installa- tion, removal or repairs, failure to follow instructions, problems caused by the carrier's network coverage, exposure to fire, water or excessive moisture or dampness, floods,...
- Page 162 Service (Customer Care) 6. LIMITATION ON REMEDIES; NO CONSEQUENTIAL OR OTHER DAMAGES Your exclusive remedy for any breach of this limited warranty is as set forth above. Except for any refund elected by Gigaset NAM, YOU ARE NOT ENTITLED TO ANY DAMAGES, INCLUDING BUT NOT LIMITED TO CONSEQUENTIAL DAMAGES, if the Product does not meet the limited warranty , and, to the maximum extent allowed by applicable law, even if any remedy fails of its essential purpose.
- Page 163 1-866-247-8758. Issued by Gigaset Communications GmbH Schlavenhorst 66, D-46395 Bocholt Gigaset Communications GmbH is a licensee of the Siemens trademark. © Gigaset Communications GmbH 2009 All rights reserved. Subject to availability. Rights of modifications reserved. Product attributes subject to change.
-
Page 164: Gigaset A580 Ip - Free Software
Gigaset A580 IP – free software Your Gigaset A580 IP's firmware includes free software that is licensed under the GNU Lesser General Public License. This free software was developed by a third party and is protected by copyright. You will find the license text in its orig- inal English version on the pages that follow. - Page 165 Gigaset A580 IP – free software GNU LESSER GENERAL PUBLIC LICENSE Version 2.1, February 1999 Copyright (C) 1991, 1999 Free Software Foundation, Inc., 59 Temple Place, Suite 330, Boston, MA 02111-1307 USA Everyone is permitted to copy and distribute verbatim copies of this license document, but changing it is not allowed.
- Page 166 Gigaset A580 IP – free software We call this license the "Lesser" General Public License because it does less to protect the user's freedom than the ordinary General Public License. It also provides other free soft- ware developers less of an advantage over competing non-free programs. These disad- vantages are the reason we use the ordinary General Public License for many libraries.
- Page 167 Gigaset A580 IP – free software 2. You may modify your copy or copies of the Library or any portion of it, thus forming a work based on the Library, and copy and distribute such modifications or work under the terms of Section 1 above, provided that you also meet all of these conditions: a) The modified work must itself be a software library.
- Page 168 Gigaset A580 IP – free software However, linking a "work that uses the Library" with the Library creates an executable that is a derivative of the Library (because it contains portions of the Library), rather than a "work that uses the library". The executable is therefore covered by this License.
- Page 169 Gigaset A580 IP – free software It may happen that this requirement contradicts the license restrictions of other proprie- tary libraries that do not normally accompany the operating system. Such a contradiction means you cannot use both them and the Library together in an executable that you dis- tribute.
- Page 170 Gigaset A580 IP – free software 12. If the distribution and/or use of the Library is restricted in certain countries either by patents or by copyrighted interfaces, the original copyright holder who places the Library under this License may add an explicit geographical distribution limitation excluding those countries, so that distribution is permitted only in or among countries not thus excluded.
- Page 171 Gigaset A580 IP – free software Applying These Terms to Your New Libraries If you develop a new library, and you want it to be of the greatest possible use to the public, we recommend making it free software that everyone can redistribute and change.
-
Page 172: Accessories
Accessories Gigaset handsets Upgrade your Gigaset to a cordless PABX: Gigaset A58H handset Illuminated graphic display Illuminated keypad Handsfree talking Polyphonic ringer melodies Directory for around 150 entries www.gigaset.com/gigaseta58h Gigaset S67H or S68H handset HDSP ready Illuminated graphical color display (65k colors) Illuminated keypad Handsfree talking Polyphonic ringer melodies... -
Page 173: Glossary
Glossary Glossary ADSL Asymmetric Digital Subscriber Line Special form of DSL. Application Layer Gateway NAT control mechanism of a router. Many routers with integrated NAT use ALG. ALG lets the data packets in a VoIP connection pass and adds the public IP address of the secure private network. The router's ALG should be deactivated if the VoIP provider offers a STUN server or an outbound proxy. - Page 174 Call forwarding = CF Automatic forwarding (CF) of a call to a different telephone number. There are three kinds of call forwarding: CFU, Call Forwarding Unconditional CFB, Call Forwarding Busy CFNR, Call Forwarding No Reply £ Call forwarding Chatting Form of communication on the Internet. During a chat, brief messages are exchanged between the communicating parties in real time.
- Page 175 Quality of Service Digital Subscriber Line Data transfer technology that allows Internet access with, for e.g. 1.5 over a conventional telephone line. Prerequisites: DSL modem and the appro- priate service offered by the Internet provider. DSLAM Digital Subscriber Line Access Multiplexer The DSLAM is a switch cabinet in an exchange at which all subscriber connec- tors converge.
- Page 176 DTMF Dual Tone Multi-Frequency Another description for dual tone multi-frequency dialing (DTMF). Dynamic IP address A dynamic IP address is assigned to a network component automatically via DHCP. The dynamic IP address for a network component can change every time it registers or at certain time intervals. £...
- Page 177 Connects two different Networks, e.g. a router as an Internet gateway. Gateway For phone calls from nected to the IP network and the telephone network (gateway/VoIP provider). It forwards calls from VoIP to the telephone network as required. Gateway provider £...
- Page 178 Headset Combination of microphone and headphone. A headset makes handsfree talk- ing more convenient. There are headsets available that can be connected to the handset by a cable. HTTP Proxy Server via which the Uses one Infrastructure network All data sent to the hub by one network subscriber is forwarded to all network subscribers.
- Page 179 Glossary A unique address for a network component within a network based on the TCP/ IP address IP protocols (e.g. LAN, Internet). On the Internet, domain names are usually assigned instead of IP addresses. the domain name. The IP address consists of four three-digit decimal numbers separated from one another by a period (e.g.
- Page 180 IP addresses Network subscribers to be concealed behind a shared IP address for the in the router, STUN in the VoIP telephone, or for the VoIP pro- proxy. or ad-hoc network SIP proxy server. They control data traffic through Glossary or Toggling.
- Page 181 Glossary Paging (handset search) A base station function to locate registered handsets. The base station estab- lishes a connection to every registered handset. The handsets start to ring. Paging is activated by briefly pressing the button on the base station and is deactivated by briefly pressing the same button again.
- Page 182 Quality of Service (QoS) Quality of service Describes the Quality of Service in communication networks. Differentiations are made between various Quality of Service classes. QoS influences the flow of data packets on the Internet, e.g. by prioritizing data packets, reserving bandwidth and data packet optimization. In VoIP networks, QoS influences the voice quality.
-
Page 183: Outbound Proxy
STUN is a data protocol for VoIP telephones. STUN replaces the private IP address in the data packets of the VoIP telephone with the public address of the secure private network. To control data transfer, a STUN server is also required on the Internet. - Page 184 Symmetric NAT A symmetric NAT assigns different external IP addresses and port numbers to the same internal IP addresses and port numbers – depending on the external target address. Transmission Control Protocol Transport protocol. Session-based transmission protocol: it sets up, monitors and terminates a connection between sender and recipient for transporting data.
- Page 185 Gateway for Internet telephony. As the phone works with the SIP standard, your provider must support the SIP standard. The provider routes calls from VoIP to the telephone network (analog, ISDN and cellular) and vice versa. Wide Area Network Wide-area network that is unrestricted in terms of area (e.g. Internet).
-
Page 186: Index
Index Access code (PABX) ....Access protection ....Access to Web configurator from other networks . - Page 187 ....Care of the telephone ........
- Page 188 Correcting incorrect entries Cost control ....defining dialing plans ..Customer Care ... . . Customer Service .
- Page 189 Index DTMF signaling for VoIP ..Dynamic DNS ....Dynamic Host Configuration Protocol ....Dynamic IP address .
- Page 190 Group call ..........Handset activating/deactivating .
- Page 191 Index Keys assigning directory entry Asterisk key ....Control key ....Delete key .
- Page 192 Name changing name of the handset ....displayed (VoIP) ....displaying caller’s name (CID) fixed line network connection .
- Page 193 Index Quality ..... . Quality of Service ....
- Page 194 ......Telephone connection configuring (Web config.) Telephone jack pin connections Telephone jack, pin connections Text information in idle display mode .
- Page 195 Index VoIP connection activating/deactivating ..automatic configuration configuring (handset) ... configuring (Web configurator) line suffix ....name (Web configurator) name/provider (Web config.) VoIP provider...
-
Page 196: Mounting The Charging Cradle To The Wall
Mounting the charging cradle to the wall Mounting the charging cradle to the wall approx. 2.5 mm Mounting the base station to the wall... - Page 197 Gigaset Communications GmbH Schlavenhorst 66, D-46395 Bocholt Schlavenhorst 66, D-46395 Bocholt Gigaset Communications GmbH is a licensee of the Siemens trademark Gigaset Communications GmbH is a licensee of the Siemens trademark © Gigaset Communications GmbH 2009 © Gigaset Communications GmbH 2009 All rights reserved.